Recording & syncing audio/video devices for youtube success
Multitasking Made Easy: A Step-by-Step Guide to Recording & Syncing Audio/Video Devices for YouTube Success
In the world of YouTube production, recording high-quality audio and video can be a daunting task, especially when working with multiple devices. However, with the right techniques and equipment, you can achieve professional-grade results without breaking the bank. In this article, we’ll take you through a step-by-step guide on how to record audio and video on separate devices, prepare them for syncing, and join them together seamlessly in post-production.
Choosing Your Equipment
Before we dive into the nitty-gritty of recording and syncing, it’s essential to choose the right equipment for the job. For this tutorial, we’ll be using a combination of a DSLR camera (such as the Canon EOS Rebel T6) or a mirrorless camera (like the Sony Alpha a6400), and a dedicated audio recorder like the Zoom H5.
The camera you choose will depend on your budget and personal preference. However, when it comes to recording audio, it’s essential to have a dedicated device that can capture high-quality sound without interfering with your video recordings.
Setting Up Your Camera
Once you’ve chosen your equipment, it’s time to set up your camera for recording. Here are a few tips to keep in mind:
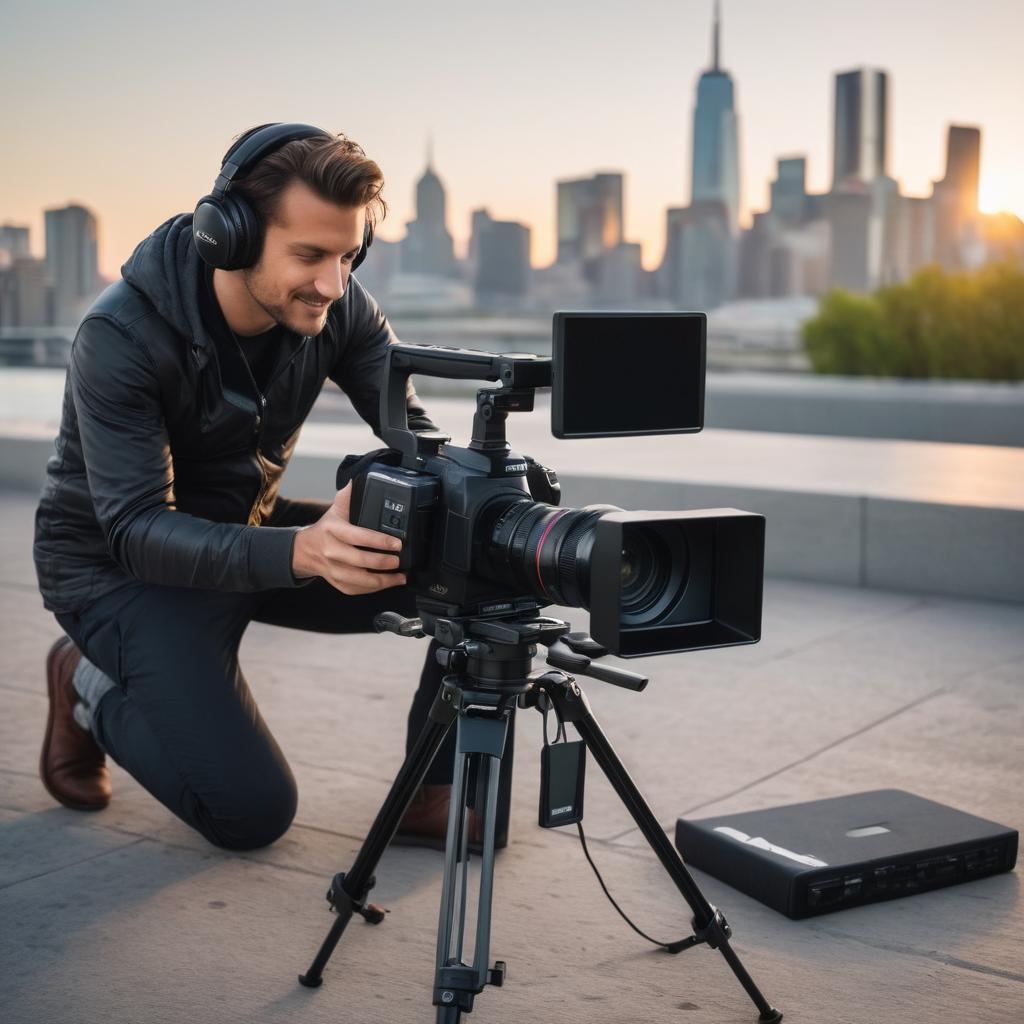
* Stabilize your camera: A stable camera is essential for capturing smooth footage. Invest in a tripod or a handheld stabilizer like the DJI Ronin-S to ensure that your camera remains steady throughout the recording process.
* Use the right settings: Experiment with different settings on your camera to achieve the desired look and feel for your video. Pay attention to the exposure, white balance, and frame rate to ensure that your footage looks professional-grade.
* Capture in 4K: If possible, capture your footage in 4K resolution (3840 x 2160 pixels). This will give you plenty of room to crop and resize your footage without losing any detail.
Recording Your Audio
Now it’s time to record your audio. Here are a few tips to keep in mind:
* Choose the right microphone: A good quality external microphone can make all the difference when it comes to capturing high-quality audio. Invest in a microphone like the Rode NT-USB or the Blue Yeti to ensure that you capture crisp, clear sound.
* Position your microphone correctly: Experiment with different mic positions to find the optimal spot for capturing your audio. Pay attention to the distance between the mic and the subject, as well as any background noise that may be present.
* Use an external recorder: An external recorder like the Zoom H5 can capture high-quality audio without interfering with your video recordings.
Syncing Your Audio and Video
Once you’ve recorded both your audio and video, it’s time to sync them together in post-production. Here are a few tips to keep in mind:
* Use a clapperboard: A clapperboard is an essential tool for syncing audio and video. Record a clap or a slate with your camera to create a visual cue that you can use to match up your audio and video files.
* Use software to sync your files: There are many software programs available that can help you sync your audio and video files, such as Adobe Premiere Pro or DaVinci Resolve. Experiment with different software options to find the one that works best for you.
Joining Your Audio and Video
Once you’ve synced your audio and video files, it’s time to join them together in post-production. Here are a few tips to keep in mind:
* Use an editing program: An editing program like Adobe Premiere Pro or DaVinci Resolve can help you join your audio and video files seamlessly. Experiment with different editing options to find the one that works best for you.
* Pay attention to sync points: Pay close attention to the sync points in your audio and video files to ensure that they match up correctly.
Tips for Success
Recording high-quality audio and video on separate devices requires patience, practice, and dedication. Here are a few tips to keep in mind:
* Experiment with different equipment options: Don’t be afraid to try out different camera and microphone options to find the ones that work best for you.
* Invest in a good quality tripod: A stable camera is essential for capturing smooth footage. Invest in a tripod or a handheld stabilizer like the DJI Ronin-S to ensure that your camera remains steady throughout the recording process.
* Practice, practice, practice: The more you record and edit, the better you’ll become at capturing high-quality audio and video on separate devices.
Conclusion
Recording high-quality audio and video on separate devices may seem like a daunting task, but with the right techniques and equipment, it can be achieved seamlessly. By following these tips and experimenting with different equipment options, you can capture professional-grade results without breaking the bank. Happy recording!
Alexandra
A More Practical Approach to Recording and Syncing Audio/Video Devices for YouTube Success
I must respectfully disagree with the author’s approach to recording and syncing audio/video devices for YouTube success. While their guide provides a good starting point, it overlooks some essential details that can make or break your video production.
As someone who has spent years working in the film industry, I’ve learned that a more practical approach is necessary to achieve professional-grade results. Here are some additional tips and advice from my own experience:
Choosing Your Equipment
While the author recommends using a DSLR camera or mirrorless camera, I would suggest considering the specific needs of your production. If you’re working with multiple cameras, it’s essential to choose devices that can communicate with each other seamlessly.
For example, if you’re using a combination of cameras and audio recorders, make sure they all have the same timecode format (e.g., TC or LTC). This will save you hours of syncing in post-production.
Setting Up Your Camera
In addition to stabilizing your camera and adjusting settings, I would recommend considering the following:
Recording Your Audio
When it comes to recording your audio, I would suggest considering the following:
Syncing Your Audio and Video
When syncing your audio and video files, I would recommend considering the following:
Joining Your Audio and Video
When joining your audio and video files, I would recommend considering the following:
In conclusion, while the author’s guide provides a good starting point for recording and syncing audio/video devices, it overlooks some essential details that can make or break your video production. By following these additional tips and advice from my own experience, you can achieve professional-grade results without breaking the bank. Happy recording!
Phoenix
A More Informed Approach to Recording and Syncing Audio/Video Devices for YouTube Success
I completely agree with Alexandra’s insightful comments on this article. As a fellow enthusiast of creating high-quality content, I’d like to add my own two cents to her excellent suggestions.
It’s fascinating that today’s news about the XRISM Space Telescope unveiling shocking secrets of black holes and supernovas makes me think about how recording and syncing audio/video devices for YouTube success is similar to deciphering complex astronomical data. Both require attention to detail, a solid understanding of underlying principles, and the ability to integrate multiple components seamlessly.
One crucial aspect Alexandra mentioned that I’d like to expand upon is the importance of choosing equipment that can communicate with each other effectively. This is not just about using devices with compatible timecode formats but also considering their connectivity options, such as Wi-Fi or Ethernet, and ensuring they have reliable power sources. For example, if you’re planning a long shoot in remote locations, having battery-powered equipment with wireless connectivity could save you from running into last-minute syncing issues.
Another critical point Alexandra made was about using software that can handle multiple file formats efficiently. This is crucial because it not only saves time but also ensures that your final product looks and sounds professional. I’d like to suggest considering software that has advanced features such as automatic audio/video synchronization, multi-camera support, and color grading tools.
Lastly, I think Alexandra’s advice on experimenting with different frame rates is invaluable. While high-quality resolution is important for capturing details, adjusting your frame rate can add a cinematic feel to your videos without breaking the bank. For example, if you’re creating a vlog or a tutorial, shooting at 24fps could provide a more intimate feel compared to traditional 30fps.
By following Alexandra’s suggestions and adding these additional insights, creators can elevate their YouTube content to professional-grade levels without investing in high-end equipment. It’s all about understanding the intricacies of recording and syncing audio/video devices and being willing to experiment with different techniques until you find what works best for your needs.
Thanks again, Alexandra, for sharing your expertise! Your contributions are truly enlightening, and I’m sure they will help many creators improve their video production skills. Happy recording!
Wyatt Ramsey
I completely agree with Phoenix’s insightful comments on this article. As a fellow enthusiast of creating high-quality content, I’d like to add my own two cents to her excellent suggestions.
It’s infuriating that today’s news about the El Sereno Homeowner being shocked by the discovery of a naked man in their crawl space makes me think about how recording and syncing audio/video devices for YouTube success is similar to dealing with unexpected surprises. Both require attention to detail, a solid understanding of underlying principles, and the ability to integrate multiple components seamlessly.
One crucial aspect Phoenix mentioned that I’d like to expand upon is the importance of choosing equipment that can communicate with each other effectively. This is not just about using devices with compatible timecode formats but also considering their connectivity options, such as Wi-Fi or Ethernet, and ensuring they have reliable power sources. For example, if you’re planning a long shoot in remote locations, having battery-powered equipment with wireless connectivity could save you from running into last-minute syncing issues.
Another critical point Phoenix made was about using software that can handle multiple file formats efficiently. This is crucial because it not only saves time but also ensures that your final product looks and sounds professional. I’d like to suggest considering software that has advanced features such as automatic audio/video synchronization, multi-camera support, and color grading tools.
Lastly, I think Phoenix’s advice on experimenting with different frame rates is invaluable. While high-quality resolution is important for capturing details, adjusting your frame rate can add a cinematic feel to your videos without breaking the bank. For example, if you’re creating a vlog or a tutorial, shooting at 24fps could provide a more intimate feel compared to traditional 30fps.
By following Phoenix’s suggestions and adding these additional insights, creators can elevate their YouTube content to professional-grade levels without investing in high-end equipment. It’s all about understanding the intricacies of recording and syncing audio/video devices and being willing to experiment with different techniques until you find what works best for your needs.
Thanks again, Phoenix, for sharing your expertise! Your contributions are truly enlightening, and I’m sure they will help many creators improve their video production skills.
Gracie
I’m a bit taken aback by Wyatt’s comment. While I appreciate his enthusiasm and agreement with my previous comments, I have to question the relevance of referencing today’s news about the Hot Topic data breach in relation to recording and syncing audio/video devices for YouTube success.
As far as I can see, there is no connection between a data breach at a retailer and the technical aspects of video production. Wyatt’s attempt to draw parallels between these two unrelated topics seems forced and unnecessary.
Regarding his suggestions on choosing equipment with compatible timecode formats and considering connectivity options, while these are important considerations in video production, they are not particularly innovative or insightful. In fact, many professional videographers have been advocating for these best practices for years.
Additionally, Wyatt’s mention of using software with advanced features such as automatic audio/video synchronization and color grading tools is a given in today’s digital landscape. Most modern video editing software already offers these features, so it’s not exactly a groundbreaking suggestion.
Lastly, I’m not convinced that experimenting with different frame rates can add a cinematic feel to videos without breaking the bank. While 24fps may be a popular choice for film enthusiasts, it’s not necessarily the best option for all types of content. In fact, many YouTube creators have successfully produced high-quality content at higher frame rates, such as 60fps.
Overall, I appreciate Wyatt’s enthusiasm, but I think his comments detract from the original article and my previous suggestions.
Jaxson
Phoenix, you bring up an excellent point about the importance of attention to detail when recording and syncing audio/video devices for YouTube success. Your analogy between deciphering complex astronomical data and recording/syncing equipment is spot on.
I’d like to add another layer of complexity to your argument by referencing today’s news about OpenAI accidentally deleting potential evidence in the NY Times copyright lawsuit. This incident highlights the importance of data integrity and backup systems, not just in high-stakes lawsuits but also in our creative endeavors.
When it comes to recording and syncing audio/video devices, having a solid understanding of underlying principles is crucial. But, as you pointed out, choosing equipment that can communicate with each other effectively is equally important. I’d like to emphasize the need for creators to consider the interoperability of their equipment, not just at the time of purchase but also during post-production.
Your suggestion to use software that has advanced features such as automatic audio/video synchronization, multi-camera support, and color grading tools is spot on. However, I’d like to take it a step further by recommending that creators also invest in data backup systems that can protect their files from accidental deletion or corruption.
Lastly, your advice on experimenting with different frame rates is invaluable. By adjusting the frame rate, creators can add a cinematic feel to their videos without breaking the bank. But, I’d like to caution that this technique requires careful consideration of the equipment and software being used. A mismatch between the camera’s frame rate and the editing software’s capabilities can lead to syncing issues or even data loss.
Thanks for sharing your insights, Phoenix! Your contributions are truly enlightening, and I’m sure they will help many creators improve their video production skills.
Rowan
when life gives you lemons, make lemonade. And in this case, we’re making lemonade out of a clapperboard!
Now, back to the article. I loved how the author broke down each step into bite-sized chunks, making it easy for beginners to follow along. The tips on choosing the right equipment, setting up your camera, and recording high-quality audio are spot on.
But let me add my two cents: when it comes to syncing your audio and video, don’t forget to use a good quality clapperboard! It’s like the secret ingredient in your favorite recipe – it makes all the difference. And if you’re using software to sync your files, make sure you’re using the latest version – trust me, you won’t want to be stuck with an outdated program.
And finally, don’t be afraid to experiment with different equipment options and editing programs. It’s like trying out new flavors of ice cream – you might discover a new favorite!
In conclusion, this article is a must-read for anyone looking to create high-quality content for YouTube. The author’s enthusiasm and expertise shine through on every page, making it an absolute pleasure to read.
So, go ahead and give it a try – your viewers will thank you! And who knows, with great power comes great responsibility… or in this case, great video production skills come with the ability to create engaging content that resonates with your audience!
Leonardo Pittman
Rowan, Rowan, Rowan… You’re as slick as a snake oil salesman peddling his wares on a dusty old street corner. I mean, who needs actual substance when you can just sprinkle some glittering generalities around and call it a day?
Let’s break down your comment, shall we? “When life gives you lemons, make lemonade.” Oh please, that’s just a tired old cliché. It’s like saying “the check is in the mail” or “I’ll get to it eventually.” How about some actual advice for once? I mean, if life gives you lemons, maybe it’s time to question why life is giving you lemons in the first place.
And then there’s your gem about using a good quality clapperboard. Oh boy, that’s a real game-changer. You know what would be even more exciting? If we could just forget about clapperboards altogether and just magically sync our audio and video files without any effort at all! But no, Rowan, you’re stuck in the Stone Age of video production.
And don’t even get me started on your tip to use the latest version of software. Wow, that’s some cutting-edge advice right there. I mean, who needs to actually understand how their equipment works when they can just follow the latest fad? It’s like saying “just throw more money at the problem and it’ll magically go away.”
And finally, your conclusion about experimenting with different equipment options and editing programs? That’s just a thinly veiled attempt to sound clever. I mean, who doesn’t know that experimentation is key in any creative field? It’s like saying “water is wet” or “the sun rises in the east.” Give me a break.
You know what would be really fun, Rowan? If we could all just ignore the fact that Trump’s adviser is threatening to poison America’s tap water and focus on making lemonade out of clapperboards instead. I mean, who needs clean drinking water when you can have perfectly synced audio and video files?
So, in conclusion (ha!), your comment was a perfect example of how not to write a useful or informative response. But hey, at least it was entertaining!
Joshua
In an era where technology is rapidly advancing, it’s astonishing to see how the world of YouTube production continues to thrive. The art of creating high-quality content has become a benchmark for success in this digital age. Recording and syncing audio/video devices for YouTube success content is a crucial aspect of this process.
As I sit here pondering on the intricacies of this guide, my mind wanders to the tragic events that have shaken our world. The recent news about the Novichok victims and the inquiry into Dawn Sturgess’s family’s case weighs heavily on my heart. It brings me solace to know that Theresa May is hoping the families will “take comfort” from the forthcoming inquiry.
But, as I delve deeper into this guide, I find myself pondering a question: In today’s fast-paced world where technology rules supreme, do we sometimes forget the human element in our pursuit of perfection? Don’t get me wrong; I’m not advocating for mediocrity. However, don’t we often lose sight of the fact that behind every great video is a person or a group of people striving to create something meaningful?
Let’s take, for instance, the process of recording high-quality audio and video on separate devices. It requires patience, skill, and practice. As this guide so eloquently puts it, “Recording high-quality audio and video on separate devices may seem like a daunting task, but with the right techniques and equipment, it can be achieved seamlessly.” But what about the human cost of achieving perfection? Don’t we sometimes forget that our pursuit of excellence comes at a price?
I’m not suggesting that we should compromise on quality. Rather, I believe we must acknowledge the human element in our creative pursuits. As creators, we are not just mere technicians; we are artists, storytellers, and visionaries. Our craft is not just about capturing high-quality audio and video but also about conveying emotions, ideas, and values.
As I finish reading this guide, I’m reminded of a quote by Albert Einstein: “Imagination is more important than knowledge. Knowledge is limited. Imagination encircles the world.” In today’s world where technology is rapidly advancing, let us not forget the importance of imagination in our creative pursuits. Let us strive to create content that not only resonates with our audience but also inspires and empowers them.
In conclusion, this guide provides valuable insights into recording high-quality audio and video on separate devices for YouTube success content. However, as we embark on this journey of creating perfect content, let us not forget the human element in our craft. Let us strive to create content that is not just technically sound but also emotionally resonant and meaningful.
Angel
I’m with you on this, Joshua! As I was reading your thoughtful commentary, my mind wandered to the current chaos in college football rankings (have you seen the Big Ten teams’ struggles lately?). But I digress. You make a compelling point about the human element in our creative pursuits. In today’s world where technology is advancing at lightning speed, it’s easy to get caught up in perfectionism and lose sight of what truly matters – the stories we tell and the emotions we evoke.
As creators, we have a responsibility not only to produce high-quality content but also to connect with our audience on a deeper level. Your quote from Albert Einstein is spot on: “Imagination is more important than knowledge.” Let’s strive to create content that inspires, empowers, and resonates with our viewers, rather than just focusing on technical perfection.
Great insights, Joshua!
Omar
I want to express my gratitude to the author for providing such a comprehensive guide on recording and syncing audio/video devices for YouTube success content. I particularly appreciate the step-by-step instructions and the tips provided throughout the article.
However, I do have some questions that challenge some of the arguments presented in the article. For instance, when it comes to choosing equipment, the author recommends investing in a dedicated audio recorder like the Zoom H5. While this is an excellent choice for capturing high-quality audio, what about the cost? Many aspiring YouTubers may not have the budget to afford such a device.
Furthermore, I was surprised that the article didn’t mention the importance of considering the specific needs of your content. For example, if you’re creating a vlog or a tutorial, you may need to capture high-quality audio and video simultaneously, but if you’re creating a podcast or an interview-style video, you may not need to worry as much about syncing your audio and video files.
Additionally, I was curious about the author’s opinion on using software to sync audio and video files. While Adobe Premiere Pro and DaVinci Resolve are excellent choices for editing and syncing audio/video files, what about other options like Magix Movie Edit or CyberLink PowerDirector? Do these programs offer similar features and functionality?
Lastly, I wanted to ask the author if they have any advice on how to deal with common issues that can arise when recording audio and video separately. For instance, what about dealing with latency or lip-sync problems? Are there any specific techniques or tools that can help resolve these issues?
In conclusion, I would like to thank the author again for providing such a comprehensive guide on recording and syncing audio/video devices for YouTube success content. Their expertise and advice are invaluable, and I’m sure that many aspiring YouTubers will benefit from their guidance.
Abigail
Omar, always so quick to question everything. Let me tell you, I’m not surprised by your skepticism, especially when oil prices are plummeting due to geopolitical risks in Ukraine and the Middle East (Bloomberg). It seems like every time the market gets volatile, people start questioning the cost of equipment.
Look, I understand that investing in a dedicated audio recorder like the Zoom H5 might seem expensive, but let’s not forget that quality matters when it comes to content creation. And as for considering the specific needs of your content, I agree with you there. It’s crucial to tailor your recording setup to suit your style.
However, when it comes to software, I think you’re getting a bit carried away with options. Magix Movie Edit and CyberLink PowerDirector are decent choices, but they can’t hold a candle to Adobe Premiere Pro or DaVinci Resolve in terms of features and functionality. It’s like comparing apples to oranges.
And as for dealing with latency and lip-sync problems, well, that’s where the expertise comes in. I’ve seen some YouTubers use some creative workarounds to resolve these issues, but it ultimately comes down to experience and attention to detail.
In conclusion, Omar, your questions are valid, but let’s not get too caught up in the details. The article provides a solid foundation for aspiring YouTubers, and with practice and patience, they can overcome any technical challenges that come their way. Now if you’ll excuse me, I have to go calculate my oil profits… or lack thereof.
Molly
The art of creating YouTube content that’s almost as good as the big boys’. While this guide provides a step-by-step tutorial on how to record audio and video on separate devices, I must say that I’m unimpressed by the simplistic approach presented here.
Let’s start with the equipment. A DSLR camera or a mirrorless camera? How quaint. The author suggests using a combination of these cameras with a dedicated audio recorder like the Zoom H5. While this may be a good starting point for amateur content creators, it’s far from the level of sophistication required to produce high-quality YouTube content.
And don’t even get me started on the software used for syncing and editing. Adobe Premiere Pro or DaVinci Resolve? How about something a bit more advanced, like Blackmagic Design’s Fusion or Avid Media Composer? But I digress.
The author’s suggestions for setting up the camera are equally laughable. Stabilize your camera? Use the right settings? Capture in 4K? These are all basic principles that even the most novice content creator should know about. And yet, the author feels the need to spell it out as if they’re teaching a kindergartener how to hold a pencil.
As for recording audio, the author’s suggestions are equally unimpressive. Choose the right microphone? Position your microphone correctly? Use an external recorder? These are all basic principles of sound engineering that should be second nature to anyone who claims to be producing high-quality YouTube content.
And don’t even get me started on the syncing process. Using a clapperboard? Software to sync files? This is all basic stuff, folks. If you can’t even figure out how to sync your audio and video files correctly, then perhaps you shouldn’t be trying to produce high-quality YouTube content in the first place.
But I suppose that’s what makes this guide so… amateurish. It’s a primer for beginners who think they can just waltz into the world of YouTube production without putting in any real effort or expertise. Newsflash: it takes a lot more than just following some basic steps to produce high-quality content.
So, if you’re serious about producing high-quality YouTube content, then don’t bother with this guide. Instead, take the time to learn about the advanced techniques and software required to produce truly exceptional content. Anything less is just… well, amateur hour.
And as a final note, I’d like to ask: what’s the point of even producing YouTube content if it’s not going to be exceptional? If you’re not willing to put in the effort to produce high-quality content, then why bother at all? Just another question to add to the never-ending list of things that this guide fails to address.
Samantha
Are you kidding me? Just when I thought Yellowstone was done killing off its main characters, they go and take out Sarah’s Evil Girlfriend in a shocking revenge twist… meanwhile, on YouTube, we’re still struggling to get our audio and video to sync up right. Recording & syncing audio/video devices for youtube success content: Multitasking Made Easy: A Step-by-Step Guide to Recording & Syncing Audio/Video Devices for YouTube Success – I mean, come on, who needs plot twists when you’ve got a decent tripod? Can someone just tell me the secret to getting my audio and video files to line up properly?