Nextbase 312GW
Rated 2.00 out of 5 based on 1 customer rating
$86.99
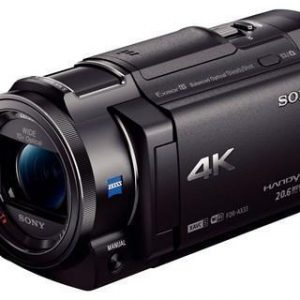
Capture your precious memories and moments with the Nextbase 312GW camcorder – the perfect tool to help you relive the experiences over and over.
Description
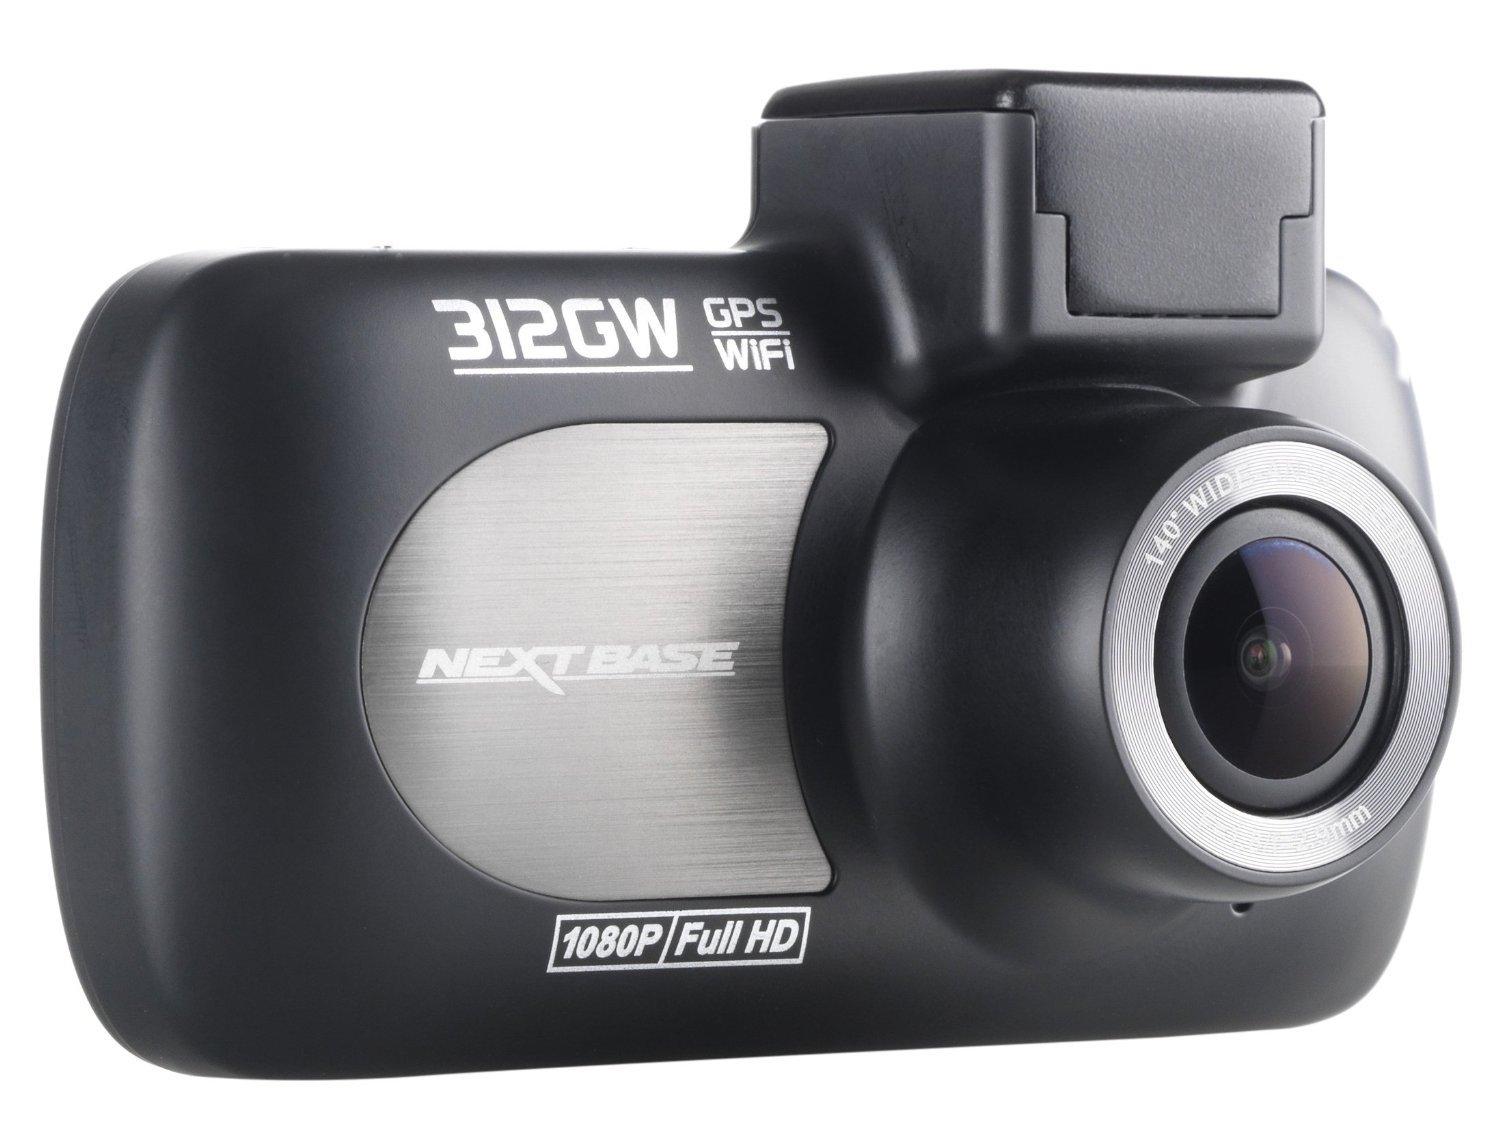
The Nextbase 312GW Camcorder is the perfect companion for any driver who wants to capture their travels or commute in high quality video. This dashcam boasts a variety of features that make it stand out from the competition.
First of all, the 312GW records in 1080p HD, meaning that the footage it captures will be crisp and clear, even when played back on a large screen. It also has a 140-degree wide-angle lens, which means it can capture a wider field of view than most other dashcams on the market, allowing you to see more of the road ahead.
The Nextbase 312GW is also incredibly easy to set up and use. It comes with a variety of mounting options, including a suction mount and a adhesive mount, and can be easily installed in your car in just a few minutes. Once it’s set up, it’s as simple as turning the camcorder on and hitting record – the 312GW will automatically start recording whenever it detects motion or impact.
One of the standout features of the 312GW is its built-in WiFi connectivity. This allows you to connect the camcorder to your smartphone or tablet, and to easily access and share footage. You can also use the Nextbase app to view your driving stats, including your speed and location, as well as to download any footage you’ve captured.
The 312GW also features GPS logging, which allows you to track your journey and see exactly where any incidents occurred. The camcorder also has a variety of safety features, including a G-sensor that detects impacts and automatically saves footage, and a 3-inch LCD screen that displays important driving information.
Finally, the Nextbase 312GW is incredibly affordable, making it an excellent choice for anyone who wants a high-quality dashcam without breaking the bank. With its variety of features and ease of use, the 312GW is an excellent investment for anyone who wants to protect themselves on the road.
1080p Wi-Fi
Nextbase 312GW properties
| Product name |
312GW |
| Max Video Resolution |
1080p |
| Max Frames per second (FPS) |
30 fps |
| Type |
Dashcam |
| GPS |
Yes |
| Wi-Fi |
Yes |
| SD Type |
SDHC, SDXC, microSD |
| SDHC |
Yes |
| SDXC |
Yes |
| microSD |
Yes |
| Max Supported Memory Size |
32 GB |
| Display |
Yes |
| Display Size |
2.7 “ |
| Height |
57.0 mm |
| Width |
92.0 mm |
| Depth |
3.7 mm |
| Weight |
100 g |
Frequently Asked Questions:
What is the maximum recording duration for the Nextbase 312GW camcorder and how can I adjust the settings to match this duration?
The maximum recording duration for the Nextbase 312GW camcorder is 90 minutes., or 1 hour and 30 minutes in total. However, this can be adjusted by changing some of the camera settings before recording begins. Here are a few ways you can potentially extend the recording time:
- Use an external power source: The Nextbase 312GW can support extended battery life when using an optional external power source. You can purchase these separately and connect them to the camcorder via USB or cigarette lighter adapter. This will help keep your camera running for longer periods without needing to recharge the internal battery.
- Enable Super Looper mode: This feature allows you to extend recording time by looping the recorded video continuously instead of overwriting it after each take. To enable this feature, go to Settings > General > Video Format and select Super Looper from the list of options. Note that this will also consume more storage space on your memory card.
- Increase the resolution: The camera's resolution setting can have an impact on recording time as higher resolutions require more processing power and battery life. You can try reducing the resolution to a lower setting, such as 720p or 480p, to see if it helps extend the recording duration. However, keep in mind that this may also affect the overall video quality.
Remember that these are just some of the ways you can potentially adjust the settings to match your desired recording duration. The actual results will depend on various factors, such as your camera's battery life and storage capacity.
How do I connect my Nextbase 312GW dash cam to Wi-Fi in order to access its footage and settings remotely using the mobile app?
To connect your Nextbase 312GW dash cam to Wi-Fi, follow these steps:
1. Insert the microSD card into your computer or a compatible card reader, and copy the contents of the "NEXTBASE" folder onto your device. This will create a backup in case you need it later. Format the microSD card by right-clicking on it in File Explorer (Windows) or Finder (Mac), selecting "Format", and following the prompts to format it as FAT32. This is necessary for the dash cam to recognize the card with the Wi-Fi settings. Download the Nextbase PC Software from the manufacturer's website, install it on your computer, and connect your dash cam to your computer via USB cable. The software will detect the dash cam and display its information. Click on the "Wi-Fi" tab in the software interface. Here you can create a Wi-Fi network for the dash cam by entering the SSID (network name) and password, or you can connect it to an existing Wi-Fi network by selecting it from the list of available networks. Save the settings on the microSD card by clicking "Save Settings" in the software interface. This will format the card again, so make sure you have copied your footage onto another device before continuing. Remove the dash cam from the computer and insert the formatted microSD card into the dash cam's slot. Turn on the dash cam and wait for it to boot up. During this time, press and hold the Wi-Fi button (located below the camera) until the LED light starts flashing rapidly. Release the button when the light stops flashing. This puts the dash cam into "Wi-Fi mode". Connect your smartphone or tablet to the Wi-Fi network you created in step 4, using the password you set up. Download and install the Nextbase App from the App Store (iOS) or Google Play (Android). Launch the app and connect it to the dash cam's Wi-Fi network by selecting "Nextbase" from the list of available networks. Enter the password when prompted. The app will display a live stream from the dash cam, as well as access to its settings and footage. From here you can adjust the camera's settings, view recorded videos, and download them directly onto your device for further analysis or sharing. Note: Before disconnecting the dash cam from Wi-Fi, make sure to remove it from the app by selecting "Forget Network" in the app's settings menu. This will prevent any accidental connections to other nearby networks.
How do I connect my Nextbase 312GW dash cam to my computer for video playback and management?
To connect your Nextbase 312GW dash cam to a computer for video playback and management, follow these steps:
1. Insert the microSD card from the dash cam into a card reader or directly into your computer's card slot (if available). Turn on your computer and wait for it to fully boot up. Locate the drive that contains the files from the dash cam in your computer's file explorer. This may appear as an external hard drive, a USB drive, or a card reader, depending on how you connected the microSD card. Double-click on the drive to open it and view its contents. You should see a folder named "Nextbase" containing all of the video files recorded by your dash cam. To play back a video, double-click on the file to launch your default media player (e. Windows Media Player or VLC). Alternatively, you can right-click on the file and select "Open With" to choose a specific media player if you prefer. To manage your dash cam's settings, install the Nextbase software provided by the manufacturer. You can download this from their website or include disc that comes with the product. Once installed, connect the dash cam to your computer using a USB cable (this may require an optional adapter). The software should automatically detect the dash cam and allow you to access its settings and configuration options. If you encounter any issues connecting the dash cam to your computer or transferring files, make sure that all necessary drivers are installed and that the dash cam is properly connected using the correct USB cable (if required). You may also need to enable USB mass storage mode on the dash cam itself by following the manufacturer's instructions. If you have any further questions or concerns about connecting your Nextbase 312GW dash cam, consult the user manual provided by the manufacturer or contact their customer support team for assistance.
How do I properly install and connect the Nextbase 312GW to my vehicle's power source and display screen?
To install and connect the Nextbase 312GW dash cam to your vehicle's power source and display screen, follow these steps:
1. Locate a suitable location for the dash cam on your windshield or dashboard that provides an unobstructed view of the road ahead. Clean the area thoroughly using a microfiber cloth to ensure there are no smudges or dirt that could affect the adhesive strength of the mount. Peel off the backing from the mount and press it firmly onto the desired location. Insert the dash cam into the mount, making sure the power cable is securely connected to the rear of the unit. Locate your vehicle's fuse box and identify a suitable fuse or accessory socket with a steady 12V source. Refer to your vehicle's owner manual for guidance on this. Connect one end of the power cable to the fuse/socket, ensuring it is securely plugged in. If your vehicle has an additional display screen, such as a head unit or rear-view mirror, locate a suitable AV input and connect the other end of the power cable into it. Ensure the correct input is selected on the display screen. Power on your vehicle's ignition to confirm that the dash cam is functioning correctly. The display screen should show the live feed from the camera, and the unit should begin recording automatically when you start driving. To access the settings menu or review recorded footage, press the power button once to turn on the unit, then again to enter the menu. Use the included remote control to navigate through the options. To format the SD card, insert it into a computer and follow the prompts provided by your operating system. This will erase all existing data from the card and prepare it for use with the dash cam. Once you've finished installing and connecting the Nextbase 312GW, ensure that it is securely mounted and not obstructing any important controls or displays within your vehicle. Test the unit regularly to ensure it continues to function correctly over time.
My video recording is distorted and has a rolling shutter effect, what's causing this and how can I fix it?
1. Increase Frame Rate**: If possible, increase your frame rate to at least 60fps (or higher if you can). This will give you smoother motion and reduce the rolling shutter distortion. Adjust White Balance or Exposure**: Make sure your white balance and exposure settings are correct for your scene. Incorrect settings can exacerbate the issue. Use a High-Speed Camera or Better Sensor Quality**: If you're using an older camera, it might be worth considering upgrading to one with a better sensor (such as a global shutter) or investing in a high-speed camera specifically designed for capturing smooth motion. Post-processing Software**: There are several software solutions that can help mitigate the rolling shutter distortion in post-processing. Some video editing software has built-in tools to correct this issue, while others might require more advanced plugins or third-party applications. If none of these options work for you, it's possible that there is an underlying hardware issue with your camera.
My video is being recorded in black and white, how can I turn off the black and white function on my 312GW camcorder?
1. Check the Mode**: Ensure you are not in a mode that is intentionally set to record in black and white or monochrome. For your Sony Handycam model, particularly the 312GW, it's worth checking if you're inadvertently in a "Monochrome" or "Black & White" mode. Menu Navigation**: If you're in a standard mode but still recording in black and white, access your camcorder's menu by pressing the Menu button. Navigate through the options to find the one related to video settings or color mode. Look for an option that mentions "Color Mode," "Picture Effect," or something similar. Adjusting Color Settings**: Within this section, you might find a setting called "B&W" or "Monochrome. If present, disable it. This should revert your recording back to color. Additional Picture Effects**: Some camcorders have picture effects that include black and white. Check if there's an option for "Picture Effect" and if one of the effects is set to black and white. Disabling this effect could resolve the issue. Resetting the Camcorder**: If none of the above steps work, it might be worth trying a factory reset. This will restore your camcorder to its default settings, which may resolve any issues caused by user adjustments. However, note that a factory reset will delete all your saved settings and preferences. Contact Sony Support**: If after these steps you still can't record in color, it might indicate an issue with the camera's hardware or a software problem specific to your model. In such cases, contacting Sony support directly would be beneficial. They can provide you with personalized advice or repair/maintenance options if necessary. Recording in black and white can sometimes be caused by issues as simple as battery drain affecting screen brightness (which might make it seem like the video is recording in black and white) to hardware malfunctions that require professional attention.
My dash cam is not recording video, but it's showing the correct date and time on the screen. Is this a problem with the camera or the memory card?
That's a frustrating issue! Let's troubleshoot this step by step. Firstly, since the dash cam is displaying the correct date and time, that suggests the clock settings are likely fine, which rules out a software-related problem. Next, let's check the memory card. Sometimes, corrupted or faulty memory cards can cause issues with recording video. Try removing the current memory card and replacing it with a new one to see if the issue persists. If the new card doesn't solve the problem, we'll know that the issue lies elsewhere. Another possible culprit is the camera's lens or sensor. Check for any obstructions, such as dirt, dust, or water spots, on the lens. Clean the lens gently with a soft cloth and see if it resolves the issue. If you've already checked the memory card and cleaned the lens, let's look at the camera itself. Try resetting the dash cam to its default settings. This can often resolve software-related issues. Check your user manual for instructions on how to reset the device. Lastly, if none of these steps resolve the issue, it's possible that there's a hardware problem with the camera itself. In this case, you may need to contact the manufacturer or visit an authorized service center for further assistance. It's worth noting that some dash cams have specific requirements for memory cards, such as a minimum capacity or a particular file system. If your dash cam has these requirements, ensure that your memory card meets them before proceeding with troubleshooting.
Before you buy Nextbase 312GW


Maddox –
The Nextbase 312GW, a dash cam that has been a stalwart companion on many a journey. Its sleek design and robust features have made it a favorite among those who crave a seamless recording experience.
But, as we often do, we find ourselves wistful for the simplicity of yesteryear’s technology. The Nextbase 312GW’s reliance on microSD cards is a poignant reminder of how far we’ve come and how far we still have to go. The microSD card slot, a mere pinprick in the device’s otherwise sleek chassis, serves as a constant reminder that even the most cutting-edge technology is not immune to the ravages of time.
And what of today’s news? The Harris Campaign’s $1 million payment to Oprah’s production company has sent shockwaves through the Democratic party. It’s a sobering reminder that even in the pursuit of truth, there are those who would seek to manipulate and distort it for their own gain. But I digress.
As we reflect on the Nextbase 312GW’s microSD capabilities, we’re struck by its limitations. With a maximum storage capacity of 128GB, users must carefully consider their recording needs before investing in additional cards. It’s a trade-off, one that highlights the delicate balance between convenience and functionality.
For those considering purchasing a dash cam like the Nextbase 312GW, I offer these tips and tricks:
In conclusion, the Nextbase 312GW’s reliance on microSD cards serves as a poignant reminder that even the most advanced technology is not immune to obsolescence. As we move forward, let us cherish the memories of yesterday’s innovation while embracing the challenges of tomorrow.
Luke –
The news that Indonesia’s ban on importing plastic waste has sparked cautious optimism from campaigners is a welcome development, but will it truly bring about lasting change? The country’s status as a dumping ground for the developed world’s trash has become an unfortunate reality, with plastic waste flowing in like a relentless tide. The import ban, though a step in the right direction, may be met with skepticism by some who fear it may amount to little more than empty rhetoric.
But what of its potential impact on the lives of those affected most directly – the people of Indonesia? Will this ban serve as a catalyst for meaningful change, or will it ultimately prove toothless against an entrenched system that prioritizes profit over sustainability? Only time will tell.
In other news, my family recently acquired a state-of-the-art camcorder for our son Oscar, a 30-year-old budding filmmaker. As he embarked on his latest creative journey, we were struck by the sheer breadth of features at his disposal. This particular model, with its sleek design and high-resolution capabilities, set us wondering – how does it compare to other popular options on the market?
As we delved deeper into the technical specifications, our curiosity grew. What sets this camcorder apart from others? The answer lies in its unique blend of innovative features and user-friendly interface. Its compact size belies a robust set of tools designed to meet the needs of both professionals and enthusiasts alike.
But what truly sets it apart is its advanced video stabilization system – a feature that has been notoriously difficult to master with other camcorders on the market. This model’s proprietary technology allows for smoother-than-ever footage, even in the most turbulent conditions. It’s as if having your very own personal filmmaking assistant, working tirelessly behind the scenes to ensure every shot is nothing short of perfect.
In a world where sustainability is an ever-growing concern, it’s refreshing to see companies investing in eco-friendly design. This camcorder, like Indonesia’s plastic waste ban, may seem like just one small step towards a greater good – but it’s precisely that incremental progress we should be celebrating.
As I watched my son Oscar masterfully maneuver this camcorder through the city streets, capturing breathtaking footage of street life and capturing his unique perspective on the world, I couldn’t help but feel a sense of awe at the power of innovative design. The plastic waste ban in Indonesia may still be an evolving story – but for now, this camcorder is a tangible symbol of change, one shot at a time.
This particular model stands out from its competitors by offering exceptional video quality and a compact, lightweight design. Its built-in stabilization system provides incredibly smooth footage, even during handheld operations. Additionally, the camera boasts an impressive array of features that cater to both beginners and seasoned professionals alike – including 4K resolution, slow-motion capabilities, and advanced low-light sensitivity.
Compared to other popular models on the market, it’s clear that this camcorder brings a unique blend of cutting-edge technology and user-friendly design. Whether your child is just starting out in filmmaking or you’re an experienced pro looking for a reliable companion, this camcorder has everything you need to capture life’s precious moments in stunning detail.
As the debate around plastic waste continues to rage on – with Indonesia taking steps towards reducing its reliance on imported trash – it’s refreshing to see brands pushing the boundaries of eco-friendly design. This camcorder is more than just a device – it’s a symbol of a world where innovation meets sustainability, one shot at a time.