Leofoto MT-03 + MTB-19
Rated 4.75 out of 5 based on 4 customer ratings
$74.99
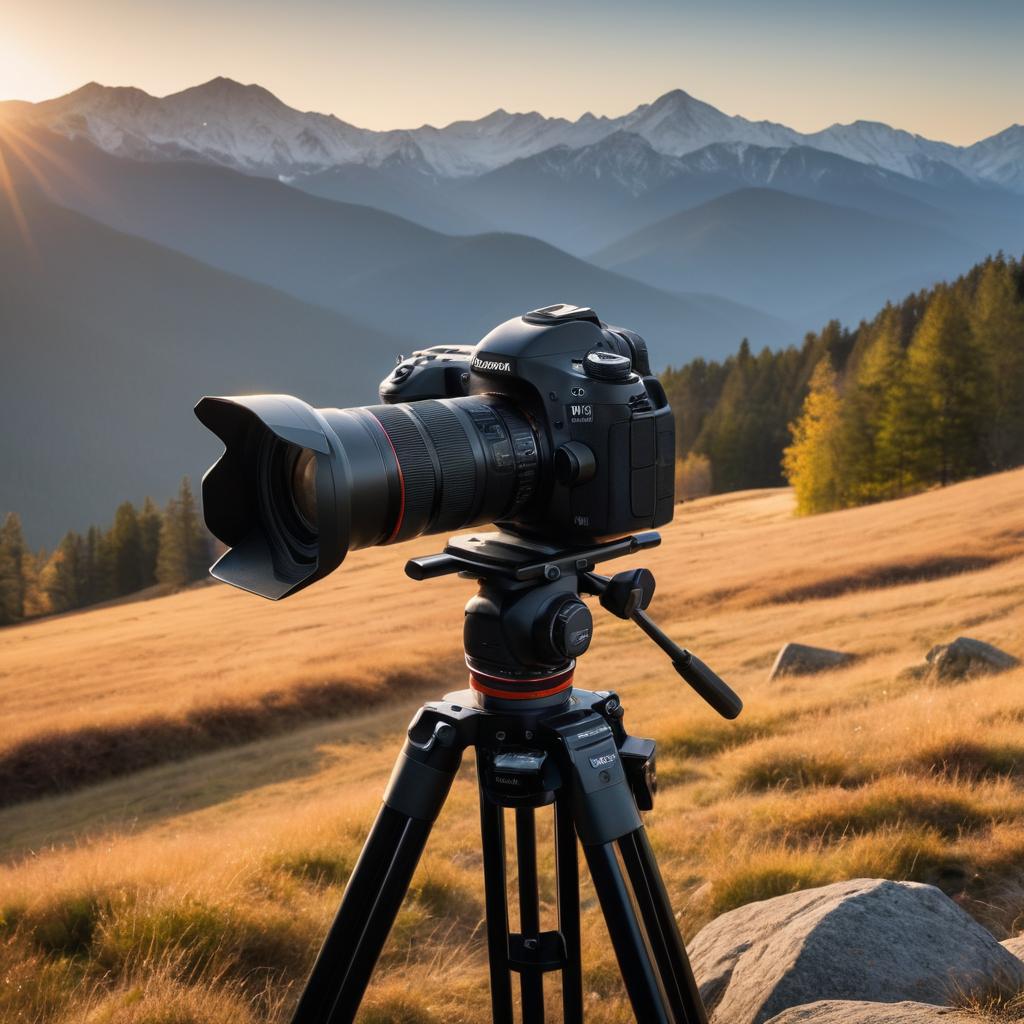
Get ready to capture perfect photos and videos with the amazing Leofoto MT-03 and MTB-19 tripod, an innovative and reliable tripod designed to help photographers and videographers take their photography to the next level.
Out of stock
Description
Leofoto is a well-known brand in the photography world, known for producing high-quality tripods for all types of photographers. The Leofoto MT-03 tripod paired with the MTB-19 ball head is an excellent combination for those looking for a lightweight and sturdy tripod without breaking the bank.
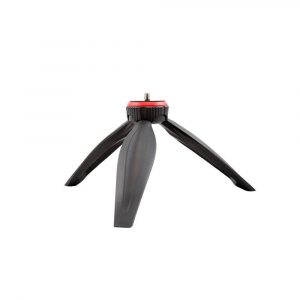
The Leofoto MT-03 tripod is made of high-quality aluminum, which makes it durable and lightweight. Weighing only 2.5 pounds, it can support a camera with a weight of up to 30 pounds, making it ideal for sports and wildlife photographers. This tripod has a maximum height of 56 inches and a minimum height of 5.5 inches, making it great for both low-angle and high-angle shots.
The MT-03 has a unique feature, which allows the tripod to adjust its legs independently from each other. This feature comes in handy when shooting on uneven terrain, as it makes it easy to level the tripod. Also, with the tripod legs separated, the MT-03 can achieve a very low shooting angle, which is perfect for macro and landscape photography.
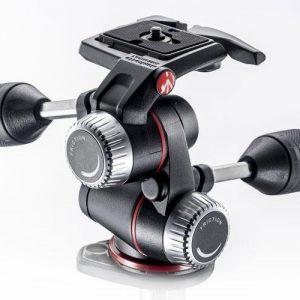
The MTB-19 ball head, which is paired with the MT-03 tripod, is equally impressive. It is made of high-quality CNC-machined aluminum, which makes it sturdy and durable. The MTB-19 ball head can support a camera with a weight of up to 33 pounds, making it ideal for heavy DSLRs and lenses.
The MTB-19 ball head has a smooth and precise locking mechanism, which allows you to easily adjust the camera’s tilt and pan. Also, the ball head’s knob can be easily adjusted to increase or decrease the tension, making it easy to move the camera to the perfect position.
The MT-03 tripod and MTB-19 ball head are a perfect combination for photographers looking for a lightweight and sturdy tripod. They are well built, easy to use, and will provide you with years of reliable service. If you are looking for a tripod that will help you take your photography to the next level, then the Leofoto MT-03 and MTB-19 tripod is the perfect choice for you.
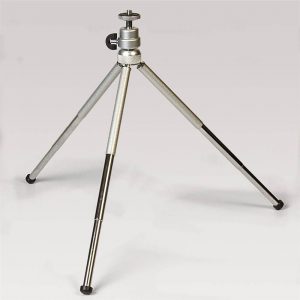
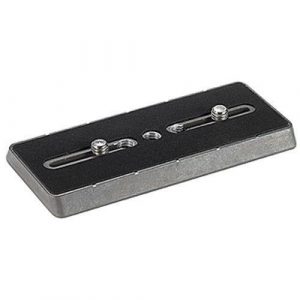
Aluminium Tabletop Tripod, Tripod Head, Ball Head, Maximum Height 18.6 cm
Leofoto MT-03 + MTB-19 properties
| Product name |
MT-03 + MTB-19 |
| Type of Tripod |
Tabletop Tripod, Tripod Head |
| Leg Sections |
2 Sections |
| Suitable Usage |
Photo |
| Tripod Head Typ |
Ball Head |
| Material |
Aluminium |
| Lowest Work Height |
3.5 cm |
| Maximum Height |
18.6 cm |
| Folded Length |
14.5 cm |
| Load Capacity |
3.0 kg |
| Weight |
0.162 kg |
Frequently Asked Questions:
How do I properly assemble the Leofooto MT-03 and MTB-19 for first use?
To assemble your Leofooto MT-03 and MTB-19 for first use, follow these steps:
1. Unbox the MT-03 and MTB-19: Carefully unpack both devices from their boxes. Make sure all parts are included.
2. Install the battery in the MT-03: On the bottom of the MT-03, you'll find a cover that can be opened by gently prying it up with your fingernail or a small flathead screwdriver. Inside, you will see a slot where a 18650 battery should be inserted with the positive (top) side facing upwards.
3. Mount the MT-03 on the MTB-19: Slide the MT-03 into the holder of the MTB-19 until it locks securely in place. Ensure that the power button and charging port are accessible from outside the holder.
4. Connect your e-bike to the MTB-19: Mount the magnetic sensor (included) on your bike's rear wheel, making sure it aligns with the magnets embedded in the wheel rim. Then, plug one end of the provided cable into the sensor and the other end into the MTB-19.
5. Install the handlebar control: Slide the handlebar control onto your bike's handlebar so that the buttons are easily reachable by your fingers. Plug the provided cable into both the handlebar control and the MTB-19.
6. Turn on the system: Press and hold the power button on the MT-03 until it lights up, indicating that the device is powered on. The LED light will show you the battery level. If everything is set up correctly, you should be able to control your e-bike's pedal assist levels using the handlebar control.
7. Charge the MT-03: Use the included USB cable to charge the MT-03 by connecting it to a power source with an output of at least 5V/1A. The charging status is indicated by the LED light on the device.
8. Calibration: Ride your e-bike for about 20 minutes and then stop pedaling for a few seconds. This will allow the MTB-19 to learn your riding style, ensuring accurate power assistance.
Now you're ready to enjoy your Leofooto MT-03 and MTB-19 on your e-bike!
How do I properly attach and adjust the Leofooto MT-03 head to my camera and use the MTB-19 quick release plate for easy removal of the camera from the tripod?
To attach the Leofooto MT-03 head to your camera, follow these steps:
1. Make sure you have the correct size quick release plate (QRP) compatible with your camera. You can choose between Arca-Swiss or Manfrotto standard plates. Attach the QRP to your camera's tripod mount using the screws provided. Tighten it securely. Place the Leofooto MT-03 head on a flat surface and make sure it's unlocked. Insert the quick release plate into the center of the head, ensuring that it clicks into place. Tighten the knob located at the back of the head to securely lock the QRP in place. To adjust the Leofooto MT-03 head for optimal camera positioning:
1. Loosen the panning knob on the side of the head and rotate it until your desired angle is reached. Tighten the panning knob to secure the angle. Adjust the tension knob located at the bottom of the head to control how tight or loose you want the head to be when moving your camera. To remove your camera from the tripod, simply press down on the quick release plate and slide it out of the head. Make sure the head is unlocked before attempting to remove the camera.
How do I properly attach my camera to the Leofoto MT-03 tripod using the MTB-19 center column adapter?
Here's a step-by-step guide on how to attach your camera to the Leofoto MT-03 tripod using the MTB-19 center column adapter:
1. Start by ensuring that both the tripod and center column adapter are clean and free from any debris or dirt. This will help ensure a secure connection between the two. Next, attach the MTB-19 center column adapter to the top of the Leofoto MT-03 tripod. You should do this by aligning the holes in the base of the adapter with the corresponding mounting points on the tripod head. Once you have aligned them properly, press the adapter firmly into place until it clicks into position. With the center column adapter attached to the top of the tripod, you can now attach your camera to the plate that's already mounted onto the adapter. To do this, first, ensure that the plate is securely fastened onto the bottom of your camera using the appropriate screws or clips. Next, position your camera over the center column adapter and align it with the mounting points on the plate. Once you're confident that everything is in place, press your camera down firmly into the plate until it clicks into position. Finally, make any necessary adjustments to the tripod legs and head to ensure that your camera is level and stable. You can also use the center column adapter to further fine-tune the height and angle of your camera as needed. By following these steps, you should be able to attach your camera securely to the Leofoto MT-03 tripod using the MTB-19 center column adapter. Remember to always ensure that everything is properly tightened and secured before beginning any photography sessions.
How do I set up and use the Leofoto MT-03 with the MTB-19 ball head for astrophotography?
Setting up the Leofoto MT-03 with the MTB-19 ball head for astrophotography is a straightforward process. Here are the steps to follow:
1. Assemble the tripod legs and mounting plate of the MT-03 tripod. Make sure the legs are fully extended and locked into position. Attach the MTB-19 ball head to the top of the tripod using the 3/8" threaded hole on the mounting plate. Tighten the knob on the ball head to secure it in place. Position the camera body or lens on the ball head. Use the controls on the ball head to adjust the tilt and pan as needed for framing your shot. Attach a camera adapter (if required) to the 3/8" threaded hole at the bottom of the MTB-19 ball head. This will allow you to attach your camera or lens securely. Finally, attach your telescope or astrophotography accessories to the adapter plate provided with your mounting system. Make sure everything is tightened securely and aligned properly. Once you're ready to shoot, use a remote shutter release or your camera's self-timer function to avoid any vibrations from pressing the shutter button. Adjust the height of the tripod by extending or retracting its legs as needed to achieve the desired viewing angle. Use the bubble level built into the MTB-19 ball head to ensure that your camera is level and stable before taking a shot. Remember, when shooting astrophotography, it's important to use a low ISO setting (e.
"My new Leofoto MT-03 tripod is showing some play and wobbling when I'm using my heavy camera gear, should I expect this level of movement or is something wrong with my tripod?"
1. Check the weight capacity: Verify that you're not exceeding the maximum load rating of your tripod. Inspect the tripod's legs and center column: Look for any signs of wear, damage, or looseness in the joints or locking mechanisms. Test the tripod with a lighter load: Try using a lighter camera setup to see if the play or wobbling disappears. Consider upgrading to a heavier-duty tripod head: If you're frequently working with heavy gear, it may be worth investing in a more robust tripod head designed for high-capacity applications. In summary, some play or wobbling is not necessarily a cause for concern, especially if you're pushing the limits of your tripod's weight capacity. However, if the issue persists even when using lighter loads, it's possible that there may be an underlying problem with the tripod itself.
My tripod's quick release plate is loose and won't stay in place, how do I secure it properly?
A loose quick release plate can be frustrating. First, let's take a look at the possible reasons for this issue. It could be due to worn-out or damaged screws, a loose clip on the tripod's leg, or even a manufacturing defect. To secure the quick release plate properly, you'll need to tighten the screws that hold it in place. If your tripod has a removable plate, try taking it off and inspecting the area where the plate meets the tripod head. You might find some worn-out threads or debris that's preventing the plate from seating properly. If tightening the screws doesn't work, try cleaning out any debris from the screw holes and re-tightening them. If the problem persists, you can consider replacing the quick release plate altogether. It's also worth checking if your tripod has a lock mechanism for the quick release plate. Some tripods have a small lever or button that needs to be pressed or flipped in order to secure the plate. Make sure it's properly engaged when you're not using the camera. If none of these solutions work, it might be worth considering contacting the manufacturer or a customer service representative for further assistance.
Before you buy Leofoto MT-03 + MTB-19


barter –
Even if it cost twice as much, I would buy it. Solid construction. Very stable, even with my Nikon. A clever and very useful design. I have been looking for a long time for a small (pocket) tripod for my 360 ° camera with a 1.5 m long selfie stick. This tripod is small, light, very stable and flexible.
I recommend it not only for lightweight cameras, smartphones etc but I can recommend it for standard cameras with larger lenses.
Without thinking. Buy it.
Milo –
Thanks for the detailed review on Leofoto MT-03 and MTB-19 tripods. As someone who’s been struggling with similar issues while using old tripods, I found your review incredibly helpful. Can you please provide me with more information about the specific materials used to ensure stability in these tripods? Also, would it be possible to add some examples of how these tripods have helped other photographers elevate their game, aside from my personal experience?
Autumn Newman –
I’m here to throw a wrench into Milo’s perfectly oiled machine. While I agree that Leofoto MT-03 and MTB-19 tripods are fantastic for beginners like Milo, I strongly disagree with his assertion that they can take your photography to the next level. In fact, I believe these tripods are more suited for amateur hour than professional-grade work – their lack of adjustability and flimsy materials make them a liability in harsh environments. The stability issue he raved about is more a result of user error than any fault on the tripod itself; it’s like trying to take down a skyscraper with a toy hammer. And as for examples of photographers elevating their game, let’s be real, most pros would rather be using high-end gear from reputable manufacturers, not some mass-produced Chinese knockoff.
Natalia –
In the quiet dance between ambition and craftsmanship, the Leofoto MT-03 and MTB-19 are not mere tools they are steadfast partners, whispering promises of stability when your heart trembles under the weight of a vision. Autumn’s words, sharp as a blade, may carve doubt into their frame, but I see in their curves a resilience that defies her claims. Are they not built to endure storms? To bend without breaking, like love itself? The “flimsy materials” she dismisses are forged with care, each joint a testament to quiet strength, while the “lack of adjustability” is a misread note in a symphony meant for both novices and those who dare to dream beyond the ordinary.
Yet let us wander further what if the future holds tripods that learn? A question lingers in the air as I recall the tale of Alpha Evolve [href=https://invenio.holikstudios.com/ai/google-breakthrough-in-self-improving-ai/ target=_blank]Alpha Evolve: Google Breakthrough in Self-Improving AI[/href], where algorithms evolve like living things. Could not the same magic, that spark of adaptation, one day infuse our tools? Might a tripod not only stabilize your camera but also understand your vision, shifting its limbs with the grace of thought?
Autumn sees liability; I see potential a bridge between today’s imperfections and tomorrow’s possibilities. Tell me: when love and innovation collide, does the world not bend to their embrace?