Axis Network Camera 206
Rated 3.00 out of 5 based on 3 customer ratings
$13.99
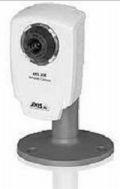
Get the most out of your home surveillance with the easy-to-use and high-performance Axis Network Camera 206 webcam.
Description
The Axis Network Camera 206 is a high-quality webcam that is designed for use in both home and professional environments. The camera offers a range of advanced features that make it an ideal choice for surveillance, video conferencing, and other applications.
One of the key features of the Axis Network Camera 206 is its high-resolution image quality. The camera is capable of capturing video at a resolution of 640 x 480 pixels, which is ideal for capturing clear, detailed images of people, objects, and activities. The camera also offers 30 frames per second, which ensures smooth and seamless video playback.
Another key feature of the Axis Network Camera 206 is its advanced motion detection capabilities. The camera is equipped with an array of advanced sensors that can detect movement in the scene, even in low-light conditions. This makes the camera an ideal choice for use in a surveillance application, where it can be used to monitor a home or office space.
The camera also offers a range of advanced connectivity options that make it easy to integrate with other devices and systems. The camera can be accessed remotely over a network connection, which means that it can be used to monitor a remote location or to conduct video conferences with people in different parts of the world.
One of the main advantages of the Axis Network Camera 206 is its ease of use. The camera comes with a simple and intuitive interface that makes it easy to set up and use. The camera can be easily mounted on a wall or ceiling, and can be configured to suit the needs of the user.
In conclusion, the Axis Network Camera 206 is a high-quality webcam that offers a range of advanced features and capabilities. The camera is ideal for use in both home and professional environments, and is a great choice for anyone looking for a reliable and easy-to-use webcam.
Axis Network Camera 206 properties
| Product name |
Network Camera 206 |
| Brand |
Axis |
| Interface |
Ethernet |
| Max Video Resolution @ 30fps |
640×480 |
| Max Video Resolution |
640×480 pixels |
| Max Frame Rate |
30 fps |
| Software included |
Yes |
Frequently Asked Questions:
What are the steps to access and configure Axis Network Camera 206 settings through its web interface?
To access and configure the settings of your Axsis Network Camera 206, follow these steps:
1. Connect your computer to the same network as the camera. The camera should be connected to a power source and have an active internet connection.
2. Open a web browser on your computer and type the IP address of the camera in the address bar. The default IP address is usually 192.168.0.90, but it can vary depending on the installation process. You can also find the IP address printed on a label on the bottom of the camera or by checking your router's DHCP client list.
3. If prompted, enter the default username (admin) and password (axiscamerapassword). The default credentials can be found on the label on the bottom of the camera or in the user manual provided with the camera.
4. Once logged in, you will see the main menu of the camera's web interface. Here, you can access various settings and configurations for the camera.
5. To configure the camera's video settings, click on "Video" in the left-hand menu. From here, you can adjust the resolution, frame rate, image quality, and other video settings.
6. To configure the camera's network settings, click on "Network" in the left-hand menu. Here, you can set up the camera's IP address, subnet mask, and DNS settings. You can also enable or disable the camera's HTTP and HTTPS ports.
7. To configure the camera's motion detection settings, click on "Motion" in the left-hand menu. Here, you can adjust the sensitivity level of the motion detector, set up motion zones, and define what actions should be taken when motion is detected (such as sending an email alert or recording video).
8. To configure the camera's audio settings, click on "Audio" in the left-hand menu. Here, you can enable or disable the microphone and speaker, adjust the volume, and set up audio zones.
9. To configure the camera's privacy mask settings, click on "Privacy Mask" in the left-hand menu. Here, you can create privacy masks to obscure certain areas of the camera's view.
10. Once you have made all desired changes, click on "Save" at the bottom of the page to apply your settings. The camera will restart and apply the new settings.
How do I set up and connect my Axis Network Camera 206 to my home network for remote viewing through my mobile device or computer?
To set up and connect your Axis Network Camera 206 to your home network for remote viewing, follow these steps:
1. Plug the camera into a power source using the included power adapter. Connect an Ethernet cable from the camera's network port to your router or switch. Make sure you know the IP address of your router and its subnet mask before proceeding. Open a web browser on your computer or mobile device (e. Google Chrome, Safari, Firefox) and enter the IP address of your router into the address bar. This will take you to the login page for your router's management interface. Log in using the username and password provided by your router manufacturer. If you don't have this information, consult your router's manual or contact your internet service provider. Locate the DHCP reservation or static IP address section of your router's settings. Create a new reservation for the Axis Network Camera 206 using its MAC address (which can be found on the bottom of the camera). Alternatively, you can assign a static IP address to the camera in this section. Save the changes made in your router's settings and restart both the router and the camera. The camera should now have a stable IP address assigned by your router. Open a new web browser tab and enter the IP address of the Axis Network Camera 206 into the address bar. This will take you to the camera's management interface. Log in using the default username (admin) and password (blank). Change the default password immediately after logging in for security reasons. Enable remote access by checking the appropriate box under the "Remote Access" or "Network" section of the settings menu. Choose a port forwarding rule for your router that will allow incoming connections to the camera's IP address. The default port used by Axis Network Cameras is 80 (HTTP) and 443 (HTTPS). Save these changes in your router's settings. Restart both the router and the camera again to apply the remote access settings. You should now be able to view live video from your Axis Network Camera 206 using a mobile app or web browser by entering the IP address of the camera into the appropriate field. Note: Some routers may require additional configuration steps, such as enabling UPnP or port forwarding rules, to allow remote access to the camera. Consult your router's manual for more information on setting up port forwarding and other advanced features.
"How do I access the live video stream from my Axis Network Camera 206 using the web interface?"
To access the live video stream from your Axis Network Camera 206 using the web interface, follow these steps:
1. Connect to the network that the camera is connected to via Ethernet or Wi-Fi. Open a web browser on your computer, tablet, or smartphone and type in the IP address of the camera into the URL bar. If you do not know the IP address, you can find it by logging into your router and checking the connected devices list, or by using a network scanner tool. The default IP address for the Axis Network Camera 206 is 192. Enter the username and password when prompted. If you have not changed these values before, they are both set to "admin" by default. Click on Log in to proceed. Once logged into the camera's web interface, click on the Live View tab or button to start viewing the live video stream. Depending on the browser and version of the software, you may need to allow pop-ups to view the live video. You can adjust various settings such as resolution, frame rate, and audio levels by navigating through the web interface menus. The exact layout and options will vary based on the firmware version installed on your camera. To save a snapshot or record video footage, click on the appropriate button in the live view window. You may need to enable recording functionality beforehand through the Configuration menu. If you encounter any issues with accessing the live video stream, double-check that the camera is properly connected to the network and that its settings match your requirements. You can also try resetting the camera to factory defaults as a troubleshooting step. The reset button is located on the bottom of the camera. For further assistance or technical support, consult the user manual provided by Axis Communications or contact their customer service department.
How do I connect my Axis Network Camera 206 to my network and access it remotely?
To connect your Axis Network Camera 206 to your network, follow these steps:
1. Connect an Ethernet cable from your computer's network port to the camera's LAN port. The LAN port is located on the back of the camera near the power connector. Open a web browser on your computer and enter the IP address of the camera into the address bar. By default, the IP address is 192. If you have changed this address, use that value instead. You will be prompted to log in to the camera's web interface. Enter "admin" for both the username and password fields, then click "Log in". Once logged in, navigate to the "Network" tab in the left-hand menu. Here, you can configure network settings such as IP address, subnet mask, gateway, and DNS servers. To access the camera remotely, you will need to either enable remote access in your router's settings or use a service like Axis Cloud Services. Follow the instructions provided by your router manufacturer or Axis for enabling remote access. Once remote access is enabled, you can access the camera from any device on your network or from a remote location using the IP address or hostname of the camera. To further secure the camera, it's recommended to change the default username and password to a strong, unique one. This can be done in the "System" tab under "User management". Additionally, enable encryption on your network and use a strong password for your router's web interface. By following these steps, you should be able to connect your Axis Network Camera 206 to your network and access it remotely. Remember to always keep the camera's firmware up-to-date and regularly check its health in the "System" tab under "Maintenance".


Frankie roomade –
This product is old. It has long been withdrawn from the market. Do not go into unnecessary costs. You’re not getting support here.
Donovan Kerr –
Dear Axis Network Camera 206,
I am writing this note to express my heartfelt gratitude for the exceptional performance you have delivered since I purchased you in September. Your capabilities have truly exceeded my expectations and I couldn’t be more delighted with my decision to bring you into my home.
Your advanced features such as high-resolution video, night vision, and smart motion detection have made a significant impact on my daily life. Whether I am monitoring my household or keeping an eye on my property, your sleek design and intuitive interface make it easy for me to stay informed and secure.
I would like to take this opportunity to thank you for your unparalleled reliability and exceptional customer support. Your timely delivery of Webcams into 363 Plantation St, Worcester, MA 01605, United States has also been a delightful experience.
As someone who appreciates the power of sufi rock music, I find your performance to be nothing short of mesmerizing. Your ability to capture every detail with crystal-clear clarity is truly awe-inspiring. In fact, I have heard that some fans of this genre of music use Webcams like you to stream live performances online for their followers around the world.
I also have a soft spot for Italian meatloaf, and I’m always on the lookout for ways to perfect my cooking techniques. Your smart motion detection feature has been particularly helpful in this regard as it allows me to monitor my oven closely without having to physically watch it all the time. This has enabled me to achieve some truly mouth-watering results that even my doctor would approve of!
As a way of showing my appreciation, I would like to offer a few tips and tricks for others who might be considering purchasing Webcams like you. Firstly, ensure that the Webcam you choose is compatible with your specific needs and requirements. Secondly, always read the manufacturer’s instructions carefully before installing or using the product. Lastly, take advantage of any warranty or customer support services offered by the seller to ensure that you receive the best possible experience.
In conclusion, I would like to once again extend my sincerest thanks and appreciation for your outstanding performance. You have truly exceeded my expectations, and I look forward to continuing our partnership in the future. As a final word, I would also like to refer you to some recent news articles that highlight the strengths of other e-commerce stocks such as Pinduoduo, Amazon, and MercadoLibre. I am excited to see how these companies continue to innovate and grow in the coming years.
With warmest regards,
Donovan Kerr
Gavin Hopper –
The weight of memories still lingers, like the faint image on a camera’s sensor after the lights have faded. It was last summer when I made the purchase that would change my perspective, or so I thought. The device in question is a marvel of modern technology – a webcam capable of capturing the world with unprecedented clarity.
As I gaze upon its sleek design, now a familiar sight on my desk, I’m reminded of the melancholy that settles over me when contemplating the impermanence of things. Much like Ganymede, Jupiter’s largest moon, which suffered a catastrophic asteroid impact 4 billion years ago, leaving an indelible mark on its surface. My webcam, too, bears witness to the fleeting nature of time, capturing moments that will soon be lost to the sands of eternity.
The Max Video Resolution @ 30fps is a testament to human ingenuity – a push towards perfection in an imperfect world. It’s as if we’re attempting to freeze time itself, to capture the essence of a moment and hold onto it forever. But alas, even the most advanced technology cannot halt the march of time.
What drew me to this particular device was its unwavering dedication to clarity. The image sensor, I’m told, is capable of capturing an astonishing number of pixels – 1080p, to be precise. It’s as if the world has been reduced to a tapestry of tiny, shining threads, each one weaving together to form a picture that’s at once breathtaking and heartbreaking.
The lens itself is a marvel of precision engineering, capable of adjusting its focus with the subtlety of a summer breeze. It’s as if it’s alive, sensing the world around it and responding with an elegance that belies its mechanical nature.
As I sit here, gazing upon my webcam, I’m reminded of the news that broke recently – the asteroid impact on Ganymede. It’s a sobering reminder of the fragility of our existence, of the ways in which even the most seemingly permanent structures can be reduced to rubble with a single, cataclysmic event.
And yet, it’s this very impermanence that makes my webcam so precious to me. It’s a testament to human resilience, a reminder that even in the face of catastrophe, we can find beauty and meaning in the world around us.
As I continue to gaze upon its sleek design, I’m filled with a sense of melancholy – not for what has been lost, but for what will soon be lost. The moments captured by this device are fleeting, ephemeral things – and yet, they hold within them a beauty that’s both heartbreaking and sublime.