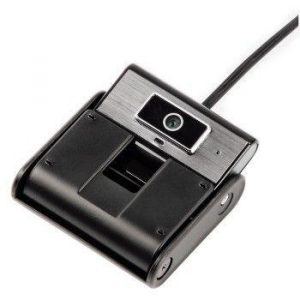
I-TEC I-cam
$19.99
Get your work done with ease with the I-TEC I-cam webcam, perfect for video calls and Zoom meetings.
Description
The I-TEC I-cam webcam is a high-quality camera that has been designed with advanced features to improve the video and audio capabilities of your computer. It is a sleek and stylish device that is perfect for online video calls, streaming, and recording videos.
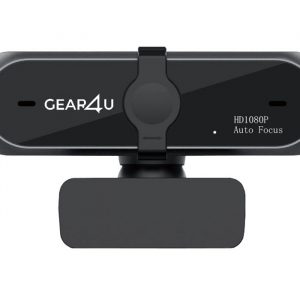
The I-TEC I-cam webcam is equipped with a 1080p full HD video sensor that offers superior clarity and sharpness. It delivers smooth video performance and provides images that are true-to-life, with bright colors and clear details. This makes it ideal for those who want to create high-quality videos, whether for business or personal use.
Another impressive feature of the I-TEC I-cam webcam is its noise-canceling microphone. This allows you to communicate clearly with your colleagues, family, or friends without any disturbances from unwanted background noise. With the combination of the video sensor and microphone, the I-TEC I-cam webcam offers fluid and realistic communication experiences.
The I-TEC I-cam webcam has a built-in adjustable clip so you can easily attach it to your computer screen or laptop, making it convenient to use. Its compact, portable design makes it easy to move around and use for a variety of different purposes. You can also adjust the angle of the camera to capture the best shots of yourself or the surrounding environment.
The I-TEC I-cam webcam is also compatible with a range of operating systems, including Windows, Mac OS, and Linux. This means that you can easily connect it to almost any computer and start recording or streaming right away.
In conclusion, the I-TEC I-cam webcam is an excellent device that offers top-notch video and audio performance at an affordable price. With its sleek design, advanced features, and easy-to-use functionality, it is a perfect choice for anyone who needs high-quality video communication capabilities. Whether for business or personal use, the I-TEC I-cam webcam is the perfect tool to bring your video communication to the next level.
I-TEC I-cam properties
| Product name |
I-cam |
| Brand |
I-TEC |
| Interface |
USB |
| Focus |
Auto |
Frequently Asked Questions:
"How do I connect my new I-TEC I-cam to my WiFi network for remote viewing?"
Make sure your I-TEC I-cam is powered on and connected to a power source via the included power adapter. Press the WPS button located on the bottom of the camera (next to the microSD card slot). Within 2 minutes, press the WPS button on your WiFi router to initiate pairing between the camera and your network. The camera's LED light will flash rapidly as it attempts to connect to your network. Once connected, the camera's LED light will stop flashing and remain solid green. You can verify that the connection was successful by accessing the camera's network settings in your router's configuration page. To view live footage remotely, open a web browser on any device connected to the same WiFi network and enter "192. This will take you to the camera's setup page where you can adjust various settings and access live video. If you prefer to use a mobile device, download the I-TEC Mobile app from your app store and follow the on-screen instructions to connect your camera. The app is available for both iOS and Android devices. Once connected, you can view live footage and adjust various settings from anywhere with an internet connection. Note that remote viewing may require a stable WiFi connection and sufficient bandwidth. If you encounter any issues connecting the camera to your network or accessing remote video, consult the user manual provided with your I-TEC I-cam for troubleshooting steps or contact our customer support team for further assistance.
How do I connect my I-TEC I-cam to my WiFi network for remote viewing?
To connect your I-TEC I-cam to your WiFi network for remote viewing, please follow the steps below:
1. Ensure that your I-cam is connected to a power source and has been initialized. Press the "WiFi" button on the back of the camera until the WiFi LED (located next to the USB port) starts flashing rapidly. This indicates that the camera is in search mode for available WiFi networks. Connect your smartphone, tablet, or computer to the same WiFi network as the camera. Open a web browser on your device and type "192. This should bring you to the I-cam configuration page. If prompted, enter the default username (admin) and password (password). Select the WiFi network that you want to connect the camera to from the list of available networks. Enter the WiFi network password when prompted. Click "Save" or "Apply" to save your changes. The camera will now be connected to your WiFi network and should be accessible for remote viewing via the IP address provided on the configuration page (usually in the format of 192. Note: If you have any issues connecting your I-cam to your WiFi network, you may need to reset it to factory defaults and repeat the process. Refer to the user manual for instructions on how to do this.
How do I connect my I-TEC I-cam to my computer using USB and what software do I need to install?
To connect your I-TEC I-cam to your computer using USB, follow these steps:
1. Make sure that the camera is turned on and in standby mode (the red LED is blinking). Connect one end of the supplied USB cable into the camera's USB port, and the other end into a USB port on your computer. The camera will automatically begin charging as soon as it's connected to the power supply. Your computer should recognize the camera as a new device. If prompted, select "Install driver" or "Setup" to continue with the installation process. Follow the instructions provided by your operating system to install the necessary drivers for the camera. Once the driver is installed, you can open your preferred video editing software (such as iMovie, Adobe Premiere Pro, or Final Cut Pro) and select the camera as your input device. Begin recording or live streaming as usual. Note that some older versions of Windows may require additional software to recognize the camera. In this case, you can download and install the I-TEC Camera Driver from our website (https://www.
How do I connect my I-TEC I-cam to my computer?
To connect your I-TEC I-Cam to your computer, you will need the following items:
1. The I-TEC I-Cam device
2. A USB cable (not included with the camera)
3. A free USB port on your computer
Here are the steps to connect your I-TEC I-Cam to your computer:
1. Plug one end of the USB cable into the I-TEC I-Cam device. Plug the other end of the USB cable into a free USB port on your computer. The camera should automatically install the necessary drivers and software for you to use it. If this doesn't happen, go to "Device Manager" in Windows or "System Preferences" in macOS and look for an option to install new hardware. Find the I-TEC I-Cam device in the list and select "Install. Once the drivers are installed, you should be able to use your I-TEC I-Cam by launching the included software or using it with third-party apps that support webcams.
I'm experiencing some issues with my I-tec i-cam, it's not capturing video in low light conditions. Is there an adjustment or setting that can be made to improve this?
The i-cam is a great little camera. Low-light performance can be a challenge for many cameras. Let's see if we can troubleshoot the issue. Firstly, have you tried adjusting the exposure compensation setting on your camera? This allows you to brighten or darken the image in low-light conditions. If your camera has an ISO adjustment, try increasing it to allow more light into the sensor. However, be aware that higher ISO settings can introduce noise into the image. Another option is to check if there's a manual focus mode available on your i-cam. Autofocus can struggle in low light, so switching to manual focus might help you get a sharper image. Additionally, have you considered using a tripod or stabilizing device? This will help reduce camera shake and blur caused by hand movement. If none of these adjustments work, it's possible that the issue lies with the sensor itself. In this case, you may need to consider replacing the camera or seeking professional assistance from I-tec support. Lastly, if your i-cam has a built-in night vision mode, try enabling it. This will often amplify available light and improve low-light performance.
I'm having trouble with my I-CAM's autofocus feature, it keeps focusing on the background instead of the subject in front of me. What is wrong and how can I fix it?
That's frustrating! There are a few possible reasons why your I-CAM's autofocus feature might be misbehaving. Let's go through them step by step. Firstly, make sure that you're using the correct autofocus mode for your situation. If you're trying to focus on a subject in front of a busy or distracting background, try switching to Continuous Autofocus (AF-C) instead of Single Shot Autofocus (AF-S). This will allow the camera to continuously adjust its focus as the scene changes. Another possibility is that the autofocus points are not correctly aligned with your subject. Check your camera's menu to see if there's an option to adjust the autofocus point layout or size. If you're using a single point AF, try switching to a multi-point AF or a zone AF mode instead. It's also possible that the lens itself is the culprit. Try cleaning the lens with a soft cloth and inspecting it for any debris or smudges. Make sure there are no fingerprints or oil residue on the lens surface. If your I-CAM has a built-in autofocus calibration feature, try running it to see if it can adjust the camera's focus settings for optimal performance. Lastly, check your camera's firmware version and make sure you're running the latest update. Sometimes, software bugs can cause autofocus issues. If none of these steps resolve the problem, there might be an issue with the lens or the camera's sensor itself. In that case, it may be worth taking your I-CAM to a professional repair service for further diagnosis and repair.
How do I troubleshoot issues with my I-Tec i-Cam not recognizing the USB camera on Windows 10?
1. Check the device manager: Open the device manager by pressing the Windows key + X and selecting Device Manager from the menu. In the device manager, expand the "Imaging devices" section and look for your camera listed there. If it is not listed, try updating the drivers for your camera. Update the drivers: You can update the drivers for your camera by going to the official website of I-Tec and downloading the latest drivers for your camera model. Once downloaded, install the new drivers and restart your computer. Disable and re-enable the camera: Sometimes, disabling and re-enabling the camera in the device manager can resolve the issue. To do this, open the device manager, expand the "Imaging devices" section, right-click on your camera and select "Disable device". Wait for a few seconds and then enable it again. Run the Windows troubleshooter: The Windows 10 operating system has a built-in troubleshooting tool that can help resolve issues with USB cameras. To run the troubleshooter, go to Settings > Update & Security > Troubleshoot > Additional troubleshooters. Select "Hardware and Sound" and then follow the instructions on the screen. Check for conflicts: If none of the above steps resolve the issue, it's possible that there are conflicts with other devices connected to your computer. Try disconnecting all non-essential devices and see if the camera is recognized by Windows then. If none of these steps resolve the issue, it may be worth considering contacting I-Tec support for further assistance or replacing the camera.
My camera is not turning on, it just blinks and turns off immediately when I plug it in. What's wrong with it?
1. Dead Battery**: If you're using a rechargeable battery, it might be dead. Try removing the battery and letting it sit for a while to see if it will charge properly. Faulty Power Source**: Make sure the power source is working correctly. Try plugging it into a different outlet or using a different power adapter to rule out any issues with your wall outlet or charger. Loose Connections**: Check all connections, including the battery contacts and any cables or wires that might be loose. This can cause the camera to malfunction. Faulty Power Button**: The power button might be faulty. Try pressing it multiple times in rapid succession to see if the camera will turn on. Overheating**: If your camera is overheating, it can shut down immediately. Check for any blockages or obstructions that might be causing the camera to overheat. Faulty Circuitry**: In some cases, a faulty circuit board can cause the camera to malfunction. This might require professional repair or replacement. Power Surge**: A power surge can damage your camera's electronics. If you've recently had a power outage or storm in your area, it could be related to that. To troubleshoot further, I'd recommend trying the following:
* Check if the camera turns on when plugged into a different outlet or using a different charger. Try pressing and holding the power button for 10-15 seconds to see if it will turn on. If you have a spare battery, try swapping it out with the current one. If none of these steps resolve the issue, it's possible that there's a more serious problem with your camera's internal electronics. In this case, it might be worth taking it to a professional repair service for further diagnosis and repair.

Silas –
I recently purchased the I-TEC I-cam webcam for use during my online meetings and classes. As a nurse living in Las Vegas, I needed a reliable camera with clear picture quality that could make it feel as if I was in the same room as my colleagues and patients. Although the quality of the I-cam is good, other features left me feeling a little disappointed.
One of the major features of the I-TEC I-cam is the auto-focus. While it’s a great feature to have, it tends to be a bit slow and takes a while to adjust when moving from one place to another. Compared to other webcams I’ve used, definitely not the best autofocusing. Though, in terms of picture quality, the I-TEC I-cam performs well and captures clear and vivid images.
Regarding the I-TEC brand, I had heard good things about them before making my purchase. While the product is decent overall, I was expecting a bit more from the brand that boasts high quality and modern technological features. Therefore, I can’t say that I was completely satisfied with my purchase.
The delivery of the I-TEC I-cam to Las Vegas was quick and smooth. The package was well packaged, and the product itself was easy to set up and start using. Despite the small hiccups, the I-TEC I-cam is still a good option if you’re looking for a webcam with good picture quality. However, I would recommend looking into other webcams with more advanced features if you’re needing more than just good picture quality.