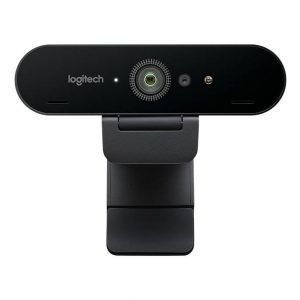
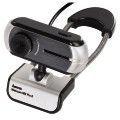
Topcom Mediakit USB 100
Rated 2.00 out of 5 based on 1 customer rating
$26.99
Capture your special moments with the Topcom Mediakit USB 100 webcam, the perfect device for high-quality and clear video recordings.
Description
Topcom Mediakit USB 100 is a high-quality webcam that provides outstanding video and audio recording capabilities. It is specially designed for internet video conferencing and chatting. The webcam is equipped with a built-in microphone and a high-resolution camera to deliver clear video and sound quality.
Installation is very straight forward with the Topcom Mediakit, simply plug and play. It is also very easy to use, you do not need to be tech-savvy to use the webcam as it is just a matter of connecting it to the USB port of your laptop or computer. It is compatible with most operating systems, so you can use it with Windows, MAC, or Linux.
Video quality is excellent thanks to the 2.0 megapixel (1920 x 1080 pixels) camera lens that captures high-quality video. The camera is also capable of capturing images with a resolution of up to 8 megapixels. This means that you can not only capture high-quality video but also take high-resolution photos as well.
The built-in microphone is a real bonus, especially for those who need to make online calls or hold internet meetings. The microphone is very sensitive and provides clear, crisp sound quality so that you can communicate clearly with others.
The webcam has a universal clip that allows you to attach it to your laptop, monitor or desktop. Its compact size and light weight make it easy to carry around, which is ideal for those who travel a lot or work remotely.
The Topcom Mediakit USB 100 is an affordable and reliable webcam that delivers high-quality video and sound quality. Whether you need to make online calls, hold video conferences or live streams, this webcam will perform brilliantly. The combination of its video quality and audio quality, easy installation, and compatibility with most operating systems makes it a perfect choice for anyone looking for a high-quality webcam.
Topcom Mediakit USB 100 properties
| Product name |
Mediakit USB 100 |
| Brand |
Topcom |
| Interface |
USB |
| Max Frame Rate |
30 fps |
Frequently Asked Questions:
Question: How do I install and use my Topcom MediaKit USB 100 webcam for the first time on my computer?
To install and use your Topcom MediaKit USB 100 webcam for the first time, follow these steps:
1. Connect the USB cable to your webcam and then plug the other end into an available USB port on your computer.
2. Turn on your computer if it's not already powered on.
3. Wait for Windows to automatically detect and install the necessary drivers for your webcam. This may take a few moments. You should see a message indicating that "New hardware found" or something similar.
4. If Windows does not automatically install the drivers, you can download them from Topcom's website: http://www.topcomusa.com/support-downloads/. Locate the "MediaKit USB 100" driver and click on it to begin the download process.
5. Once the driver file is downloaded, run the installation by double-clicking the file and following the prompts.
6. After the drivers are installed, you should see your webcam listed in the device manager under "Imaging devices." If it's not listed there, reinstall the drivers or check for any additional software that may be interfering with the installation process.
7. Now that your webcam is installed and recognized by your computer, you can use it to take photos and record videos using compatible applications such as Skype, Zoom, or any other video conferencing software.
8. To test your webcam, open a compatible application and click on the video icon or select "Start Video" from the menu options. If everything is working correctly, you should see yourself on-screen using your Topcom MediaKit USB 100 webcam.
9. You may also need to adjust your computer's microphone settings if you plan on using the built-in microphone for audio during video calls or recordings.
How do I connect and use my new Topcom Mediakit USB 100 webcam on my computer running Windows 7 operating system?
To connect and use your new Topcom Mediakit USB 100 webcam on a computer running the Windows 7 operating system, follow these steps:
1. Insert one end of the included USB cable into the bottom of the webcam, and insert the other end of the cable into an available USB port on your computer. The webcam should automatically begin installing its drivers. If prompted by the Windows Device Manager, select "Install the software automatically" to allow Windows to automatically search for and download the necessary driver software from the Internet. Alternatively, you can choose to manually install the drivers by selecting "Browse my computer for driver software" and then locating and selecting the installation files (usually found in a folder on your desktop labeled "Topcom" or "Mediakit"). Once the drivers have been successfully installed, you should be able to open any video conferencing or messaging application that supports webcam use and select the Topcom Mediakit USB 100 as your default camera device. Adjust the focus and brightness of the webcam by using the manual focus ring located on the barrel of the lens (if present). Note that some models may also have a built-in autofocus feature. To optimize video performance, ensure that the webcam is positioned at eye level and in a well-lit area with minimal background distractions. Additionally, consider using a separate microphone or headset for improved audio clarity.
How do I properly install and configure the Topcom Mediakit USB 100 webcam on my computer running Windows 7 operating system?
Here's a step-by-step guide to help you install and configure your Topcom Mediakit USB 100 webcam on a Windows 7 computer:
1. Connect the Topcom Mediakit USB 100 webcam to an available USB port on your computer. The LED light on the front of the camera will blink rapidly for about 3 seconds, indicating that it's powered up. If you have installed any other USB devices on your computer, Windows will automatically detect and install the Topcom Mediakit USB 100 webcam drivers. If prompted by a dialog box asking if you want to install the drivers, click "Install" or "Yes" to proceed. After the drivers have been installed, you should be able to see the webcam as an available device in your computer's Device Manager. To access the Device Manager, right-click on the Start menu and select "Device Manager" from the context menu. In the Device Manager window, locate the section labeled "Imaging Devices" or "Camera. Expand this section to reveal a list of all connected webcams and cameras. The Topcom Mediakit USB 100 should appear in this list with a yellow exclamation mark icon next to it. Right-click on the Topcom Mediakit USB 100 device entry and select "Properties" from the context menu. This will open the Properties window for the webcam. In the Properties window, switch to the "General" tab to view some basic information about the webcam, such as its name, manufacturer, and driver version. Click on the "Resources" tab to configure the Webcam's resource allocation settings. Make sure that the "Use any available USB port (USB Legacy)" option is selected under the "Location" section. This ensures that the webcam can use any available USB port on your computer, regardless of which one it was originally plugged into. If you want to change the name or location of the webcam in Windows, switch to the "Advanced" tab and make the necessary modifications under the "Device Properties" section. Once you're satisfied with the configuration settings, click "OK" to save your changes and exit the Properties window. The Topcom Mediakit USB 100 webcam should now be fully installed and operational on your Windows 7 computer. To test the webcam, launch a video conferencing application or any other software that supports webcam functionality. The Topcom Mediakit USB 100 should automatically be selected as the default input device for the application. If you don't see the webcam in the list of available devices, double-check that it's properly connected and that your computer recognizes it as a valid peripheral. To further optimize the performance and quality of the Topcom Mediakit USB 100 webcam, you can refer to the user manual or consult the manufacturer's website for additional configuration tips and guidelines.
How do I connect my Topcom Mediakit USB 100 webcam to my computer for the first time?
To connect your Topcom Mediakit USB 100 webcam to your computer for the first time, follow these steps:
1. Ensure that your computer has a free USB port. Connect the USB cable provided with the webcam to both the back of the webcam and an available USB port on your computer. Wait for your computer to recognize the device. This may take a few seconds. Once the webcam is recognized, you should see a pop-up message indicating that "New Hardware Found" has been detected. Click the "Install Driver" button to begin the installation process. If prompted, insert the installation CD that came with the webcam into your computer's DVD drive. Follow the on-screen instructions to complete the installation process. If you do not have the installation CD or prefer an online installation, go to the Topcom website and download the latest drivers for your operating system (Windows or Mac). Once the driver is installed, the webcam should be ready to use. You may need to close any open applications or restart your computer before the webcam becomes fully functional. To test the webcam, launch your preferred video conferencing software or web browser and verify that the camera feed is being displayed correctly. Adjust the focus and other settings as needed using the provided software or drivers. If you experience any issues with the webcam, refer to the user manual that came with the device for troubleshooting tips or contact Topcom customer support for additional assistance.
My webcam is not recognized by my computer, but the indicator light on the device is flashing - what is wrong and how can I fix it?
1. Driver issues**: Outdated or corrupted drivers might be preventing your computer from recognizing the webcam. Try updating the drivers for your webcam:
* On Windows, right-click on the Start button and select Device Manager. Expand the Imaging Devices section, find your webcam, and right-click on it to Update driver. On macOS, go to System Preferences > Software Update (or use Spotlight search). If an update is available, install it. Conflicting software**: Some programs might be interfering with your webcam's functionality. Try closing any video conferencing or screen recording apps that you've opened recently:
* Close all instances of Zoom, Skype, FaceTime, or other similar apps. Disable any browser extensions related to webcam usage (e. Video Recorder). Physical connection issues**: The issue might be with the physical connection between your webcam and computer. Try cleaning the connections:
* Inspect the USB connector on your webcam for dust or debris. Use a soft brush or cotton swab to clean it gently. Make sure the USB port on your computer is not damaged or loose. Firmware issues**: In some cases, the firmware of your webcam might be outdated or corrupted. Try resetting the webcam's firmware:
* Unplug the webcam and wait for 30 seconds. Plug it back in while holding down the reset button (usually a small pinhole). Hold it until the indicator light stops flashing. Hardware issues**: If none of the above steps work, there might be a hardware problem with your webcam. Try testing it on another computer:
* Borrow a friend's laptop or use a different computer to see if the webcam works. Windows Camera app issues**: On Windows 10/11, try resetting the Windows Camera app:
* Go to Settings > Apps > Apps & features > Manage optional features. Click on the Windows Camera app and click Uninstall. Restart your computer and reinstall the Windows Camera app. If none of these solutions work, it's possible that there's a hardware issue with your webcam. You might need to contact the manufacturer or consider replacing the device.
My webcam is not detecting my face properly when I'm wearing glasses, can it be adjusted in the settings?
That's a pretty common issue! Many webcams have trouble detecting faces with glasses on due to the glare and reflections from the lenses. Firstly, let's try adjusting the lighting around you. Sometimes, a simple change in lighting can make all the difference. Try moving your webcam away from any harsh light sources or using a diffuser to soften the light. Next, we can experiment with some settings tweaks. Check if your webcam software (e. Skype, Zoom, or Google Meet) has an option for "face detection" or "auto-framing. These features can sometimes get confused by glasses, so disabling them might help. You can also try adjusting the "contrast" and "brightness" settings to see if that improves face detection. If you're using a specific app or software, there might be more advanced settings available. For example, some apps allow you to adjust the sensitivity of the face detection algorithm or even use a different camera source (if your device has multiple cameras). Lastly, if none of these tweaks work, it's possible that the issue is with the webcam itself. Some webcams are better at handling glasses than others. If you're using an older model, it might be worth considering upgrading to a newer one.
My webcam is not working properly, it's not detecting my face when I'm wearing glasses, how can I adjust the settings so it works with me wearing glasses?
1. Adjust the Lighting**: Make sure the lighting in the room is not too harsh or dim. Webcams perform best in well-lit conditions, so try moving closer to a natural light source or using a desk lamp. Positioning of the Webcam**: Experiment with different angles and distances from your face. Sometimes, repositioning can make a big difference. Try angling the camera slightly above your face or at an angle that minimizes glare from your glasses. Clean Your Glasses**: Dirt on your lenses could be causing the issue. Clean your glasses thoroughly, especially around the frames where they might be obstructing the webcam's view of your face. Webcam Settings in Software**: Check if there are any settings in your video conferencing software or camera app that can be adjusted to improve face detection. For example, you might find options for adjusting contrast, brightness, or even a "face detection" feature specifically designed for dealing with obstacles like glasses. Adjust the Webcam's Field of View**: Some webcams allow you to adjust their field of view (FOV), which could help in including more of your face while keeping your glasses out of the shot. Check if your webcam software or the camera app allows this adjustment. Consider a Tripod**: Sometimes, even with the best positioning, the camera might still be slightly off due to movement. Using a tripod can keep the camera steady and help in getting a clearer view of your face without the need for extensive adjustments. Software Adjustments Specific to Your Webcam**: Certain webcams have software that comes pre-installed or is available for download on their official websites. These might offer additional settings or features specifically designed to deal with issues like yours, so it's worth checking if such software exists for your webcam. Replace Your Glasses Temporarily**: This might sound drastic, but if none of the above steps work, you could try temporarily removing your glasses during video calls or using a different pair that doesn't obstruct the view as much.


Bb –
The first impression after unpacking is promising:
A product that combines three functions at a reasonable price. Unfortunately, it is of limited use for Apple users. It looks chic and is easy to install, but that’s about it.
The USB hub and headset are instantly recognized for plug and play, are available in OS X and can be configured via the control panel without rebooting.
The headset has good sound, which is suitable for Voip or chat, less suitable for listening to music. The microphone looks a bit like a toy, but it seems to work. The audio control display is at least off, but unfortunately the recorded audio does not play on the headphones.
Unfortunately, the cameras could not be persuaded to work with OS X at all, the appropriate driver for OS X is completely missing and is also not offered for download on the manufacturer’s website. The supplied CD only includes software for Windows.
It’s a pity actually … so I had no choice but to send back. Maybe the manufacturer will improve it.
Delilah –
As a courier living in Bakersfield, I’ve come across various webcams in my line of work. However, the Topcom Mediakit USB 100 has impressed me the most. This webcam is rated a perfect 5 out of 5, and it’s easy to see why.
Firstly, the Topcom brand is known for its innovative and high-quality products. This webcam is no exception, delivering crystal-clear visuals and crisp audio quality. Whether it’s for video conferencing or online streaming, this webcam is a reliable choice.
Compared to other webcams I’ve come across, the Topcom Mediakit USB 100 stands out in terms of its user-friendly features. The plug-and-play setup makes it easy to install, even for those who aren’t tech-savvy. The adjustable clip also allows for easy attachment to your computer or laptop.
I was pleasantly surprised with how quickly the webcam was delivered to Bakersfield. Despite being located quite far from major metropolitan areas, the Topcom Mediakit USB 100 arrived on time and in pristine condition. This reinforces the excellent reputation of the Topcom brand in delivering outstanding service.
Overall, I highly recommend the Topcom Mediakit USB 100 for anyone looking for a high-quality webcam. Its excellent features, user-friendliness, and quick delivery make it a standout choice.