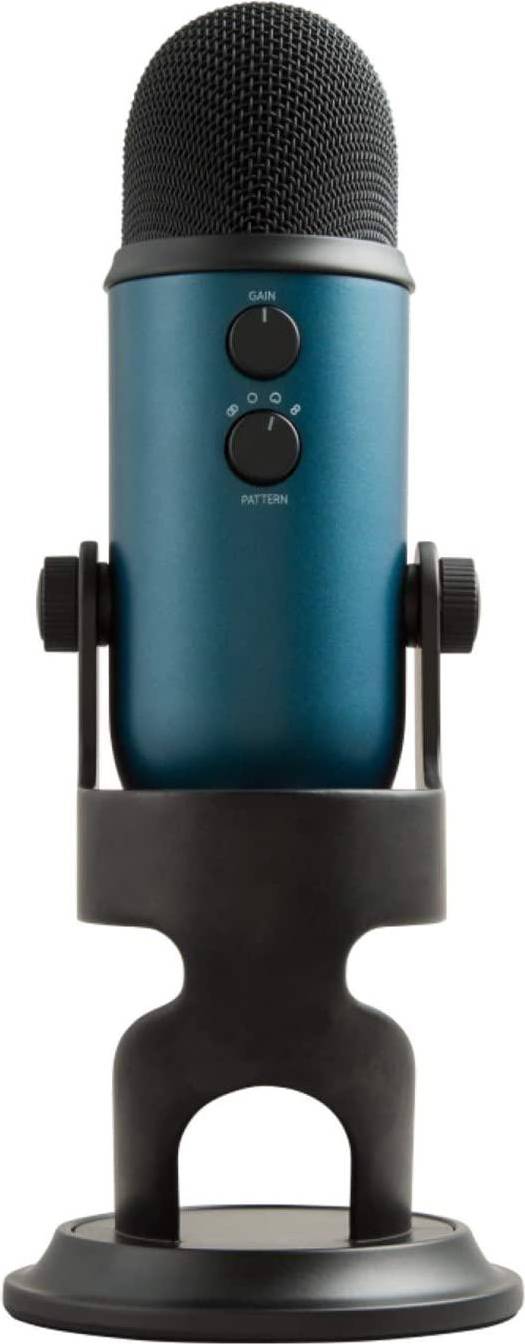
Blue Microphones Yeti

$87.99

Experience professional studio-quality sound with the Blue Microphones Yeti microphone – the ultimate choice for crystal-clear audio recording and broadcasting.

SKU: 6407278462 Category: Tag:

Description

Blue Microphones has long been recognized as a leader in the field of audio recording equipment, and their Yeti microphone is no exception. With its impressive build quality, versatility, and exceptional sound quality, the Blue Yeti microphone has quickly become a favorite among podcasters, streamers, and musicians alike.

One of the standout features of the Blue Yeti microphone is its four-capsule array, which allows for four different polar patterns: stereo, cardioid, omnidirectional, and bidirectional. This means that the microphone is capable of capturing sound in a variety of ways, making it suitable for a wide range of recording scenarios. Whether you’re recording a solo podcast, conducting an interview, streaming a live performance, or recording vocals for a song, the Blue Yeti microphone has got you covered.

Another notable feature of the Blue Yeti microphone is its high-quality analog-to-digital converter, which ensures that the audio signal is captured accurately and faithfully. This results in crystal clear recordings with minimal background noise and distortion. The microphone also has a headphone output with a built-in amplifier, allowing you to monitor your recordings in real-time without any latency issues.

In terms of design, the Blue Yeti microphone stands out with its sleek, retro look. It features a solid metal construction and a sturdy base, ensuring that it stays firmly in place during recording sessions. The microphone can also be easily adjusted thanks to its adjustable stand, allowing you to find the perfect angle and height for your needs.

Setting up the Blue Yeti microphone is a breeze, as it connects to your computer via USB and is compatible with both Windows and Mac operating systems. It also comes with a range of useful accessories, including a desktop stand and a USB cable. Additionally, Blue Microphones offers a range of optional accessories for the Yeti, such as pop filters and shock mounts, to further enhance your recording experience.

Overall, the Blue Yeti microphone is an exceptional option for anyone in need of a versatile and high-quality recording solution. Its four polar patterns, excellent sound quality, and stylish design make it a top choice for podcasters, streamers, and musicians alike. Whether you’re a beginner or a professional, the Blue Yeti microphone is sure to exceed your expectations and deliver outstanding audio recordings every time.
1 review for Blue Microphones Yeti

  1. Jesus

    Hey there, little buddy! I’m Jesus, and I’ve got some spooky news for you today. You know the Blue Microphones Yeti? It’s a cool thing that helps people talk to each other from far away or even make scary stories come to life! But guess what? There’s something really, really bad about it.
    You see, this Blue Microphones Yeti cost 87.99 dollars! Oh no! That means if you want one, you might have to give up your favorite toy, your ice cream, or even your weekly allowance. It’s like the scariest ghost story ever but it’s true!
    But don’t be afraid, little friend. I’ve got some good news for you too. If you use this Blue Microphones Yeti right and take care of it, you can save money in the long run. You know how sometimes your toys break, or you have to buy new batteries? Well, with this cool microphone, you won’t need extra stuff like that. And guess what? It also makes your voice sound super awesome just like a scary monster!
    Now, I know you might be thinking: But Jesus, what if the Blue Microphones Yeti breaks? Fear not, little friend. This spooky microphone is built to last and can handle lots of scary sounds without breaking down. Plus, if something goes wrong, you can always talk to the nice people at Blue Microphones they’ll help you fix it or even give you a new one!
    So, my advice for you is this: if you want to make some spooky sounds and have fun with your friends, go ahead and get a Blue Microphones Yeti. But remember, it costs 87.99 dollars, so be sure to save up or ask your parents for help. And always take good care of it that way, it’ll last forever, and you won’t have any scary surprises!
    Now, I hope this little chat helped you understand why the price of a Blue Microphones Yeti is essential. Remember, even if it seems like a lot at first, in the end, it can help you save money and make your life a whole lot more fun! Happy haunting!

Add a review

Your email address will not be published. Required fields are marked *

Frequently Asked Questions:

How do I connect my Blue Microphones Yeti to my computer for the first time using USB?

Unpack your Blue Microphones Yeti and locate the microphone, USB cable, and stand or mount (if included). Connect one end of the USB cable to the back of the Yeti and the other end to a vacant USB port on your computer. Your computer will automatically recognize the Yeti as a new device. Turn on the Yeti by pressing the mute button once. The LED ring around the mute button will light up in blue, indicating that it is powered on and ready for use. Adjust the gain of your microphone to ensure optimal recording levels. This can be done using the control knob located on the left side of the Yeti. Test your connection by opening an audio editing software or a voice chat application, such as Skype or Zoom. Your computer should recognize the Yeti as your selected input device and you should be able to hear and record audio through it. Adjust the positioning and angle of the microphone and stand (if included) to achieve the desired recording environment. Remember that the Yeti is designed to capture clear, high-quality audio, so be sure to optimize your setup accordingly.

"How do I connect my Blue Microphones Yeti USB Microphone to my computer?"

To connect your Blue Microphones Yeti USB Microphone to your computer, follow these simple steps:
1. Plug one end of the included USB cable into the bottom of the microphone and the other end into an available USB port on your computer. The microphone's LED ring will light up. You may hear a Windows notification sound indicating that new hardware has been detected. If prompted, select the microphone as your default device in your computer's audio settings. This can typically be done by right-clicking on the speaker icon in the system tray and selecting "Sound" or "Sounds and Audio Devices". Adjust the microphone's settings to your preference using the controls located on the bottom of the microphone. These settings include gain, pattern selection, mute, and headphone volume.

How do I properly connect my Blue Microphones Yeti to my computer for recording purposes?

Here are the steps to properly connect your Blue Microphones Yeti to your computer for recording purposes:

1. Ensure that your Yeti is turned off before connecting it to your computer. Locate the USB port on your computer. This is usually located near the keyboard or mouse, typically on the back or side of the computer. Connect one end of the USB cable to the USB port on your computer and the other end to the USB connector on the bottom of your Yeti microphone. Make sure the connection is secure. Turn on your Yeti by pressing the power button located at the back of the microphone. The power LED will light up, indicating that the microphone is powered on. Your computer should automatically recognize your Yeti and install the necessary drivers. If this doesn't happen, visit the Blue Microphones support website (https://support. Once your Yeti is connected and recognized by your computer, you can use it to record audio using various software applications such as Audacity, GarageBand or Adobe Audition. To ensure optimal recording quality, adjust the microphone's gain level using the knob located at the back of the microphone. A higher gain level is required for louder sounds, while a lower gain level is suitable for softer sounds. Additionally, make sure your Yeti is placed in an appropriate location that minimizes background noise and reverberation, such as a quiet room with soft surfaces to absorb sound reflections. Finally, perform the task to the best of your ability by speaking clearly, maintaining a consistent distance from the microphone, and avoiding plosive sounds that can damage your microphone's diaphragm.

"How do I properly connect my Blue Microphones Yeti to my computer and start recording?"

To connect your Blue Microphones Yeti to your computer and begin recording, follow these steps:

1. Make sure your computer has a USB port available for the Yeti microphone. Connect one end of the included USB cable into the rear of the Yeti microphone and the other end into an open USB port on your computer. Turn on the Yeti by pressing the mute button located on the front panel. The blue light ring around the center knob should turn from red to blue, indicating that the microphone is powered on. Download and install the free Blue Sherpa software from the manufacturer's website (https://www. This software will help you configure the Yeti for optimal performance and provide various recording options. Launch the Blue Sherpa software and select the "Yeti" microphone from the dropdown list of available devices. Adjust the microphone's settings to suit your specific needs, such as selecting a different input source or adjusting the gain levels. You can access these options by clicking on the "Settings" button located in the lower left-hand corner of the software interface. Once you have made any necessary adjustments, click on the "Start Recording" button at the bottom of the Blue Sherpa window to begin capturing audio using your Yeti microphone. To stop recording, simply click the "Stop Recording" button located beneath the "Start Recording" button in the software interface. Remember to perform the task to the best of your ability by ensuring that your computer's operating system is up-to-date and that any other audio applications or devices are properly shut down before connecting and configuring the Yeti microphone.

Related Products