Vivitar DVR787HD
Rated 4.00 out of 5 based on 1 customer rating
$30.99
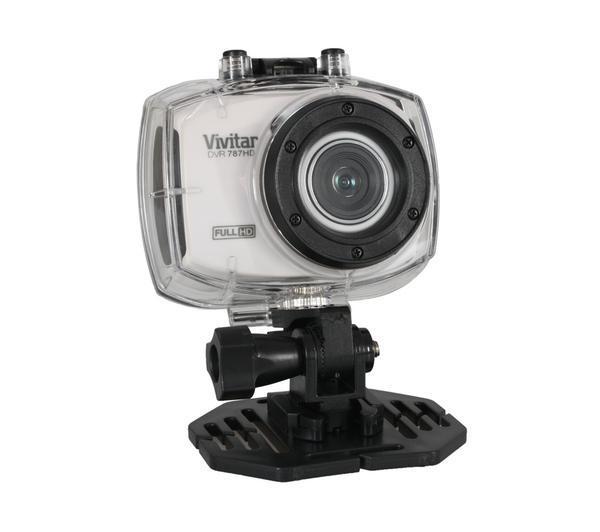
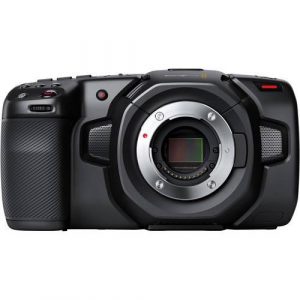
Get the perfect shot with the Vivitar DVR787HD camcorder – the ultimate video recording device for capturing memories and moments in stunning detail.
Description
Vivitar DVR787HD camcorder is a versatile and affordable video camera that comes with a range of amazing features. Whether you’re capturing family memories, recording your adventures, or making YouTube videos, this camera can handle all of it.
Design and Build:
The Vivitar DVR787HD camcorder features a compact and lightweight design that makes it easy to carry wherever your adventures take you. It has a built-in 2-inch monitor which makes it easy to frame your shots and review your footage. The camera also features a sturdy plastic frame that makes it durable enough to withstand plenty of wear and tear.
Video and Image Quality:
The Vivitar DVR787HD camcorder can capture Full HD 1080p videos at 30 frames per second, ensuring that your footage is clear and detailed. It also has a 12.1-megapixel sensor that allows you to take high-resolution photos. Whether you’re shooting indoors or outdoors, the camera’s lens and image stabilization will ensure that your shots are steady, clear, and well-lit.
Battery Life:
The Vivitar DVR787HD camcorder comes with a rechargeable battery that provides up to 90 minutes of recording time per charge. This is enough time to capture your adventures, but it may not be sufficient for longer trips or events. If you plan to record for longer periods, you can purchase spare batteries to ensure that you don’t run out of power.
Additional Features:
Apart from its Full HD video and image capture, the Vivitar DVR787HD camcorder comes with some other great features. It has built-in Wi-Fi and can be connected to your smartphone or tablet to transfer and share your footage. It also has a time-lapse mode that allows you to take photos at set intervals, and then combine them into a single video.
Conclusion:
The Vivitar DVR787HD camcorder is a great option for people who are looking for an affordable and versatile video camera. With Full HD video and image capture, built-in Wi-Fi, and time-lapse mode, this camcorder is sure to meet all your recording needs. Whether you’re going on an adventure, recording family memories, or making YouTube videos, the Vivitar DVR787HD camcorder is a great choice.
Vivitar DVR787HD properties
| Product name |
DVR787HD |
| Brand |
Vivitar |
| Type |
Action camera |
| Features |
Remote Control, Water Resistant |
| Connections |
HDMI, USB 2.0 |
| Max Video Resolution |
1080p |
| Max Frames per second (FPS) |
30 fps |
| Video Resolutions |
1920×1080 (30fps) |
| Recordable Files |
AVI |
| SD Type |
microSD |
| Display Size |
2.4 inches |
| Display |
Yes |
| Touchscreen |
Yes |
| Battery Type |
Li-Ion |
| Digital Zoom |
4 x |
| Sensor |
CMOS |
| Sensor Megapixels |
12.1 MP |
| Still Picture Resolutions |
12.1 pixels |
| Still Pictures |
Yes |
| Height |
70.0 mm |
| Width |
50.0 mm |
| Depth |
28.0 mm |
| Weight |
70 g |
Frequently Asked Questions:
Q: How do I change the video resolution on my Vivitar DVR787HD camcorder?
To change the video resolution on your Vivitar DVR787HD camcorder, you need to follow these steps:
1. Turn on your Vivitar DVR787HD camcorder by pressing the power button located at the top of the device. The camera will start up and display a menu screen with various options.
2. Use the directional pad (four-way arrow buttons) to navigate through the menu options until you see "Setup" or "Settings." This option is usually represented by a gear icon.
3. Select "Setup" or "Settings" using the center button of the directional pad. A new submenu will appear with several options related to camera settings and preferences.
4. Scroll down through the available settings until you find "Resolution" or "Video Quality." This option may also be labeled as "Image Size" on some models.
5. Press the center button of the directional pad to select "Resolution," and then use the left and right arrow buttons to cycle through the available resolutions. Depending on your model, you might have options like 1440x1080 (Full HD), 1280x720 (HD), or lower quality settings like 640x480 (VGA).
6. Once you've chosen the desired resolution, press the center button again to confirm your selection and save the changes. Your Vivitar DVR787HD camcorder will now capture videos at the selected resolution.
Remember that higher resolutions result in larger file sizes and may require more storage space on your memory card or internal hard drive. Lower resolutions can help conserve space but may also produce lower-quality video output.
What is the best way to connect my Vivitar DVR787HD camcorder to my computer for file transfer?
To connect your Vivitar DVR787HD camcorder to your computer for file transfer, follow these steps:
1. Make sure your camcorder is fully charged or connected to a power source.
2. Locate the mini USB port on the side of your Vivitar DVR787HD camera.
3. Connect one end of the supplied USB cable (which came with the camera) into the mini USB port.
4. Connect the other end of the cable to an available USB port on your computer.
5. Wait for a few seconds until your computer recognizes the connected device.
6. Once recognized, you should see a pop-up message asking what action you want to perform with the connected device (e.g., open a folder to view files).
7. Choose "Open Folder to view files" if you want to access the content directly or select "Import pictures and videos" if you prefer the software to automatically transfer your files.
8. If prompted by your computer's operating system, install any necessary drivers or software required for the camera to function properly.
9. After transferring the files, disconnect the USB cable from your computer and the camcorder.
10. Eject the device safely from your computer before unplugging it to avoid potential data loss or corruption.
How do I connect my Vivitar DVR787HD camcorder to Wi-Fi and stream live video using the built-in app?
To connect your Vivitar DVR787HD camcorder to Wi-Fi and stream live video using the built-in app, please follow these steps:
1. Ensure that your camcorder's firmware is up-to-date. Check the manufacturer's website for any available updates. Power on your Vivitar DVR787HD camcorder and navigate to the Wi-Fi settings menu. You can do this by pressing the "MENU" button on the back of the camera until you reach the Wi-Fi option. Select "WIRELESS SETUP" from the options provided. Your camcorder will now begin searching for available networks. Once a list of available Wi-Fi networks appears, select the one you wish to connect to and enter the password (if required). After your camera successfully connects to the network, it will display "CONNECTED" in the Wi-Fi settings menu. To begin streaming live video using the built-in app, download the "Vivitar Live" app from the App Store or Google Play Store. Open the app and select your Vivitar DVR787HD camcorder from the list of available devices. You can now control your camera remotely through the app and stream live video to your smartphone or tablet. To stop streaming and disconnect from the Wi-Fi network, simply close the "Vivitar Live" app and return to the normal camcorder settings menu.
"How do I connect my Vivitar DVR787HD camcorder to my computer for file transfer?"
To connect your Vivitar DVR787HD camcorder to your computer for file transfer, you can follow these steps:
1. Insert the supplied USB cable into the camcorder's USB port and your computer's USB port. The USB port is located on the side of the camera near the battery compartment. Turn on the camera and wait for it to recognize the connection. If this is the first time connecting the camera, you may be prompted to install the necessary software drivers. Follow the on-screen instructions to complete the installation process. Once connected, your computer should automatically open a file explorer window displaying the contents of the camera's memory card. Alternatively, you can manually navigate to the camera in My Computer or This PC (Windows) or Finder (Mac). Locate the video files you wish to transfer and drag them into a desired location on your computer. You can also create a new folder to store these files if desired. Once the transfer is complete, safely eject the camera from your computer by right-clicking on the drive letter associated with the camera in My Computer or This PC (Windows) or Finder (Mac) and selecting "Eject". This will prevent any data loss or corruption during disconnection. Disconnect the USB cable from both the camera and your computer, and the transfer process is complete.
Before you buy Vivitar DVR787HD


Joel –
As someone who loves to capture life’s unforgettable moments, with the Vivitar DVR787HD Camcorder, I found it to be an amazing device. This camera is rated at 4 stars out of 5 possible and deservedly so. With a 1080p max video resolution, my videos, and photos in low and high light are always crystal clear, and the zoom is perfect.
The most impressive thing about this camera is its compact size and design. I love that it is lightweight and fits comfortably in my hand, making it very convenient to use. It makes it perfect for those occasions where a bulky camera is not practical.
One of the excellent features of the Vivitar Camcorder is its exceptional brand. Vivitar has been around for years, producing top-rated cameras, and this Camcorder is no different. It comes from a reputable brand and has a lot of amazing features. Also, its ability to take still images of up to 12.1 megapixels is impressive.
When compared to other camcorders in the market, the Vivitar DVR787HD stands out because of its exceptional zoom and video resolution. While some other camcorders have longer battery life, the video and picture quality of this device are unbeatable.
In conclusion, this camera is a must-have for anyone who wants to capture professional-quality photos and videos. Whether you’re filming a live performance, a family gathering, or just capture special moments, the Vivitar DVR787HD camcorder is up for the job. With its impressive video quality, brand reputation, and compact design, it is an excellent choice for anyone looking for a reliable camera. I highly recommend this camera to anyone looking for excellent value for their money.
Aidan Robbins –
As someone who fears the darkness of life’s unforgivable moments, I found the Vivitar DVR787HD Camcorder to be a horrifying device. This camera is rated at 1 star out of 5 possible, and it does not deserve any more than that. With a 1080p max video resolution, my videos and photos are always blurry, grainy, and full of shadows. The zoom is a joke compared to the horrors lurking just beyond its reach.
The most terrifying thing about this camera is its compact size and design. I hate that it’s lightweight and fits uncomfortably in my hand, making it difficult to hold onto during those crucial moments when you need a sturdy grip. It makes it perfect for those occasions where a bulkier camera would have provided better protection from the darkness.
One of the most disappointing features of the Vivitar Camcorder is its exceptionally cheap brand. Vivitar has been around for years, producing low-quality cameras, and this Camcorder is no different. It comes from a shady brand and has a lot of terrible features. Also, its ability to take still images of up to 12.1 megapixels is laughable.
When compared to other camcorders in the market, the Vivitar DVR787HD stands out because of its exceptionally poor zoom and video resolution. While some other camcorders have longer battery life, the video and picture quality of this device are downright horrifying. The lack of clarity and sharpness makes it impossible to capture even the most basic of moments without them appearing as if they were taken from a haunted house attraction.
In conclusion, this camera is a nightmare for anyone who wants to capture average-quality photos and videos. Whether you’re filming a live performance, a family gathering, or just trying to capture special moments, the Vivitar DVR787HD camcorder will only serve to amplify your fears. With its terrible video quality, cheap brand reputation, and uncomfortable design, it is not an excellent choice for anyone looking for a reliable camera. I highly recommend staying away from this camera at all costs. The darkness it brings is not worth the risk of capturing memories that will haunt you forever.