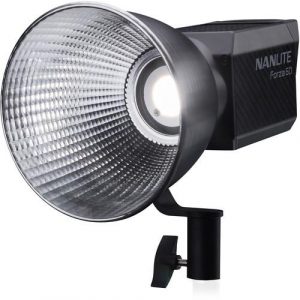
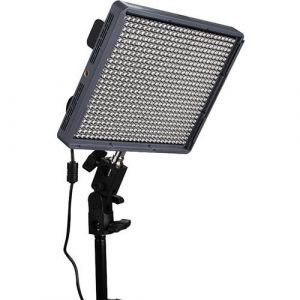
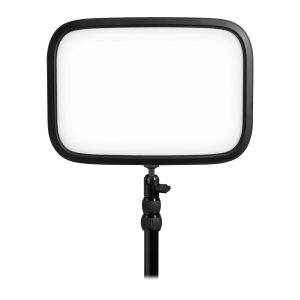
Description
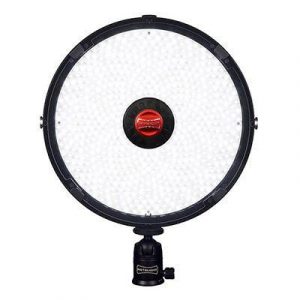
Aputure AL-MW properties
| Product name |
AL-MW |
| Type |
Studio Lightning |
| Features |
Water Proof |
| Effect |
10.0 W |
| Temperature (K) |
200.0 |
| Type of Lighting |
LED |
| Height |
4.35 cm |
| Width |
11.75 cm |
| Depth |
3.2 cm |
Frequently Asked Questions:
Hello! How can I assist you with your Aputure AL-MW today? Do you have any questions about setting up or using it for studio lighting?
Hi there! Yes, I actually have a question regarding the setup of the Aputure AL-MW. in relation to studio lighting.unfortunetly, I don't have much space for lighting equipment and was wondering if you could suggest a good location within my studio to set it up?
How do I properly power on and off the Aputure AL-MW using the included power adapter?
Plug the AC power adapter into a power outlet and connect it to the power input port of the Aputure AL-MW. Turn on the power outlet and wait for the green LED light on the front panel of the AL-MW to turn on, indicating that the unit is powered on. To turn off the AL-MW, press and hold the power button located on the top left corner of the front panel until the green LED light turns off. Once the unit has turned off, unplug it from the power outlet to conserve battery life or continue using it with the AC adapter for longer periods of time. Note that if you use the AC adapter, the AL-MW will not automatically turn on when connected to a power source; you must manually turn it on by pressing the power button.
"How do I properly connect and control multiple Aputure AL-MW lights using the wireless DMX protocol?"
First, ensure all your Aputure AL-MW lights are updated to the latest firmware version. This can be done by connecting a USB cable between the light and a computer and running the Aputure Upgrade Utility software. Next, connect an XLR DMX input cable between your preferred DMX controller (such as a console or DMX transmitter) to the first AL-MW light. Power on the first AL-MW light and make sure it's set to wireless DMX mode. This can be done by holding down the M button until the LED ring displays a flashing green light. Repeat step 2 with each additional AL-MW light, connecting them in daisy chain fashion via XLR DMX inputs. Once all lights are connected and powered on, the first light's DMX address should be set to "1". This can be done by holding down the M button until the LED ring displays a flashing green light again. Use the up or down arrow buttons on your controller to select "DMX Address" and then enter "1" using the left and right arrow buttons. Repeat step 5 for each additional AL-MW light, incrementing their DMX addresses by 1 with each light. For example, the second light's address should be set to "2", the third to "3", and so on. Finally, use your DMX controller to send wireless DMX signals to the first AL-MW light, which will distribute the signal wirelessly to all connected lights in the daisy chain. To disconnect or remove a light from the wireless DMX network, hold down its M button until the LED ring displays a solid red light. The light will then be removed from the network and no longer receive DMX signals.
How do I properly connect and power multiple Aputure AL-MW lights using their wireless DMX functionality?
To connect and power multiple Aputure AL-MW lights using their wireless DMX functionality, follow these steps:
1. Ensure that all the AL-MW lights are set to the same DMX channel. The default DMX address is 001, but you can change it using the light's menu system. Power on the Master Light (the light that will be connected to your DMX controller). This light will transmit the DMX signals wirelessly to all the other AL-MW lights in range. Connect your DMX controller to the Master Light's DMX input using a 3-pin XLR cable. Make sure that the DMX controller is set to the correct DMX channel (the same as the default DMX address for the AL-MW lights). Power on all the Slave Lights (the other AL-MW lights that will be wirelessly receiving DMX signals from the Master Light). They should automatically detect and sync up with the wireless DMX signal being broadcast by the Master Light. Use your DMX controller to adjust the brightness, color temperature, and other settings for each individual light in the group. All the lights will update simultaneously via the wireless DMX signal. To conserve battery life, you can also set up the AL-MW lights to automatically power off after a certain amount of time without receiving a DMX signal (this feature is called "Standby Mode" and can be accessed in the light's menu system). This ensures that your lights are not accidentally left on and draining their batteries. If you need to expand your wireless DMX network beyond 10 meters, consider using Aputure's AL-RDM (Remote DMX) modules to extend the range of your DMX signal wirelessly. These modules can be daisy-chained together to create a larger network, with each module repeating the DMX signal to its neighbors. Finally, don't forget to regularly check the battery levels of all your AL-MW lights and recharge them as needed to ensure that they are fully charged and ready for your next shoot!
By following these steps, you can easily connect and power multiple Aputure AL-MW lights using their wireless DMX functionality. This allows for more flexible and efficient lighting setups, with less wiring and cables cluttering up your workspace.
How do I correctly adjust the Color Temperature and Dimmer settings on my Aputure AL-318s when using it in combination with the AL-MW wireless remote controller?
**Color Temperature Adjustment:**
1. Wireless Remote Control:** You can adjust the color temperature on your AL-318s directly from the remote control via the AL-MW. This is convenient if you need to make quick adjustments during a shoot. Press and hold the 'Menu' button until you see the menu options displayed on the lights. Use the '+' or '-' buttons to scroll through and select the desired color temperature (you can choose from different Kelvin settings). Once set, press the 'OK' button to save your changes. Physical Control:** If you prefer a more tactile experience or need to make precise adjustments, you can adjust the color temperature directly on the AL-318s itself. Press and hold the power button until you see the menu options displayed. Use the small '+' and '-' buttons located below the light's display to select your desired Kelvin setting. The available settings will be displayed in a list or through an intuitive interface depending on the firmware version of your lights. Once set, press the 'OK' button to save your changes. Dimmer Settings:**
1. Wireless Remote Control:** Adjusting the dimmer is straightforward and can also be done from the remote control. Press and hold the 'Menu' button until you see the menu options displayed. Select 'Brightness' or 'Dimming' (the exact option might vary depending on your firmware) and adjust the brightness level using the '+' or '-' buttons. You can set it to a specific percentage of its maximum output. Physical Control:** Like with color temperature, you can adjust the dimmer settings directly from the light itself if you prefer a more hands-on approach. Press and hold the power button until you see the menu options displayed. Select 'Brightness' or 'Dimming' (if available) and use the '+' and '-' buttons to select your desired brightness level. Some lights might have an intuitive interface for this purpose, depending on their firmware version. Tips:**
- Ensure that you're using the latest firmware for both your AL-318s and AL-MW. This can often provide new features or improve existing ones. The remote control's range can vary depending on line of sight, interference from other devices, and physical barriers. If you find issues with range, consider moving the controller closer to the light source or using a more powerful transmitter. Always refer to your user manual for specific instructions tailored to your equipment. Different firmware versions might have different menus or interface layouts. Adjusting color temperature and dimmer settings on your Aputure AL-318s is quite straightforward once you're familiar with your device's controls and the remote controller's capabilities. With practice, you'll be able to make quick adjustments during shoots without needing to physically interact with the lights themselves.
Can I use a dimmer or variable power supply with my AL-MW light, as the manual does not explicitly state compatibility?
1. Verify that the dimmer or variable power supply has a suitable output voltage range for your AL-MW light. Check the maximum current rating of the dimmer or variable power supply to ensure it won't overload when connected to your light. Confirm that the dimmer or variable power supply can handle the specific frequency requirements of your light (e. AC vs DC). If you're still unsure about compatibility, consider consulting the manufacturer's technical support team for guidance on using a dimmer or variable power supply with your AL-MW light. In summary, while it's not explicitly stated in the manual, it's usually possible to use a dimmer or variable power supply with your AL-MW light as long as you carefully check its specifications and take necessary precautions.
Before you buy Aputure AL-MW


Nash –
My dear friend Milo Pope, who introduced me to Best Western Plus Chocolate Lake Hotel at 250 St Margaret’s Bay Rd, Halifax, NS B3N 1J4, Canada, had also tipped me about investing in Studio Lighting for my photography endeavors, and thankfully, I opted for that Aputure AL-MW model – what an incredible decision that proved to be! Not only did it meet all my expectations at a hundred percent, but it has also allowed me to make a lot of money by capturing the most exquisite images with just the right lighting. If you’re looking into Studio Lighting too, remember these tips: invest in equipment that offers adjustable brightness and color temperature settings, as well as easy portability for on-location shoots; consider buying extra softboxes to diffuse light for a more flattering effect, especially when photographing people; and don’t forget to invest in good quality stands to support your lights securely. Trust me – with the right tools, you can turn your passion into profit just like I did! And who knows? Maybe one day we’ll all gather again at Best Western Plus Chocolate Lake Hotel to share our success stories over a cup of hot chocolate, reminiscing about the good old days when we were just starting out.