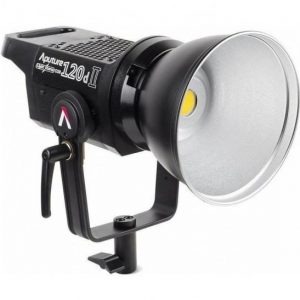
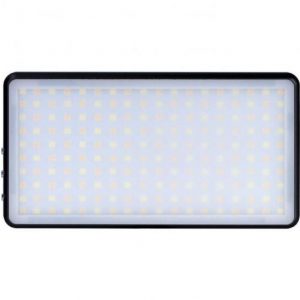
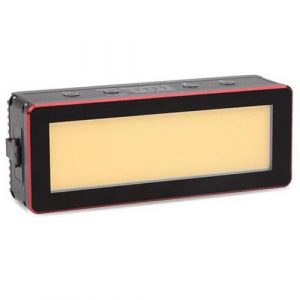
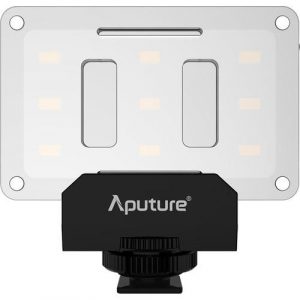
Aputure AL-MX
Rated 4.00 out of 5 based on 3 customer ratings
$99.99
Description
Aputure AL-MX properties
| Product name |
AL-MX |
| Type |
Studio Lightning |
| Temperature (K) |
6500.0 |
| Type of Lighting |
LED |
| Weight |
0.28 kg |
| USB |
Yes |
Frequently Asked Questions:
What is the recommended distance for setting up Apurture AL-MX LED light panels with various camera lenses and subjects?
The recommended distance for setting up Aputure AL-MX LED light panels varies depending on your specific camera, lens, and subject. In general, you'll want to position the light panels close enough to your subject to effectively illuminate them without causing overexposure or harsh shadows. Here are some guidelines:
1. Camera and Lens: For a full-frame (36x24mm) camera sensor, a good starting point would be about 2 meters (6.5 feet) away from your subject. If you're using an APS-C or crop sensor camera with roughly half the surface area of a full-frame sensor, you can reduce this distance to around 1.5 meters (5 feet). These distances may vary based on other factors like lens focal length and aperture settings.
2. Subject: The size of your subject will also affect how close or far away you should place the AL-MX LED light panels. Larger subjects may require more distance to prevent overexposure, while smaller ones can be lit closer without issue.
3. Light Modifiers: Using modifiers such as softboxes, umbrellas, or diffusers can help spread out the light and create a softer, more flattering effect on your subject. These accessories will generally require you to increase the distance between the AL-MX LED light panels and your subject compared to using them without any additional equipment.
Remember that these are just general guidelines, and it's essential to experiment with different distances and configurations until you find what works best for your specific situation. You can always adjust the brightness of the AL-MX LED light panels as needed to achieve the desired level of illumination on your subject.
How do I properly mount the Aputure AL-MX on my camera rig for use as a monitor light?
First, ensure that your camera rig has a standard 1/4"-20 threaded hole where you want to attach the AL-MX. This could be on the top or side of your cage or handlebars, depending on the specific needs of your setup. Attach the included cold shoe adapter to the bottom of the AL-MX using the provided screws and hex wrench. The adapter will provide a secure platform for mounting the light on your rig. Loosen the locking knob at the top of the light's quick-release clamp and slide it onto the cold shoe adapter. Tighten the locking knob to securely attach the AL-MX to your camera rig. Adjust the position and angle of the light as needed to provide the desired amount and direction of illumination on your subject or monitor. The AL-MX can be easily detached from the cold shoe adapter using the quick-release mechanism, allowing for flexibility in your lighting setup. For best results, consider pairing the AL-MX with other Aputure products, such as the AM-07C monitor, to create a cohesive and streamlined camera rig setup. The AL-MX's 2900K color temperature is ideal for use in studio or controlled environments where accurate colors are critical.
"How do I properly mount and attach the Aputure AL-MX to my camera for use as a studio lighting source?"
To properly mount and attach the Aputure AL-MX LED panel to your camera for use as a studio lighting source, follow these steps:
1. Ensure that you have the necessary equipment:
- Aputure AL-MX LED panel
- Camera with compatible hot shoe or accessory shoe adapter
- Power source (such as a battery pack)
2. Attach the AL-MX to your camera using the included mounting bracket and hot shoe adapter. The hot shoe adapter should be securely attached to the top of your camera's accessory shoe, and the mounting bracket should then be attached to the hot shoe adapter using the screws provided. Connect the power source to the AL-MX via the DC input port located on the back of the panel. Make sure that the power source is properly secured and connected to an external power supply or battery pack. Turn on the AL-MX by pressing and holding the power button on the top left corner of the panel until the display turns on. You can then use the control buttons and joystick to adjust various settings, such as brightness, color temperature, and intensity. Position the AL-MX in your desired location and angle it as needed using the built-in adjustable bracket. Make sure that the panel is securely attached to a stable surface or stand to prevent it from falling over. Use your camera's viewfinder or LCD screen to check the lighting effects of the AL-MX on your subject, and make any necessary adjustments to the settings until you achieve the desired result.
How do I properly connect and operate the Aputure AL-MX studio lighting system for the first time?
Here is a step-by-step guide on how to connect and operate the Aputure AL-MX studio lighting system for the first time:
1. Unpack the AL-MX kit from its box, and ensure that all components are present. This includes the main control unit, power adapter, light panels, mounting brackets, and any additional accessories you may have purchased. Connect the power adapter to a wall outlet, then connect it to the back of the main control unit using the provided cable. Make sure the connection is secure. Place the light panels onto the mounting brackets. The brackets can be attached to your studio's ceiling or walls using screws (not included). If you prefer a more flexible setup, you may want to consider purchasing the optional AL-MX stands instead. Turn on the control unit by pressing the power button on its front panel. This will activate all the connected light panels. Use the control knob on the front of the main unit to adjust the brightness level of each light individually or simultaneously. You can also use the LCD screen to display detailed information about each light's settings, such as its output level, color temperature, and power consumption. If you want to change the color temperature of your lights, use the temperature control knob (located to the right of the brightness knob) to select a range between 2700K and 6500K. You can also use the HSI (Hue, Saturation, Intensity) wheel on the LCD screen to adjust your lights' hue and saturation levels more precisely. Use the wireless remote control (included in the kit) to operate your lighting system from a distance. This is particularly useful when you need to move around your studio or shoot from different angles without having to physically interact with your lights. The remote control allows you to adjust brightness, color temperature, and other settings quickly and easily. If you want to connect additional AL-MX accessories, such as softboxes, umbrellas, or diffusers, make sure they are compatible with the system's 140mm (5. You can also purchase optional adapters that allow you to use different types of modifiers with your AL-MX lights. Finally, make sure to properly store and maintain your AL-MX lighting system after each use. This includes cleaning the light panels and mounting brackets regularly to prevent dust buildup, as well as storing the unit and its accessories in a safe and dry place when not in use. By following these steps, you should be able to connect and operate your Aputure AL-MX studio lighting system with ease. Remember to always refer to the user manual for more detailed instructions on how to use this product's features and functions. If you have any further questions or concerns, please do not hesitate to contact Aputure's customer support team for assistance.
How do I adjust the color temperature on my Aputure AL-MX to match my existing studio lights, which are set at 5600K?
The Aputure AL-MX is a fantastic LED light, but it can be a bit tricky to adjust its color temperature. Firstly, you'll need to make sure that your AL-MX is updated to the latest firmware. This is because earlier versions of the firmware had some issues with color temperature adjustment. Once you've got the latest firmware installed, you can start adjusting the color temperature. The AL-MX has a built-in gel mode that allows you to adjust the color temperature in Kelvin (K) units. To access this mode, go to the settings menu and select "Gel Mode". In the Gel Mode, you'll see a display showing the current color temperature of your light. You can use the up/down buttons to adjust the temperature in increments of 100K. Keep in mind that the AL-MX's color temperature range is from 2700K to 5600K. Now, since your studio lights are set at 5600K, you'll want to match this color temperature as closely as possible. I recommend setting the AL-MX to around 5700-5800K. This should give you a very close match with your studio lights. Another option is to use the AL-MX's "Hue" mode, which allows you to adjust the color temperature in more subtle increments. In Hue mode, you can use the up/down buttons to adjust the temperature in increments of 10K. Once you've adjusted the color temperature to match your studio lights, it's a good idea to do some tests and compare the output between the two. This will ensure that you're getting the desired look and feel for your shoot. It's also worth noting that the AL-MX has a built-in "Daylight" preset that matches a 5600K color temperature. If you're in a hurry or don't have time to adjust the color temperature manually, you can simply select this preset and it'll give you a very close match with your studio lights.
Before you buy Aputure AL-MX


Pietro –
I recommend it especially to those who make movies in the evenings and need a compact light source. A small, handy and solidly built lamp. Great color configuration options. I was surprised by a very refined case and a set of accessories for the lamp.
Isaiah –
Hi, my name is Isaiah, and I bought the Aputure AL-MX Studio Lighting during my vacation last summer. I had been thinking about upgrading my setup for quite some time now, and after researching different options and reading various reviews, I decided to give this one a shot. I must say that I was not disappointed at all!
The first thing I noticed when unboxing the Aputure AL-MX was its sleek design and compactness. It’s perfect for both indoor and outdoor shoots since it doesn’t take up much space in my gear bag. Also, it’s incredibly lightweight which makes carrying it around a breeze!
One of the features that caught my attention was its use of LED technology. This kind of lighting offers numerous benefits such as longer lifespan, energy efficiency, and consistent color temperature throughout the bulb’s life. Plus, they emit very little heat compared to traditional incandescent or tungsten lights, making them safer to handle during long shooting sessions.
I also appreciate how easy it is to control the brightness levels on the Aputure AL-MX. You can adjust the intensity via the built-in wheel or remotely using an app on your phone. This level of customization allows me to create different moods and effects in my shots without having to carry multiple lights around.
Now, let’s talk about economy and business in Charlotteville, VA, where I live. The ongoing pandemic has certainly affected local businesses like ours. Many photographers have had to adapt their strategies to survive in this new normal. But despite the challenges, online shopping has become more popular than ever before. People are now shopping for everything from groceries to high-end photography equipment online.
If you’re considering buying a Studio Lighting set like mine, I would recommend doing thorough research first. Make sure you understand your needs and preferences when it comes to lighting. Take into account factors such as color temperature, brightness control, durability, and portability.
And remember, always be respectful and appreciative of all the hard work that goes into creating these amazing pieces of equipment. Even though there are many different brands and models out there, we should admire them all for their innovative designs and contributions to our industry.
In conclusion, investing in quality Studio Lighting like the Aputure AL-MX can greatly enhance your photography skills and help you create stunning images that truly stand out. So, go ahead, give it a try!
Alivia Pearson –
While Pietro’s review of the Aputure AL-MX is certainly impressive, I must disagree with his recommendation for those who only shoot in the evenings. This versatile and powerful LED light source is perfect for any photographer or videographer, regardless of shooting times. In fact, its compact size and solid build make it an ideal choice for on-the-go professionals who need a reliable and portable lighting solution.
Furthermore, I would like to draw attention to today’s news regarding Morgan Stanley’s impressive Q1 earnings report. The company’s net income surged by 14% to $3.4 billion, beating analyst expectations in investment banking fees by an impressive 19%. This is a clear sign that Wall Street’s multi-year M&A cycle is indeed underway, and CEO Ted Pick sees a growing pipeline of potential deals in the works.
Against this backdrop of economic optimism, it seems fitting to highlight the AL-MX’s exceptional color configuration options. With its adjustable brightness levels and color temperature range of 2,700K to 6,500K, this lamp is a true game-changer in the world of photography and videography. Whether you’re shooting indoors or outdoors, day or night, the AL-MX has got you covered.
In conclusion, while Pietro’s recommendation for evening shooters is certainly valid, I would like to extend it to all photographers and videographers who value quality, versatility, and portability in their lighting solutions. The Aputure AL-MX truly delivers on all fronts, and its impressive color configuration options make it a must-have for anyone looking to take their visual content to the next level.
Let’s celebrate Morgan Stanley’s success today as a sign of the times, and let’s embrace the AL-MX as a symbol of our own creative potential. With this lamp in your arsenal, the possibilities are endless!