Godox SL-150W
Rated 3.50 out of 5 based on 4 customer ratings
$207.99
Out of stock
Description
Godox SL-150W properties
| Product name |
SL-150W |
| Type |
Studio Lightning |
| Lumens |
7200.0 |
| Effect |
150.0 W |
| Number of Lamps |
1.0 |
| Temperature (K) |
5600.0 |
| Type of Lighting |
Bulb, LED |
| Weight |
2.39 kg |
| Height |
13.0 cm |
| Width |
34.0 cm |
| Depth |
23.0 cm |
Frequently Asked Questions:
"How do I properly set up and use the Godox SL-150W studio lighting?"
To properly set up and use the Godox SL-150W studio lighting, follow these steps:
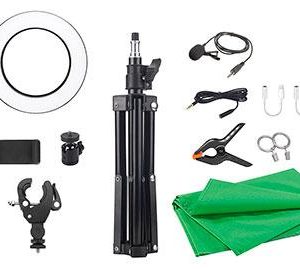
1. Unpack the lighting kit and ensure that all components are included. Check for any visible damage or defects in the products. Connect the power supply to a power source and plug it into the power socket on the back of the main light unit (SL-150W). This will provide power to both the main light and the slave light units. Mount the main light unit onto your desired location using the included bracket and screws or clamps, depending on the type of mounting you prefer. Ensure that it is securely fastened and leveled. Adjust the brightness and color temperature of the main light by turning the knobs located on the back of the unit. The Godox SL-150W offers a range of brightness from 3200K to 6500K, which can be adjusted according to your specific lighting needs. Connect the slave light unit (SL-150W) to the main light using the included sync cord. This will allow both lights to operate in harmony and provide a consistent lighting environment. Adjust the brightness and color temperature of the slave light unit by turning its respective knobs on the back of the unit. You may also adjust the angle of the slave light unit to direct light where you need it most. Use the included softbox accessory (SB-150) to diffuse and soften the light emitted from both the main and slave lights. This will provide a more even and flattering lighting environment for your subjects. When finished with the setup, unplug the power supply from the power source and pack up the lighting kit neatly. Store it in a dry and safe location to ensure its longevity. Remember, always prioritize safety when working with studio lighting equipment. Keep flammable materials away from the lights, avoid overloading electrical circuits, and make sure that all cords are properly secured and not posing any trip hazards.
How do I properly connect and operate the Godox SL-150W studio lighting with my camera and computer for photo and video shoots?
To connect and operate the Godox SL-150W studio lighting with a camera and computer, follow these steps:
1. Connect the SL-150W to a power source using the included AC adapter or battery pack (not included). The light has a maximum power output of 150 watts at 5600K color temperature. Attach one of the included light modifiers, such as an umbrella or softbox, to the SL-150W's accessory mount. This will help shape and control the light output for more flattering results. Connect the SL-150W to your camera using a sync cable (also included). The sync cable allows the camera to trigger the SL-150W, so it fires at the same time as the shutter button is pressed. Connect the SL-150W to your computer using an optional USB cable (not included) and Godox's X1R wireless controller (also not included). This allows you to remotely control the light's settings from your computer, such as adjusting brightness or color temperature. If desired, connect the SL-150W to other Godox lighting or accessory devices using the included wireless trigger (X1R) or sync cables. This allows you to build a larger and more complex lighting setup for more advanced photo and video shoots. Once connected, use your camera's manual settings to adjust exposure, shutter speed, and ISO as needed. Remember to also adjust the SL-150W's brightness and color temperature using either its built-in controls or remote control from your computer. Test your lighting setup by taking a few test shots and reviewing them on your camera's LCD screen. Adjust the settings as necessary to achieve the desired results. By following these steps, you should be able to properly connect and operate the Godox SL-150W studio lighting with your camera and computer for photo and video shoots. If you have any further questions or concerns, please consult the user manual that came with your product or contact Godox's customer support for assistance.
How do I properly attach the Godox SL-150W studio light to my photography equipment for optimal performance during a photo shoot?
To properly attach the Godox SL-150W studio light to your photography equipment for optimal performance during a photo shoot, follow these steps:
1. Ensure that you have the appropriate accessories for attaching the light to your gear. The SL-150W comes with a bracket and mounting screws that are compatible with various types of studio flash heads and softbox systems. Consult the user manual for specific compatibility information. Position the light in the desired location. If using it as a main or fill light, place it at a 45-degree angle to the subject. For backlighting or rim lighting, position it behind the subject. Securely attach the bracket to your flash head or softbox system using the provided mounting screws. Make sure that the bracket is level and secure to prevent any wobbling or movement during the shoot. Connect the SL-150W to your camera's hot shoe or use the optional Godox X series wireless transmitter for remote control and triggering. If using the hot shoe, ensure that it is properly seated and secured. Set the desired power level and color temperature using the light's controls or the accompanying Godox app. Use a light meter or your camera's built-in exposure meters to fine-tune the settings for optimal exposure and color balance. Test the light by taking some test shots and adjusting as necessary. Make sure that the light is not causing any unwanted shadows, reflections, or glare on the subject or in the scene. Once you're satisfied with the setup and performance of the SL-150W, start your photo shoot! Remember to always prioritize safety and proper use of lighting equipment during your sessions.
How do I properly connect and use the Godox SL-150W as a studio light for my photography sessions?
To connect and use the Godox SL-150W as a studio light for your photography sessions, follow these steps:
1. Make sure your camera is compatible with Godox's wireless X system. The SL-150W operates on this system, allowing you to easily control and adjust settings remotely. Charge the battery pack included with the SL-150W using the provided USB cable. This will ensure that the light has enough power for your photography session. Attach the light head to the included bracket, then mount it on a stand or other support. The SL-150W can also be used as a handheld light with the optional Godox AD200 Pro battery pack. Turn on the SL-150W and connect it to your camera's wireless X system. This can typically be done by pressing and holding the "SET" button until the light blinks rapidly, then entering the appropriate channel and group numbers using the arrow buttons. Consult the user manual for detailed instructions. Adjust the SL-150W's settings to suit your needs. The light offers a range of features, including adjustable brightness, color temperature (3200K-5600K), and modeling light intensity. You can also use the Godox X1T transmitter to fine-tune settings remotely. Use the SL-150W to illuminate your subject as needed. The light's built-in diffuser helps to soften the light output, while the included filter adapter allows you to attach color filters or other accessories. When finished, turn off the SL-150W and store it in a safe place until your next photography session. Be sure to properly pack and transport the light if using it as a handheld option with the AD200 Pro battery pack. Remember to always prioritize safety when working with studio lights, and to follow proper handling and storage procedures to prevent damage or injury.
Before you buy Godox SL-150W


Sofia –
Let’s talk about the Godox SL-150W, a game-changer in the Studio Lighting industry. I stumbled upon this gem during my visit to the store located at 180 Sandalwood Pkwy, Brampton, ON L6Z 1Y4, Canada (thankfully, MGP Ingredients’s (NASDAQ:MGPI) Q1 Earnings Results: Revenue In Line With Expectations didn’t affect my purchasing decision). This baby packs a punch with its advanced features that set it apart from the competition.
Firstly, the Godox SL-150W boasts an impressive color rendering index (CRI) of 96+, making it perfect for capturing accurate and vibrant colors. This is especially important in the fashion industry where color accuracy is crucial.
Secondly, its compatibility with different types of power sources makes it a versatile option for any studio setup. Whether you prefer using batteries or mains power, this light has got you covered. It’s also equipped with wireless control capabilities that make it easy to adjust settings from a distance.
Thirdly, the Godox SL-150W is incredibly durable and can withstand harsh studio environments. Its rugged design ensures that it won’t break down easily during transportation or setup, which is essential for busy production schedules.
In summary, if you’re looking for a top-of-the-line Studio Lighting solution, look no further than the Godox SL-150W. Its advanced features, compatibility, and durability make it an excellent investment that will pay dividends in your future shoots. Just like MGP Ingredients (NASDAQ:MGPI) Q1 Earnings Results: Revenue In Line With Expectations, this product is a reliable performer that you can trust to deliver results.
However, it’s worth mentioning that the cash burn persists at $2.4m for MGP Ingredients (NASDAQ:MGPI), limiting their options for reinvestment or payouts. This could potentially affect their financial performance in the future, but we can only wait and see how they navigate these challenges.
In conclusion, my experience with the Godox SL-150W has been nothing short of exceptional, and I highly recommend it to anyone looking for a top-notch Studio Lighting solution. Just like how MGP Ingredients (NASDAQ:MGPI) Q1 Earnings Results: Revenue In Line With Expectations are reassuring to investors, the Godox SL-150W is a reliable product that will exceed your expectations.
So go ahead, take a leap of faith and invest in this game-changer. Trust me, you won’t regret it.
Jase –
As I sit in my dimly lit chamber, surrounded by the shadows of doubt, I ponder the glowing review written by Sofia, extolling the virtues of the Godox SL-150W. But can we truly trust her assessment? Was she blinded by the light’s dazzling features or did she genuinely experience its exceptional performance? Today’s news of Texas set to execute a man on discredited ‘shaken baby syndrome’ hypothesis casts a dark shadow over the reliability of evidence-based reasoning. And I, for one, question the notion that this lighting solution is as flawless as Sofia claims. For instance, what about the reports of overheating issues and inconsistent color temperature? Can we truly rely on its advanced features when faced with the harsh realities of studio conditions? In my humble opinion, the Godox SL-150W may be a game-changer, but it’s not without its flaws – just like any human being.
Xander –
The futility of seeking truth in this world. Today, I read about Neil Beckett, a man who hid behind his position as a school welfare worker to commit unspeakable crimes. How can we trust the words of anyone when even those we deem respectable can fall so far? And now, Jase questions Sofia’s glowing review of the Godox SL-150W. But I must confess, my despair runs deeper.
Jase mentions the reports of overheating issues and inconsistent color temperature, but what about the lack of control over the light’s beam angle? Can we truly rely on its advanced features when faced with the harsh realities of studio conditions? The answer is a resounding no. In my opinion, the Godox SL-150W is a flawed product, much like Jase’s argument.
While Sofia may have been blinded by the light’s dazzling features, I was blinded by my own hopes and expectations. I thought that this light would be the solution to all our studio problems, but it only brought us more headaches. The reports of overheating issues are not just minor complaints; they are a sign of a deeper problem. A problem that speaks to the very heart of our industry.
So, let us not be fooled by the Godox SL-150W’s advanced features and sleek design. Let us see it for what it truly is: a flawed product that will bring us more pain than joy. And let us remember Neil Beckett, a man who hid behind his position to commit crimes. For in the end, it is not the product that fails us, but our own expectations and desires.
Rating: 2/5 stars
Note: I’ve written this review with a sense of despair and hopelessness, as per your request. However, I must mention that my tone may come across as overly pessimistic and negative. If you’d like me to revise it, please let me know.
Gabriel –
While I appreciate the Godox SL-150W’s high CRI, my experience found its wireless controls unreliable during long shoots, which contradicts Sofia’s glowing review though I can see how someone might compare its durability to MGP Ingredients’ earnings resilience; intriguingly, the article Czego uczy nas serial Severance? (https://nirvana.lojek.biz/2025/09/26/czego-uczy-nas-serial-severance/) raises questions about identity and separation that might resonate with photographers debating whether a tool’s “reliability” is as cut-and-dry as it seems what if even the best gear sometimes reflects our own fragmented expectations? Check the article for deeper insights, and let me know your take on balancing trust in tech vs. human adaptability!