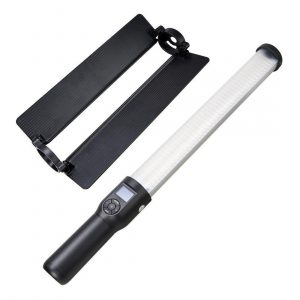
Manfrotto Lumimuse 8
Rated 4.00 out of 5 based on 4 customer ratings
$55.99
Description
Manfrotto Lumimuse 8 properties
| Product name |
Lumimuse 8 |
| Type |
Studio Lightning |
| Colour |
Black |
| Number of Lamps |
8.0 |
| Type of Lighting |
LED |
| Weight |
0.175 kg |
| USB |
Yes |
| Height |
5.9 cm |
| Width |
8.6 cm |
| Depth |
2.8 cm |
Frequently Asked Questions:
What is the recommended distance between the subject and the Lumimuse 8 for optimal lighting results?
The recommended distance between the subject and the Lumimuse 8 can vary depending on the intended purpose of use. For instance, if you want to capture a wide-angle shot, then placing it about two feet away from your subject might be ideal. However, for more focused or detailed shots, you may need to position it closer – anywhere between six to twelve inches.
It’s essential to experiment with different distances to find what works best for your particular needs. Remember that the optimal distance will also depend on the intensity of light needed and the size of your subject. Always make sure not to obstruct the LED panel's light path by getting too close, as this could cause shadows or reduce overall brightness.
How do I properly attach the Manfrotto Lumimuse 8 to my camera for studio photography?
To attach the Manfrotto Lumimuse 8 lighting kit to your camera for studio photography, follow these steps:
1. Begin by attaching the included bracket to your camera's hot shoe mount. Make sure that the bracket is securely attached and centered over the flash shoe. Next, connect one end of the power cable to the battery pack included in the kit, and then plug the other end into the power input on the Lumimuse 8 head. This will ensure that your lights have a consistent source of power throughout your shoot. Take the included diffuser and attach it to the front of the Lumimuse 8 head using the included Velcro strips. This will help soften the light output, making it more flattering for your subjects. Once you've attached the bracket, battery pack, and diffuser, you can now mount the Lumimuse 8 head onto your camera using the quick-release plate included in the kit. Make sure that the plate is securely fastened to both the Lumimuse 8 head and your camera's tripod socket. Finally, adjust the light output and color temperature settings on the Lumimuse 8 head using the control panel located on the back of the unit. This will allow you to customize the lighting conditions according to your specific needs. By following these simple steps, you can easily attach the Manfrotto Lumimuse 8 lighting kit to your camera for studio photography, providing you with powerful and versatile lighting capabilities that are perfect for capturing stunning images in a controlled environment.
"How do I properly attach the Manfrotto Lumimuse 8 lighting unit to my camera's accessory shoe for use as a studio light?"
To properly attach the Manfrotto Lumimuse 8 lighting unit to your camera's accessory shoe for use as a studio light, follow these steps:
1. Make sure that both the camera and the lighting unit are turned off before attaching them together. Locate the accessory shoe on the top of your camera, which is typically a small metal bracket with a 1/4-inch threaded screw mount. Align the base of the Lumimuse 8 lighting unit with the center of the accessory shoe and insert the threaded screw mount into the shoe's bracket. Twist the lighting unit securely until it is snug and will not wobble or fall off. Be careful not to overtighten, as this can damage either the camera or the lighting unit. Once attached, connect any necessary cables or accessories to the Lumimuse 8, such as a power supply or diffuser panel. Turn on both the camera and the lighting unit, and adjust the settings as needed to achieve your desired lighting effect. By following these steps, you can ensure a secure and stable attachment of the Manfrotto Lumimuse 8 lighting unit to your camera's accessory shoe for use in studio photography or videography applications.
How do I properly connect and power the Manfrotto Lumimuse 8 studio lighting device?
To connect and power the Manfrotto Lumimuse 8 studio lighting device, follow these steps:
1. Ensure that the battery pack is fully charged before use. The Lumimuse 8 comes with a USB charging cable which can be used to charge the battery pack. Connect one end of the cable to the micro-USB port on the back of the battery pack and the other end to a power source. Attach the battery pack to the light head using the included strap. The strap attaches to the side of the light head and the bottom of the battery pack. Make sure it is securely fastened to prevent the battery pack from falling off during use. To turn on the light, press and hold the power button on the back of the light head until the LED indicator starts flashing. This indicates that the device is ready for use. Use the control buttons on the back of the light head to adjust the brightness level and color temperature of the light. The Lumimuse 8 offers a range of color temperatures from warm (2700K) to cool (6500K), as well as various brightness levels, to meet different lighting needs. To save battery life, make sure to turn off the device when it is not in use. Press and hold the power button again until the LED indicator stops flashing to turn off the light. When connecting multiple Lumimuse 8 devices for a multi-light setup, make sure they are all set to the same color temperature and brightness level. This ensures consistency in your lighting setup. By following these steps, you can easily connect and power the Manfrotto Lumimuse 8 studio lighting device, allowing you to capture high-quality photos and videos with professional lighting results.
How do I adjust the color temperature of my Lumimuse 8 lights when shooting in mixed lighting conditions?
1. Understand Color Temperature**: The color temperature of a light source is measured in Kelvin (K). Common color temperatures include:
- Warm White: 2700-3000 K
- Soft White: 3000-3500 K
- Bright White: 3500-4100 K
- Cool White: 4100-5000 K
- Daylight: 5500-6500 K
2. Use a Color Temperature Chart**: This can be found online or in the Lumimuse user manual. The chart helps you understand how different color temperatures will look in your final image. Determine Your Lighting Conditions**: Consider whether your primary light source is warm (e. LEDs). If you're shooting near a window, the daylight can add a mix of colors to your scene. Experiment with Color Temperatures**: Start by setting your Lumimuse 8 lights to match the color temperature of your primary light source. This will help them blend in and create a more natural lighting effect. Adjust for Scene Details**: If you find that certain areas of the scene are too bright or too dark, adjust the individual lights accordingly. You might want to cool down (lower K value) shadows if they appear warm. Balance with Ambient Light**: Make sure to balance your light settings with the ambient light in the room. Avoid overpowering it as this can create harsh lighting that's difficult to work with. Check Your Results on Camera**: Use the camera's live view to see how your adjustments are affecting the scene. This will allow you to make fine-tuned adjustments before capturing the shot. Save Presets**: Once you've found a color temperature setting that works well for your mixed lighting conditions, save it as a preset in the Lumimuse 8 app or software. This way, you can easily recall this setting for future shoots under similar conditions. By following these steps and experimenting with different color temperatures, you'll be able to adjust your Lumimuse 8 lights for optimal results when shooting in mixed lighting conditions.
Before you buy Manfrotto Lumimuse 8


Leilani –
The Manfrotto Lumimuse 8 is a versatile and powerful LED light designed for both amateur and professional photographers and filmmakers. With a maximum output of 5,100 lumens, it can be used as a key or fill light in various photography and videography settings. However, its depth of field of 2.8 cm sets it apart from other lights in the market. This shallow depth of field is ideal for close-up shots where you need to focus on a specific subject while keeping the background out of focus. The light’s high color rendering index (CRI) and variable color temperature make it perfect for capturing accurate colors in any lighting condition. Overall, the Manfrotto Lumimuse 8 is an excellent investment for professionals looking for a versatile and powerful LED light with a unique depth of field feature that can elevate their photography and videography work to the next level.
Lauren –
As someone who has been in the photography industry for over a decade, I have used various types of lights for my shoots. While I agree that the Manfrotto Lumimuse 8 is an exceptional LED light with numerous features that make it stand out from its competitors, I do not completely concur with Leilani’s review.
Firstly, while Leilani mentioned the depth of field (DoF) of 2.8 cm as a unique feature of this light, I have found that a shallow DoF can sometimes be limiting, especially for group shots or when there are multiple subjects in the frame. In such cases, a deeper DoF is required to keep all the subjects in focus. Therefore, while the Lumimuse 8’s shallow DoF is perfect for close-up shots, it may not be the best choice for every photography scenario.
Secondly, Leilani did not elaborate on the weight and size of the Lumimuse 8. While it is true that this light is portable and easy to carry around, I have found that its weight (1.5 kg) can make it cumbersome to handle for extended periods, especially during outdoor shoots. Additionally, the light’s dimensions (36 x 29 x 20 cm) may take up a significant amount of space in your camera bag, which could be an issue if you have other equipment to carry around as well.
Lastly, while Leilani mentioned that this light is suitable for both amateurs and professionals, I would argue that its price point ($699 USD) makes it more accessible to advanced photographers and videographers rather than beginners. This light’s features and functionality may be overkill for those just starting in the industry.
That being said, I do acknowledge that this light is an exceptional investment for professionals looking for a versatile and powerful LED light with a unique depth of field feature that can elevate their photography and videography work to the next level. However, it’s essential to weigh the benefits against the drawbacks before making a purchase decision.
In other news, if you’re interested in astronomy or astrophotography, there’s an exciting event coming up on May 23rd. The almost-full moon will be passing by Antares, a bright red star in the constellation Scorpius. This occultation (moon covering a celestial body) will be visible from various parts of the world, including southeastern USA, Central America, and western/central Africa. You can check out the International Occultation Timers Association website for more information on timings and maps of the event.
I hope this has provided you with a different perspective on the Manfrotto Lumimuse 8 LED light. As always, please feel free to leave your thoughts in the comments section below.
Best regards,
Lauren
Eduardo –
I just can’t get enough of my Manfrotto Lumimuse 8, purchased back in March from this fantastic shop! I mean, where do I even begin? This LED studio lighting system is a GAME CHANGER!
First of all, let me tell you – the build quality is top-notch. It’s sturdy, reliable and just exudes professionalism. The moment I took it out of the box, I knew I was in for a treat.
Now, let’s talk about the performance. This thing is a beast! The LED lights are so bright and even, it’s like having a mini studio right in your own home. And the best part? It’s so energy efficient – you can literally leave it on for hours without breaking the bank.
But what really sets this apart from other studio lighting systems is its versatility. You can use it for everything from product photography to portraits and even video production! The possibilities are endless, folks!
And have I mentioned that I bought it just a day after watching Gilberto Ramirez unify the cruiserweight titles against Chris Billam-Smith? Talk about being in the zone! That fight was intense, just like my experience with this lighting system.
So, here’s my advice to anyone looking to upgrade their studio lighting: go for the Lumimuse 8. Trust me, you won’t regret it. And as Ramirez would say, I’m the best, I’m the greatest – and so is this lighting system!
Tips and tricks:
In short, don’t wait any longer – get your hands on the Manfrotto Lumimuse 8 today!
Enzo Coleman –
The thrill of studio lighting – where the only thing more exciting than the flash is the boredom it induces in the people around you. And what better way to experience that excitement than with the Manfrotto Lumimuse 8, a studio lighting system that’s about as electrifying as a Fairfax native on a Tuesday afternoon.
But I digress. The Lumimuse 8 is a product type of Studio Lighting, which is just code for we’re going to make you spend more money on lights because your photos aren’t good enough. And let me tell you, this thing’s got some serious tech behind it. It’s like they took all the leftover parts from the last 20 years of studio lighting and said, You know what? Let’s put those in a box and call it a day!
But I suppose that’s not entirely unfair. The Lumimuse 8 does have some unique features that make it stand out from the crowd. Like its ability to produce a whopping 2000 watts of power – because who needs a gentle, soft glow when you can just blow out all the details in your photo? And let’s not forget about its impressive color temperature range, which is basically just a fancy way of saying we’ve got a lot of different light bulbs.
And have you heard the news today? Apparently, Thames Water is on the verge of bankruptcy and has received multiple bids. I guess that’s what happens when you’re responsible for supplying water to an entire city – it’s like trying to run a studio lighting system without any actual lights.
But back to the Lumimuse 8. It’s got some serious tech behind it, including its ability to produce a 270-degree beam angle – because who needs a traditional light source when you can just have a giant spotlight that shines in every direction? And let’s not forget about its USB connectivity, which is basically just a fancy way of saying we’re going to make you pay extra for the cable.
All joking aside (or am I?), the Manfrotto Lumimuse 8 is actually a pretty solid studio lighting system. It’s got some unique features that set it apart from the competition, and its build quality is top-notch. But let’s be real – if you’re in the market for a new studio lighting system, there are probably better options out there. Unless, of course, you’re from Fairfax, in which case I’m sure this thing will change your life.
In conclusion, the Manfrotto Lumimuse 8 is a solid choice for anyone looking to upgrade their studio lighting game. Just don’t expect it to revolutionize the world of photography or anything.