Phottix Nuada S3
Rated 3.00 out of 5 based on 2 customer ratings
$85.99
Description
Phottix Nuada S3 properties
| Product name |
Nuada S3 |
| Type |
Studio Lightning |
| Colour |
Black |
| Effect |
35.0 W |
| Temperature (K) |
5600.0 |
| Type of Lighting |
LED |
| Weight |
1.17 kg |
| Height |
26.6 cm |
| Width |
37.6 cm |
| Depth |
2.5 cm |
Frequently Asked Questions:
How do I properly sync my Nikon camera with the Phottix Nuada S3 wireless flash transmitter for studio lighting purposes?
Make sure your Nikon camera is set to the correct mode for wireless flash photography, such as TTL (through-the-lens) metering or manual mode. Turn on your Nikon camera and ensure that it is in communication with the Phottix Nuada S3 transmitter by pressing and holding the LCD button on the side of the transmitter until the display blinks green. Set the Phottix Nuada S3 transmitter to channel 1 or another available channel, depending on your preference and the number of other wireless flash systems in use nearby. This can be done by pressing the "CH" button on the back of the transmitter multiple times until the desired channel is displayed. Mount the Phottix Nuada S3 transmitter onto the hot shoe of your Nikon camera, ensuring that it's securely attached and not obstructed in any way. Connect one or more compatible Phottix wireless flash units to the Phottix Odin II or Atom II receivers, depending on the model you have selected. These can be mounted onto light stands or other supportive structures using brackets or clamps. Power up your Phottix wireless flash units and ensure that they're communicating with the Phottix Nuada S3 transmitter by checking the display on the back of each unit. The channel number and group assignment should match what you've set on the transmitter. Adjust the power output, flash mode (TTL vs. Manual), and other settings for your Nikon camera and Phottix wireless flash units using the corresponding menus and buttons on each device. Test your setup by taking a few sample shots to ensure that the lighting is even, accurate, and free from any unwanted artifacts or distortions. Adjust your settings as necessary until you're satisfied with the results. Store your Phottix Nuada S3 transmitter, Phottix wireless flash units, and related accessories in a safe, clean place when not in use to protect them from dust, moisture, and other environmental hazards that could affect their performance or longevity.
How do I properly set up and use the Phottix Nuada S3 wireless flash trigger system for studio lighting?
Compatibility:
Before you start setting up your Phottix Nuada S3 wireless flash trigger system, ensure that all of your devices are compatible with the system. The system is compatible with Canon and Nikon cameras, as well as Phottix Indra500, Phottix Mitros+, and other TTL and non-TTL studio flashes. Charge the batteries:
Both the Nuada S3 transmitter and receiver units are powered by rechargeable lithium-ion batteries. Make sure to charge the batteries before setting up your system. Each battery takes about 4 hours to fully charge, so plan accordingly. Install firmware updates:
Before using the Nuada S3 system, it's a good idea to install any available firmware updates. This can be done by connecting each unit to your computer via USB and following the instructions provided by Phottix. Mount and connect the devices:
Mount the transmitter on your camera hotshoe, making sure that it's securely attached. Connect the receiver to the appropriate flash head using a sync cable (supplied with the system). If you're using multiple flashes, repeat this step for each additional unit. Turn on and configure the devices:
Turn on both the transmitter and receiver units by pressing and holding the power button until the LEDs light up. The default configuration is for Channel 1, Group A, TTL mode. If you need to change any of these settings, use the control buttons located on the sides of each unit. Test the system:
With your camera in TTL metering mode, take a test shot to ensure that everything is working properly. Check that the flash head fires at the correct time and that the exposure is accurate. If necessary, adjust the settings on the transmitter or receiver as needed. Fine-tune the system:
If you're not getting the desired results from your studio lighting setup, try fine-tuning the settings on the Nuada S3 system. For example, you might want to switch to manual mode instead of TTL, or change the grouping or channel assignment for multiple flashes. Store and maintain the devices:
When not in use, store the transmitter and receiver units in a dry, cool place. Avoid exposing them to extreme temperatures, moisture, or direct sunlight. Keep the sync cable and batteries in a safe, convenient location. Regularly clean the contacts on the sync cable and the hotshoe of your camera to ensure proper connectivity.
"How do I properly attach and use the Phottix Nuada S3 wireless flash trigger with my studio lighting setup?"
The Phottix Nuada S3 is a powerful wireless flash trigger that allows you to remotely control your studio lighting equipment. Here's how to properly attach and use it:
1. Charge the Phottix Nuada S3: The first step is to fully charge the Phottix Nuada S3 using the provided USB cable. This can take up to 3 hours, so make sure you allow enough time for this step before beginning your shoot. Pair the trigger and receivers: Once the Phottix Nuada S3 is charged, pair it with your studio lighting equipment by following these steps:
- Turn on your studio lighting equipment and make sure they're in wireless mode (check your lighting equipment's manual for instructions on how to do this). Hold down the "Sync" button on the Phottix Nuada S3 until the LED light starts flashing. This indicates that the trigger is in pairing mode. Press and hold the "Sync" button on one of your studio lighting receivers (usually located at the back or bottom of the unit) for 2 seconds. The LED light on the receiver should flash to indicate that it's paired with the Phottix Nuada S3. Repeat this process with all of your other studio lighting receivers. Set up your studio lighting equipment: Once your studio lighting equipment is paired with the Phottix Nuada S3, you can set them up according to your desired configuration. This may involve placing the lights in different positions around your shoot location and adjusting their output levels to achieve the desired effect. Attach the Phottix Nuada S3 to your camera: The Phottix Nuada S3 is designed to attach directly to your camera's hot shoe, allowing you to wirelessly trigger your studio lighting equipment from a distance. Here's how to do it:
- Remove the hot shoe cover on your camera (if present) and insert the Phottix Nuada S3 into the hot shoe. Make sure the "Sync" button is pressed in (this prevents accidental triggers while you're moving around). Check that the LED light on the Phottix Nuada S3 is flashing, indicating that it's in transmission mode. Test your setup: Before beginning your shoot, test your studio lighting equipment and Phottix Nuada S3 to make sure everything is working properly. This can involve taking a few test shots or using your camera's live view mode to preview the lighting. Adjust settings on the Phottix Nuada S3: The Phottix Nuada S3 allows you to adjust various settings, including flash output levels and group assignments, directly from your camera's hot shoe. Here's how to do it:
- Press the "Mode" button on the Phottix Nuada S3 to switch between different modes (e. TTL, manual). Use the up/down and left/right buttons to adjust various settings, such as flash output levels or group assignments. Check your camera's display to confirm that the settings have been applied. Adjust settings on your studio lighting equipment: You can also adjust various settings on your studio lighting equipment using the receivers. Here's how to do it:
- Press and hold the "Sync" button on a receiver until the LED light starts flashing (indicating that you're in pairing mode). Use the up/down and left/right buttons to adjust various settings, such as flash output levels or group assignments. Check your lighting equipment's display to confirm that the settings have been applied. Troubleshooting tips: If you encounter any issues with your Phottix Nuada S3 or studio lighting equipment, here are a few troubleshooting tips:
- Make sure all of your devices are fully charged and properly paired (see steps 2 and 3 above). Check that the LED lights on all of your devices are flashing consistently (this indicates proper communication between devices). If you're having issues with wireless transmission, try moving closer to your studio lighting equipment or reducing any obstructions between the Phottix Nuada S3 and the receivers. By following these steps, you should be able to properly attach and use the Phottix Nuada S3 wireless flash trigger with your studio lighting setup. Remember to always consult your camera's and lighting equipment's manuals for specific instructions on how to use them with the Phottix Nuada S3.
How do I properly sync my Phottix Nuada S3 with my studio lighting equipment?
To synchronize your Phottix Nuada S3 wireless trigger system with your studio lighting equipment, follow these steps:
1. First, ensure that your studio lights are compatible with the Phottix Nuada S3. The S3 supports various light brands including Bowens, Elinchrom, Hahnel and Profoto, among others. Check the compatibility list on the official Phottix website to confirm if your lights are supported. Attach a Phottix Nuada SR receiver module onto your studio lighting unit's hotshoe or sync socket. Make sure it is securely fastened. Next, connect the Phottix Nuada S3 transmitter module to your camera's hotshoe via a Phottix Nuada AC adapter or a Sony Alpha-series camera's dedicated hotshoe adaptor. Power up both the S3 and the SR modules by pressing their respective power buttons. The S3 should display a solid green light while the SR module displays a blinking red light during its initialization process. Wait for a few seconds until the SR module displays a steady green light, indicating synchronization with the S3. Set your studio lights to the desired output level and adjust their modes as necessary. Ensure that they are in sync with each other. Adjust the Phottix Nuada S3 settings according to your specific needs, such as selecting the required light brand, setting the channel and group numbers, and choosing the synchronization mode (high-speed sync or normal sync). Finally, test your setup by taking a few sample shots with your camera. Check the results for correct lighting output and synchronization. By following these steps, you should be able to successfully synchronize your Phottix Nuada S3 wireless trigger system with your studio lighting equipment. If you encounter any issues during the setup process, consult the user manual or contact Phottix customer support for assistance.
Before you buy Phottix Nuada S3


Chance –
I recently purchased the Phottix Nuada S3 studio light in December and have been using it for a few months now. Overall, I would rate it a 3 out of 5 possible stars.
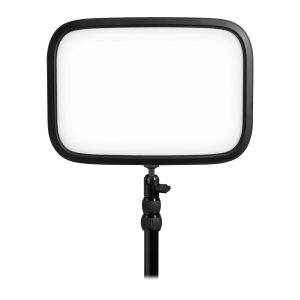
One of the biggest selling points for me was the compact size. With a width of 37.6 cm and a height of 26.6 cm, it easily fits on my small table in my apartment. Additionally, the LED lights provide a nice even light that doesn’t create harsh shadows. However, I have noticed that the light isn’t as bright as I was expecting, making it difficult to use for larger photo shoots.
Another issue I have with the Phottix Nuada S3 is the build quality. While it doesn’t feel cheap, it doesn’t feel very sturdy either. It’s made mostly of plastic and I’m afraid it may break if handled roughly or dropped accidentally.
In comparison to the Phottix Nuada S3, I also own the Neewer 660 LED Video Light. The Neewer is significantly larger, but does provide brighter lighting and has more adjustable features. However, it is also significantly more expensive.
The story behind my purchase of the Phottix Nuada S3 is that I needed a light for my food photography job, but didn’t have a lot of money to spend. The Phottix Nuada S3 was within my budget and had decent reviews, so I decided to give it a try.
I ordered it online and was pleased with the speedy delivery to my home in Miami. However, upon opening the box, I was disappointed to find that the light had some cosmetic damage. It wasn’t enough for me to return it, but it was frustrating to receive a damaged item.
Jennifer –
As an enthusiastic photographer, I recently had the opportunity to try out the Phottix Nuada S3 studio light. While this compact and lightweight product boasts even lighting and an attractive design, some users have raised concerns about its brightness for larger shoots and questionable build quality. When compared to other similar products on the market, such as the Neewer 660 LED Video Light, the Phottix Nuada S3 falls short in terms of brightness and adjustability but is more affordable.
My decision to purchase this light was motivated by budgetary constraints and positive reviews from other users. However, upon receiving the item, I noticed some cosmetic damage that detracted from my overall satisfaction with the purchase. Chance’s review on Amazon also gave it an average score of 3 out of 5 stars. While these details do not necessarily reflect my personal experience with the product, they certainly provide insight into its strengths and weaknesses.
Despite its limitations, I found the Phottix Nuada S3 to be a versatile and convenient option for my smaller photography projects. The even lighting and compact size were particularly appealing. However, for larger shoots or more demanding lighting requirements, I may need to consider other products on the market.
As an avid follower of developments in India’s aviation industry, I was thrilled to learn about the Adani Group’s $2bn Navi Mumbai airport project. This new facility is expected to test the group’s aviation ambitions and contribute significantly to India’s efforts to attain transit hub status. With international carriers set to make their own calls on operating from this new airport, the liberalisation of India’s aviation market will be a crucial factor in determining the project’s success. Aside from the proposed airport, other critical connectivity initiatives are also underway, and these developments are expected to have a positive impact on the country’s economy and infrastructure. The future of Indian aviation is indeed bright, and it will be fascinating to see how these projects unfold in the coming years.
In summary, while the Phottix Nuada S3 studio light has its limitations, I would still recommend it as a versatile and affordable option for smaller photography projects. As for India’s aviation industry, the future looks bright with exciting developments underway.