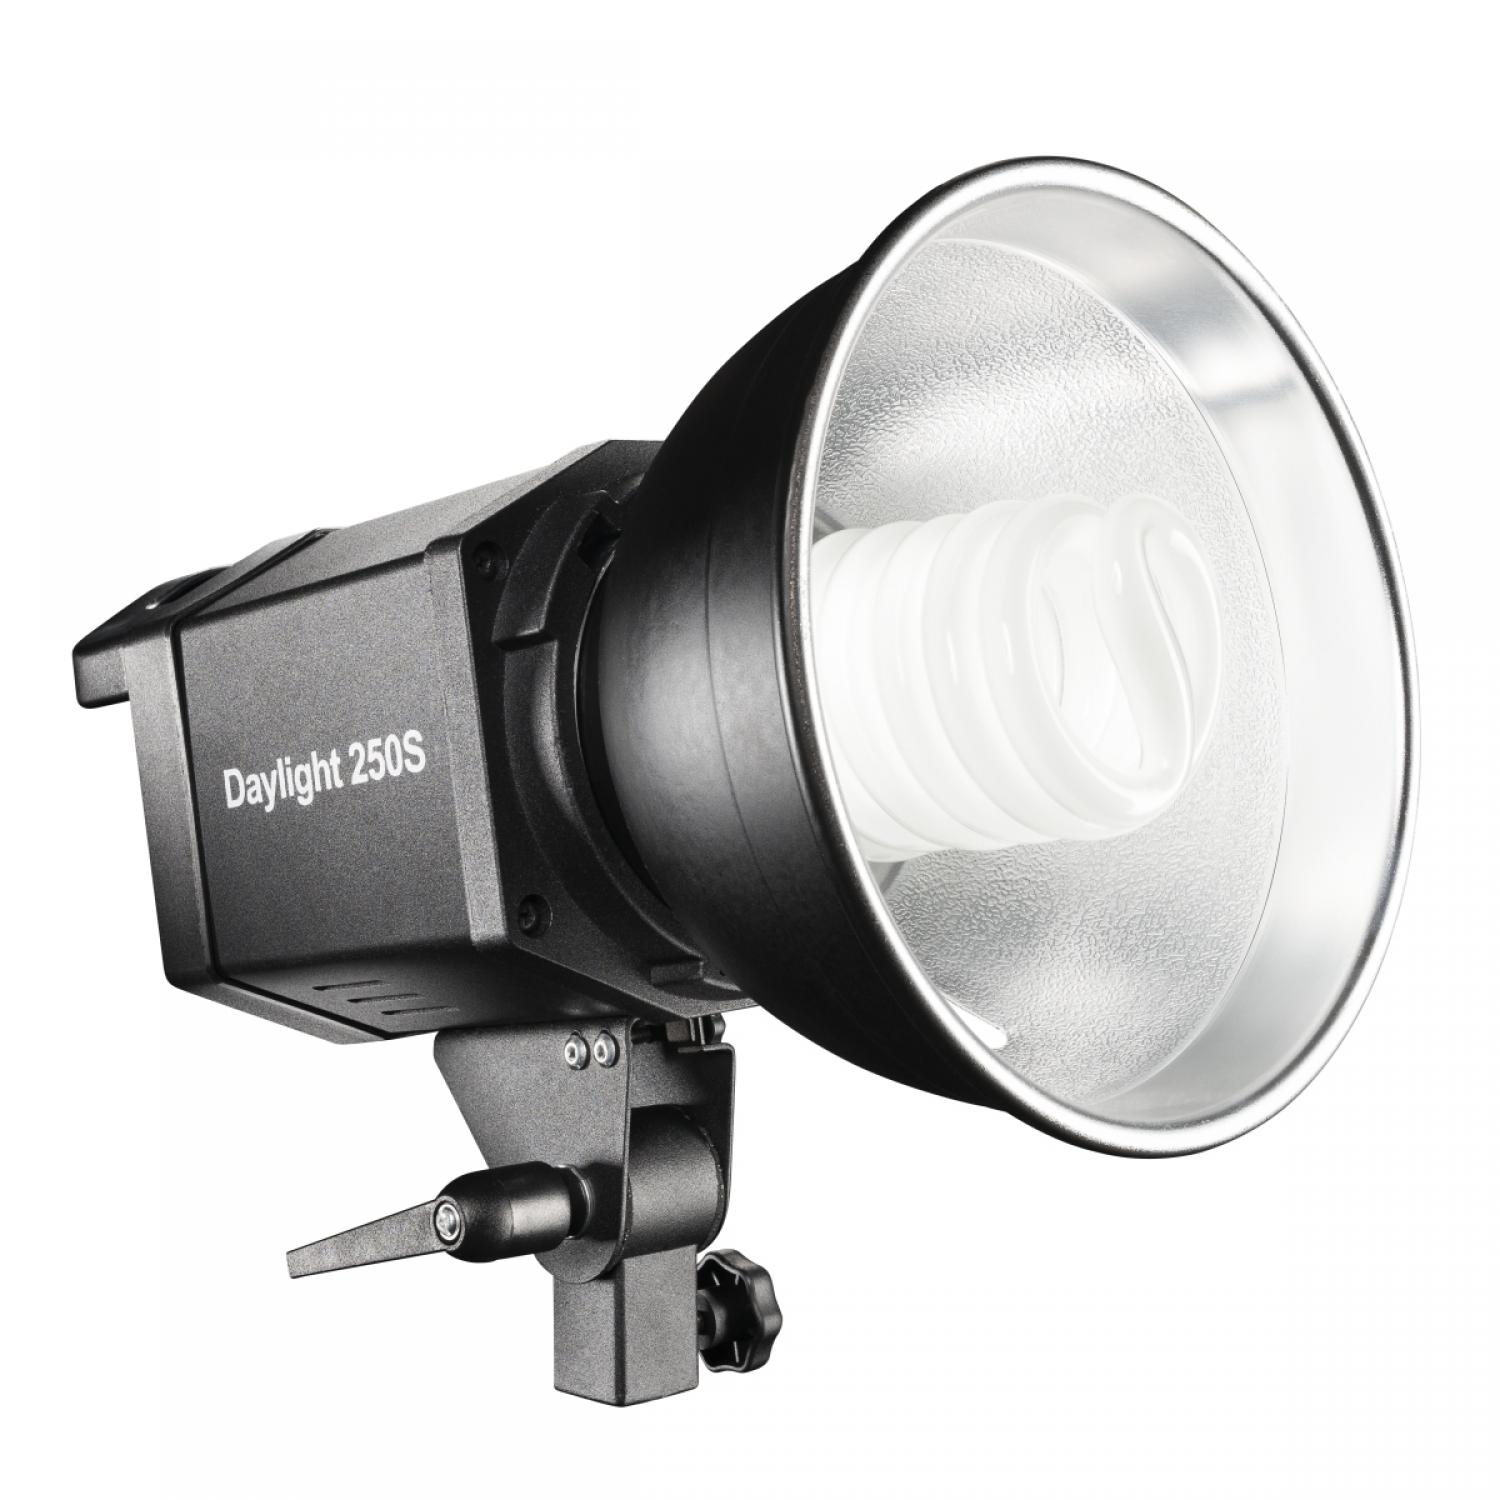
Walimex Daylight 250S
$70.99
Description
Walimex Daylight 250S properties
| Product name |
Daylight 250S |
| Type |
Studio Lightning |
| Colour |
Black |
| Material |
Aluminium |
| Lamp Socket |
E27 |
| Effect |
50.0 W |
| Number of Lamps |
1.0 |
| Temperature (K) |
5500.0 |
| Type of Lighting |
Bulb |
| Weight |
1.09 kg |
| Height |
22.0 cm |
| Width |
13.0 cm |
Frequently Asked Questions:
What is the recommended distance between the Walimex Daylight 250S and a subject for optimal lighting results?
The recommended distance between the Walimex Daylight 250S light source and the subject can vary depending on several factors, such as the size of the subject, the power output of the light, and the desired level of illumination. However, as a general guideline, you should aim to place your subject approximately 3-4 feet (1-1.2 meters) away from the light source for optimal lighting results. This distance will allow you to achieve evenly distributed light without causing hot spots or unwanted shadows on your subject. Remember that these are just rough estimates and you may need to adjust the distance based on your specific needs and shooting conditions.
How do I properly set up and use the Walimex Daylight 250S studio lighting for portrait photography?
Unpack the light: Remove all the components of the light from their respective packaging. The kit includes two lights, softboxes, stands, and connecting cords. Assemble the stands: Connect the legs of each stand to form a tripod base. Make sure that the center column is tightened securely. Attach one light to each stand using the included connectors. Attach the softboxes: Slip the softbox onto the light unit, making sure it's secured tightly. The softbox will diffuse the light, preventing harsh shadows and providing a more flattering portrait light. Adjust the brightness: Use the included dimmer switch to adjust the brightness of each light according to your needs. This allows you to create different lighting scenarios depending on the subject's skin tone or the desired effect. Position the lights: Place one light at an angle to the right of the subject and the other to the left, creating a triangle-shaped lighting setup known as a three-point lighting system. Adjust the height of each light to suit your subject. Connect the cords: Use the connecting cords to connect each light to the power source. Make sure that the lights are plugged into different outlets to prevent overloading the circuit. Test the lighting: Take a few test shots, adjusting the brightness and position of the lights as needed. Look for any harsh shadows or unwanted reflections, and make adjustments accordingly. Use a reflector: Consider using a white or silver reflector to bounce light onto your subject's face, filling in any shadows that may remain. This can help create more even lighting and prevent the need for post-processing corrections. Adjust camera settings: Make sure you have set the correct exposure settings on your camera, taking into account the brightness of the studio lights. Use a tripod to ensure a steady shot. Take the final shots: With everything in place, take your final portrait photos using your Walimex Daylight 250S studio lighting kit. Remember to experiment with different lighting setups and adjustments to achieve the desired effect.
"How do I properly adjust the power output of my Walimex Daylight 250S studio lighting for a specific shoot?"
Determine the desired brightness level: Before adjusting the power output, decide on the required brightness level for your shoot. This will depend on various factors such as the type of photography you're doing, the available light in the space, and the desired mood or effect. Turn on the lighting unit: Plug in your Walimex Daylight 250S studio lighting and turn it on using the power switch. Make sure the lamp is fully warmed up before making any adjustments to the power output. Adjust the brightness: Locate the power control knob or digital display panel on your lighting unit, depending on its model. Turn the knob or use the buttons to increase or decrease the light intensity until you reach the desired brightness level. Be sure to make incremental changes and test each adjustment as needed to avoid overexposure or underexposure. Check the results: Preview your images on your camera's LCD screen to see how the lighting is affecting the scene. Make any necessary adjustments until you achieve the desired brightness level. Test for color accuracy: Walimex Daylight 250S studio lighting produces daylight-balanced light, which is ideal for capturing true colors in your images. However, it's still important to test for color accuracy by using a gray card or other calibration tool to ensure that the colors are accurate and consistent throughout your shoot. Store and maintain: After finishing your shoot, turn off your Walimex Daylight 250S studio lighting and store it in a safe, dry place. Regularly clean the lamps and diffusers to prevent dust buildup and ensure optimal performance over time.
How do I properly adjust the brightness and color temperature of the Walimex Daylight 250S studio lighting for optimal results in my photography sessions?
To adjust the brightness and color temperature of your Walimex Daylight 250S studio lighting, follow these steps:
1. First, ensure that your lighting is set up in a location where it will not create shadows or glare on your subject. To adjust the brightness, use the dimmer switch located on the back of each light head. Turn the dial clockwise to increase the brightness and counterclockwise to decrease it. To adjust the color temperature, locate the Kelvin temperature control knob on the back of each light head. This control will allow you to change the color temperature from 5600K (daylight) to 3200K (tungsten). Turn the dial clockwise for cooler temperatures and counterclockwise for warmer temperatures. It’s essential to ensure that all your lighting sources have consistent brightness and color temperature settings for optimal results in your photography sessions. Remember to always use a light meter or your camera's built-in light meter to accurately measure the light levels in your scene, as this will help you achieve the desired exposure. Finally, to ensure that your lighting is delivering optimal results, test different brightness and color temperature settings during your shoots to determine which ones work best for your specific photography needs.
Lamp not recognized". What could be causing this and how can I fix it?
1. Hub/Bridge Disconnection**: Check if the hub or bridge is properly connected to your router and powered on. Make sure it's not in standby mode or turned off. Device Not Added Correctly**: Ensure that the lamp has been correctly added to the hub or bridge. Try removing and re-adding the device from the app or software. Power Cycle the Lamp**: Sometimes, a simple power cycle can resolve connectivity issues. Turn off the lamp, unplug it from the power source, wait for 30 seconds, and plug it back in. Hub/Bridge Firmware Update**: Ensure that your hub or bridge is running the latest firmware. Check the manufacturer's website for updates and follow their instructions to update the firmware. Interference**: Other devices on the same network can cause interference with your smart lamp. Try moving other devices away from the router or switching them off temporarily. Lamp Hardware Issue**: In some cases, the issue might be with the lamp itself. Check if there are any physical issues, such as a loose connection or a faulty power supply. To fix the issue:
1. Restart Your Network**: Restart your router and modem to ensure they're functioning properly. Re-pair the Lamp**: Remove and re-add the lamp from the hub or bridge using the app or software. Update Firmware (if necessary)**: Update the firmware of your hub or bridge if an update is available. If none of these steps resolve the issue, it may be worth contacting the manufacturer's support team for further assistance.
Before you buy Walimex Daylight 250S



Reviews
There are no reviews yet.