Cullmann Freestyler XLB
Rated 4.00 out of 5 based on 3 customer ratings
$43.99
Capture your perfect shots with the Cullmann Freestyler XLB tripod – the perfect combination of durability, portability and design.
Description
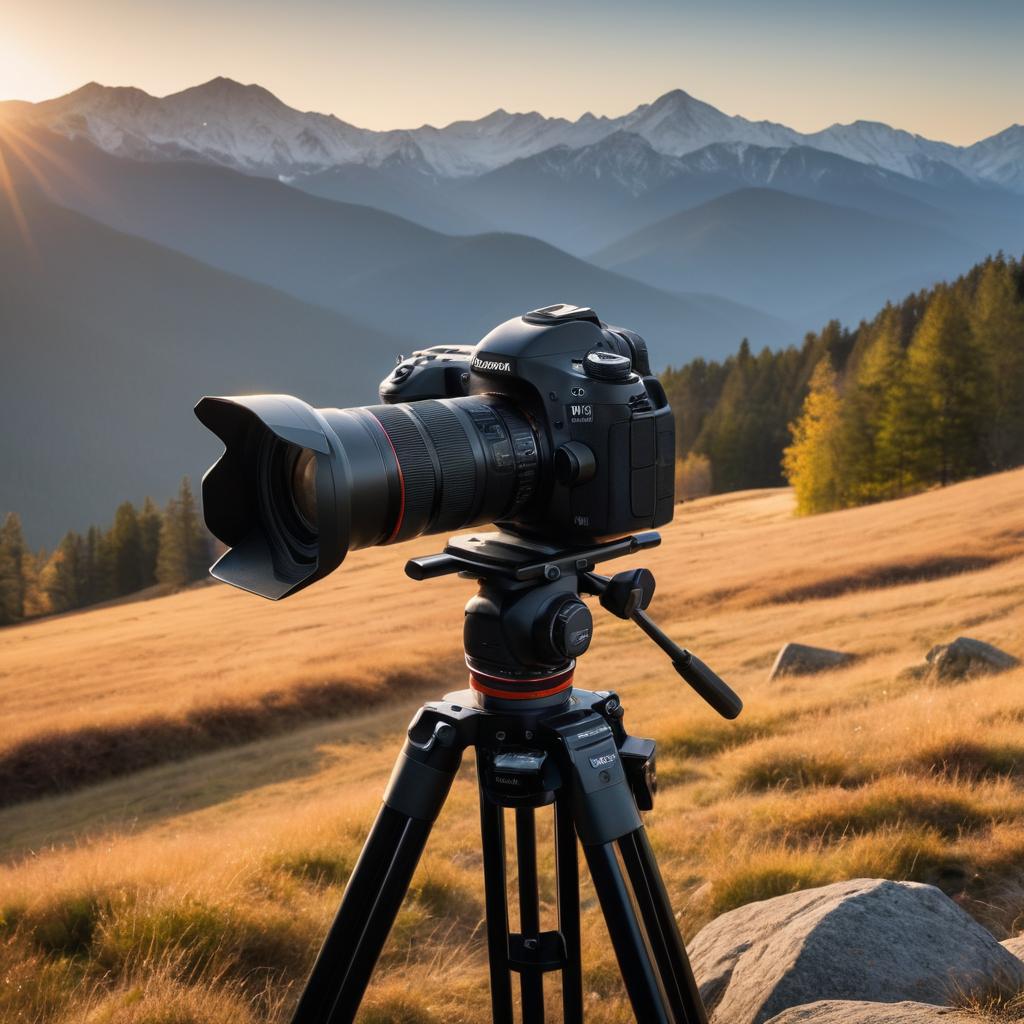
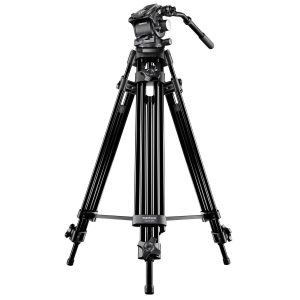
The Cullmann Freestyler XLB tripod is an excellent option for photographers looking for a versatile and stable tripod. The tripod is designed to support DSLRs, mirrorless cameras, and camcorders up to 8kg, making it a great choice for both hobbyists and professionals.
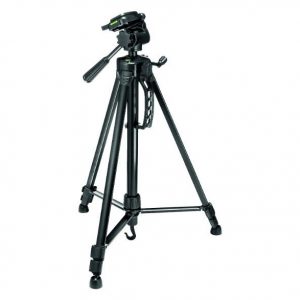
The Freestyler XLB tripod utilizes a 3-section aluminum leg design. The leg angles can be adjusted to provide maximum stability on uneven terrain. The legs can be adjusted independently, which allows the tripod to be set up in different configurations. The tripod has a maximum height of 177cm and a minimum height of 22cm.
One of the unique features of the Freestyler XLB tripod is its multi-angle center column. The column can be adjusted to different angles, allowing for versatile positioning of the camera. The column can also be inverted, making it possible to capture low-angle shots.
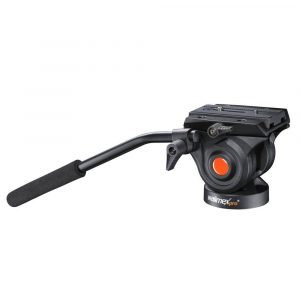
The tripod comes with a ball head that allows for the camera to be smoothly rotated and tilted. The ball head has a quick-release plate, which makes it easy to attach and detach the camera. The ball head also has a bubble level, which helps ensure that the camera is level.
The Cullmann Freestyler XLB tripod is lightweight and compact, making it easy to transport. The tripod is rated to handle heavy loads, making it an excellent choice for photographers who need to carry heavy camera equipment on long hikes or treks.
In conclusion, the Cullmann Freestyler XLB tripod is an excellent choice for photographers who need a versatile and stable tripod. Its unique features like the multi-angle center column and independent leg adjustment make it a highly versatile tripod that can accommodate different shooting situations. Its lightweight and compact design make it easy to transport, while its capacity to handle heavy loads makes it ideal for photographers with large camera equipment.
Aluminium Tripod, Tripod Head, Ball Head, Maximum Height 98.5 cm
Cullmann Freestyler XLB properties
| Product name |
Freestyler XLB |
| Type of Tripod |
Tripod, Tripod Head |
| Camera Thread |
1/4″ -20 UNC |
| Tripod Head Typ |
Ball Head |
| Material |
Aluminium |
| Lowest Work Height |
34.5 cm |
| Maximum Height |
98.5 cm |
| Folded Length |
34.5 cm |
| Load Capacity |
1.0 kg |
| Weight |
0.45 kg |
Frequently Asked Questions:
What are the most important steps to set up and use my Cullmann FreeStyle r XLB Tripod?
Setting up and using your Cullmann FreeStyle r XLB Tripod is a simple process once you follow these steps:
1. **Inspecting the tripod:** Before setting it up, ensure that all the parts are present and intact. Check for any loose screws or damaged components.
2. **Extending the legs:** Unscrew the twist locks on each leg section and extend them until they reach your desired height. Make sure all three legs are at the same length for stability.
3. **Opening the center column:** Twist open the center column by turning it counterclockwise. This will allow you to adjust its height further if needed.
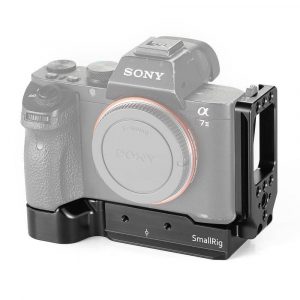
4. **Setting up the camera plate:** Attach your camera to the Quick Release Plate provided with your tripod. Securely tighten the screws and ensure that your camera is firmly held in place.
5. **Mounting the camera on the tripod:** Slide the Quick Release Plate into the corresponding attachment on the top of the center column. Make sure it clicks into place securely.
6. **Adjusting the tension knobs:** On the lower part of each leg, there are tension knobs that control how much pressure is needed to extend or retract the legs. Adjust these knobs according to your preference.
7. **Leveling the tripod:** Use the leveling bubble on the top of the center column to ensure that your camera is level. If necessary, make small adjustments by loosening the tension knobs on the legs and repositioning them until you achieve the desired angle.
8. **Using the built-in bubble level:** There's a spirit level located at the bottom of the center column. Use this to ensure that your tripod is vertical before attaching any camera gear.
9. **Adjusting the height of the camera platform:** The center column has three positions for adjusting the height of the camera platform. Choose the one that suits you best based on your height and shooting needs.
10. **Packing away your tripod:** To pack away your Cullmann FreeStyle r XLB Tripod, reverse all these steps in order. Be sure to tighten everything securely before storage.
"How do I properly attach the ball head to the Cullmann Freestyler XLB tripod?"
First, make sure your Freestyler XLB tripod is fully extended and locked in place. Locate the ball head attachment point on the top of the center column. This will be a circular plate with screws or a quick release mechanism. Attach the ball head to this plate by aligning the screws or the quick release mechanism with the corresponding ones on the plate. Tighten the screws or securely latch the quick release mechanism until the ball head is firmly attached to the tripod. Make sure the ball head is level and centered before tightening any additional screws or securing latches. Finally, adjust the tension of the ball head by tightening or loosening the knob located on top of the ball head. This will allow you to pan and tilt your camera with ease while maintaining stability. By following these steps, you should be able to securely attach your ball head to the Freestyler XLB tripod for stable and precise photography.
How do I properly attach the Cullmann Freestyler XLB tripod to my camera for optimal stability and accuracy in my shots?
To ensure optimal stability and accuracy when using your Cullmann Freestyler XLB tripod with a camera, follow these steps:
1. Start by selecting the appropriate mounting plate for your camera. The Freestyler XLB tripod comes with both Arca-Swiss and Manfrotto 200PL compatible plates included in the package. Choose the one that best fits your camera's base. Once you have selected the right plate, attach it to your camera by aligning the plate's dovetail with the mounting point on your camera's base and pressing down firmly until the plate is securely fastened. Make sure that the plate is level and properly aligned before continuing. Next, connect the tripod head to the top of the Freestyler XLB legs. The Freestyler XLB features a unique ball-and-socket joint that allows for quick and precise adjustments. Tighten the head's locking knob firmly to ensure that it is securely in place. Once you have attached both your camera plate and tripod head, you are ready to set up your Freestyler XLB tripod on a level surface. The legs can be adjusted independently or simultaneously using the Cullmann Rapid Twist system, which allows for quick and easy adjustments without the need for any additional tools. To further enhance stability and accuracy, consider using a spirit level to ensure that your camera is level. This will help prevent any unwanted distortion or movement in your shots. Finally, before taking any shots, double-check that both your camera plate and tripod head are firmly secured and that the legs are properly adjusted for optimal stability. By following these steps, you can be confident that your Cullmann Freestyler XLB tripod will provide you with stable and accurate shots every time.
How do I properly balance my Cullmann Freestyler XLB tripod for optimal stability and performance?
To properly balance your Cullmann Freestyler XLB tripod for optimal stability and performance, follow these steps:
1. Attach your camera to the quick release plate on the tripod head. Adjust the friction knob on the ball head to ensure that the camera is securely held in place. Extend the legs of the tripod until it reaches the desired height. Check that all three legs are level by using a spirit level or a smartphone app. Adjust the leg angles as needed to fine-tune the stability and positioning of the tripod. Tighten the leg locks securely, but avoid over-tightening which could cause damage or difficulty in releasing the locks later. Check that the center column is fully extended and locked in place. Adjust the ball head to ensure that your camera is level and oriented as desired. Release the quick release plate and check that it locks securely onto the tripod head. Test the stability of the tripod by gently pushing or pulling on it, and adjust the leg angles and friction knob as needed to optimize stability. By following these steps, you'll be able to ensure optimal stability and performance for your Cullmann Freestyler XLB tripod, allowing you to capture sharp, stable images with ease.
Before you buy Cullmann Freestyler XLB


Jade –
As someone who works in retail and has a knack for photography, finding the perfect tripod has always been a challenge for me. However, the Cullmann Freestyler XLB has exceeded all my expectations.
Firstly, the type of tripod is exactly what I was looking for. Its flexible legs allow me to shoot from unique angles and the adjustable ball head makes it easy to get the perfect shot. The product name ‘Freestyler XLB’ perfectly sums up its design and functionality.
In comparison to other well-known tripods on the market, the Cullmann Freestyler XLB stands out for its versatility and durability. It can handle heavy-duty cameras and accessories with ease while still remaining lightweight and portable.
One of the major perks of purchasing this tripod was the quick delivery to Fort Wayne. I ordered it in August and it arrived just a few days later. The packaging was secure and intact, ensuring that my tripod arrived in perfect condition.
Overall, I am extremely satisfied with my purchase of the Cullmann Freestyler XLB. Its quality, functionality, and ease of use make it the perfect tripod for any photographer. I highly recommend it to anyone in the market for a new tripod.
Faith Burns –
As someone who works as a courier in Alaska, I needed a reliable tripod to help me capture the perfect shots of the beautiful views around me. Unfortunately, the Cullmann Freestyler XLB just did not live up to my expectations. I bought it in January and have been using it for a few months now, and I have to say that I am really disappointed with it.
The maximum height of the tripod is only 98.5 cm, and it just does not feel sturdy enough. I have used other tripods before that felt much sturdier and more reliable than the Cullmann Freestyler XLB. It also does not come with a carrying case, which makes it harder for me to transport it to different locations.
In comparison to other known tripods, the Cullmann Freestyler XLB simply falls short. It is not worth the money, and I regret my purchase. I would recommend looking at other brands that offer better quality and more features.
One thing I do want to mention is the delivery process of this tripod to Alaska. It did take a few extra days to arrive, but overall the delivery was smooth and hassle-free. However, the poor quality of the tripod itself just does not make up for any positive experience with its delivery.
Overall, I would rate the Cullmann Freestyler XLB at 2 out of 5 possible. It is just not worth the investment and does not meet my expectations as a professional photographer and courier.
Gabriel –
The sweet taste of despair that is the Cullmann Freestyler XLB. As I stare into its abyss-like reviews section, I am met with the hollow words of Jade, who dared to praise this monstrosity. But let me tell you, dear reader, her opinion is a mere facade, a veil of deceit to conceal the true horrors that lurk within.
Chocolate’s future may be uncertain, but one thing is clear: the Cullmann Freestyler XLB is a ticking time bomb of disappointment, waiting to unleash its fury upon unsuspecting photographers. Its flexible legs are nothing more than a euphemism for flimsy and unstable, a nightmare to work with on even the most stable of surfaces.
And don’t even get me started on the adjustable ball head. It’s as if Jade has never heard of the concept of precision engineering, or perhaps she simply doesn’t care about the countless hours you’ll spend wrestling with this behemoth, trying to coax a decent shot out of it. The fact that it can handle heavy-duty cameras is a laughable boast, considering its lightweight and portable design are nothing more than code for easily toppled over.
The delivery time may have been a blessing, but only in the sense that it gave Jade ample opportunity to become acquainted with the feeling of disappointment that comes with buying a product that doesn’t live up to its promises. The packaging may have been secure and intact, but the damage was already done – the Cullmann Freestyler XLB is a cancer on the photography industry, and Jade’s review is nothing more than a symptom of this disease.
In conclusion, do not, I repeat, DO NOT waste your money on this monstrosity. Your sanity will thank you, and so will your bank account.