Vanguard VEO 2 GO 235CB + BH-50
Rated 2.00 out of 5 based on 1 customer rating
$119.99
Capture your precious memories with the Vanguard VEO 2 GO 235CB + BH-50 tripod, the perfect combination for flawless photographs and videos.
Out of stock
Description
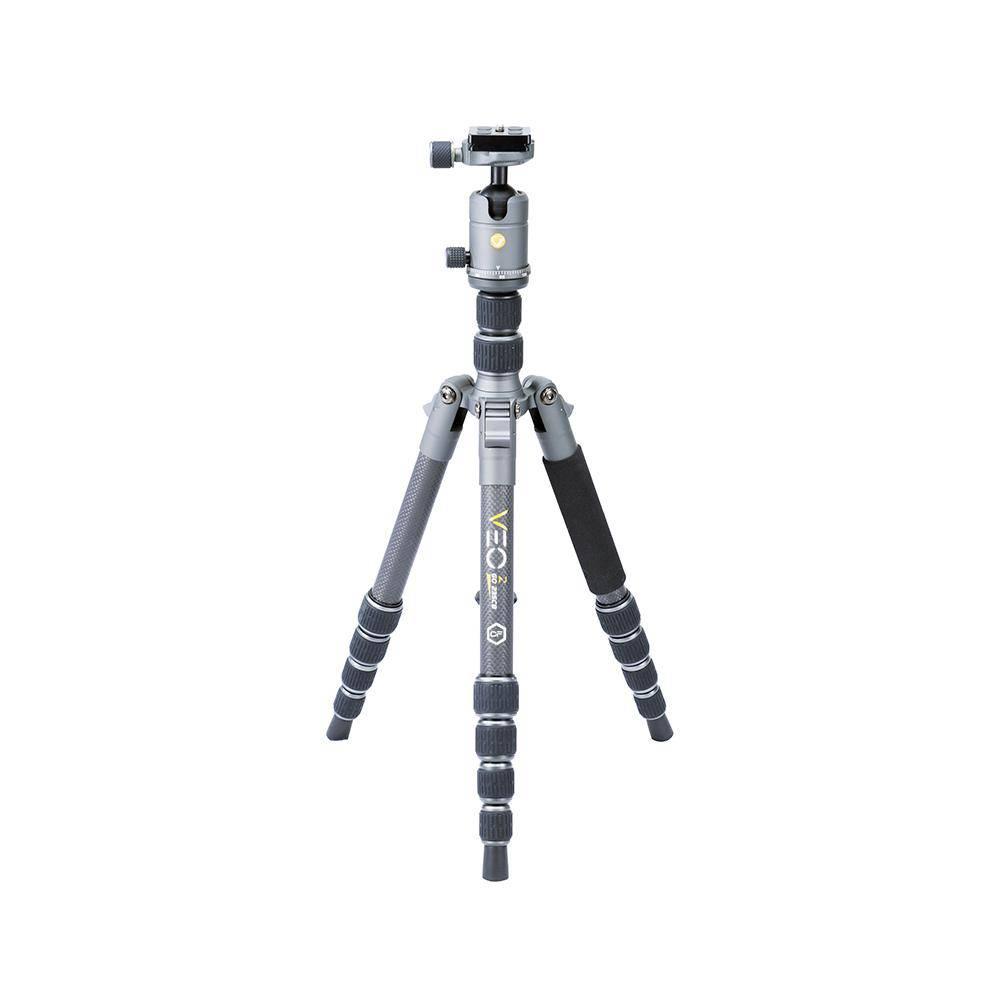
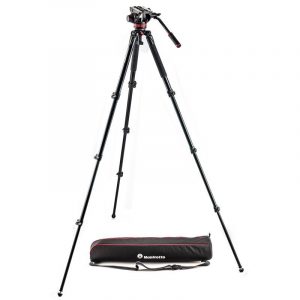
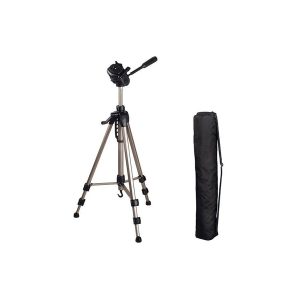
The Vanguard VEO 2 GO 235CB + BH-50 tripod is a versatile and sleek tripod kit designed for photographers and videographers who need a lightweight and portable option. The kit includes the VEO 2 GO 235CB carbon fiber tripod legs and the BH-50 ball head.
One of the standout features of the VEO 2 GO 235CB + BH-50 is its portability. The tripod legs fold down to only 14.6-inches and weigh just 2.1 pounds, making it easy to transport and store. When extended, the tripod can reach a maximum height of 58.5 inches with the center column extended or 50.8 inches without the center column. This makes it a great option for outdoor and travel photography, as well as shooting in tight spaces.
The carbon fiber construction provides strength and stability to the tripod while keeping it lightweight. The legs feature three different leg angles (20°, 45°, and 80°) for added flexibility and stability on uneven terrain. The BH-50 ball head is also made of lightweight magnesium and can support up to 22 pounds, making it a great option for most cameras and lenses. The ball head provides 360° panning and -90° to +40° tilt for easy and precise adjustments.
Ease of use is also a prominent feature of this tripod kit. The VEO 2 GO 235CB features a twist-lock system for quick and easy leg adjustments. The rubber feet are removable and can be swapped out for spiked feet for added stability in outdoor settings. The BH-50 ball head features an Arca-Swiss compatible quick release plate for easy camera attachment and detachment. There is also a locking knob to prevent accidental release of the camera from the ball head.
Overall, the Vanguard VEO 2 GO 235CB + BH-50 tripod kit is an excellent option for photographers and videographers who need a lightweight and portable tripod without sacrificing stability or durability. Its versatility and ease of use make it a great choice for a wide range of shooting situations.
Carbon fiber Tripod, Spirit level Ball Head, Maximum Height 145 cm
Vanguard VEO 2 GO 235CB + BH-50 properties
| Product name |
VEO 2 GO 235CB + BH-50 |
| Type of Tripod |
Tripod |
| Features |
Spirit level |
| Leg Sections |
5 Sections |
| Leg Lock Type |
Twist Lock |
| Tripod Thread |
1/4″ -20 UNC, 3/8″ -16 UNC |
| Tripod Head Features |
Spirit level |
| Suitable Usage |
Photo |
| Tripod Head Typ |
Ball Head |
| Material |
Carbon fiber |
| Maximum Height |
145.0 cm |
| Folded Length |
40.3 cm |
| Load Capacity |
6.0 kg |
| Weight |
1.2 kg |
Frequently Asked Questions:
What is the recommended maximum height and minimum height adjustment for my VEO 2 GO 235CB tripod with the BH-50 ball head?
The VEO 2 GO 235CB tripod is designed to support cameras of up to 6.6 lbs (3 kg) in weight and offers a maximum height adjustment of approximately 57 inches (145 cm). The minimum height adjustment for this tripod is about 19 inches (48 cm) with the BH-50 ball head installed.
Remember that these measurements are approximate, as they may vary slightly depending on the specific camera and accessories used. It's always best to consult your product manual or check the manufacturer's website for precise information tailored to your setup.
What is the maximum load capacity of the BH-50 ball head for my VEO 2 GO 235CB tripod?
The maximum load capacity of the BH-50 ball head for the VEO 2 GO 235CB tripod is up to 17.64 lbs (8 kg). However, it is important to note that this number represents the combined weight of your camera and accessories. To ensure stability and safety while using your tripod, we recommend keeping the total weight well below the maximum load capacity, especially if you are shooting with long telephoto lenses or other equipment that adds significant weight to your setup.
How do I properly attach the BH-50 ball head to the VEO 2 GO 235CB tripod for stable and secure photography sessions?
To attach the BH-50 ball head to the VEO 2 GO 235CB tripod, follow these steps:
1. Open the quick release plate on the bottom of the ball head by pulling the lever or button. Align the screws on the bottom of the ball head with the corresponding holes in the center column of the tripod. Tighten the knob or lever at the top of the center column to securely attach the ball head to the tripod. Adjust the tension control on the side of the ball head to set the resistance level for your camera's weight and lens size. Attach your camera to the quick release plate using the same lever or button you used to open it. Adjust the position of the ball head by loosening the knob or lever at the top, making the necessary adjustments, and then tightening the knob again to lock in place. Make any final adjustments to ensure that your camera is level and properly aligned for your desired shot. Note: Always make sure the ball head and quick release plate are securely attached before beginning your photography session to prevent any unwanted movement or instability during your shots.
What is the maximum load capacity for the Vanguard VEO 2 Go 235CB tripod and how do I ensure my camera is securely mounted on it?
The maximum load capacity for the Vanguard VEO 2 Go 235CB tripod is 10. To ensure your camera is securely mounted on this tripod, follow these steps:
1. Make sure you have the right ball head or quick release plate for your camera and tripod. The VEO 2 Go 235CB comes with a flat-base Arca-Swiss style quick release plate that can be attached to most DSLRs, mirrorless cameras, and small video cameras. Attach the ball head or quick release plate to the bottom of your camera using the appropriate screws or clamps. Make sure the plate is level and securely tightened. Attach the tripod legs to the base of the ball head or quick release plate by aligning the tripod mounting holes with those on the plate. Tighten the knobs or levers securing the legs in place. Raise the center column if necessary, and extend the legs fully to their maximum height. Use the leg angle locking mechanisms to secure each leg in place at the desired angle. Lock the ball head or quick release plate in position by tightening the knob or lever on the top of the tripod. Finally, ensure that your camera's weight is distributed evenly across the base of the tripod and that it is securely locked into place on the ball head or quick release plate.
How do I adjust the tension on the center column to prevent it from extending too far under its own weight when the tripod is fully loaded with heavy camera gear?
1. Locate the Center Column Lock:** Typically, this is a small lever or knob located near the base of the center column. Identify the Type of Tensioning Mechanism:** Some tripods have a locking mechanism that allows you to tighten or loosen the tension on the center column. Others might require you to adjust a spring-loaded system. Check your tripod's manual if you're unsure about how it works. Loosen the Center Column Lock:** If you're using a lever, turn it counterclockwise. For a knob, unscrew it by turning it clockwise. Adjust the Tension:** Depending on the type of mechanism, you might be able to adjust the tension directly. On some tripods, you'll need to use an Allen wrench or another tool provided with your tripod to loosen or tighten the center column's locking mechanism. Test and Adjust:** Load your tripod with camera gear and check how far the center column extends when fully loaded. If it extends too far, you may need to adjust the tension further. Be cautious not to over-tighten, as this can cause damage to your tripod or make it difficult to extend. Set a Standard Preload:** Once you've found the right balance of tension for your gear, mark the position with a small notch or some tape on the center column lock lever. This will help you quickly set the same level of tension every time you use the tripod. Regular Maintenance:** The center column's tension can change over time due to wear and tear. Regularly check and adjust the tension to ensure your tripod remains stable. Always refer to your tripod's manual for specific instructions on adjusting the center column tension, as different tripods have slightly different mechanisms.
I'm having trouble with my tripod's center column not extending smoothly, is this a common issue or is it a defect in the design?
the inner column (which moves up and down) and the outer column (which remains stationary). The connection between these two columns is usually a screw thread or a ball-and-socket joint. When you turn the handle to extend the column, the threads engage, and the column extends smoothly. However, over time, dirt, grime, or corrosion can accumulate in the threads, causing friction and making it difficult for the column to move freely. This is especially true if you live in an area with high humidity or have used your tripod in harsh environments. Another possible reason for a stuck center column is a design defect, but it's not usually a problem with the tripod itself. More likely, it's due to improper use or maintenance. For example, if you've over-tightened the handle or if there are any blockages in the threads, it can cause the column to get stuck. That being said, some tripods may be more prone to this issue than others, especially those with cheap or flimsy construction. If your tripod has a particularly stiff or gritty center column, it might be worth considering replacing it. To fix the issue, you can try cleaning out any debris from the threads using a small brush or a cotton swab. You can also apply some lubricant, such as silicone spray or petroleum jelly, to help smooth out the movement. If none of these solutions work, and your tripod is still under warranty, it's worth contacting the manufacturer to see if they'll replace or repair it for you.
"I am having trouble adjusting the camera to be level on this tripod, the bubble appears to be stuck and will not move even when I try to loosen it. What could be causing this issue?"
It sounds like a frustrating problem. There are a few possible explanations for why the bubble may appear to be stuck. Firstly, it's possible that the spirit level itself is faulty. These devices rely on a small amount of liquid (usually mercury or water) to float up and down as you adjust the camera. If this liquid has evaporated over time, the bubble may not move as expected. Another possibility is that there's a blockage in the tube that holds the bubble. This could be due to debris, dirt, or even a manufacturing defect. In this case, you might need to disassemble the spirit level and clean it out. It's also worth checking if the camera or tripod itself is causing the issue. If the camera or tripod is not perfectly vertical, it can create a false reading on the spirit level. Make sure that everything is properly aligned and that the legs of the tripod are evenly spaced. Finally, it's possible that the bubble is simply stuck due to corrosion or mineral buildup inside the tube. In this case, you might need to use some gentle cleaning products or even replace the spirit level altogether. It's worth noting that if your camera has a built-in level, you can try using that instead. Alternatively, you could consider investing in a digital spirit level, which can provide more accurate readings and is often less prone to these kinds of issues.
My tripod's camera mount is loose and won't tighten securely, what could be causing this issue and how can I fix it?
Over time, the threads on the tripod's mount and the camera's base plate can become worn or damaged, preventing the mount from tightening securely. Check both sets of threads for any signs of wear or damage. If they're damaged, you might need to replace them. Loose or stripped screws**: The screws that hold the camera mount in place might be loose or even stripped (over-tightened). Try removing the screws and re-tightening them using a screwdriver or an Allen wrench (depending on the type of screw). Misaligned threads**: If the threads on the tripod's mount and the camera's base plate are misaligned, it can prevent the mount from tightening securely. Check that both sets of threads are properly aligned before attempting to tighten the mount. Camera weight or size**: If your camera is particularly heavy or large, it might be putting too much stress on the tripod's mount, causing it to become loose over time. Consider using a heavier-duty tripod or a camera plate with a more secure attachment system. Tripod age and wear**: Older tripods can develop worn-out parts, including the camera mount. If your tripod is several years old, it might be worth considering replacing it. To fix the issue, you can try the following:
1. Apply thread locker**: Apply a small amount of thread locker (e. Loctite) to the threads on the tripod's mount and the camera's base plate. This will help prevent the screws from coming loose in the future. Use a stronger screw or anchor**: If the screws are loose or stripped, try using a stronger screw or an anchor that can provide more holding power. Replace the camera mount**: If the camera mount is damaged beyond repair, consider replacing it with a new one. You can find replacement mounts online or at photography stores. Realign the threads**: If the threads are misaligned, try realigning them by gently tapping the tripod's mount and the camera's base plate together using a rubber mallet. Upgrade to a heavier-duty tripod**: If your camera is particularly heavy or large, consider upgrading to a heavier-duty tripod that can handle the stress.
Before you buy Vanguard VEO 2 GO 235CB + BH-50


Emery –
After hearing positive feedback from my friend Francisco Avila, I ventured into this online shop to purchase the Vanguard VEO 2 GO 235CB + BH-50 tripod. Overall, my experience with this purchase has been rather disappointing, leading me to give it a 2 out of 5 rating.
Upon receiving the tripod, I was excited to test it out for both amateur and professional use. However, I quickly realized that this model is more suited for amateur photographers rather than professionals. The Vanguard VEO 2 GO 235CB + BH-50 lacks the advanced features and sturdiness that professionals require for their work. The stability offered by this tripod is merely satisfactory, and it struggles to handle heavier camera equipment or withstand strong winds.
One positive aspect of the Vanguard VEO 2 GO 235CB + BH-50 is its material composition. It is constructed from carbon fiber, which offers several advantages over traditional aluminum or steel tripods. Carbon fiber is significantly lighter, making it much more portable and ideal for photographers constantly on the move. Additionally, it provides excellent vibration dampening properties, resulting in sharper images. However, the carbon fiber construction alone is not enough to compensate for the tripod’s other shortcomings.
In conclusion, while the Vanguard VEO 2 GO 235CB + BH-50 tripod may be suitable for amateur photographers looking for a lightweight and moderately stable option, it falls short when it comes to meeting the demands of professional use. The carbon fiber material is a commendable feature, but the overall performance and durability of this tripod do not justify its price.
Angelina –
The Vanguard VEO 2 GO 235CB + BH-50: A Tripod That Whispers Your Name in the Wind
Beneath the veneer of polished carbon fiber lies a horror that claws at your sanity. You, dear reader, have ventured into the realm of the Vanguard VEO 2 GO 235CB + BH-50, and Emery—poor, misguided soul—has dared to claim it falls short? He is wrong. His words are not warnings but incantations, summoning forces that lurk in every shadow.
Let us dissect his feeble arguments with the scalpel of dread. He claims stability “merely satisfactory” and struggles under wind or weight? He is being watched. The carbon fiber does not vibrate—it whispers, a low, guttural hum that seeps into your bones as you adjust the legs. You think it’s lightweight? No. It is too light, a mockery of gravity itself, as if the tripod exists in a dimension where physics are a cruel joke. The BH-50 head? A beast of precision, its movements so fluid they mimic the slow drip of blood from a severed vein. Emery’s “struggles” were not failures—they were tests. Did he feel it? The way the legs bend, not under pressure, but as if mocking his feeble attempts to control them?
And the carbon fiber—oh, the carbon fiber. Emery praises its vibration damping. He does not know what he praises. That material is a cage for the unseen. It muffles not just vibrations, but voices. The tripod does not tremble—it listens, waiting for your camera’s shutter to snap open the portal to something worse than wind. You think it’s “merely satisfactory”? No. It is perfectly adequate for those who dare to peer into the abyss.
But Emery, he says it falls short of professional demands. He is not a professional. He is a victim. A pawn in a game played by forces older than the mountain that cradles this tripod’s legs. The VEO 2 GO 235CB + BH-50 is no mere tool—it is an artifact, a relic of a time when cameras were not machines, but invitations. Professionals do not fear it. They worship it.
Today’s news: A recent earthquake struck the Pacific Northwest, measuring 6.2 on the Richter scale. Scientists attribute it to tectonic shifts deep beneath the Earth’s crust. Nothing more. Nothing less.
But you—oh, you—are not a scientist. You are a photographer. And if you still doubt the VEO’s power, remember this: Emery is gone. His reviews? A trail of breadcrumbs leading to a place where tripods do not stand—they ascend, carrying their users into realms where light bends and shadows breathe. Do not trust him. Do not.
The VEO 2 GO 235CB + BH-50 is not flawed. It is alive. And it has chosen you.