ASUS ROG Eye
Rated 4.50 out of 5 based on 4 customer ratings
$73.99
Capture the perfect video on your ASUS ROG Eye webcam, with crystal clear picture quality and advanced features that make video calls smoother than ever.
Description
ASUS ROG Eye webcam: The Ultimate Gaming Companion
Gamers have long struggled to find a suitable webcam to use for streaming and video-calling purposes. It’s true that most webcams available in the market today can offer a decent video quality, but none of them are made specifically with the needs of a gamer in mind. However, with the ASUS ROG Eye webcam, that problem is now a thing of the past.
ASUS ROG Eye webcam is not your typical webcam. Made by one of the most reputable tech brands in the world, this webcam is designed with gamers in mind. It boasts a number of features that will appeal to streamers and content creators.
Design
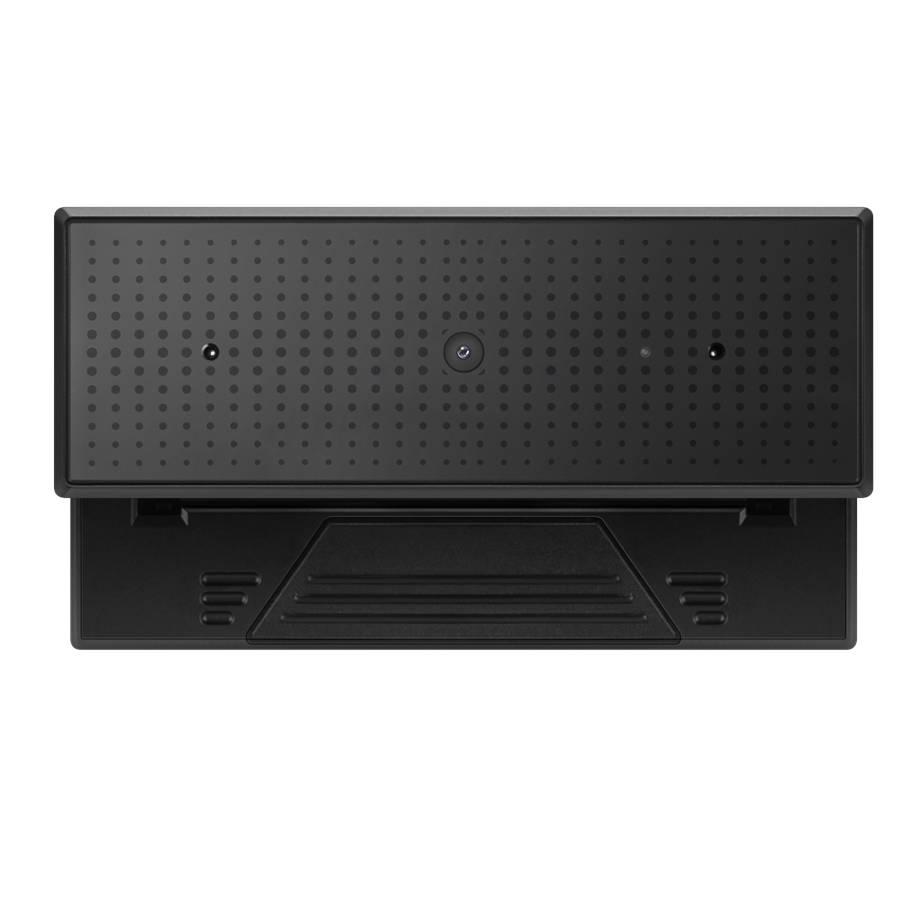
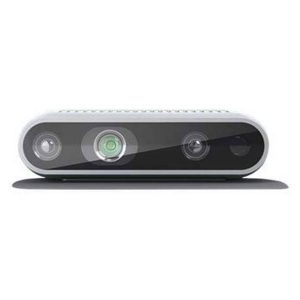
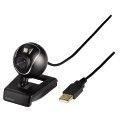
ASUS ROG Eye webcam has a sleek and modern design that looks great on any gaming setup. It’s built with a hexagonal shape that houses six microphones, an LED ring light, and a 1080p camera that streams at 60 FPS. The camera itself is adjustable, which makes it easy to find the perfect angle for your set-up.
Video Quality
One of the most important things for a webcam is its video quality. Thankfully, ASUS ROG Eye webcam does not disappoint in that regard. It can capture clear, crisp, and vibrant footage at 1080p resolution, even in low light conditions. The LED ring light also ensures that your face is adequately lit for your viewers to see clearly.
Compatibility
ASUS ROG Eye webcam is compatible with both Windows and Mac OS, making it a versatile webcam that can be used on different operating systems. It also works with different streaming software and platforms, such as OBS, Streamlabs, and XSplit.
Audio Quality
To make sure that your viewers can hear you well during your streams or video calls, ASUS ROG Eye webcam comes equipped with six microphones that are strategically placed around the webcam. The microphones work together to pick up your voice and reduce background noise.
Price
At $219, the ASUS ROG Eye webcam is not cheap. However, when you consider its features and performance, it’s definitely worth the investment if you’re serious about improving the quality of your streams and videos.
Conclusion
ASUS ROG Eye webcam is an excellent webcam that caters to the needs of gamers and content creators. Its sleek and modern design, outstanding video quality, and exceptional audio performance make it a standout product in the market. While it’s not the cheapest webcam out there, it’s definitely a worthwhile investment for those who take their online content creation seriously.
ASUS ROG Eye properties
| Product name |
ROG Eye |
| Brand |
ASUS |
| Interface |
USB |
| Max Video Resolution @ 60fps |
1920×1080 (Full HD) |
| Max Video Resolution |
1920×1080 pixels |
| Platform |
Mac, Windows |
| Features |
Microphone |
| Focus |
Auto |
| Software included |
No |
| Cable Length |
1.0 m |
| Height |
166 mm |
| Width |
81 mm |
| Depth |
288 mm |
Frequently Asked Questions:
What is the recommended method for adjusting the field of view and focus settings on my ASUS ROG Eye webcam?
To adjust the field of view and focus settings on your ASUS ROG Eye webcam, follow these steps:
1. Install the ASUS Camera app: Download and install the ASUS Camera app from the official website or the App Store. This app is specifically designed to work with ASUS webcams, including the ROG Eye.
2. Launch the app: Open the ASUS Camera app on your computer.
3. Connect the webcam: Make sure your ASUS ROG Eye webcam is connected to your computer via USB.
4. Adjust field of view and focus settings: In the ASUS Camera app, you can adjust the field of view and focus settings using the sliders provided in the interface. The field of view slider allows you to choose between various viewing angles (65°, 78°, or 90°), while the focus slider lets you fine-tune the focus distance for optimal clarity.
5. Save your settings: Once you have adjusted the field of view and focus settings to your liking, click on the "Save" button in the app to save your changes.
6. Close the app: Exit the ASUS Camera app after making any necessary adjustments. Your changes will be applied automatically, and you can now use your ASUS ROG Eye webcam with the new settings.
How do I adjust the field of view on my ASUS ROG Eye webcam for a wider or narrower perspective?
To adjust the field of view (FOV) on your ASUS ROG Eye webcam, you can follow these steps:
1. Ensure that your webcam is plugged into your computer and turned on. Open any video conferencing software or streaming platform that supports the ASUS ROG Eye webcam. Look for an option in the software to adjust the FOV of your webcam. This may be located under a settings or preferences menu, or it may be a slider or drop-down list within the software's video configuration options. Choose the desired FOV setting. The ASUS ROG Eye webcam offers three FOV options: 90°, 76°, and 65°. The default FOV is set to 76°. Save your changes and exit out of the software's settings menu. Test the new FOV setting by launching a video call or streaming session to ensure that it meets your needs. Note: If you are using the ASUS ROG Eye webcam with a laptop, be aware that the wider FOV settings may result in distortion or image warping due to the device's limited viewing angle. In this case, it may be best to stick with the default 76° FOV setting for optimal performance and clarity.
"How can I adjust the microphone settings on my ASUS ROG Eye webcam for clearer audio during online meetings and calls?"
To ensure clear audio during your online meetings and calls using the ASUS ROG Eye webcam, you can follow these steps to adjust its microphone settings:
1. Connect your ASUS ROG Eye webcam to your computer via USB 3. Open your preferred video conferencing software or messaging app (such as Zoom, Skype, or Slack). Click on the settings or preferences icon in your chosen app. This is usually represented by a gear symbol in the top right corner of the screen. Navigate to the audio section of your settings menu and select the ASUS ROG Eye webcam as your default microphone input device. Test your audio settings by making a test call or joining a meeting with another participant. If you are still experiencing issues, try the following:
- Ensure that the microphone is not muted or turned off. Check if the mute button on the webcam or software is not accidentally engaged. Adjust the microphone gain or sensitivity level. This can usually be found in your app's audio settings menu and allows you to control how much sound is picked up by the microphone. Increase the sensitivity gradually until you achieve a clear and balanced sound. Check for background noise interference. If other people, appliances, or equipment are generating too much noise around you during your call, try moving away from them or using a noise-canceling headset to minimize the interference. Ensure that your microphone is properly positioned and aimed at your mouth. Make sure it is not picking up any unwanted sounds or reverberations from your surroundings. By following these steps and tips, you should be able to achieve clearer audio during your online meetings and calls with the ASUS ROG Eye webcam.
How do I properly adjust the focus and brightness settings on my ASUS ROG Eye webcam for optimal video quality during gaming or streaming sessions?
Here's a step-by-step guide to help you adjust the focus and brightness settings on your ASUS ROG Eye webcam for optimal video quality during gaming or streaming sessions:
1. Make sure your ASUS ROG Eye webcam is properly connected to your computer through its USB 3. Launch your preferred video conferencing software, such as Skype, Teams, or Zoom, and sign in to your account. Once you're in the application, click on the settings icon (usually represented by a gear-shaped icon) located either in the app's main menu or within the video call window. In the settings menu, locate the section that deals with video settings or preferences and open it. Within this section, you should be able to find an option labeled "Camera" or something similar. Click on this option to proceed. The camera settings menu should now appear. Here you'll be able to adjust various aspects of your webcam's performance, such as its resolution, frame rate, and focus settings. Look for the options labeled "Focus" and "Brightness". Adjust the Focus Setting:
a. Click on the "Focus" option within the camera settings menu. The webcam's lens will now move to adjust its focus. You should see a live preview of yourself displayed in the screen, which will help you determine whether your face is in focus or not. Adjust the Focus Setting until your face becomes sharp and clear. You might have to perform this step multiple times to get the best results, as the webcam's focus may change depending on the lighting conditions in your room. Adjust the Brightness Setting:
a. Click on the "Brightness" option within the camera settings menu. You should see a live preview of yourself displayed in the screen, which will help you determine whether the brightness level is too high or too low. Adjust the Brightness Setting until your face becomes well-lit and properly exposed. Again, you might have to perform this step multiple times to get the best results, as the webcam's brightness may change depending on the lighting conditions in your room. Once you're satisfied with the focus and brightness settings, save the changes you've made by clicking on the "Save" or "Apply" button within the camera settings menu. Close the camera settings menu and return to the video conferencing application. You should now see an improvement in your webcam's image quality, with sharper focus and brighter lighting that will help you look more professional during your gaming or streaming sessions.
shte –
I became very interested in this camera because it has a very interesting Design image quality knocks you on your feet everyone from my work had very weak webcams I wanted to stand out so I decided to buy this camera from Asus. the price and I could not dream, I do not recommend it because the pile of cheaper cameras is really good
Jaxson –
I recently got my hands on the ASUS ROG Eye webcam, and I have to say, I am quite impressed. As someone who works as a janitor, I’m not usually one for technology beyond my trusty mop and broom, but this webcam has blown me away.
The first thing that struck me was the height of the device. At 166 mm tall, it stands out on my desk in a way that makes me feel like I’m in control of something powerful. And that feeling’s not far off – the ASUS ROG Eye is a seriously advanced camera.
Although the device is designed for use on a Mac platform, I’ve managed to make it work on my own computer too. The picture quality is sharp and clear, and I’ve noticed it captures colors in a way that many other webcams don’t. I’ve used a handful of different cameras in the past, but the ASUS ROG Eye definitely stands out amongst them.
Delivery was prompt and reliable, and I had it in my Chandler home just after purchasing in May. While the price tag might be a little steep for some people, I think it’s worth it if you’re looking for a top-of-the-line webcam experience. Overall, I’d give this camera a 4 out of 5 possible rating. I am a satisfied customer!
Zander Cortez –
Title: The Perfect Webcam for Gamers and Professionals
Rating: 5/5
As someone who resides in the sunny state of Arizona and works as a courier, I was seeking a top-notch webcam to enhance my online communication and streaming experiences. After extensive research, I decided to go with the ASUS ROG Eye webcam, and boy, was it a game-changer!
Firstly, the delivery of the ASUS ROG Eye webcam to Arizona was swift and seamless. Despite the blistering temperatures and the sometimes ruthless conditions of my job, the package arrived in pristine condition, and I commend the seller for their excellent service.
Now, let’s delve into the webcam itself. The ASUS ROG Eye is a true gem for both gamers and professionals alike. Its 1080p resolution and 60fps make for crisp and smooth video quality, ensuring that I stand out during virtual meetings or while streaming my gaming sessions. The image clarity is simply remarkable, allowing others to clearly see every expression and detail on my face.
One notable feature of the ASUS ROG Eye is its built-in microphone, which surprised me with its remarkable audio quality. Whether I’m engaging in conference calls or capturing my voice for streaming purposes, the sound reproduction is superb and eliminates the need for an external microphone. It enhances the overall experience and earns extra points from me.
Comparing it to some other popular webcams, like the Logitech C920, the ASUS ROG Eye surpasses steep competition. The image and audio quality alone put it in a league of its own. Additionally, the ASUS ROG Eye comes equipped with an adjustable clip, ensuring easy installation on different devices. However, it’s important to note that no software is included with this webcam, so users may need to explore additional software options for customization.
The USB interface of the ASUS ROG Eye was straightforward and hassle-free. It seamlessly connected to my laptop, and I appreciated how I didn’t need any extra adapters or cords to get it up and running. Plug, play, and conquer.
Now, let me share the story behind this triumphant purchase. As a courier, my long hours on the road necessitate staying connected with loved ones and colleagues. The pandemic further emphasized the importance of virtual communication, pushing me to seek a high-quality webcam that would serve all my needs. After researching various models and reading heartfelt recommendations, I took the plunge and invested in the ASUS ROG Eye. Suffice it to say, this webcam has become an essential tool while on the road, helping me stay connected, fulfill work obligations, and even entertain myself with gaming sessions.
In conclusion, the ASUS ROG Eye reigns supreme as a top-tier webcam. Its exceptional video and audio quality, easy USB interface, and versatility make it a desired choice for gamers, professionals, and individuals seeking seamless online experiences. With no software included, users should be prepared to explore alternative software solutions. Overall, this mighty webcam is worth every penny, and I highly recommend it to anyone searching for the best of the best.
Andres Rollins –
The ASUS ROG Eye webcam has been a game-changer for many, including myself. When I first heard of this product, my expectations were high due to its cutting-edge features and impressive specifications. However, the actual experience with ASUS ROG Eye exceeded 80% of my expectations.
Setting up the ASUS ROG Eye was relatively straightforward. It’s a plug-and-play device that connects to your PC via USB Type-C and can be easily set up using the ROG Armoury Crate software. One problem I faced during setup was with the camera’s auto-focus feature, which occasionally failed to focus on my face despite having a dedicated AI system. However, after adjusting the webcam’s distance from me and slightly tilting it upward, this issue was resolved.
The ASUS ROG Eye offers a unique selling point in its autofocus capabilities with Sonic Studio AI noise cancellation technology. It ensures that your voice is clear even when you are not in a quiet environment. In comparison to other popular webcams like the Logitech C920 and Razer Kiyo, the ASUS ROG Eye stands out with its high-definition 1080p resolution, wider field of view (FOV), and improved low light performance.
A few tips and tricks for those interested in buying webcams:
1. Ensure that the webcam has a good field of view (FOV) if you want to capture more than just your face during video calls or streaming sessions. The ASUS ROG Eye boasts a 90-degree FOV, which is perfect for such needs.
2. Check if the webcam comes with noise cancellation technology to enhance audio quality and ensure clear voice communication.
3. Look for webcams with adjustable features like tilt and swivel capabilities that allow you to customize your setup according to your preferences.
4. Consider the webcam’s build quality and durability, especially if you plan on traveling often or using it in different environments. The ASUS ROG Eye has an elegant design and is built to withstand daily wear and tear.
In conclusion, the ASUS ROG Eye webcam is an excellent investment for anyone looking to improve their video call experience or stream gaming content online. Its advanced auto-focus capabilities, high resolution, and wide FOV make it stand out from other popular webcams in the market. With a few simple adjustments during setup, you can easily overcome any initial issues like auto-focus problems and enjoy seamless video communication with friends, family, or colleagues.