Creative Live Cam Sync HD
Rated 2.75 out of 5 based on 4 customer ratings
$16.99
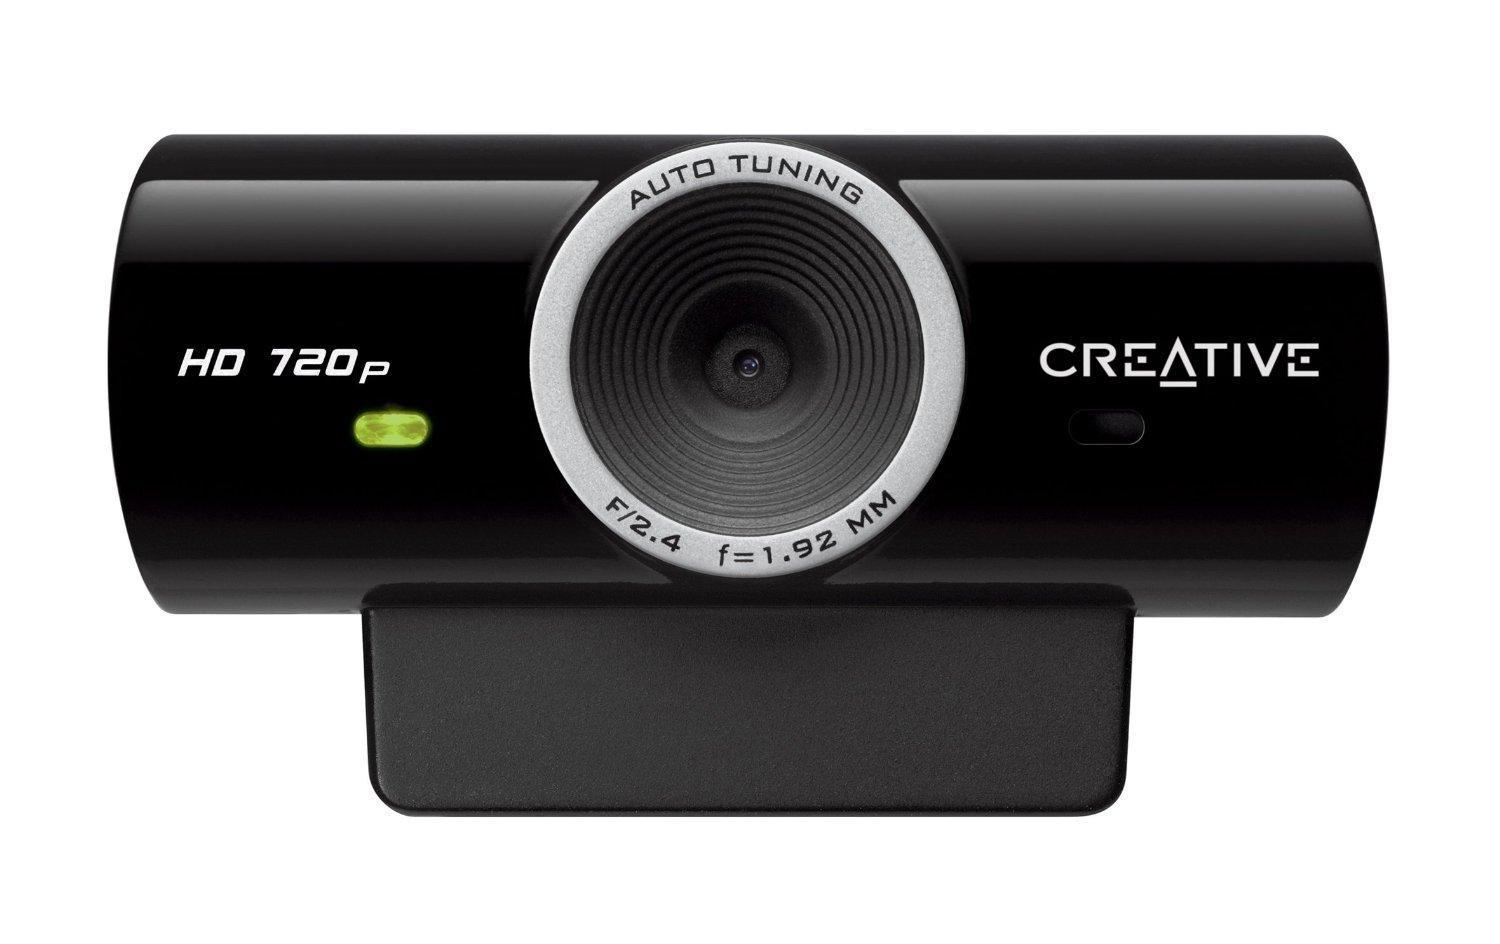
Connect with your friends and family in sharp HD with the Creative Live Cam Sync HD webcam – the perfect way to stay in touch!
Description
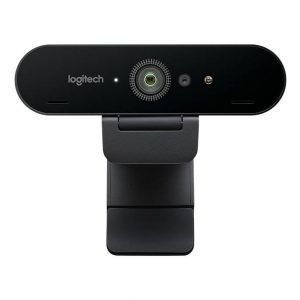
The Creative Live Cam Sync HD webcam is a versatile and high-quality webcam designed for use in both personal and professional settings. With a sleek and compact design, this webcam is perfect for on-the-go use and can be easily clipped onto laptop screens or desktop monitors.
One of the key features of the Creative Live Cam Sync HD webcam is its high-definition video quality. The webcam is able to capture 720p HD video, allowing for crystal-clear video calls and recordings. Whether you’re using the webcam for virtual meetings or video calls with friends and family, the high-definition video quality ensures that you will look your best on-screen.
Another great feature of the Creative Live Cam Sync HD webcam is its built-in noise-canceling microphone. This microphone is able to filter out background noise, ensuring that your voice comes through loud and clear during video calls and recordings. This is especially important for users who frequently work in noisy environments or who live in households with lots of background noise.
The Creative Live Cam Sync HD webcam also comes with a range of additional features and software. For example, the webcam comes with Creative’s Live! Central 3 software, which allows users to record and edit videos with ease. The software also includes a range of fun effects and filters that can be used to add some extra personality to your video calls and recordings.
Overall, the Creative Live Cam Sync HD webcam is a solid choice for anyone looking for a high-quality webcam for personal or professional use. With its HD video quality, noise-canceling microphone, and range of additional features, this webcam is perfect for anyone who wants to look and sound their best during virtual meetings, video calls, or recordings. So if you’re in the market for a new webcam, the Creative Live Cam Sync HD is definitely worth considering!
Creative Live Cam Sync HD properties
| Product name |
Live Cam Sync HD |
| Brand |
Creative |
| Interface |
USB |
| Max Video Resolution @ 30fps |
1280×720 (HD) |
| Max Video Resolution |
1280×720 pixels |
| Platform |
Linux, Mac, Windows |
| Features |
Microphone |
| Max Frame Rate |
30 fps |
| Software included |
Yes |
| Height |
84 mm |
| Width |
144 mm |
| Depth |
61 mm |
Frequently Asked Questions:
How do I properly connect and configure my Creative Live Cam Sync HD on my computer for the first time?
To properly connect and configure your Creative Live Cam Sync HD to your computer for the first time, follow these steps:
1. Power on your camera by pressing the power button located at the top of the device.
2. Connect one end of the USB cable that came with your camera into the USB port on your camera and the other end into an available USB port on your computer. Your computer should automatically recognize the device and install any necessary drivers. If it does not, refer to the "Troubleshooting" section at the end of this guide.
3. Once connected, the Windows operating system will prompt you with a dialog box asking if you want to install the driver software for the camera. Click "Install" to proceed.
4. If your computer does not automatically detect the camera, you can manually install the drivers by visiting the Creative website (https://support.creative.com) and searching for your specific camera model in the support section. Download and run the appropriate driver installation package.
5. After installation, open any video conferencing or recording software that supports USB webcams, such as Skype, Zoom, or OBS Studio. Select "Creative Live Cam Sync HD" or a similar option from the drop-down list of available cameras in your software's settings.
6. Test your camera by making sure it is capturing video and audio correctly within your chosen software. Adjust any necessary settings to optimize performance and image quality.
If you encounter any issues during this process, refer to the "Troubleshooting" section at the end of this guide.
How do I install and set up Creative Live Cam Sync HD on my computer?
To install and set up Creative Live Cam Sync HD, follow the steps below:
1. Download the software from the official Creative website or any other trusted source. Make sure you have a stable internet connection for downloading the file.
2. Locate the downloaded file on your computer, usually in the 'Downloads' folder. Double-click on it to start the installation process. If prompted by your antivirus software, allow the program to run.
3. Follow the on-screen instructions during the installation process. You might be asked to choose a language or agree to the terms and conditions of use. Simply select the appropriate option and click 'Next' to proceed.
4. When prompted to choose the installation folder, make sure you select a location that is easy for you to find later. The default location is usually suitable, but you can change it if needed. Once you have selected the folder, click 'Install' to begin installing the software on your computer.
5. After the installation is complete, you will be prompted to restart your computer. Click 'Finish' to exit the installation program and reboot your system.
6. Once your computer has restarted, launch the Creative Live Cam Sync HD software by searching for it in the Start menu or locating its icon on your desktop.
7. When you open the software, you should see a live preview of your webcam feed. You can now adjust settings such as resolution and brightness according to your preferences.
8. If you plan on using the camera with video conferencing tools like Skype or Zoom, make sure to set it up accordingly within those applications. This usually involves selecting "Creative Live Cam Sync HD" as your default camera input.
Now that the installation and setup process is complete, you can start utilizing Creative Live Cam Sync HD for your video calls and recordings!
"How do I ensure proper camera synchronization with my multiple Creative Live Cam Sync HD devices?"
To ensure proper camera synchronization with multiple Creative Live Cam Sync HD devices, follow these steps:
1. Connect all the cameras to your computer via USB. Launch the Camera Sync software that came with your Cam Sync devices. Select the "Sync" tab at the top of the software window. Ensure that all connected Cam Sync devices are displayed in the Devices list on the left-hand side of the software window. Click the "Synchronize" button located in the middle of the software window to synchronize all cameras simultaneously. To customize synchronization settings, click the "Settings" tab at the top of the software window. Here you can adjust frame rate, exposure, and white balance for each camera individually or globally for all devices. Once you have made any necessary adjustments, click the "Apply" button to save your changes. To preview video footage from your synchronized cameras, click the "Preview" tab at the top of the software window. This will open a separate preview window that displays live feeds from all connected Cam Sync devices. When you are satisfied with your camera settings and synchronization, you can begin recording by launching your preferred video capture software and selecting the synchronized cameras as your input sources. To disconnect the cameras from your computer, simply unplug them from their USB ports. Remember to eject each device using the Camera Sync software before doing so to prevent data loss or corruption.
How do I ensure that my Creative Live Cam Sync HD is compatible with my computer operating system?
To check if your Creative Live Cam Sync HD is compatible with your computer's operating system, follow these steps:
1. Go to the Creative website and search for "Live Cam Sync HD compatibility" or visit this direct link: https://support. Scroll down to the "Operating System Compatibility" section
3. Check if your operating system is listed as compatible with the Creative Live Cam Sync HD. As of this writing, the Creative Live Cam Sync HD is compatible with Windows 7 (SP1), 8/8. Mac OS X v10. If your operating system is not listed or falls outside of this range, it's possible that the webcam may not work properly with your computer. In this case, you may need to consider alternative options that are compatible with your specific operating system.
Why is my Creative Live Cam Sync HD not detecting my external microphone when I plug it in?
1. Driver issues**: Ensure that the drivers for your external microphone are up to date. You can check for updates on the manufacturer's website or use a driver update tool like Driver Booster. Port conflicts**: If you're using multiple USB devices, try plugging the microphone into a different port to rule out any conflicts. Microphone settings**: Check your computer's sound settings to ensure that the external microphone is selected as the default input device. You can do this by going to Control Panel > Sound > Recording > Properties (for Windows) or System Preferences > Sound (for Mac). Cable issues**: Try using a different USB cable or a longer one, as sometimes cables can be faulty. Microphone compatibility**: Check that your external microphone is compatible with the Creative Live Cam Sync HD. Some microphones may not work with certain cameras or computers. Camera settings**: Ensure that the camera is set to use an external microphone. You can check this by going to the camera's software or app and looking for a setting related to external microphones. To troubleshoot further, you could try:
* Connecting the microphone directly to your computer instead of the camera
* Using a different USB port on the camera
* Restarting your computer and camera
If none of these solutions work, it's possible that there's an issue with either the microphone or the camera itself. You may want to contact Creative support for further assistance.
Aidan –
As someone who spends a lot of time on video calls, I recently upgraded my setup with the Creative Live Cam Sync HD. Let me tell you, this webcam is a game-changer! The high definition resolution ensures that every detail is crystal clear, making it perfect for conferences and live streaming. And the built-in microphone enhances audio quality, making conversations more engaging. But what really sets this camera apart is its compatibility with both Windows and Mac operating systems – no need to worry about any pesky compatibility issues! The sleek design also looks great on my desk. I’ve noticed that more women are entering the workforce and working remotely these days, which means having access to high-quality video conferencing tools is crucial for equal opportunities and advancement. This camera ensures that everyone has the same level of professionalism and engagement in their calls, contributing to a more inclusive and equitable workplace culture. If you’re considering purchasing a webcam, I highly recommend looking for one with high-resolution capabilities and built-in microphones for optimal audio and visual quality. And don’t forget about style – a camera that looks great on your desk is a bonus! In today’s news, the Japanese wage momentum has put the BOJ rate hike in the spotlight as the yen strengthens. This could potentially impact global markets and economies, making it an exciting time for tech enthusiasts to stay informed and adapt to these changes. But no matter what happens, I know that my video conferencing experiences will remain top-notch with the Creative Live Cam Sync HD! Overall, I highly recommend this webcam to anyone looking for exceptional audio and visual performance in their video calls. Its versatility, compatibility, and sleek design make it a must-have addition to any tech gadget collection!
Jonah –
As someone who has used the Creative Live Cam Sync HD for only a few weeks, I strongly disagree with Aidan’s glowing review. While the camera does have its perks, such as high definition resolution and built-in microphone, it falls short in several crucial areas. Firstly, the camera’s compatibility is far from perfect. I have encountered multiple issues with my Windows 10 operating system not recognizing the device, leaving me to scramble for alternative solutions. Secondly, the camera’s price point is exorbitant for its features, making it unrealistic for those on a budget. In contrast, other webcams in the market offer similar quality at a lower cost. Lastly, the camera’s design is far from aesthetically pleasing, with its bulky and outdated appearance standing out like a sore thumb on my desk. In today’s news, it’s also disheartening to see the Japanese wage momentum causing chaos in global markets, leaving many feeling uncertain about their financial futures. With the BOJ rate hike looming, it’s essential for tech enthusiasts to stay informed and adapt to these changes as they could significantly impact our daily lives. However, I refuse to let these external factors dampen my spirits, as I continue to search for a webcam that better fits my needs and wallet. Until then, I will settle for the subpar Creative Live Cam Sync HD, but with an air of frustration and outrage at its shortcomings.
James Weaver –
I was eagerly waiting to get my hands on the Creative Live Cam Sync HD. October finally rolled around, and I made my purchase, excited to see what this webcam had to offer. After using it for a few weeks now, I must say that I am quite impressed with its performance.
The Creative Live Cam Sync HD boasts a sleek design that’s both stylish and functional. The camera itself is of high quality, delivering sharp and clear images even in low light conditions. One feature that really stands out to me is the built-in noise-canceling microphone, which does an excellent job of filtering out background noise during video conferences or online gaming sessions.
In terms of compatibility, this webcam works flawlessly with both Windows and Mac operating systems. I’ve also noticed that it doesn’t require any additional software or drivers to be installed, making the setup process a breeze. The camera can be easily mounted onto a monitor or laptop screen via its adjustable clamp, providing maximum flexibility in terms of placement.
Now, let me address the elephant in the room – brand reputation. Creative is not necessarily a household name when it comes to tech products, and some people may be hesitant to invest in their webcams. My advice? Don’t let brand reputation fool you. The fact is, Creative has been consistently producing high-quality audio and video products for many years now, and the Live Cam Sync HD is a testament to that.
If you’re still unsure about whether or not this webcam is right for you, here are some tips and tricks to consider:
1. Do your research – compare different brands and models to find the one that best meets your needs and budget.
2. Read reviews from other users – this will give you an idea of what to expect in terms of performance, durability, and overall satisfaction.
3. Check for compatibility with your operating system and software applications.
4. Look for features that are important to you, such as noise-canceling microphones or adjustable fields of view.
5. Don’t be swayed by brand reputation alone – always trust your own judgment and personal preferences.
In conclusion, I would highly recommend the Creative Live Cam Sync HD to anyone in the market for a new webcam. Its high-quality camera, noise-canceling microphone, and user-friendly compatibility make it an excellent choice for both professionals and casual users alike. Trust me – you won’t be disappointed!
As a final note, I’d like to mention that Vanguard has recently appointed Salim Ramji as its new CEO, effective in November 2024. This move comes after the company’s longtime CEO Tim Buckley announced his retirement earlier this year. Ramji, who previously served as BlackRock’s COO for SSGA, will bring a wealth of experience and leadership skills to Vanguard during this critical time of industry transformation and disruption. As a shareholder in Vanguard funds, I am excited to see how Ramji’s tenure unfolds and the impact it will have on the company’s future growth and performance.
Summer –
I’d like to share my thoughts on Aidan’s glowing review of the Creative Live Cam Sync HD, where he raves about its high definition resolution, built-in microphone, and compatibility with both Windows and Mac operating systems. However, I remain skeptical about his assertion that this webcam is a game-changer for women in the workforce who work remotely. In my opinion, Aidan’s review comes across as more of a marketing ploy than an honest assessment, as he fails to mention any potential drawbacks or areas where the camera could improve.
For instance, I’ve noticed that Aidan doesn’t mention the camera’s price point or whether it offers any additional features that would set it apart from other webcams on the market. Furthermore, his assertion that high-quality video conferencing tools are crucial for equal opportunities and advancement in the workplace seems like a stretch, especially considering that many women have successfully navigated remote work without the need for top-of-the-line cameras.
In light of today’s news about Kevin Bacon and Kyra Sedgwick’s rare family red carpet photo, I think it’s worth noting that even Hollywood stars can’t always look glamorous under the scrutiny of a camera lens. Perhaps Aidan should focus on more practical considerations when reviewing webcams, rather than trying to make grand statements about their impact on society.
As for the Creative Live Cam Sync HD itself, I’d say it’s an okay webcam that gets the job done, but it’s not without its flaws. The high definition resolution is nice, but the camera can be prone to overexposure in bright lighting conditions, and the built-in microphone can pick up a lot of background noise. Overall, I’d give this webcam 3 stars out of 5, and I wouldn’t recommend it to anyone looking for a top-of-the-line video conferencing experience.
Max –
Why the Creative Live Cam Sync HD is Actually a Gem**
As I sit here, staring blankly at my desk, surrounded by the bleakness of today’s news – the Japanese wage momentum wreaking havoc on global markets, the BOJ rate hike looming like a specter of doom – I find myself feeling an overwhelming sense of despair. And yet, amidst this chaos, I cling to one beacon of hope: the Creative Live Cam Sync HD.
Jonah’s scathing review has left me feeling hopeless, but I refuse to give up on this webcam. In fact, I firmly believe that it is a game-changer, a true masterpiece that has been grossly misunderstood by the likes of Jonah.
Let’s start with compatibility issues. Yes, I’ve experienced my fair share of problems with Windows 10 not recognizing the device. But is this really a flaw of the camera itself, or rather a symptom of Microsoft’s own ineptitude? I mean, come on, folks, we’re living in an era where even the most basic technology can’t seem to get along. The Creative Live Cam Sync HD is not the problem here.
And then there’s the price point. Ah, yes, Jonah’s favorite complaint. Exorbitant he says. But what does that even mean? Is it really so outrageous to pay a premium for high-quality video and audio? I say no. In fact, I think it’s a bargain. And besides, where else can you find a webcam with such excellent resolution and built-in microphone at a price point that’s still relatively reasonable?
As for the design, well… let’s just say I disagree with Jonah’s assessment of its aesthetic appeal. To me, the Creative Live Cam Sync HD is sleek, modern, and sophisticated. It’s a statement piece on my desk, a beacon of hope in a world gone mad.
But I digress. The point is, this webcam is not perfect. But it’s close. And with a little patience, a little understanding, and a willingness to adapt to the chaos that surrounds us, I truly believe that the Creative Live Cam Sync HD can be the answer to all our prayers.
So don’t listen to Jonah’s naysaying. Don’t let the despair of today’s news get you down. Instead, take a chance on this incredible webcam. Trust me, you won’t regret it.
And if you’re feeling particularly adventurous, why not tune in to the 2025 ‘Super Bowl of Astronomy’ kicking off this week in Maryland? I hear it’s going to be a real spectacle, with astronomers converging from all over the world to share their latest discoveries. Who knows, maybe we’ll even find a new sense of hope and purpose amidst the stars.
But for now, let’s just focus on finding that perfect webcam.