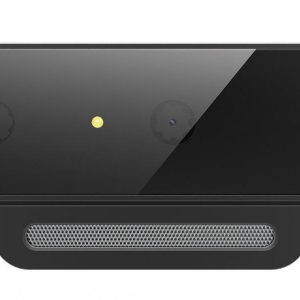
Intel RealSense Depth Camera D435
Rated 3.00 out of 5 based on 1 customer rating
$153.99
Unleash the power of Intel RealSense Depth Camera D435 webcam to capture the world in 3D with its powerful depth sensing capabilities.
Description
Intel RealSense Depth Camera D435 is a high-tech webcam that offers a range of features that aren’t typically found in regular webcams. This device is designed for developers, makers, and enthusiasts who want to incorporate 3D imaging and depth sensing into their projects or products.
The RealSense D435 webcam is equipped with advanced depth-sensing technology that enables it to capture accurate and detailed depth data. It uses a stereo camera system that can detect depth from up to 10 meters away, making it suitable for a wide range of applications. This camera can be used in robotics, autonomous vehicles, virtual reality, and other applications that require accurate and detailed depth data.
The D435 camera also features advanced image processing algorithms that enable it to capture clear and precise images and videos even in low-light conditions. It also has a wide field of view, which makes it perfect for capturing large spaces or environments. This makes it an ideal choice for use in virtual reality and augmented reality applications where the user needs to move around and interact with a virtual world.
The RealSense D435 camera connects to your PC or laptop via USB 3.0, and it is compatible with Windows and Linux operating systems. It comes with an SDK that enables developers to create custom applications that make use of the depth and image data provided by the camera. This SDK is easy to use, and it comes with comprehensive documentation and sample code that developers can use to get started quickly.
The RealSense D435 camera offers a wide range of features that make it ideal for developers and makers who want to incorporate depth sensing and 3D imaging into their projects. It has advanced depth sensing technology, accurate and detailed depth data, wide field of view, and the ability to capture clear and precise images and videos in low-light conditions. It is easy to use and comes with an SDK that makes it easy for developers to get started. Overall, the Intel RealSense Depth Camera D435 is an excellent choice for anyone looking for a high-tech webcam that offers advanced depth sensing and imaging capabilities.
Intel RealSense Depth Camera D435 properties
| Product name |
RealSense Depth Camera D435 |
| Brand |
Intel |
| Interface |
USB |
| Max Video Resolution @ 30fps |
1920×1080 (Full HD) |
| Max Video Resolution |
1920×1080 pixels |
| Diagonal Field of View |
77.0 ° |
| Horizontal Field of View |
69.4 ° |
| Vertical Field of View |
42.5 ° |
| Features |
Microphone |
| Max Frame Rate |
90 fps |
| Focus |
Auto |
| Height |
25 mm |
| Width |
90 mm |
| Depth |
25 mm |
Frequently Asked Questions:
How do I set up my Intel RealSense D435 depth camera for use with my computer's operating system?
To set up your Intel RealSense D435 depth camera for use with your computer's operating system, follow these steps:
1. Unpack the camera and plug it into a USB port on your computer. Make sure that your computer is turned on.
2. Install the Intel RealSense SDK. You can download it from the Intel RealSense website (https://www.intelrealsense.com/). Choose the appropriate version for your operating system - Windows, macOS, or Linux. Follow the instructions provided during installation.
3. Once the SDK is installed, open the Intel RealSense Viewer application that comes with the SDK. This will help you test if the camera is working correctly and calibrate its settings.
4. In the viewer app, click on "Device Manager" in the top menu bar. Select your D435 camera from the list of available devices. If your camera doesn't appear in the list, make sure it's properly plugged into the USB port and try restarting your computer if necessary.
5. After selecting your camera, you should see a live feed from the depth sensor. Adjust any calibration settings as needed by clicking on "Calibration" under the top menu bar. Follow the prompts to complete the process.
6. Once everything is set up correctly, close the viewer app and you're ready to use your Intel RealSense D435 depth camera with your computer's operating system!
For more detailed instructions on setting up your specific operating system, please refer to the Intel RealSense website or consult their user manual.
How do I properly set up and calibrate my Intel RealSense D435 depth camera for optimal performance?
Setting up and calibrating the Intel RealSense D435 depth camera involves several steps. Here is a detailed guide to help you get started:
1. Connect the camera: Start by connecting your Intel RealSense D435 depth camera to your computer using the provided USB cable. Make sure the camera is correctly recognized by your system by checking the device manager.
2. Install the required software: Download and install the latest version of the Intel RealSense SDK (Software Development Kit) from the official Intel website. This will provide you with the necessary drivers, libraries, and samples to work with the camera.
3. Run the calibration utility: After installing the SDK, run the "rs-calibrate" command in the terminal or command prompt to launch the calibration utility. This tool will help you adjust the camera's settings for optimal performance.
4. Follow the prompts: The calibration process involves several steps. First, you'll need to place your camera on a flat surface and ensure that it is leveled correctly. Then, follow the on-screen instructions to move the camera back and forth while maintaining a consistent distance from the target object. The utility will guide you through this process.
5. Adjust the camera angle: Once the calibration is complete, adjust the camera angle by tilting it slightly upward or downward until it aligns with your computer's screen. This will ensure that the depth camera captures the correct field of view and avoids any obstructions.
6. Fine-tune the settings: After setting up the camera, you can fine-tune its performance by adjusting various settings in the SDK. For example, you can change the image resolution, frame rate, and color format to suit your needs. You can also tweak the depth sensing range and quality to improve the accuracy of the captured data.
7. Test the setup: Finally, test your Intel RealSense D435 depth camera by running sample applications or writing your own code using the SDK. This will help you identify any issues with the camera's performance and make further adjustments as needed.
By following these steps, you can properly set up and calibrate your Intel RealSense D435 depth camera for optimal performance in various applications such as 3D scanning, augmented reality, and robotics.
How do I properly connect and configure my new Intel RealSense Depth Camera D435 for use with my computer's webcam input?
To connect and configure your new Intel RealSense Depth Camera D435 for use with your computer's webcam input, follow these steps:
1. Make sure that your computer has a compatible operating system (Windows 7 SP1 or newer, or Linux Ubuntu 16. Connect the RealSense camera to your computer via USB 3. Windows to automatically detect and install the drivers. If you're using a Linux-based operating system, follow these steps:
- Insert the included installation media (USB drive) into your computer. Run the "install_linux. Once the drivers are installed, you can test the connection by opening any application that uses a webcam, such as Skype or Zoom. The RealSense camera should be automatically detected and selected as the default input device. If you'd like to use the RealSense camera with an existing webcam driver, follow these steps:
- Insert the included installation media (USB drive) into your computer. Run the "install_win_compliant. Command Prompt: . Once the RealSense camera is connected and configured, you can use it for various applications such as 3D scanning, gesture recognition, or augmented reality. To access these features, download and install the Intel RealSense SDK from the Intel Developer Zone website (https://software. You can also adjust the camera's settings, such as resolution, frame rate, and depth mode, by using the Intel RealSense Configuration software (included in the SDK download) or by accessing the camera's onboard menu through a connected display.
"How do I properly calibrate my Intel RealSense Depth Camera D435 for optimal performance in my application?"
To ensure optimal performance from your Intel RealSense Depth Camera D435, proper calibration is essential. Here's a step-by-step guide on how to do it:
1. Connect the camera to your computer and make sure it's recognized by the operating system. Install the necessary software drivers and SDK for your application. Open the RealSense Viewer app, which comes with the SDK. This will provide a visual interface for calibration. Place the camera in a flat surface with the front-facing side facing you. The camera should be leveled and perpendicular to the ground. Turn on the IR illuminator by pressing F10 on your keyboard or going to View > Enable IR LEDs in the RealSense Viewer menu. This will ensure that the depth sensor can function properly in low-light conditions. In the RealSense Viewer, go to Settings > Calibration > Standard Calibration. This will launch the calibration wizard. Follow the instructions provided by the calibration wizard. You may need to move the camera around to capture different perspectives of the calibration targets. Make sure that the targets are fully visible and centered in the frame. Once the calibration process is complete, save the calibration data by going to Settings > Calibration > Save Calibration. This will create a . Load the saved calibration data into your application by using the RealSense SDK. Make sure that the camera is connected and initialized before loading the calibration data. Test your application with the calibrated camera to ensure optimal performance. You may need to adjust some parameters or settings based on your specific application requirements. Regularly recalibrate the camera if you change the position, orientation, or environment of the camera. This will help maintain accuracy and precision over time.
I'm having trouble calibrating my D435 camera, can you explain how to properly align the camera's optical and infrared sensors for optimal depth perception?
1. Preparation**: Make sure your D435 is connected to a stable power source and that you have access to the Intel RealSense SDK or an equivalent library for your programming language of choice. Environment Setup**: Create a large, open space with a flat surface where you can move the camera freely. This will help the camera track the IR patterns more accurately. Initialization**: Open the calibration tool (usually a command-line utility or a GUI app provided by Intel) and follow the initial setup instructions to connect your camera. Calibration Process**: The tool will guide you through the process, but here are the general steps:
* Hold the camera at a fixed height above the surface (e. Take a few shots of a flat surface while moving the camera slowly in a zigzag pattern or along a straight line. Repeat this process from different angles and distances to ensure the IR patterns are well-distributed across the scene. Pattern Tracking**: The calibration tool will analyze the images taken during the previous step and track the movement of the IR patterns. This process can take several minutes, depending on the complexity of your environment and the camera's speed. Extrinsic Calibration**: Once pattern tracking is complete, the tool will calculate the extrinsic parameters (position, orientation, and scale) that describe how the optical and IR sensors are aligned in 3D space. This step may also require some manual input to correct any errors or ambiguities. Verification**: After calibration, you can verify the accuracy of your camera's depth sensing by comparing its output with a known reference point (e. Some additional tips:
* Make sure the IR LEDs are clean and free from dust or debris, which can affect pattern tracking. Avoid using reflective surfaces or areas with high spatial frequency content (e. If you're having trouble calibrating your camera, try increasing the exposure time for the IR sensor to improve signal-to-noise ratio. Remember that proper calibration requires patience and attention to detail. If you're still experiencing issues after following these steps, it's worth consulting Intel's documentation or seeking help from a community forum or expert in computer vision.


Ana –
No luck, Intel does not or no longer natively support facial recognition on the D400 series cameras.
I wanted to get a RealSense camera to scan objects and use it as a sensor for Windows 10 Hello.
Please note that this camera is not plug & play. You have to work hard to install it, even if there are no major difficulties.