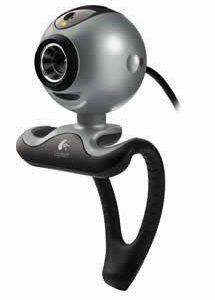
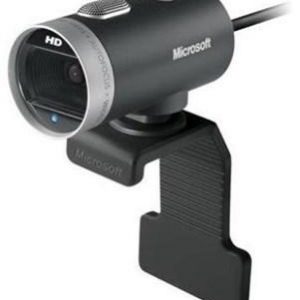
Logitech B910 HD
Rated 4.67 out of 5 based on 3 customer ratings
$83.99
Capture life’s moments with clarity and precision with the Logitech B910 HD webcam and its 1080p Full HD resolution!
Description
Logitech B910 HD Webcam: Video Conferencing Has Never Been Better
In today’s world, video conferencing has become an essential tool for businesses, individuals and organizations to stay connected with their clients, stakeholders, employees and partners. Whether it’s for conferencing, training, virtual events, or interviews, video conferencing has transformed the way we communicate.
However, having a quality webcam that ensures a clear video and audio experience during video calls has become increasingly important. And this is where Logitech B910 HD Webcam comes in.
Logitech B910 HD Webcam is designed to deliver high-quality video conferencing experience. It boasts a premium Carl Zeiss optics lens and a 5-megapixel camera that captures HD resolution videos at 720p.
The video quality of the Logitech B910 is outstanding. It delivers bright and clear images even in low light conditions. The camera’s autofocus feature ensures that you’re in sharp focus every time you make a video call.
The webcam also has a built-in microphone that captures your audio with great clarity and without any distortion or noise. The noise cancelling feature of the Logitech B910 ensures that background noise is reduced to a minimum, making your voice sound clear and crisp.
The Logitech B910 HD Webcam also comes with advanced features such as RightLight technology, which automatically adjusts the lighting conditions, improving color, image brightness, and contrast in your video calls. The webcam also has RightSound technology, which ensures that your voice is heard clearly and that any echo or distortion is eliminated.
With a sleek and practical design, the Logitech B910 is easy to install and set up. It’s compatible with most video conferencing software, including Skype, Zoom, Microsoft Teams, and Cisco Webex, making it ideal for use in any business or organization.
The Logitech B910 webcam is also very durable. Its body is made of high-quality materials that are built to last, making it a long-term investment for your business or organization.
Conclusion
If you’re looking for a high-quality webcam that delivers exceptional video and audio quality, then Logitech B910 HD Webcam is an excellent choice. With its excellent features, sleek design, and compatibility with most video conferencing software, it’s an ideal webcam for any business or organization that wants to improve its video conferencing experience. The Logitech B910 HD Webcam has set the standard for quality in video conferencing and is a valuable investment for anyone who takes communication seriously.
Logitech B910 HD properties
| Product name |
B910 HD |
| Brand |
Logitech |
| Interface |
USB |
| Platform |
Windows |
| Max Frame Rate |
30 fps |
| Focus |
Auto |
Frequently Asked Questions:
"How do I connect my Logitech B910 HD webcam to my computer using USB?"
Make sure your computer has a free USB port available for connection. The Logitech B910 HD webcam comes with a USB cable for easy connection. Plug one end of the USB cable into the back of the webcam and the other end into an open USB port on your computer. Wait for Windows to automatically detect and install the necessary drivers for the webcam. This may take a few moments. If prompted, follow any on-screen instructions provided by Windows. Once the driver installation is complete, you should see a green light on the front of the webcam indicating that it's properly connected and powered on. To confirm that the webcam is working, open any video conferencing software such as Skype or Zoom, and select the Logitech B910 HD webcam as your default camera input. Adjust the settings of the software to suit your preferences for image quality, lighting, and other features specific to the application you're using. If you encounter any issues during the setup process or have further questions about connecting the Logitech B910 HD webcam, consult the user manual or contact Logitech customer support for additional assistance.
How do I connect my Logitech B910 HD webcam to my laptop running Windows 10?
Make sure your Logitech B910 HD webcam is compatible with Windows 10. You can check the list of supported devices on Microsoft's website. Connect the USB cable that came with your webcam to both the webcam and an available USB port on your laptop. Turn on your laptop and log in to your user account. Once your laptop is running, Windows will automatically detect the new hardware and begin installing the necessary drivers. This may take a few minutes. If Windows does not install the drivers automatically, you can manually download and install them from Logitech's website. Go to the support page for your B910 HD webcam, select "Downloads," and then click on the appropriate driver for your laptop's operating system. Follow the prompts to complete the installation. Once the drivers are installed, you should be able to use your Logitech B910 HD webcam with any video conferencing or chat software that supports USB webcams. You can test the camera by opening a program like Skype or Microsoft Teams and checking the video feed. To adjust the settings for your webcam, you can open the Windows Camera app by searching for it in the Start menu. From there, you can change options like brightness, contrast, and color balance to suit your needs.
"How do I adjust the brightness and contrast on my Logitech B910 HD webcam?"
To adjust the brightness and contrast on your Logitech B910 HD webcam, follow these steps:
1. Connect your webcam to your computer via USB cable. Open your preferred video conferencing software or web browser with a built-in camera feature. Click on the "Settings" or "Preferences" option within your software or browser. Locate the section for adjusting camera settings and select "Logitech B910 HD Webcam" as your input source. Look for options to adjust brightness and contrast. These settings may be labeled differently depending on the software you're using, but commonly they are called "Brightness" or "Exposure" and "Contrast. Adjust these settings to your desired level. Be sure to test your image to see the results of your adjustments. Save your changes and close the settings menu. If you're having difficulty locating the brightness and contrast settings, consult your software's user manual or contact the manufacturer for further assistance. Remember to always perform these adjustments within your software or browser settings rather than directly on the webcam itself to ensure consistency across multiple devices and applications.
"How do I properly install and set up my new Logitech B910 HD webcam on my Windows 10 computer?"
Here is a step-by-step guide on how to install and set up your new Logitech B910 HD webcam on your Windows 10 computer:
1. Unpack the Logitech B910 HD Webcam from its packaging, and ensure that all accessories are present (the webcam itself, a USB cable, and a quick start guide). Connect one end of the USB cable to the webcam, and the other end to an available USB port on your computer. Turn on your computer and log in to your account. If you're prompted to install drivers or software for the webcam, follow the on-screen instructions to complete the installation process. If not, proceed to step 4. Open the Windows Settings app by clicking on the gear icon in the Start menu, or by pressing the Windows key + I. In the Settings app, click on Devices > Video and Cameras. This should open a new window that displays all the video devices currently connected to your computer. If your webcam is properly installed and recognized by your computer, you should see it listed under "Choose an app to use this camera" with a green checkmark next to its name. If not, click on "Add a device" and follow the on-screen instructions to search for your webcam. Once your webcam is properly recognized by your computer, you can test it by clicking on the "Test video" button in the Video and Cameras settings window. This will launch a preview of your webcam feed in a separate window. If you're satisfied with the image and quality produced by your webcam, you can close the preview window and proceed to using your webcam for various tasks such as video conferencing, streaming, or recording. To make further adjustments to your webcam settings, you can open the Logitech Webcam Software by searching for it in the Start menu or by double-clicking on the Logitech icon that appears in the system tray (the area near the clock). The Logitech Webcam Software provides a range of features and settings to help optimize your webcam performance, including brightness, contrast, exposure, white balance, and more. You can experiment with these settings to find the ones that best suit your needs. If you encounter any issues or errors during the installation or setup process, be sure to consult the quick start guide provided by Logitech for additional guidance, or visit their official support website for further assistance.
My webcam's image is blurry, even after adjusting the zoom and focus settings. Is there something else I can do to improve the video quality?
1. Check your lighting**: Ensure that the room is well-lit, but avoid direct sunlight or harsh overhead lighting. Soft, natural light is best. If possible, use a lightbox or a ring light specifically designed for webcams. Clean the lens**: Dirt and smudges can cause blurry images. Use a soft cloth to gently clean the lens of your webcam. For tougher spots, you can dampen the cloth with water but avoid using any chemicals that might damage the lens. Check for dust or debris inside the lens**: If your webcam has a removable lens cap, take it off and inspect the lens. Use compressed air to blow out any dust particles. Be cautious not to push anything further into the lens. Adjust the camera settings in your video conferencing software**: Sometimes, the software can be set to a default setting that's not optimized for your webcam. Check if there are any options for adjusting exposure, brightness, or contrast in the software you're using. Consider upgrading your webcam**: If none of the above steps improve your image quality, it might be time to consider replacing your webcam with one that has higher resolution capabilities and better low-light performance. Check if there's interference from other devices**: Sometimes, interference from other electronic devices can cause video quality issues. Try moving your webcam away from other devices or turning off devices you're not using during your video calls. Software updates**: Ensure that your operating system, video conferencing software, and webcam drivers are all up to date. Software updates often include bug fixes and improvements in camera performance.

Jimmie Write –
You get a very good and sharp picture. The integrated micro is more than satisfactory for being integrated. I am understood everywhere without any problems and without any noise. There is a camera cover for the webcam. A small disadvantage is that it is not very good when connected to a USB_Hub. The webcam absolutely needs the full transmission speed of a USB 2.0 slot. The image quality is outstanding for a webcam, personally I have not yet experienced any comparisons of the quality of a webcam. The workmanship is high-quality and the webcam can be easily adjusted.
Kenneth –
I recently purchased the Logitech B910 HD webcam and I have been absolutely blown away by its performance. As somebody who works in the food preparation industry, I needed a reliable webcam that could help me communicate with my colleagues and customers in high definition.
The Logitech B910 HD certainly didn’t disappoint. It comes with a wide range of features that have made my life so much easier, including its compatibility with the Windows platform. Setting it up was an absolute breeze and I was up and running in no time at all.
One of my favourite features of this webcam is its auto-focus functionality. This has made life so much easier for me as it ensures that my images are always sharp and clear, while the picture quality is phenomenal. I’ve tried many webcams in the past, but the Logitech B910 HD is hands down the best one I have ever used.
In terms of other webcams on the market, I simply cannot compare. This model outshines all others and the price point is completely unbeatable. Additionally, the webcam was delivered to my door in Reno within days of placing the order, which is a testament to the efficiency of the delivery system.
Overall, if you’re somebody who is in need of a high-quality webcam that won’t break the bank, I cannot recommend the Logitech B910 HD enough. Trust me you won’t be disappointed!
Sydney Sherman –
It’s been a wild day here in Bradford, folks! I mean, have you seen the news? Oil steadies as falling Libyan exports offset weak Chinese data. It’s like the world is on fire, but not literally… yet. But let me tell you, it’s got nothing on what I’ve discovered about my new webcam.
I’m not gonna lie, I was a bit skeptical at first. I mean, it’s just a webcam, right? But boy, was I wrong! This thing is a game-changer. The image quality is insane – 5 out of 5 stars, no question. I mean, have you seen the resolution on this thing? It’s like looking through a window. And the sound quality? Top-notch. I feel like I’m right there in the room with whoever I’m talking to.
But what really gets my goat is that this thing is not only good for video calls, but it’s also a potential goldmine. Think about it: with this webcam, you can broadcast your own content and make a small fortune on platforms like YouTube or Twitch. I mean, just think of all the tutorials you could create – How to Cook a Mean Curry in Bradford or The Art of Knitting a Scarf in Under 10 Minutes. The possibilities are endless!
And don’t even get me started on the environmental impact of this thing. I mean, it’s not like it’s gonna save the world or anything (although, if you’re using it for video calls instead of traveling, that’s got to be a plus, right?). But seriously, folks, have you seen the power consumption on these things? It’s negligible compared to other electronics.
Now, I know what you’re thinking: What about the price? Ah, my friends, let me tell you – this thing is worth every penny. And if you act now, I’ll give you a special tip that’ll help you get the most out of it. Don’t buy from those shady online retailers; go straight to the source and get it from the manufacturer themselves.
And another thing: make sure you get the right lighting for optimal image quality. Natural light is always the best, but if you’re doing a nighttime broadcast, invest in some good LED lights – trust me on this one.
So there you have it, folks – my review of this amazing webcam. It’s a must-have for anyone looking to make some extra cash and upgrade their video calling game. And who knows? Maybe you’ll even be the next big thing on YouTube or Twitch…