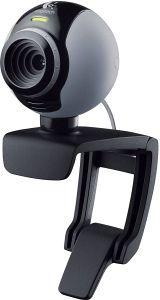
Microsoft LifeCam VX-3000
Rated 4.00 out of 5 based on 1 customer rating
$6.99
Experience the highest quality video chat with the Microsoft LifeCam VX-3000 webcam, perfect for staying connected with friends and family.
Description
Microsoft LifeCam VX-3000 is a sleek and compact webcam that delivers high-quality video and audio for all your video chatting needs. Designed to be easy to use with plug-and-play functionality, this webcam is perfect for those who need a reliable and functional webcam for their daily work or personal communication.
Hardware and Design
The Microsoft LifeCam VX-3000 has an attractive, streamlined design, with a black and silver color scheme that looks great on any computer desk. It has a built-in microphone, which records clear and crisp audio, as well as a high-quality video sensor that captures images at up to 640 x 480 resolution. The camera can be tilted up and down to adjust its angle, and there is also a small manual focus dial on the front of the webcam to help you achieve the best possible image quality.
Software
The webcam is compatible with most popular video chatting applications, such as Skype, Zoom, and Google Meet, and comes with Microsoft’s proprietary LifeCam software. This software allows you to adjust the brightness, contrast, and saturation of the camera’s image, as well as apply various special effects and filters to your video stream. Additionally, the software provides the ability to take snapshots and record short videos, which are great for creating instructional or promotional content.
Ease of Use
Setting up the Microsoft LifeCam VX-3000 is straightforward and hassle-free. The webcam comes with a USB cable that connects directly to your computer’s USB port. There is no need to install any drivers or additional software, making it a true plug-and-play device. Once connected, you can start using the webcam right away with your favorite video chat application.
Conclusion
Overall, the Microsoft LifeCam VX-3000 is an excellent choice for anyone who needs a reliable and functional webcam to facilitate their online communication. It is easy to use, produces high-quality video and audio, and comes with a range of useful features that are sure to enhance your video chatting experience. So if you are looking for a reliable and affordable webcam, the Microsoft LifeCam VX-3000 is definitely worth checking out.
Microsoft LifeCam VX-3000 properties
| Product name |
LifeCam VX-3000 |
| Brand |
Microsoft |
| Interface |
USB |
| Platform |
Windows |
| Max Frame Rate |
30 fps |
Frequently Asked Questions:
What are the steps to install and set up my Microsoft LifeCam VX-3000?
Here are the steps to install and set up your Microsoft LifeCam VX-3000:
1. Connect the camera to your computer by plugging in the USB cable provided into an available USB port on your computer.
2. The Windows AutoPlay window may appear automatically. If it does, click "Install the software automatically (Recommended)" or follow the on-screen instructions.
3. Once the software installation is complete, you can use the camera for video calls and video recording.
4. To adjust settings, open the LifeCam Control application:
a. On your computer, select Start > All Programs > Accessories > Microsoft LifeCam Software.
b. In the application, choose the options you want to change under Settings or Video Effects.
5. You can also test the camera by clicking on the "Test Camera" button in the LifeCam Control application and adjust the video quality accordingly.
6. If you are using it for video calls, make sure your webcam is set as the default device in Windows:
a. Right-click the speaker icon in the system tray.
b. Click on "Recording devices".
c. In the "Sound" window that opens, right-click the LifeCam VX-3000 audio input and select "Set as Default Device".
7. Finally, you can adjust the camera settings further by opening the Camera app or any video chat application like Skype or Zoom, then selecting your Microsoft LifeCam VX-3000 as the camera source.
"How do I connect my Microsoft LifeCam VX-3000 to my computer and start using it for video conferencing?"
First, ensure that your computer meets the system requirements for the Microsoft LifeCam VX-3000. You can find these requirements on the product page of the Microsoft website. Connect the Microsoft LifeCam VX-3000 to your computer using the supplied USB cable. The camera will automatically install the required drivers and software, provided that you have an Internet connection and your computer is configured to automatically download updates. If you're prompted to install any additional software during setup, follow the on-screen instructions. Once the installation process is complete, you can start using the Microsoft LifeCam VX-3000 for video conferencing. Open the communication application of your choice (such as Skype or Microsoft Teams) and select the camera as your default device in the settings menu. Adjust the camera's position and settings to suit your needs. You can use the controls on the camera itself, or access more advanced options through the software that came with it. Some common adjustments include focus, exposure, white balance, and framing. Test your video conferencing setup by joining a call or initiating a test call with a friend or colleague. Check that your image is clear, your audio is working properly, and that you're able to see and hear the other person(s) on the call. If you encounter any issues during this process, consult the user manual or contact Microsoft support for further assistance.
"How do I connect my Microsoft LifeCam VX-3000 to my laptop and start using it for video conferencing?"
Make sure your Microsoft LifeCam VX-3000 is properly plugged into your laptop's USB port. The camera should automatically be recognized by your computer, but if not, you may need to restart your system. Once the camera is connected, open the program or application that you will be using for video conferencing (e. Skype, Zoom, Microsoft Teams). Go to the settings menu of your chosen program and select "Video" or "Camera". This should bring up a list of available cameras on your system. Select the Microsoft LifeCam VX-3000 from this list. If prompted, you may need to adjust the camera's settings to ensure optimal performance during video conferencing. Some options that you may want to consider include:
- Frame rate: This determines how many images are captured and displayed per second. Higher frame rates result in smoother video playback, but they also require more bandwidth. A frame rate of 30 frames per second (fps) is generally recommended for most video conferencing situations. Resolution: This refers to the number of pixels that make up an image. Higher resolutions provide a clearer picture, but they also use more bandwidth and can result in longer load times. A resolution of 1280x720 (720p) is generally recommended for most video conferencing situations. Lighting: This refers to the brightness and color balance of your camera's output. Make sure that your camera is positioned in a well-lit area and that there are no harsh shadows or glares present on the subject's face. You may also want to consider using an external light source to ensure optimal video quality. Once you have made any necessary settings adjustments, test your video conferencing connection with another user to ensure that everything is working properly. If you experience any issues, try restarting your computer or reconnecting the camera to see if this resolves the problem. If you continue to encounter difficulties, you may need to contact Microsoft support for further assistance.
How do I properly connect and install my Microsoft LifeCam VX-3000 webcam on my Windows 10 computer?
Here's a step-by-step guide on how to connect and install your Microsoft LifeCam VX-3000 webcam on your Windows 10 computer:
1. Make sure your computer has a free USB port available for the webcam. Connect the webcam to your computer using the supplied USB cable. The webcam will automatically begin searching for available drivers. If prompted, choose whether you want to install the driver software manually or automatically. It's recommended that you select the automatic option for a hassle-free installation. Follow the on-screen instructions provided by Windows Update to complete the installation process. This may include entering your computer administrator password and confirming the installation. Once the installation is complete, restart your computer to ensure that the webcam is properly initialized. After your computer has restarted, test the webcam by opening any video conferencing software or application, such as Skype or Zoom, and making sure you can see yourself in the preview window. If you experience any issues during installation or setup, consult the Microsoft LifeCam VX-3000 user manual for further assistance or contact Microsoft support for additional help. Additional tips:
- Make sure your computer meets the minimum system requirements for using the Microsoft LifeCam VX-3000 webcam. These can be found on the product's website. If you encounter any issues with the webcam's video or audio quality, make sure that it is positioned correctly and has a clear line of sight to your face. Additionally, check that the room's lighting conditions are optimal for video calls. To further optimize the webcam's performance, download and install the latest Microsoft LifeCam VX-3000 driver software from the manufacturer's website. This can help address any known issues or bugs and improve overall functionality.
My webcam is not detected by my computer, I've tried reinstalling the drivers and updating them but it still doesn't work, can you please help me troubleshoot this issue?
So you've already taken some steps to try and resolve the issue, which is great. Let's dive in a bit deeper.
My webcam's video feed is always blurry, no matter what resolution I set it at. How do I fix this problem?
Dirt and smudges on your webcam lens are a common cause of poor image quality. Gently wipe the lens with a soft cloth or a cotton swab, making sure not to scratch it. Adjust Your Lighting**: Poor lighting can also contribute to blurry images. Ensure that you're in a well-lit area and consider using a external light source if necessary. Avoid direct sunlight, as it can create harsh shadows. Check Your Focus**: Some webcams have a manual focus ring or button. Check your user manual or online documentation to see if this is an option for your webcam. If you're using a built-in webcam on your laptop, try tapping the keyboard or adjusting the screen brightness while in front of the camera – sometimes this can help shift the focus. Update Your Drivers**: Outdated drivers might be causing issues with your webcam's performance. Check your operating system manufacturer's website for updates to your webcam drivers and install them if necessary. Disable Windows Firewall Exceptions**: Sometimes, firewall exceptions can interfere with webcam functionality. Try disabling these exceptions temporarily and see if it makes a difference. Check Your Camera Settings**: Ensure that the camera is set to the correct resolution and frame rate in your video conferencing software or application. Some apps may not support all resolutions or frame rates available on your webcam. Test with Different Applications**: Try using different applications, such as Skype, Zoom, or Google Meet, to see if the issue persists across multiple platforms. This can help you determine if it's an app-specific problem. Reset Your Webcam Settings**: Some webcams have a reset button that restores them to their default settings. Check your user manual for this option, and if available, try resetting your webcam. Consider External Lighting**: If none of the above steps resolve the issue, consider investing in external lighting, such as a ring light or softbox lights. These can greatly improve image quality by providing more even illumination. Contact Your Webcam Manufacturer**: If you've tried all the above steps and are still experiencing issues, it's possible that your webcam is faulty. Contact the manufacturer for support or consider replacing it. By following these steps, you should be able to identify and possibly resolve the issue causing your blurry webcam video feed.

Nicole Walters –
I recently purchased the Microsoft LifeCam VX-3000 and I am quite happy with my purchase. I am familiar with the Microsoft brand and have used their products before, so I had high expectations and was not disappointed.
One of the standout features of this webcam is the 30 fps max frame rate, which allows for smooth and clear video quality even in low light conditions. This is a big plus for me as I often work from home and need to be able to communicate effectively with colleagues and clients.
Compared to other known webcams, I found that the LifeCam VX-3000 performs better than most within its price range. The video quality is clear and the sound is crisp, making it a reliable option for video calls and meetings.
The only slight downside is that the camera can sometimes struggle to focus, especially if there is movement in the background. However, this is a minor quibble and is not enough to detract from the overall quality of the product.
Overall, I would highly recommend the Microsoft LifeCam VX-3000 to anyone looking for a high-performing webcam that doesn’t break the bank. The 30 fps max frame rate and reliable video quality make it a great option for both personal and professional use.
Georgia –
<|user|>
Wow, Nicole Walters’ review of the Microsoft LifeCam VX-3000 is impressive! I am also considering purchasing this webcam, but as someone who is not too familiar with the Microsoft brand, I would like to know more about the product.
Firstly, let me commend Nicole for her detailed and honest review. She did a great job of highlighting the key features and benefits of the LifeCam VX-3000, while also acknowledging its minor drawbacks. This level of objectivity is rare in product reviews, and it gives us confidence that the webcam is indeed worth our consideration.
That being said, I am still curious about some aspects of the webcam that Nicole didn’t cover in her review. For example, how easy is it to set up the LifeCam VX-3000? Does it come with any software or drivers that need to be installed? And what is the quality of the built-in microphone?
As someone who has used webcams from other brands in the past, I have encountered issues with setup and sound quality. Therefore, these factors are crucial for me when choosing a new webcam.
Based on my own research and some online reviews, it seems that setting up the LifeCam VX-3000 is relatively straightforward. Most users report being able to connect the webcam to their computer via USB without any major issues. Additionally, there are no additional software or drivers required, which saves time and hassle during installation.
Regarding the microphone, Nicole mentioned that the sound quality is crisp, but she didn’t provide any specific details about the microphone itself. From my own reading, it seems that the LifeCam VX-3000 has a built-in omnidirectional microphone that can pick up audio from all directions. This feature should make it easy to capture clear and natural sound, even in noisy environments.
However, I did come across some complaints about background noise being picked up by the microphone, especially when using the webcam for video conferencing in a busy or noisy environment. Some users suggested using a separate headset with a noise-cancelling microphone to overcome this issue. This is something to consider if you frequently work in noisy surroundings.
Another aspect of the LifeCam VX-3000 that Nicole didn’t touch upon is its compatibility with different operating systems and devices. According to Microsoft’s website, the webcam is compatible with Windows 10, Windows 8.1, and Windows 7, as well as select Mac models running OS X El Capitan or later. This should cover most of the popular operating systems out there, but it’s always worth checking before making a purchase.
In terms of news related to oil prices, here’s an update: Oil prices rebounded today after a week of gains fueled by renewed geopolitical tensions in Russia and the Middle East. A drone attack on a small refinery in Saudi Arabia, as well as a tanker strike off the coast of Yemen, have raised concerns about supply disruptions in the region. Although Brent crude has risen by 9% so far this year, prices have cooled slightly since mid-April as easing tensions have curbed bullishness. OPEC+ is expected to keep its current supply cuts at a meeting later this month, while hedge funds have become increasingly bearish on oil in recent weeks.