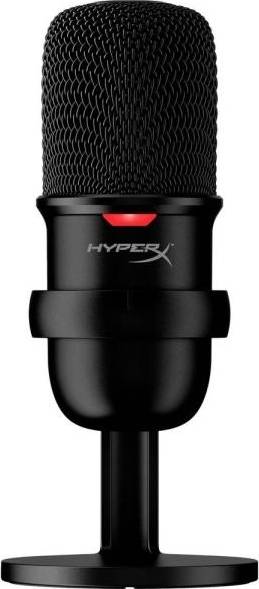
HyperX SoloCast

$38.99

Experience crystal-clear audio and professional-grade sound with HyperX SoloCast microphone, the perfect companion for streaming, podcasting, and gaming.

Description

Introducing the HyperX SoloCast Microphone: Elevate Your Audio Experience

In today’s digital age, clear and high-quality audio is essential, whether you’re a content creator, gamer, or professional in need of crystal-clear communication. The HyperX SoloCast microphone is a powerful yet affordable solution that promises to deliver exceptional sound quality and elevate your audio experience.

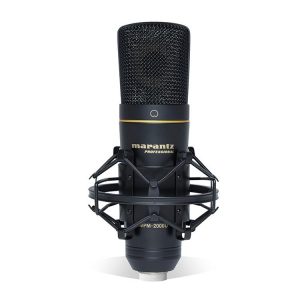
The HyperX SoloCast is a USB microphone designed with simplicity and functionality in mind. Its sleek and compact design makes it easy to set up on any desk, while its durable build ensures longevity. It features a sturdy, adjustable stand that allows you to position the microphone at the perfect height and angle for optimal sound recording.

One of the standout features of the SoloCast is its Plug and Play functionality. Simply connect it to your computer, and you’re good to go. No need for additional drivers or software installations. This makes it an excellent option for beginners, as it eliminates any technical complications and allows you to focus on what matters most: your content.

When it comes to audio quality, the HyperX SoloCast truly shines. Equipped with a cardioid polar pattern, it effectively captures sound directly from the source while minimizing background noise. This ensures that your voice will be crisp and clear, making it perfect for voiceovers, podcasts, video conferences, and streaming.

The SoloCast also boasts a built-in shock mount that isolates the microphone from any vibrations or accidental bumps, resulting in an even more pristine audio recording. Additionally, its integrated pop filter helps reduce plosive sounds, such as p and b sounds, further enhancing the overall audio quality.

Another impressive feature of the SoloCast is the useful tap-to-mute function. With a single touch of a button on the top of the microphone, you can instantly mute your audio. This comes in handy during gaming sessions or when you need to quickly silence yourself during a live stream.

Compatibility is also a key aspect of the HyperX SoloCast. It works seamlessly with both PC and Mac systems, as well as popular streaming software such as OBS, XSplit, and Streamlabs OBS. This versatility ensures that you can use the microphone for various applications without any hassle.

In conclusion, the HyperX SoloCast microphone is an exceptional addition to any setup. With its sleek design, user-friendly Plug and Play functionality, and outstanding audio quality, it is tailor-made for content creators, gamers, and professionals alike. Whether you’re recording podcasts, streaming, or having virtual meetings, the SoloCast promises to elevate your audio experience to the next level.
Additional information

Product name

Brand

Product type

Suitable For

,

Polar Patterns

Microphone Type

Wireless

Colour

,

Clip-On

Mute Button

Volume Control

Stand Included

USB

XLR

Reviews

There are no reviews yet.

Be the first to review “HyperX SoloCast”

Your email address will not be published. Required fields are marked *

Frequently Asked Questions:

"How do I connect the HyperX SoloCast microphone to my computer and start using it for streaming or recording purposes?"

Firstly, make sure that your computer meets the system requirements for using the HyperX SoloCast microphone. The mic is compatible with Windows 7 or later, and macOS 10. Connect the microphone to your computer via USB. The microphone comes with a detachable boom arm that can be adjusted for optimal positioning. Attach the boom arm onto the stand and tighten the screw to secure it in place. Once you have connected the microphone, wait for your computer to recognize it. You should see the HyperX SoloCast listed under Sound & Audio Devices or Recording Devices in your control panel or device manager. If you are using a Windows 10 computer, open the Settings app and navigate to System > Sound. From here, you can select the HyperX SoloCast as your default input and output devices. For macOS users, go to System Preferences > Sound > Input tab and choose the HyperX SoloCast microphone from the drop-down menu. You may also need to adjust the input level under the Output tab. Now that you have successfully connected and configured your HyperX SoloCast, you can start using it for streaming or recording purposes. Most popular streaming platforms such as Twitch, YouTube Gaming, and Facebook Live should automatically recognize and use the microphone once it's set up correctly. To test your mic, you can open a voice recording software or an audio editing program such as Audacity to ensure that you are getting clear audio output. If you want to optimize your audio settings for streaming, you may consider adjusting the audio levels and equalization (EQ) of both your microphone and game/system audio in your streaming software or hardware mixer. This can help prevent any unwanted background noise or echoes during live streams. Lastly, regularly clean the mic's capsule grille with a soft, dry cloth to maintain its performance and prevent dust buildup over time.

How do I properly connect and configure my HyperX SoloCast microphone for use with my computer and recording software?

Unpack the HyperX SoloCast microphone from its packaging and ensure that all parts are present, including the microphone, stand, USB cable, and carrying pouch. Locate a suitable position to place the microphone. The microphone can be attached to a standard microphone stand using the threaded mount on the bottom of the microphone or placed directly on a desk or tabletop using the included desktop stand. Connect the USB cable provided with the microphone to both the HyperX SoloCast and your computer. The USB connection should be located at the rear of the microphone, near the base. Ensure that your computer recognizes the microphone by checking the device manager or system tray for any new devices. If your computer does not automatically detect the microphone, you may need to connect it via a different USB port or restart your computer. Open your preferred recording software and select the HyperX SoloCast as your input device. The exact steps for this will vary depending on the software being used but can typically be found in the settings or preferences menu of the software. Adjust the microphone's gain and sensitivity levels using the controls located on the rear of the microphone near the USB connection. These settings will depend on your specific use case and may require some experimentation to achieve optimal results. Test your microphone by speaking or making other sounds into it and monitoring the output in your recording software. Make any necessary adjustments to gain, sensitivity, or other settings as needed to achieve the desired sound quality. When finished using the microphone, disconnect the USB cable from both the HyperX SoloCast and your computer and store the microphone and accessories in their included carrying pouch for safekeeping.

"How do I properly connect my HyperX SoloCast microphone to my computer for use during online gaming or virtual meetings?"

First, ensure that your computer has a USB port available. The HyperX SoloCast is a USB-enabled microphone and requires a USB connection for power and signal transmission. Locate the microphone's USB cable and connect one end to the bottom of the microphone. On the opposite end of the USB cable, insert it into an available USB port on your computer. Ensure that the USB cable is securely connected at both ends. Power up your computer and boot it to the desktop. If you're connecting the microphone for use during online gaming or streaming, launch the game or streaming software you'll be using. Navigate to your audio settings within the game or streaming software. This is where you can select the input source of your microphone. Locate the option for "Microphone" or "Input" and select the HyperX SoloCast from the list of available devices. For virtual meetings, ensure that your video conferencing software is launched, and then navigate to its audio settings. Select the HyperX SoloCast as your input source. To test whether the microphone is working properly, speak into it, and listen for the sound being picked up by the microphone through your computer's speakers or headphones. If you're having any issues with connectivity or audio performance, consult the user manual that came with your HyperX SoloCast or reach out to customer support for further assistance.

How do I properly connect and set up my HyperX SoloCast microphone for use with my gaming console or PC?

First, ensure your gaming console or PC has a 3. If you're using a gaming console, check that it supports external microphones. Connect the HyperX SoloCast microphone to your device by inserting its 3. If you're using a PC, connect the microphone to the green audio input jack (line-in). If you're using a gaming console, check the location of the audio jack and make sure it's compatible with external microphones. Ensure that the volume level on your device is set high enough for optimal sound quality. You can do this in the audio settings menu of your device or by adjusting the volume dial on your device. If you're using a PC, download and install the HyperX SoloCast microphone driver from the HyperX website. This will ensure that your microphone is properly recognized by your operating system and that it operates at peak performance. Configure the microphone settings in your gaming console or PC. This may involve adjusting the audio input levels, selecting the correct audio output device, and setting up any necessary voice chat software. To ensure clear and crisp sound quality, position the microphone close to your mouth but not too close, as this can cause distortion. Also, try to minimize background noise by finding a quiet space to game in or using a pop filter to reduce plosive sounds. Finally, test your microphone setup by speaking into the mic and checking the audio output on your device. Adjust the settings as needed until you achieve optimal sound quality.

My microphone is not picking up my voice clearly, but it's working fine when I'm singing along with music, what could be causing this issue?

1. Audio signal levels**: When you're speaking, the audio signal from your voice may not be strong enough for the microphone to pick up clearly. However, when you're singing along with music, the musical background noise is likely to boost the overall audio signal level, making it easier for the microphone to pick up your voice. Dynamic range**: Microphones have a limited dynamic range, which means they can only handle a certain range of audio signal levels before distorting or clipping. When you're speaking, your voice may be close to the maximum allowed signal level, causing distortion or clipping. However, when you're singing along with music, the musical background noise is likely to mask some of this distortion. Acoustic characteristics**: The acoustic characteristics of a room can affect how sound waves interact with objects and surfaces. When you're speaking, your voice may be interacting with the room's acoustics in a way that reduces its clarity. However, when you're singing along with music, the musical background noise is likely to mask some of these acoustic effects. Microphone placement**: The position of your microphone can also affect how well it picks up your voice. If the microphone is not positioned correctly, it may be picking up more background noise or sound reflections than your actual voice. To troubleshoot this issue, you could try adjusting the audio signal levels on your device to see if that improves the clarity of your voice. You could also experiment with different microphone placements to see if that makes a difference. Additionally, you might consider using a pop filter or a windscreen on your microphone to reduce background noise and improve sound quality. It's worth noting that this issue may be specific to certain types of microphones or devices, so it might be helpful to provide more information about the equipment you're using.

Related Products