HyperX QuadCast
Rated 5.00 out of 5 based on 2 customer ratings
$94.99
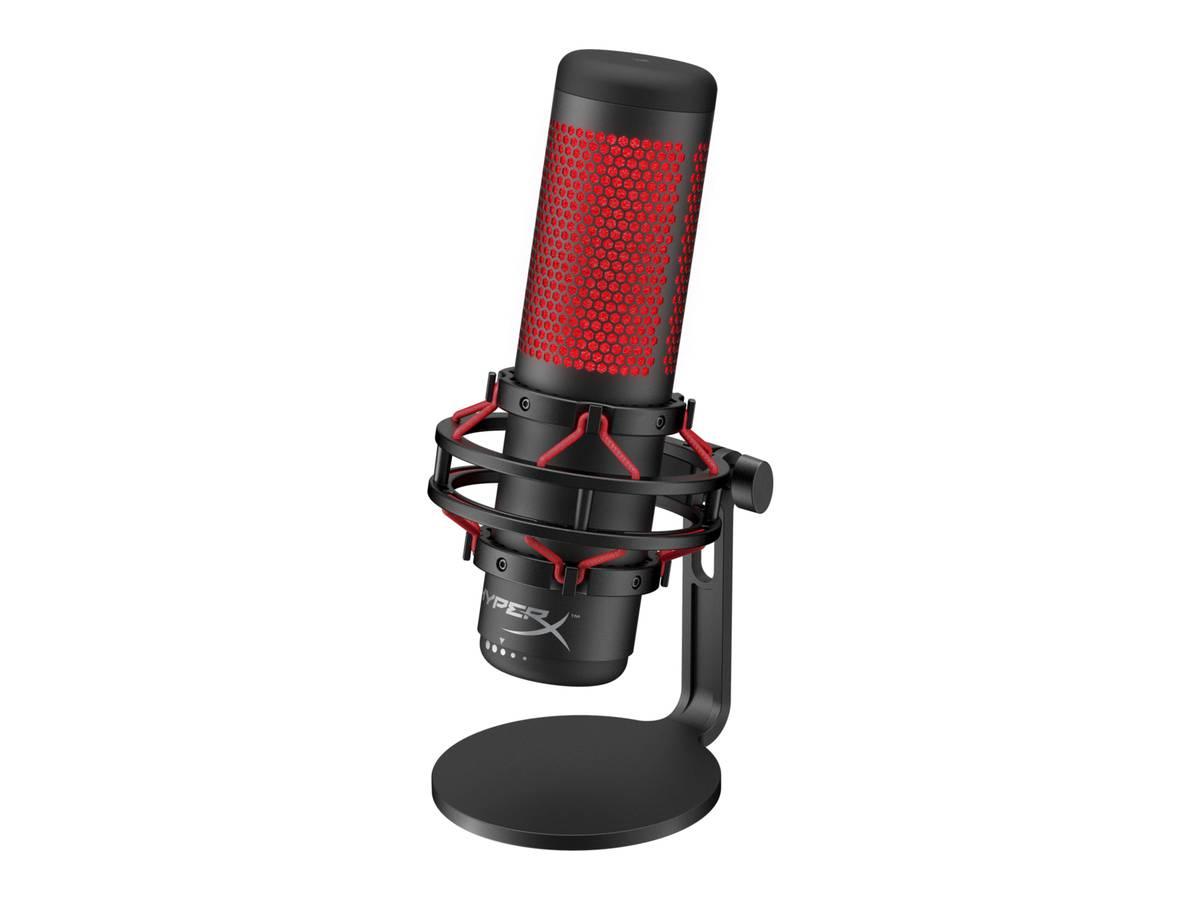
Take your gaming streams to the next level with HyperX QuadCast, the premium, feature-packed microphone designed for all levels of streamers and content creators.
Description
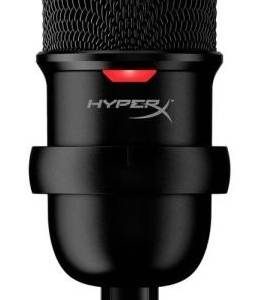
The HyperX QuadCast microphone is an impressive piece of audio equipment favored by professionals of various backgrounds, including streamers, podcasters, gamers, and YouTubers. HyperX has long been known for its high-quality gaming peripherals, and the QuadCast microphone is no exception.
The QuadCast is a condenser microphone with a cardioid polar pattern, which means it’s best suited for solo recordings. It’s also versatile enough for casual conversations, voiceovers, and ASMR recordings. It has a frequency response of 20Hz to 20kHz, which covers a wide range of sounds, but the QuadCast might not be the best choice if you’re looking for a microphone to record deep bass sounds.
One of the standout features of the QuadCast is its built-in shock mount that helps isolate the microphone from external vibrations, ensuring clear audio recording. This is particularly useful if you’re recording in a noisy environment or if you accidentally bump the table.
The QuadCast also has a built-in pop filter that reduces plosive sounds like p and b that can be particularly problematic when recording with a microphone. This is particularly useful for people who are new to recording and might not be used to speaking directly into a microphone.
Another useful feature of the QuadCast is its four selectable polar patterns: stereo, omnidirectional, cardioid, and bidirectional. This offers a range of options for different recording scenarios. The omnidirectional mode is useful for capturing sounds from all directions, while the bidirectional mode is useful for two-person recordings, ideal for interviews or group discussions.
The QuadCast features a 3.5mm headphone jack that allows you to monitor your audio in real-time. It also has a mute button on the top of the microphone that you can quickly access if you need to pause the recording or take a break.
The microphone itself is made of solid metal that feels robust and sturdy. It’s also easy to set up and comes with a stand that can be detached and replaced with a more professional shock mount, microphone boom, or desk arm.
Overall, the HyperX QuadCast microphone is an excellent choice for beginners or professionals looking for a high-quality microphone. It offers a range of features, including four polar patterns, built-in shock mount, and pop filter, at a reasonable price. If you’re looking for a microphone that’s easy to set up and produces clear, high-quality sound, look no further than the HyperX QuadCast.
Microphones with Table Stands, Gaming
HyperX QuadCast properties
| Product name |
QuadCast |
| Type |
Microphone |
| Placement for Microphone |
Microphones with Table Stands |
| Suitable For |
Gaming |
| Polar Patterns |
Bi-directional and figure 8, Cardioid, Omniderectional |
| Microphone Type |
Condenser |
| Wireless |
No |
| Mono/Stereo |
Stereo |
| Mute Button |
Yes |
| On and Off Button |
Yes |
| 3.5mm (1/8″) TRS |
Yes |
| Colour |
Black, Red |
| Height |
24.94 cm |
| Depth |
12.84 cm |
| Width |
10.17 cm |
| Weight |
254.0 g |
Frequently Asked Questions:
How do I properly set up and use the HyperX QuadCast microphone for the first time?
Setting up and using the HyperX QuadCast microphone for the first time involves a few simple steps. Here's how to do it:
1. Unpacking: Carefully unpack the box and take out the microphone, stand, USB cable, and user manual. Make sure all parts are present before proceeding.
2. Setting up the stand: Attach the microphone to the stand by securing it with the clip or screw mount (depending on which one came with your model). Adjust the height and angle of the stand for optimal comfort and positioning.
3. Plugging in: Connect the USB cable to the microphone and then plug it into a USB port on your computer or laptop. The QuadCast is a USB microphone, so there's no need for additional drivers or external power sources.
4. Setting up audio software: Open an audio recording or communication software such as TeamSpeak, Discord, or OBS Studio to configure the microphone settings. Make sure your computer recognizes the QuadCast and sets it as the default microphone.
5. Configuring audio settings: In the software, go to the audio settings and set the input device to the HyperX QuadCast. Adjust the input volume and any necessary equalization or compression settings for optimal sound quality.
6. Testing the microphone: Before starting your recording or communication session, test the microphone by speaking into it and checking the volume levels in your software. Make adjustments as needed to ensure clear and crisp audio.
7. Troubleshooting: If you encounter any issues during setup or use, consult the user manual or HyperX's official support site for troubleshooting steps.
8. Cleaning and maintenance: Clean the microphone with a soft cloth or brush to remove dust or debris that may affect its performance. Avoid using liquids or harsh chemicals to clean it. Regularly check the stand and cable for damage and replace them if necessary.
How do I change my microphone sensitivity on the HyperX QuadCast?
To change your microphone sensitivity on the HyperX QuadCast, follow these steps:
1. Connect your HyperX QuadCast microphone to your computer using the USB cable provided in the box. Press and hold down both the "Volume Up" and "Mute" buttons simultaneously for 2 seconds until the blue LED ring around the gain control knob begins to flash. This will enter the sensitivity adjustment mode. Rotate the gain control knob on top of the microphone clockwise or counterclockwise to increase or decrease the sensitivity of your microphone. The blue LED ring will show you how much sensitivity is currently set. Once you have reached your desired level, release both the "Volume Up" and "Mute" buttons. Your microphone's sensitivity will now be changed accordingly. Note: If you need to make more adjustments in the future, simply repeat steps 2-4.
"How do I connect my HyperX QuadCast microphone to my computer using USB?"
To connect your HyperX QuadCast microphone to your computer using USB, follow these simple steps:
1. Locate the USB port on your computer. The USB port is typically located on the back or side of your computer. Connect one end of the USB cable that came with your HyperX QuadCast microphone into the USB port on your computer. Connect the other end of the USB cable to the bottom of your HyperX QuadCast microphone. Turn on your computer and wait for it to fully boot up. Your HyperX QuadCast microphone should now be connected to your computer via USB. To test that your microphone is working, open a program or application that allows you to record audio (such as Audacity) and speak into the microphone. The audio should be recorded and played back through your speakers or headphones. If you encounter any issues with connectivity or audio quality, ensure that your HyperX QuadCast microphone is set up correctly and that the drivers are up-to-date. You can find the latest drivers for your HyperX QuadCast microphone on the official HyperX website. If you continue to have issues, contact HyperX support for further assistance.
How do I properly set up and use my new HyperX QuadCast microphone for gaming and streaming purposes?
Unboxing:
When you receive your new HyperX QuadCast microphone, make sure all the components are included in the packaging. The box should contain the microphone, a tripod stand, a pop filter, a USB cable, and a user manual. Check that everything is working properly before proceeding with setup. Connectivity:
Connect the HyperX QuadCast microphone to your computer using the provided USB cable. Make sure your computer's operating system recognizes the device by checking its device manager or by plugging and unplugging it a few times. Adjusting Microphone Settings:
After connecting the mic, open up your preferred audio software like Audacity, OBS, or TeamSpeak. In these applications, go to the settings section and choose the HyperX QuadCast microphone as the input device. Make sure that the volume is not too high or too low. It’s always better to start with a lower volume level and gradually increase it until you reach the desired sound output. Placement and Positioning:
The ideal placement for your HyperX QuadCast microphone would be around 6 inches (15 cm) away from your mouth, at a height of approximately 2 inches (5 cm). This distance will help eliminate unwanted background noise and ensure that your voice is clear and crisp. The pop filter that comes with the microphone helps prevent plosive sounds like 'P' and 'B. Attach it to the front of the mic and position it as close to your mouth as possible without getting in the way of your face. Troubleshooting:
If you experience any issues during setup, such as distorted audio or no sound at all, make sure that the microphone is properly connected and that its settings are correct. Check that your computer's operating system recognizes the device by going to its Device Manager. If you still have problems, try resetting the mic to its factory default settings using a button located near its base. If none of these steps work, contact HyperX customer support for further assistance. Maintenance:
Clean the microphone and pop filter regularly with a soft cloth or brush. This will prevent any buildup of dirt, dust, or debris that could affect the performance of your HyperX QuadCast microphone over time. Store it in a safe place where it won't get damaged or knocked over accidentally. Performance:
Once you have set up and tested your HyperX QuadCast microphone, start using it for your gaming and streaming sessions. Remember to speak clearly and at a consistent distance from the mic to maintain consistent sound quality. If you experience any issues during gameplay or streaming, try adjusting your audio settings or changing your position relative to the mic. With proper use and maintenance, your HyperX QuadCast microphone should provide clear, high-quality audio for all of your gaming and streaming needs.
My microphone is not picking up my voice clearly, but it can pick up other sounds in the room. Why is this happening and how do I fix it?
1. Microphone Placement**: The most basic reason could be the placement of the microphone. If it's too far away from you, it will struggle to pick up your voice effectively compared to other sounds in the room. Try moving the microphone closer to your mouth. Background Noise**: Background noise can easily overpower your voice if the levels are not properly adjusted or filtered out. Check for any loud noises in the room that could be interfering with your audio and consider using a noise cancellation feature on your recording device or software, such as a pop filter to reduce plosives (hard consonants). Volume Levels**: Ensure your microphone is picking up sound from you at an adequate level compared to background noise. If necessary, adjust the gain settings in your recording software. Microphone Type and Quality**: A low-quality or mismatched microphone can fail to capture your voice properly while catching other sounds. Consider using a good quality USB microphone that's specifically designed for capturing audio from a single source (like a voice). Audio Interface Quality**: If you're using an external audio interface, ensure it's of good quality and well-matched with your microphone. Recording Software Settings**: Sometimes, the issue can be related to how your recording software is set up. Check if there are any settings that could be causing this issue. For example, in some software, you might need to adjust the input gain or turn on noise reduction features. Environmental Factors**: Environmental factors like humidity and temperature can affect both voice quality and background noise levels. However, these are generally beyond your control unless you're recording in a specific environment that's known to cause such issues. To fix this issue, consider trying the following:
- Check and adjust the microphone placement. Use a pop filter for reducing background noises. Adjust volume levels or gain settings in your software if necessary. Consider using higher quality equipment if your current setup is not meeting your needs. Experiment with different recording settings in your software to see if you can find a combination that works better. If none of these steps resolve the issue, it might be worth seeking professional advice from someone who's familiar with audio technology.
Before you buy HyperX QuadCast


Allan Brad –
I was looking for an interesting microphone for a long time and decided to invest in this one.
I am not a player, I bought it for the appearance and features to be able to create podcasts and tutorial recordings and I must say that I am VERY happy. Really!
You can follow quality changes in the programs on my channel.
AWESOME !! I highly recommend it.
Markeru –
Very good price / quality ratio. I recommend to all people. Quality and durability for years. Hassle-free connection and operation. Stable microphone. Due to the dimensions and quite large packaging, I recommend it for stationary use. To the briefcase and packaging too large. The older model in this case is more appropriate.
Very good microphone for the price, solidly made, quite heavy, not too loud, but the quality compensates for it. I recommend it, it also shines green very nicely and the cable also does the job, this gaming version is simply cooler
A perfect microphone if someone doesn’t have a sound card. All metal. It gives the impression of being very solid. The sound quality is impeccable. Virtually zero noise, although I suspect that for professional use it is worth buying something more expensive. For example, streaming as he found.
Leilani Hanson –
I bought the HyperX QuadCast microphone in January because I needed a good quality microphone for my gaming streams. I was attracted to the fact that it was recommended for gaming use and had a sleek look to it. However, after using it for a few months, I can’t say I’m too impressed with it.
First of all, the weight of the microphone is pretty heavy at 254.0 g. This makes it a bit difficult for me to handle and adjust during my gaming sessions. Additionally, I don’t like the placement of the controls on the microphone. They’re located in a spot that makes it difficult for me to access them while I’m gaming.
When it comes to sound quality, I’ve definitely heard better from other microphones. The audio always comes out sounding a bit muffled and not as clear as I would like. I’ve tried messing around with the settings and adjusting it, but even with proper settings, it doesn’t deliver like some of the other microphones I’ve used in the past.
Overall, I have to rate this microphone at 2 out of 5. While it may be suitable for gaming, I think there are better options out there for the same price point. Not to mention, the delivery process was a bit of a hassle since I live in Virginia. It took longer than expected, and the overall packaging was subpar. I would suggest looking into other microphones before deciding to purchase the HyperX QuadCast.