Philips, DVT2510
Rated 5.00 out of 5 based on 1 customer rating
$48.99
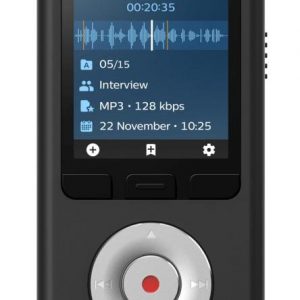
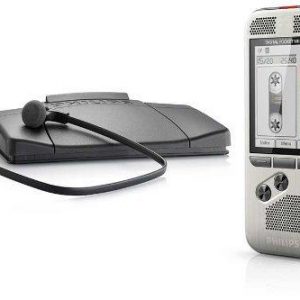
Capture every word with crystal clear clarity using the Philips DVT2510 digital audio recorder, perfect for recording lectures, meetings or interviews.
Description
Philips, a renowned brand in electronics, has introduced the DVT2510 audio recorder. This recorder is designed for professional use with its high-quality recording capabilities and ease of use. The DVT2510 is perfect for recording interviews, lectures, meetings, and other important conversations.
This audio recorder is equipped with two high fidelity microphones that can pick up sound from all directions. The recorder has three different recording modes: PCM, MP3, and WMA. With PCM mode, you can record audio in CD-like quality which means that the audio file produced will be of high quality that can be played on any device. MP3 and WMA modes are also suitable for long recordings where the user needs to record for extended periods.
One of the most prominent features of DVT2510 is its voice activation feature. If enabled, the recorder will automatically start recording as soon as it hears any sound, and once there is no sound, it will automatically stop recording. This can be very useful when recording interviews, as it eliminates unwanted pauses or moments of silence.
The DVT2510 has 8 GB built-in memory, which can store around 88 hours of recording in PCM format, or 261 hours of recording in MP3 format. This amount of storage is perfect for most professional recording needs. Additionally, the memory can be expanded up to 32 GB with the addition of a MicroSD card.
Another useful feature of the DVT2510 is its ability to transfer files wirelessly. The recorder can connect with a smartphone or tablet via Wi-Fi, and the files can then be transferred to the said device with a simple click. This feature is especially helpful for those who need to share their voice recordings quickly.
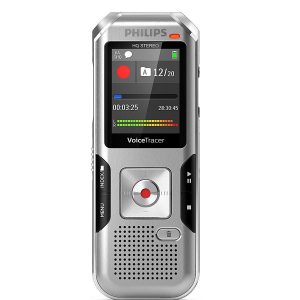
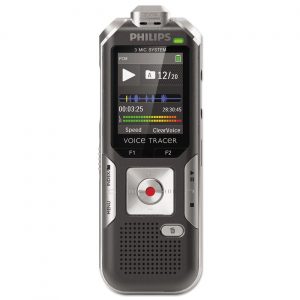
The recorder has an easy-to-use interface with an LCD screen that displays basic information. It also has a built-in USB connector, which allows for easy charging and file transfer. The device is lightweight and compact, making it easy to carry around anywhere.
Overall, the Philips DVT2510 audio recorder is an excellent choice for professionals who need to record high-quality audio in various recording situations. With its sleek design, wireless connectivity, and voice-activated recording, it is a perfect fit for anyone who needs a reliable and easy-to-use audio recorder.
Dictaphone
Philips, DVT2510 properties
| Product name |
DVT2510 |
| Type |
Dictaphone |
Frequently Asked Questions:
What is the maximum recording time for the Philips DVT2510 audio recorder on one AA battery?
The Philips DVT2510 Audio Recorder can run for approximately 12 hours on a single alkaline AA battery. This estimate may vary slightly depending on factors like temperature and usage, but the DVT2510 is known for its long-lasting battery life.
How do I connect my Philips DVT2510 audio recorder to a computer for playback?
To connect your Philips DVT2510 audio recorder to a computer, you can use the USB cable provided with the device. Follow these steps:
1. Locate the USB port on your Philips DVT2510 audio recorder. It is usually located at the bottom or side of the device.
2. Plug one end of the USB cable into the port on the audio recorder and the other end into a USB port on your computer.
3. Once connected, the Philips DVT2510 will appear as an external storage device on your computer.
4. Open your preferred media player software (e.g., Windows Media Player or VLC) and navigate to the folder where the audio files are stored in the Philips DVT2510.
5. Select the desired audio file and play it using the media player software.
6. If you want to transfer the audio files from the Philips DVT2510 to your computer, simply drag and drop them into a folder on your computer's hard drive.
How do I connect my Philips, DVT2510 to an external microphone for better audio quality during recordings?
To connect an external microphone to your Philips, DVT2510 for better audio quality during recordings, follow these steps:
1. Make sure your microphone is compatible with the Philips, DVT2510 and has a 3. Locate the microphone input on your camera. It is usually labeled as "MIC" or "EXT MIC". Insert one end of the 3. Switch the camera's audio input mode to "External" or "Line" using the camera's menu settings. This will ensure that the audio is being picked up by the external microphone instead of the built-in camera microphone. Test the connection by making a recording and checking the audio quality. Make adjustments as needed, such as adjusting the volume or checking the battery levels on your microphone. Once you're satisfied with the audio quality, save your recordings to an external storage device or cloud service for safekeeping. By following these steps, you should be able to improve the audio quality of your recordings using an external microphone with your Philips, DVT2510 camera.
How do I properly connect my Philips DVT2510 audio recorder to a USB drive for transferring recorded files?
To connect your Philips DVT2510 audio recorder to a USB drive and transfer recorded files, follow these steps:
1. Insert the USB drive into the USB port on the front of the recorder. Press the "Menu" button to access the main menu. Use the navigation buttons to select "USB" from the list of options. Select "Format USB Drive" if you want to format the USB drive for use with this device. Follow the on-screen instructions to complete the formatting process. If the USB drive is already formatted, select "Copy Files to USB. The recorder will search for files to copy and begin transferring them automatically. When the transfer is complete, remove the USB drive from the recorder and insert it into your computer to access the transferred files. To prevent data loss or corruption, always eject the USB drive properly before removing it from the recorder. If you encounter any issues during the transfer process, consult the user manual for troubleshooting tips or contact Philips customer support for further assistance. Remember to perform this task carefully and thoroughly to ensure that your recorded files are transferred accurately and efficiently.
My recorder will not turn on, it just beeps continuously when I press the power button. What is wrong with my unit and how can I resolve this issue?
A stuck or faulty switch could cause a continuous beeping sound when you press the power button. This happens because the switch doesn't properly register the button press or release, causing the recorder to get stuck in an "on" state. Another possible reason for this problem is that the battery might be dead and not charging correctly. If your recorder uses batteries, try removing them and letting it sit for a few minutes before putting them back in. If the issue persists, you may want to check if there's any corrosion or dirt on the battery contacts. Cleaning these contacts with a cotton swab dipped in vinegar can help restore proper connection. Another common issue could be related to faulty circuitry inside your device. This might require professional repair or replacement of components. If the problem is due to a software glitch, you may want to try resetting the recorder by removing the batteries and pressing the power button for 30 seconds to discharge any residual electrical charge. Then put the batteries back in and see if it turns on properly. It's also possible that there might be some internal issue with the electronics of your unit, which would need professional repair or replacement.
Before you buy Philips, DVT2510




Conrado –
Easy to use, small recorder, better sound quality than in previous models – one side down takes ordinary batteries or rechargeable batteries, but the rechargeable batteries do not charge when the recorder is connected to the computer to transfer files – you need to remove the batteries and charge in the charging unit. I know this is because you can use regular batteries and it’s a safety feature, but charging would be really easier.
Jane –
Buying Philip’s DVT2510 in April turned out to be a great decision! This audio recorder has truly exceeded my expectations, earning itself a well-deserved rating of number five (the best possible note).
From the moment I unboxed it, I could tell that this device was built with top-quality materials and craftsmanship. The sound quality is incredible, capturing even the subtlest nuances in speech and music with crystal clarity. It’s also extremely user-friendly; setting up the recorder took less than five minutes, and operating it requires minimal effort – perfect for both novice users and seasoned audiophiles alike.
Comparing Philip’s DVT2510 to other popular audio recorders on the market, it stands out as a top contender due to its exceptional performance and versatility. While other brands may boast similar features, none have quite managed to match the overall reliability and ease-of-use that this product offers.
One tip I would like to share with potential buyers is to pay attention to battery life when considering different models. With continuous use, Philip’s DVT2510 provides up to ten hours of recording time on a single charge, making it an ideal choice for long days or extended projects. Additionally, the built-in memory allows you to store countless recordings without needing to constantly change storage devices, which can save both time and money in the long run.
In conclusion, investing in Philip’s DVT2510 has been one of the best decisions I’ve made regarding audio equipment. Its outstanding sound quality, user-friendly interface, and impressive battery life make it a must-have for anyone looking to capture high-quality audio recordings with ease. So if you’re ready to take your recording game to the next level, don’t hesitate – give this remarkable audio recorder a try!