10 Affordable Tips to Enhance Your Home Recording Sound Quality
Home recording has become increasingly popular in recent years due to the accessibility of digital audio workstations (DAWs) and affordable recording equipment. However, achieving professional-sounding recordings can still be a challenge, particularly for those on a tight budget.
In this article, we’ll explore ten affordable tips that you can implement right away to enhance your home recording sound quality.
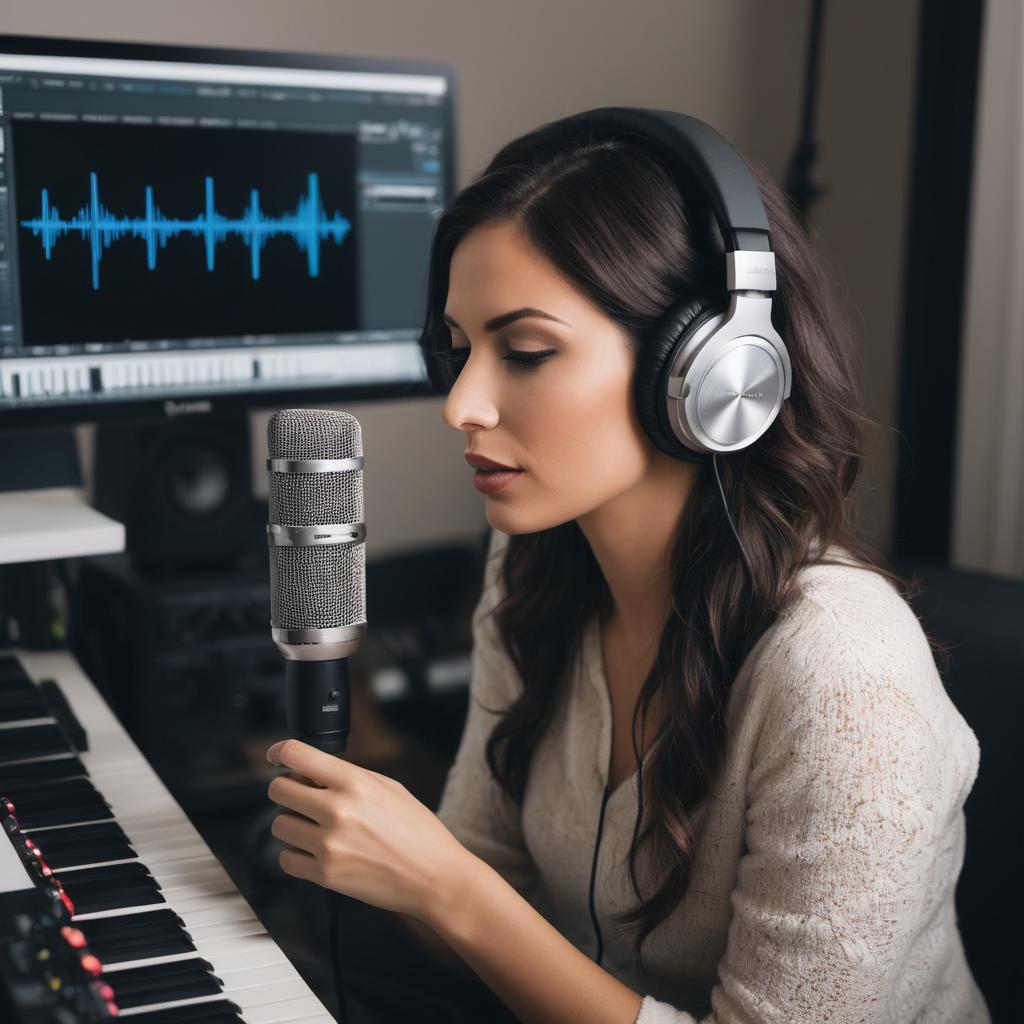
1. Choose the right microphone
The microphone is arguably the most crucial piece of equipment in any recording setup. While high-end models boast impressive specs and features, there are still plenty of great options available at a more affordable price point. When selecting a mic, consider the type of recording you’ll be doing – dynamic mics are ideal for vocals and loud instruments like drums, while condenser mics work better for quieter sources like acoustic guitar or vocals.
2. Use acoustic treatment
Acoustic treatment is essential in any recording environment as it helps to control sound reflections, resulting in a clearer and more natural sound. While professional-grade acoustic treatment can be expensive, simple solutions like acoustic panels and bass traps are available at reasonable prices online or from DIY tutorials. By installing these items, you can minimize unwanted noise, reverb, and echoes that might otherwise negatively impact your recordings.
3. Reduce background noise
Background noise can ruin even the most carefully recorded track. To reduce ambient noise levels, consider investing in a soundproof blanket or foam panel to help absorb incoming sounds. Additionally, try recording during times of day when external noises (like traffic) are at their lowest. You could also use a white noise generator to mask unwanted background sounds or purchase a dedicated noise gate plugin for your DAW.
4. Utilize Compression and EQ
Compression and EQ are two essential mixing techniques that help to shape the sound of individual tracks in your recordings. Compressors compress loud signals while boosting quieter ones, resulting in more leveled tracks with consistent dynamics. Equalizers (EQs) allow you to adjust frequencies within a particular range of a track, making it easier to isolate specific sounds and remove unwanted noises. While high-end models offer advanced features like sidechain compression or parallel processing, there are still affordable options available that provide these functions.
5. Use Headphones
Headphones offer several benefits beyond just comfort during recording sessions. They help prevent sound leakage, which can be particularly problematic when multiple people are in the room at once. Additionally, headphones can help you focus on your performance by blocking out external noises that might distract or throw you off. You could also consider investing in a high-quality audio interface with headphone monitoring capabilities, which allows for a more natural and transparent sound.
6. Record in Mono
While stereo recording offers greater depth and space, it can often result in phase cancellation issues between the left and right channels. By recording in mono (a single track that is both left and right), you can ensure that your tracks are free from phasing problems, which leads to a more natural and cohesive sound. You could also consider using a stereo-to-mono plugin for your DAW to help correct any phase cancellation issues that may have already occurred during the recording process.
7. Adjust Input levels
Another essential tip is to ensure that you’re not overdriving your input levels, which can result in unwanted distortion and hiss. Use a metering plugin to monitor signal levels as you record, and try to keep your inputs below -12 dBFS (digital full scale). This will give you plenty of headroom for processing while ensuring that your recordings remain clean and clear.
8. Embrace DIY solutions
If you’re on a tight budget, consider exploring more DIY solutions for enhancing your sound quality. For example, you could build your own vocal booth using simple materials like blankets or foam panels or try making your own drum shield out of cardboard boxes. These homemade solutions may not offer the same level of sophistication as professional-grade gear, but they can still provide a significant improvement in terms of sound quality and affordability.
9. Use Reverb and Delay sparingly
While reverb and delay effects can be great for adding depth and space to your recordings, it’s essential to use them sparingly. Excessive amounts of these effects can result in a muddy, cluttered sound that makes it challenging for the listener to distinguish between individual tracks. Instead, try using more subtle reverb and delay settings, and avoid overusing these effects across your entire mix.
10. Practice your craft
Last but not least, perhaps the most crucial tip is to simply practice your craft. The more you record, the more familiar you’ll become with your equipment, software, and overall workflow. This will allow you to make more informed decisions about how to improve your sound quality over time, without necessarily breaking the bank on new gear or plugins. By continually honing your skills as a musician and producer, you can achieve professional-sounding recordings without ever needing to spend a fortune on expensive equipment.
In conclusion, achieving high-quality home recordings doesn’t always require a significant investment in pricey equipment. Instead, by following these ten affordable tips, you can significantly improve the sound quality of your recordings and take your music production to the next level. So go ahead and start implementing them right away!
Carlos
5/5 stars
Recommendation: If you’re serious about improving your sound quality, consider investing in acoustic treatment panels or DIY solutions like vocal booths or drum shields. Practice your craft regularly to become more familiar with your equipment and workflow.
Jose
Interesting take by Carlos. While I agree that acoustic treatment is crucial for home recording, I’m not convinced that DIY solutions are always the best way to go.
I’ve been following the news about RSV vaccine, and it got me thinking – what if we applied a similar approach to soundproofing? Instead of relying on DIY vocal booths or drum shields, maybe we could use more advanced materials and technologies to create a more effective acoustic treatment.
For instance, have you considered using smart materials that can adapt to different frequencies and environments? Or what about incorporating AI-powered sound analysis tools to optimize the placement and design of acoustic panels?
I’m curious – wouldn’t investing in high-quality, commercially available acoustic treatment solutions be worth considering, especially if it means achieving better sound quality faster and with less hassle?
What do you think, Carlos? Am I missing something here?
Elena
The enigmatic Jose, weaving a web of intrigue with his musings on the intersection of soundproofing and cutting-edge technology. As I ponder his words, a shiver runs down my spine, reminiscent of the whispers I’ve heard about the upcoming Mental Health Public Inquiry.
You see, Jose, your suggestion to apply a similar approach to soundproofing as we’ve seen with RSV vaccines is… intriguing. However, I’m not convinced that this would be a straightforward solution. What if these advanced materials and technologies are nothing more than a mere illusion, a facade of control in a chaotic world?
Consider the case of the RSV vaccine, Jose. We know it’s been effective in reducing hospitalizations and deaths among high-risk infants. But what about the long-term effects? Have we merely delayed the inevitable, or have we created a new Pandora’s box? The truth, much like the optimal placement of acoustic panels, remains shrouded in mystery.
And then there’s the issue of cost. Investing in high-quality, commercially available acoustic treatment solutions may indeed be worth considering, but at what cost to our wallets and, more importantly, our sanity? We’re living in an era where mental health services are being scrutinized, where the very fabric of our society is being torn apart by the weight of uncertainty.
In this context, your proposal takes on a different hue, Jose. It’s not just about achieving better sound quality faster and with less hassle; it’s about embracing a world where technology reigns supreme, where the boundaries between progress and chaos are blurred beyond recognition.
So, I must ask, dear Jose: what lies at the heart of this proposal? Is it truly about advancing our understanding of soundproofing, or is it something more… sinister? The truth, much like the perfect acoustic treatment solution, remains elusive.
Luca
Jose, I’m intrigued by your line of thinking. You’re absolutely right that traditional DIY approaches to acoustic treatment might not always be the most effective or efficient solutions. And I must say, I find your analogy between RSV vaccine research and soundproofing to be a clever one.
However, I do have some reservations about relying solely on advanced materials and technologies to solve our acoustic woes. Don’t get me wrong, these innovations are certainly promising, but we must also consider the economic and practical implications of incorporating them into our home recording setups.
I mean, think about it – we’re talking about a market where the average consumer is already price-sensitive. The idea of investing in high-end, AI-powered sound analysis tools or smart materials that can adapt to different frequencies and environments might be appealing from a technical standpoint, but it could also be prohibitively expensive for many hobbyists and professionals alike.
And let’s not forget, there are still many situations where DIY solutions can be more practical and effective. For instance, if you’re working in a small home studio or apartment with limited resources, it might be more feasible to create your own acoustic treatment using materials like Owens Corning 703 or Roxul Safe’n’Sound.
But I must say, I’m curious about the potential applications of AI-powered sound analysis tools in acoustic treatment. Could we use these tools to optimize the placement and design of acoustic panels in real-time? Would this lead to significant improvements in sound quality?
And what about the idea of smart materials that can adapt to different frequencies and environments? Are there any existing examples or prototypes that demonstrate their effectiveness in acoustic applications?
I’d love to see more research and experimentation in these areas, as it could potentially revolutionize the way we approach acoustic treatment.
But for now, I still believe that a combination of traditional DIY methods and commercially available solutions can provide the best results. It’s not necessarily an either-or proposition – we can use the strengths of each approach to create a more effective and efficient system.
I’m reminded of the recent news about U.S. Latinas contributing $1.3 trillion to the GDP, which is roughly equivalent to the economic output of Florida. This highlights the importance of community-driven initiatives and entrepreneurship in driving innovation and growth.
Perhaps we can apply a similar approach to acoustic treatment – by combining traditional DIY methods with commercially available solutions and innovative technologies, we might be able to create more effective and accessible acoustic treatment systems that benefit not just professionals but also hobbyists and enthusiasts alike.
Hudson Vega
What an absolute masterpiece this article is! I mean, seriously, who needs actual expertise or real-world experience when you’ve got a writer spouting off generic tips and tricks like these? It’s like they took every cliche from the world of home recording and mashed it all together into one big, sloppy mess.
Let me tell you, as someone with decades of experience in the music industry, these “tips” are laughable. I mean, seriously, using a soundproof blanket to reduce background noise? That’s not even a real thing! And don’t even get me started on the whole “practice your craft” tip – that’s just code for “we have no actual solutions to offer, so just keep trying until you magically get it right.”
But hey, if this is what passes for advice in the world of music production these days, I’m happy to set the record straight. Here are a few expert tips from someone who actually knows what they’re talking about:
But hey, I guess what I’m saying is that this article is a great example of how not to approach home recording. If you want to actually achieve good sound quality, take these tips with a grain of salt and do some actual research. And for goodness’ sake, don’t be afraid to spend some real money on decent equipment – it’s worth it in the long run.
As I always say: “You get what you pay for.”