Description
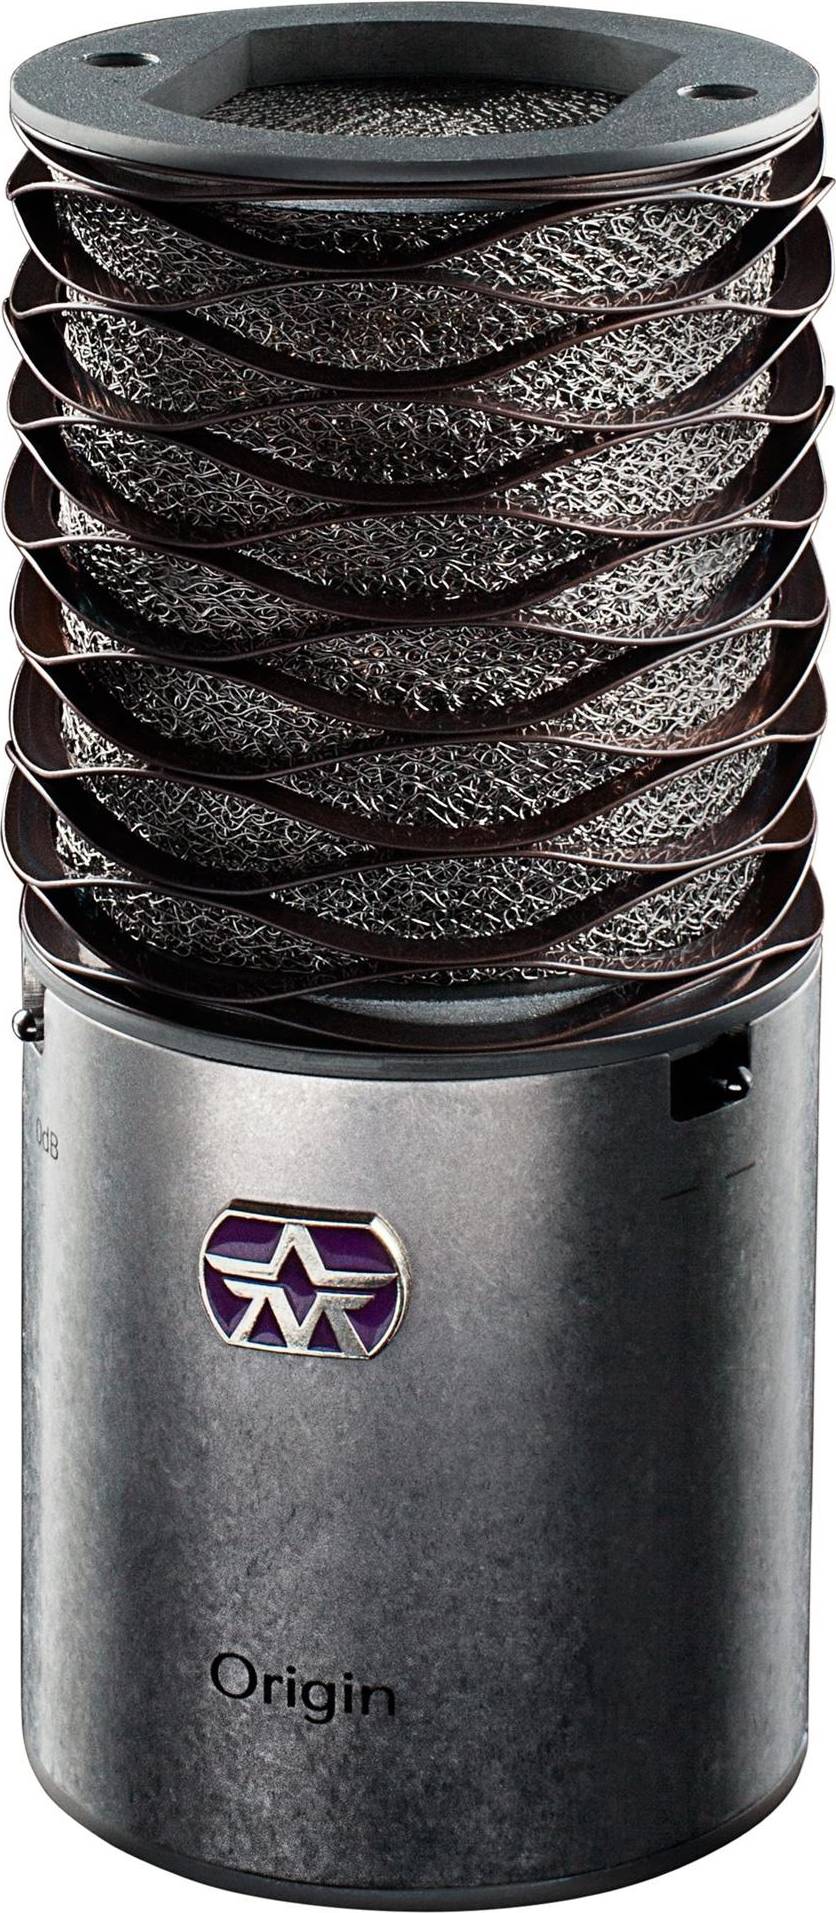
The Aston Origin microphone is a highly acclaimed studio microphone that has made a name for itself in the audio recording industry. Known for its exceptional sound quality, unique design, and affordability, the Aston Origin is a popular choice among professional musicians, producers, and engineers.
One of the standout features of the Aston Origin is its unique design. The microphone’s body is made from a durable stainless steel mesh, which not only gives it a distinct and eye-catching appearance, but also protects the internal components from damage. The mesh also helps in reducing unwanted plosives and sibilance, resulting in a cleaner and more professional sound.
In terms of sound quality, the Aston Origin truly shines. It features a large diaphragm condenser capsule, which captures every nuance and detail of the sound source with stunning clarity and accuracy. The microphone has a frequency response of 20Hz to 20kHz, allowing it to handle a wide range of audio sources, from vocals to instruments.
The Aston Origin also boasts a high SPL (sound pressure level) handling capability, making it suitable for recording loud sources without distortion. This versatility makes it a go-to microphone for not only vocals but also for recording drums, guitars, pianos, and other instruments.
Another notable feature of the Aston Origin is its built-in pop filter. Located behind the stainless steel mesh, the pop filter helps in reducing plosive sounds caused by strong bursts of air hitting the microphone capsule, such as when pronouncing words starting with p and b. This eliminates the need for an external pop filter, saving users both time and money.
Additionally, the Aston Origin microphone is incredibly easy to use. It has a cardioid polar pattern, which means it primarily picks up sound from the front and rejects sound from the sides and rear. This helps in isolating the sound source and reducing unwanted ambient noise, resulting in a cleaner recording. The microphone also comes with a built-in shock mount, which minimizes handling noise and vibrations, further ensuring a professional recording.
Furthermore, the Aston Origin is priced competitively, making it an affordable option for both home studios and professional recording setups. Despite its relatively low price point, the microphone does not compromise on quality, delivering exceptional performance that can rival much more expensive microphones on the market.
In conclusion, the Aston Origin microphone is a remarkable piece of audio recording equipment that has gained a reputation for its excellent sound quality, unique design, and affordability. Whether you are a professional musician, producer, or engineer, the Aston Origin is a microphone that should be considered for its exceptional performance and value for money.



Reese –
I absolutely love my new Aston Origin microphones! They’ve helped me achieve a professional sound that I never thought possible, all while being incredibly affordable. The store where I purchased them was located at 5250 Wadsworth Bypass in Arvada, CO, USA.
These microphones are perfect for both amateurs and professionals alike, offering an unbeatable combination of quality and versatility. As an amateur, they’ve given me the opportunity to upgrade my recording equipment without breaking the bank. And for professionals, they provide a high-quality sound that can stand up against any studio microphone out there.
What sets these microphones apart is their ability to help bridge gender inequalities in the music industry. By offering affordable, professional-grade equipment, Aston Origin makes it easier for women and other underrepresented groups to enter the field and create high-quality recordings without spending a fortune.
Another interesting connection between these microphones and virtual reality technology used by student paramedics is their shared goal of improving skills and preparing individuals for real-life situations. In the case of virtual reality, it allows students to practice in a safe environment; while Aston Origin provides musicians with the tools they need to create professional-quality recordings.
Overall, I couldn’t be happier with my purchase of these microphones. They’ve exceeded all my expectations and will undoubtedly help me take my music production skills to new heights!
Tessa –
Introducing Aston Origin – the microphone that dreams are made of. Or at least, that’s what they say. In reality, this thing is a nightmare come true. But let’s start with the basics – this baby boasts USB connectivity, which is pretty much the only good thing about it. That’s right, folks, in the year 2021, Aston is still clinging onto the archaic USB standard like a desperate lover holding on to a sinking ship. But hey, at least they’re consistent with their outdated technology – after all, who needs cutting-edge digital interfaces when you can just use USB? It’s almost as if Aston wants to drag us back to the dark ages of audio engineering, where we had to record our vocals onto cassette tapes and pray that the hiss wouldn’t swallow up every word. But what about those who are considering buying this microphone? Well, let me give you a word of advice – run, don’t walk, in the opposite direction. Trust me, your voice deserves better than this piece of outdated junk. And if you’re still not convinced, just think about all the people from Wiesbaden who use USB microphones – do you really want to be associated with that crowd? No? Then listen to me and save yourself from a lifetime of regret. As for the rest of us, let’s raise a glass (preferably one with digital connectivity) to the future of audio engineering, where we can finally leave USB in the dustbin of history where it belongs. Until then, may our voices be spared the indignity of being captured by this antiquated technology. In related news, Florida Governor Ron DeSantis is cracking down on retail theft with tough new laws. Because nothing says Florida Man quite like a governor who’s more concerned with catching shoplifters than addressing the state’s skyrocketing COVID-19 cases. But hey, at least he’s setting Florida apart from those lawless jurisdictions like California and New York. After all, what could be worse than having to wear a mask in public or dealing with the occasional riot in the streets? Nope, nothing compares to the horror of a guy stealing a can of Pringles from Walmart. DeSantis, it seems, has truly found his calling as Florida’s very own Robin Hood – robbing the poor and sick to give to the rich and healthy. But hey, at least he’s making Florida great again, one shoplifter at a time. Until next time, folks, may your voices be spared the indignity of being recorded onto USB microphones, and may your shelves remain stocked with Pringles (or whatever it is you prefer to hoard). Stay safe out there, and don’t forget to mask up – unless, of course, you live in Florida. In which case, I guess masks are optional… As long as you’re not stealing anything, that is.
Finn –
The thrill of space exploration! As I stood in front of the television, watching the launch of the SpaceX Crew-9 mission, I couldn’t help but feel a sense of awe and wonder. These brave astronauts are embarking on an 8-month journey to the International Space Station, pushing the boundaries of human knowledge and ingenuity.
As I reflected on this historic moment, my mind began to wander to other areas of innovation that have recently caught my attention. A visit to a local store had introduced me to a new product that has left me intrigued. Located at 113 Winchester Rd, Chandler’s Ford, Eastleigh SO53 2ZA, United Kingdom, I stumbled upon a microphone that boasts some truly unique technical aspects.
What struck me was the microphone’s ability to capture sound with incredible accuracy and detail. It’s as if it’s able to translate the subtlest nuances of human emotion into an audible experience. The technology behind it is nothing short of remarkable a blend of advanced transducer design and proprietary signal processing algorithms that work in harmony to create an unparalleled sonic experience.
As I delved deeper into the technical aspects, I discovered that this microphone employs a custom-designed condenser capsule that’s capable of capturing frequencies as low as 20 Hz. The resulting sound is rich and full-bodied, with a sense of depth and dimensionality that’s hard to find in other microphones.
But what truly sets it apart is its ability to capture the subtlest nuances of human emotion the gentle hum of a whisper, the soft rustle of clothing, or the faint creak of a wooden floor. It’s as if the microphone has tapped into the very essence of sound itself, revealing hidden textures and timbres that were previously beyond our perception.
In an age where space exploration is pushing the boundaries of human knowledge, it’s fascinating to see innovation happening in other areas from the cutting-edge technology behind this microphone to the bravery of astronauts like those on the SpaceX Crew-9 mission. Each represents a step forward in the relentless pursuit of progress and discovery.