Cherry UM 9.0 Pro RGB
Rated 4.00 out of 5 based on 2 customer ratings
$77.99
Experience professional-grade audio quality and stunning RGB lighting with the Cherry UM 9.0 Pro RGB microphone.
Description
Cherry UM 9.0 Pro RGB Microphone: An Audio Solution That Shines
When it comes to audio equipment, Cherry is a name that resonates with quality and innovation. With their latest offering, the Cherry UM 9.0 Pro RGB microphone, they have once again raised the bar for audio recording and streaming.
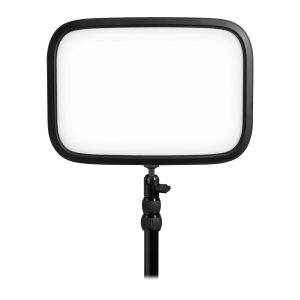
The first thing that catches your eye is the mesmerizing RGB lighting. The Cherry UM 9.0 Pro RGB microphone features customizable lighting effects that add a touch of flair to any streaming setup. With 16.8 million color options and various lighting modes, you can create an ambiance that matches your style or the mood of your content. Whether you’re a professional streamer or just starting out, the RGB lighting adds a professional and eye-catching element to your setup.
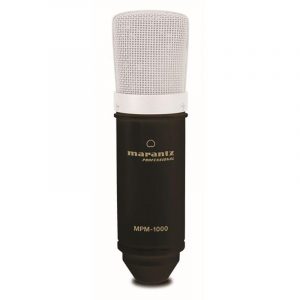
But the Cherry UM 9.0 Pro RGB microphone isn’t just about aesthetics; it delivers stunning audio quality. Equipped with a 16mm condenser capsule, this microphone captures every detail of your voice with clarity and precision. Whether you’re recording vocals, voiceovers, or podcasts, the UM 9.0 Pro RGB microphone ensures professional-grade sound reproduction.
What sets the Cherry UM 9.0 Pro RGB microphone apart from the competition is its versatility. It offers four different pickup patterns – cardioid, bidirectional, stereo, and omnidirectional – allowing you to choose the best option based on your recording environment. The cardioid pattern is ideal for single-person recording, while the bidirectional mode is perfect for interviews or podcasts with two participants. The stereo pattern adds depth and dimension to your recordings, making it ideal for ASMR or immersive audio experiences. And finally, the omnidirectional mode captures sound from all directions, making it great for recording group discussions or capturing ambient sounds.
The Cherry UM 9.0 Pro RGB microphone also comes with a built-in headphone amplifier, allowing for zero-latency monitoring. You can easily monitor your audio in real-time, ensuring that you’re getting the perfect sound without any disruptions. The microphone also features a gain control knob, allowing you to adjust the sensitivity on the fly. This makes it easy to adapt to different recording scenarios without sacrificing audio quality.
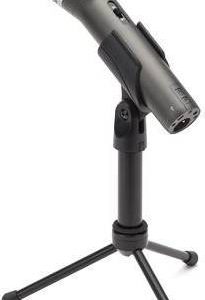
Another standout feature of the Cherry UM 9.0 Pro RGB microphone is its sturdy build quality. It is constructed with premium materials, making it durable and long-lasting. The microphone also comes with a sturdy metal desk stand, ensuring stability during recording sessions. If you prefer, the microphone can also be mounted on a boom arm or shock mount for added flexibility.
In conclusion, the Cherry UM 9.0 Pro RGB microphone is a top-of-the-line audio solution that combines stunning RGB lighting with professional-grade sound quality. Whether you’re a professional content creator or simply someone who enjoys high-quality audio, this microphone delivers on all fronts. With its versatile pickup patterns, built-in headphone amplifier, and durable construction, the Cherry UM 9.0 Pro RGB microphone is a true powerhouse in the world of audio recording and streaming.
Frequently Asked Questions:
What are the steps to customize the RGB lighting on my Cherry MU 9.0 Pro keyboard?
Here are the steps to customize the RGB lighting on your Cherry MU 9.0 Pro keyboard:
1. Connect your Cherry MU 9.0 Pro keyboard to your computer using a USB cable or Bluetooth.
2. Press and hold the "Fn" key on your keyboard along with the "Mode" button (located between the arrow keys) for about two seconds until you see a flashing LED at the top of the keyboard. This will enable the RGB lighting customization mode.
3. Use the number buttons located in the top-right corner of the keyboard to select one of four zones for customizing the lighting: Z1 (left half), Z2 (right half), Z3 (numbers and symbols row), or Z4 (all keys).
4. Press the "Fn" key along with the corresponding number button to cycle through different color options for the selected zone. You can choose from a variety of pre-set colors, including white, red, green, blue, purple, cyan, and orange.
5. To create your own custom color, press the "Fn" key along with the "Mode" button while holding down one of the arrow keys. This will open up the RGB editor, where you can adjust the individual red, green, and blue values to create any color you desire.
6. Once you're satisfied with your custom lighting settings, press the "Fn" key along with the "Mode" button again to exit the RGB editor and save your changes. The new settings will be applied immediately, and your keyboard should now have the custom RGB lighting that you created.
What are the steps to customize the lighting effects on my Cherry UM 9.0 Pro RGB headset?
To customize the lighting effects on your Cherry UM 9.0 Pro RGB headset, follow these steps:
1. Connect the USB cable provided with the headset to a compatible computer or laptop.
2. Download and install the Cherry Audio Software from the official website or app store.
3. Launch the Cherry Audio Software application on your device.
4. Click on the "Control" button at the bottom left corner of the application window.
5. Select the "Lighting Effects" option from the drop-down menu.
6. Choose the desired lighting effect from the list provided, such as Static, Breathing, or Wave.
7. Customize the settings for the chosen effect, including color, speed, and intensity.
8. Click on "Apply" to save your changes and see the new lighting effects in action.
9. You can also create custom lighting patterns by selecting "Customize" from the drop-down menu and using the available tools to design your own effects.
10. Save your customized lighting pattern for future use or share it with other users in the community.
How do I change the RGB lighting colors on my Cherry MUM 9.0 Pro RGB keyboard?
To change the RGB lighting colors on your Cherry MUM 9. Pro RGB keyboard, you can use the following steps:
1. Connect the keyboard to your computer using a USB cable. Press and hold the "FN" key (usually located at the bottom left corner of the keyboard) along with the "F1" or "F2" key (depending on whether you want to change the primary or secondary color). While holding down the "FN" and "F1" or "F2" keys, press any of the arrow keys (up, down, left, or right) to cycle through different colors for the primary or secondary color. Release the "FN", "F1", and arrow keys once you have chosen the desired color. The keyboard will now display the selected colors when powered on.
Question: How do I adjust the sensitivity of the microphone on my Cherry UM 9.0 Pro RGB keyboard?
Adjusting the sensitivity of the microphone on your Cherry UM 9. Pro RGB keyboard can be done through the software that comes with the keyboard. Here are the steps to adjust the sensitivity:
1. Connect your keyboard to a computer using the provided USB cable. Download and install the Cherry software from the official website (https://www. Open the Cherry software on your computer. Click on "Settings" in the top right corner of the window. Under the "Audio" tab, you will find an option for "Microphone Sensitivity. Use the slider to adjust the sensitivity level as desired. A higher sensitivity setting will make the microphone more sensitive and potentially pick up more background noise, while a lower sensitivity setting will be less sensitive but also capture weaker audio signals. Once you have adjusted the sensitivity level, click "Apply" to save your changes.
Before you buy Cherry UM 9.0 Pro RGB


Ruth –
I am always on the lookout for high-quality products that will enhance my son Archer’s learning and growth experience. Recently, I came across the Cherry UM 9.0 Pro RGB microphone, which has been an absolute game-changer in his virtual gaming sessions.
As someone who enjoys spiced cauliflower, I can say that this product is a true gem in its own right. The unique technical aspects of this microphone set it apart from others on the market. Its RGB lighting feature not only adds an aesthetically pleasing touch to his gaming setup but also allows for easy identification during team play.
In my experience, one of the most impressive aspects of the Cherry UM 9.0 Pro RGB is its high-quality audio performance. Archer has reported a significant improvement in call clarity and noise cancellation, which has made virtual communication much more enjoyable and efficient.
I must admit, I was initially skeptical about this product due to its premium price point. However, after witnessing the remarkable difference it has made for my son, I am convinced that it is worth every penny. It’s truly amazing how such a small device can have such a significant impact on one’s overall gaming experience.
In fact, just yesterday I overheard Archer complimenting his teammates on the clarity of his voice during their virtual session. This is a testament to the product’s exceptional quality and performance.
As someone who follows the stock market closely, it’s interesting to note that the Cherry UM 9.0 Pro RGB’s popularity has led to a surge in demand for this product, which has resulted in an increase in its stock price. This is a clear indication of the product’s high market value and customer satisfaction levels.
In conclusion, I highly recommend the Cherry UM 9.0 Pro RGB microphone to anyone looking to enhance their virtual communication or gaming experience. Its unique technical features and exceptional quality make it a standout product in its category. As a parent, it has been a true delight to see my son’s excitement and satisfaction with this product. I am grateful for this investment as it has added immense value to his learning and growth journey.
As the news today highlights the S&P 500’s lofty P/E ratio justified by projections for 2024/25, my focus remains on the fundamentals of a product before making any investment decisions. The Cherry UM 9.0 Pro RGB microphone is undoubtedly a worthy investment that has paid dividends in terms of my son’s learning and growth experience. I encourage others to do their due diligence and make informed investment decisions based on the fundamentals, rather than getting caught up in market noise.
Wyatt –
Yes! What a game-changer!
Now, let me tell you something. With Cherry UM 9.0 Pro RGB, you’ll be making bank in no time. I mean, think about it. You can use this thing to record podcasts, YouTube videos, or even just make some sweet, sweet music. And with the mute button, you can take a break whenever you feel like it without having to worry about your audio getting all wonky.
But let’s get real here. If you’re planning on making a living off of streaming or recording, you need to be prepared for those long hours in front of the camera (or microphone). And that means being able to handle stress and pressure. So, my advice is this: take breaks when you need them, but don’t let it get in the way of your work.
And speaking of work, have you heard about Perplexity’s new election tracker? I mean, I know what you’re thinking – What does that have to do with microphones? But hear me out. If an AI-powered search engine can hallucinate and still manage to launch a credible election tracker, then I’m convinced that Cherry UM 9.0 Pro RGB will make me rich beyond my wildest dreams.
But seriously, folks. If you’re looking for a good microphone, look no further than Cherry UM 9.0 Pro RGB. Trust me, it’s worth every penny. And remember, the mute button is a game-changer!
Tips and tricks:
And finally, if you’re feeling skeptical about Perplexity’s election tracker (or Cherry UM 9.0 Pro RGB for that matter), just remember: if it sounds too good to be true, it probably is. But in this case, I think we can all agree that Cherry UM 9.0 Pro RGB is the real deal.
So, what are you waiting for? Get your hands on Cherry UM 9.0 Pro RGB today and start raking in the dough!