RØDE NT1 5th Generation
$171.99
Experience unparalleled studio-quality sound with the RØDE NT1 5th Generation microphone, delivering exceptional clarity and precision for professional-grade recordings.
Description
The RØDE NT1 5th Generation microphone is a game-changer in the world of audio recording. Known for its exceptional sound quality, durability, and affordability, this microphone has become a staple for both professional and amateur musicians and audio enthusiasts.
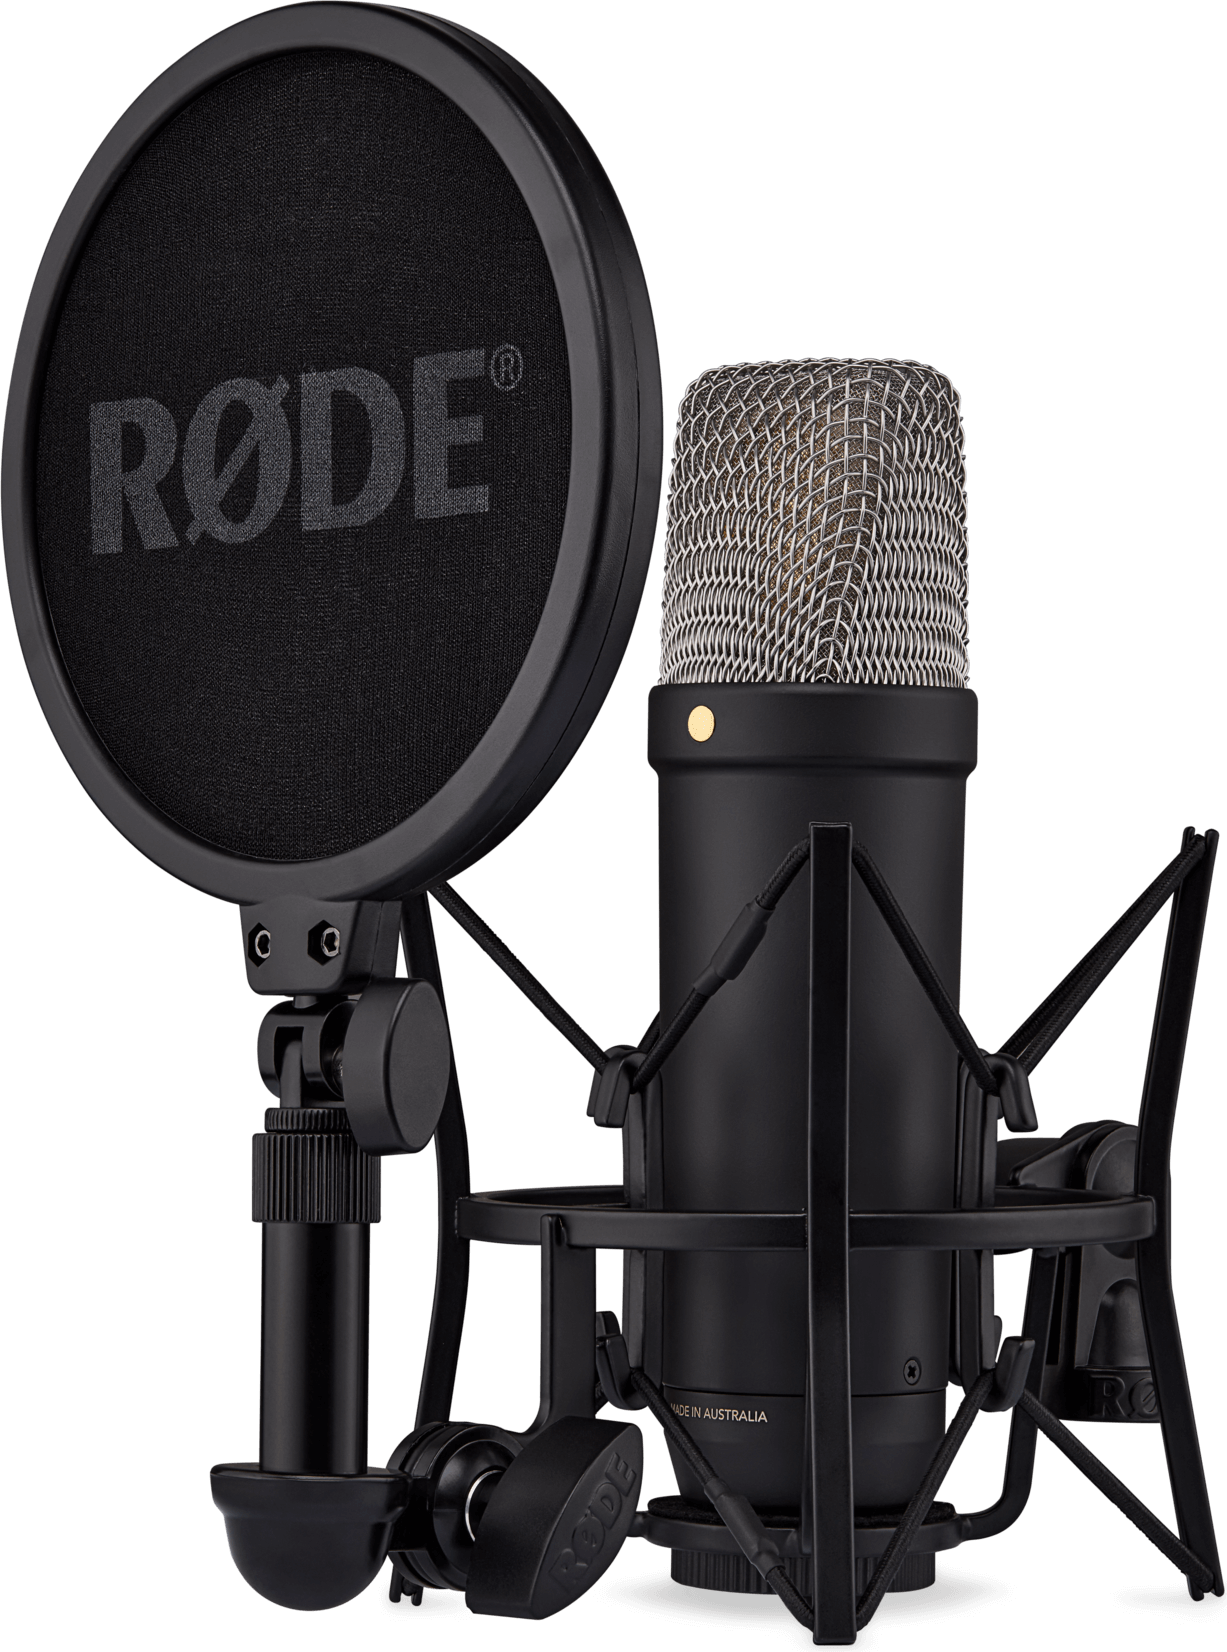
The first thing that sets the RØDE NT1 5th Gen apart is its sound quality. It features a large 1-inch condenser capsule with a gold-plated diaphragm, which delivers a warm and transparent sound. Whether you are recording vocals, acoustic instruments, or podcasts, this microphone captures every detail with stunning clarity and accuracy.
One of the standout features of the RØDE NT1 is its incredibly low self-noise. With only 4.5 dB of self-noise, this microphone is one of the quietest on the market. This means that even the most subtle nuances of your recording will be captured without any unwanted background noise or hiss. This low self-noise makes it ideal for recording in quiet environments or for capturing delicate vocal performances.
Durability is another area where the RØDE NT1 excels. The microphone body is made from a durable nickel-plated aluminum and features a corrosion-resistant coating, ensuring that it can withstand the rigors of studio use. Additionally, the capsule is internally shock-mounted, reducing the risk of mechanical noise from handling or vibrations.
The RØDE NT1 5th Gen is also incredibly versatile. It has a wide frequency response range from 20Hz to 20kHz, allowing it to capture a broad spectrum of sounds. The microphone also includes a high-pass filter, which can be engaged to reduce low-frequency rumble or proximity effect. This makes it suitable for a wide range of recording applications, from capturing delicate vocal performances to recording loud instruments like drums or electric guitars.
Furthermore, the RØDE NT1 comes as a complete package. It includes a shock mount, a pop shield, and a dust cover, providing everything you need to start recording right away. The shock mount is designed to isolate the microphone from vibrations, ensuring clean and accurate recordings. The pop shield helps to minimize plosive sounds and sibilance, resulting in cleaner vocal recordings.
In terms of affordability, the RØDE NT1 5th Gen is hard to beat. Despite its exceptional sound quality and professional-grade build, this microphone is priced competitively, making it accessible to a wide range of users.
In conclusion, the RØDE NT1 5th Generation microphone is a remarkable piece of audio equipment. Its exceptional sound quality, low self-noise, durability, versatility, and affordability make it an ideal choice for both professional and amateur audio enthusiasts. Whether you are a musician, podcaster, or content creator, the RØDE NT1 will undoubtedly elevate the quality of your recordings.
Frequently Asked Questions:
What are the recommended recording settings for using the RØDE NT1 5th Generation microphone with a digital audio interface or audio mixer?
The RØDE NT1 5th Generation is an exceptional studio condenser microphone that offers excellent performance across a range of applications. Here are some recommended recording settings for using the NT1 with a digital audio interface or audio mixer:
- Microphone Type: The default setting should be set to "Condenser" as the RØDE NT1 is a studio condenser microphone.
- Sample Rate: Set your sample rate to 48 kHz or higher. This will provide you with a wide range of flexibility during post-production and allow for better audio quality overall.
- Bit Depth: Use a minimum bit depth of 24 bits, as this provides an adequate dynamic range for most recording scenarios.
- Input Gain: Start by setting your input gain between -10 dB to -6 dB depending on the preamplifier's quality in your audio interface or mixer. If you need more gain, slowly increase it while keeping an eye on your input meter levels. Aim for a peak level of around -12 dB to -6 dB during recording.
- Monitoring: Use zero-latency monitoring if available on your interface or mixer to avoid audio feedback and echo when recording. This is especially important if you're recording vocals while listening to playback through headphones.
- Polar Pattern: For most applications, the cardioid polar pattern should be suitable for capturing sound from the front of the microphone while minimizing background noise from other directions.
- Phantom Power: Make sure your audio interface or mixer has phantom power enabled. The RØDE NT1 requires +48V phantom power to function properly.
By following these guidelines, you should be able to achieve excellent results when recording with the RØDE NT1 5th Generation microphone and any compatible digital audio interface or audio mixer.
How do I properly connect and use the RØDE NT1 5th Generation microphone for recording vocals in my home studio setup?
To properly connect and use the RØDE NT1 5th Generation microphone for recording vocals in your home studio setup, follow these steps:
1. Firstly, ensure that your audio interface is compatible with the NT1-A. Most modern interfaces will work, but it’s always best to check the manufacturer’s website or contact their support team if you are unsure. Connect the NT1-A to your audio interface using an XLR cable. The microphone comes with a 10ft (3m) XLR cable included in the box, but you can use any standard XLR cable that suits your needs. Make sure the phantom power is switched on in your audio interface settings. This provides the necessary voltage to power the NT1-A and is essential for its proper operation. Adjust the gain of your audio interface to a suitable level. The exact setting will depend on the input sensitivity of your interface and the distance between you and the microphone, but aim for a level that is around -18dBFS (peak levels should not exceed 0dBFS). Position the microphone in front of your vocalist at a distance of approximately 6-12 inches (15-30cm) and at an angle of around 30 degrees. This will help to reduce any unwanted plosives and sibilance. Encourage your vocalist to speak into the microphone with good enunciation and avoid shouting or screaming, as this can cause distortion. To improve the clarity of the recording, use a pop filter or windscreen to reduce any unwanted noise from breaths or plosives. You can also use a shock mount to further isolate the microphone from any vibrations or handling noise. Finally, record your vocal track and listen back to make sure it sounds clear and balanced. Adjust the levels as necessary and save your file in a suitable format (such as WAV or AIFF) for editing and mixing later on. By following these steps, you should be able to properly connect and use the RØDE NT1 5th Generation microphone for recording vocals in your home studio setup.
How do I properly set up and calibrate my new RØDE NT1 5th Generation microphone for optimal recording performance?
To ensure optimal recording performance with your new RØDE NT1 5th Generation microphone, please follow these steps for setup and calibration:
1. Connect the NT1 to a preamp or audio interface using the included XLR cable. Ensure that the connection is secure. Power on the preamp/interface and select the appropriate input source (e. Line in or Mic in). Adjust the gain of the preamp/interface to a level suitable for your recording needs. It's recommended to start with a low gain setting and gradually increase as needed. Plug in the supplied 15V DC power supply to the NT1. The power indicator light will illuminate when the microphone is connected to a power source. To calibrate the microphone, connect it directly to your computer's USB port using the included USB cable. This will bypass any preamp/interface gain settings and allow for accurate level readings during calibration. Open your preferred audio software or use RØDE's free REC software. In your chosen software, set up a new session with your desired recording parameters (e. Begin playing back a known source, such as white noise or a tone generator, at a consistent level. Monitor the input levels in your audio software and adjust the gain of the preamp/interface if necessary to ensure that the signal is not clipping (i. BFS). Record a short test file and play it back to confirm that the sound quality meets your expectations. If you notice any issues, such as distortion or low volume levels, try adjusting the gain settings again or repositioning the microphone for better acoustic performance in your recording environment. By following these steps, you can ensure that your RØDE NT1 5th Generation microphone is properly set up and calibrated for optimal recording performance. If you have any further questions or concerns, please don't hesitate to reach out to our customer support team for assistance.
My NT1 is picking up a loud hum and it sounds like static, what could be causing this issue?
1. Ground Loops**: Ground loops occur when there's an electrical path between two devices, creating a current flow that can cause hum. Check if any cables or connectors are touching metal parts, like equipment racks or tables. Electromagnetic Interference (EMI)**: EMI from nearby electronic devices, fluorescent lights, or radio transmitters can induce noise in your microphone. Try moving the NT1 away from potential sources of EMI. Power Supply Issues**: The power supply unit (PSU) for your studio equipment might be malfunctioning. Check if any other devices are experiencing similar issues. If you have a dedicated PSU for your NT1, try swapping it with another one or replacing it altogether. Grounding Issues in Your Studio**: Insufficient grounding can lead to hum and noise on your microphone. Ensure that all metal parts of your studio equipment and the floor are properly grounded. Faulty or Old Cables**: Over time, cables can develop issues that cause hum or static. Try swapping the cable with a new one or inspecting it for signs of wear and tear. Microphone Internal Components**: Sometimes, internal components within the microphone itself can fail, causing noise. If you've recently dropped your NT1 or subjected it to excessive stress, this could be a possibility. However, it's worth noting that Neumann microphones are generally built with high-quality components and are less prone to internal failure. Bad Connectors**: Faulty or damaged XLR connectors can cause hum and noise on your microphone. Inspect the connections carefully and clean them if necessary. To troubleshoot this issue further, you might want to try:
* Using a different cable
* Moving the NT1 to a different location in the studio
* Swapping the PSU for another one
* Grounding your equipment properly
If none of these steps resolve the issue, it's possible that there's a more complex problem at play.
Before you buy RØDE NT1 5th Generation




Reviews
There are no reviews yet.