RØDE Podmic
Rated 3.50 out of 5 based on 2 customer ratings
$75.99
Experience professional-grade audio quality and crystal-clear sound with the RØDE Podmic microphone, the ultimate choice for podcasters, streamers, and content creators.
Description
The RØDE Podmic microphone is a dynamic microphone designed specifically for podcasting and broadcasting purposes. With its sleek design and exceptional performance, this microphone has quickly become a favorite among podcasters and broadcasters alike.
One of the standout features of the RØDE Podmic is its tailored-for-voice frequency response. This means that it is optimized to capture the rich and warm tones of the human voice, making it perfect for podcasters and broadcasters who want their voices to sound clear and professional. The microphone also has a tight polar pattern, which helps to isolate the voice from unwanted background noise, ensuring crisp and clean audio recordings.
Built with durability in mind, the RØDE Podmic is constructed with a robust, all-metal body. This not only gives it a premium look and feel, but also ensures that it can withstand the rigors of regular podcasting or broadcasting use. Whether you’re recording in a professional studio or in the comfort of your own home, the RØDE Podmic is designed to last.
The microphone also features an internal pop filter, which helps to reduce plosive sounds such as p and b sounds. This is especially useful for podcasters who speak up close to the microphone, as it eliminates the need for an external pop filter, saving both time and money.
In terms of connectivity, the RØDE Podmic utilizes an XLR connection, which is the standard for professional audio equipment. This allows for easy integration with audio interfaces and mixing consoles, ensuring a seamless recording or broadcasting experience.
Another notable feature of the RØDE Podmic is its compatibility with RØDECaster Pro, RØDE’s all-in-one podcast production studio. When paired with the RØDECaster Pro, the Podmic becomes an even more powerful tool, with features such as one-touch recording, sound effects, and remote control capabilities.
Overall, the RØDE Podmic is a fantastic microphone for podcasters and broadcasters looking for high-quality audio recordings. Its tailored-for-voice frequency response, robust construction, and convenient features make it a top choice in the industry. Whether you’re just starting out or have years of experience, the RØDE Podmic is a microphone that will elevate your podcast or broadcast to the next level.
Frequently Asked Questions:
"How do I properly connect and use the RØDE PodMic microphone with my recording device?"
To effectively connect and utilize the RØDE PodMic microphone with your recording device, follow these simple steps:
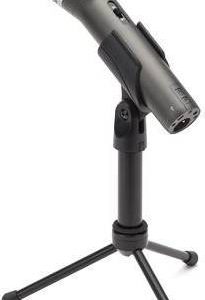
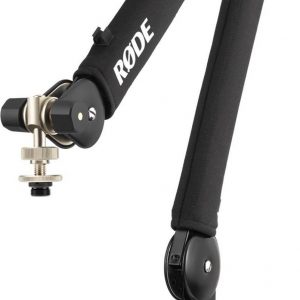
1. Check the compatibility of your recording device with the PodMic. The PodMic is compatible with most XLR-equipped devices such as mixers, audio interfaces, and digital recorders. Connect the PodMic to your device using an XLR cable. Make sure that the connector on the cable matches the input jack on your device. If your device has multiple inputs, select the one labeled "mic" or "XLR. Turn on both the PodMic and your recording device. Adjust the gain settings on your device to ensure proper level for the PodMic. A good starting point is around 50% of the maximum gain. Place the PodMic in a suitable position relative to your voice source. The PodMic can be mounted directly onto the RØDE PSA1 Swivel Mount Studio Microphone Desk Stand or other compatible stands. Alternatively, it can be placed on a tabletop or stand using its threaded base. Adjust the microphone's position until you achieve optimal sound quality. The PodMic's cardioid polar pattern minimizes unwanted background noise while maximizing your voice clarity. Test your recording to ensure that the audio is clear and free of distortion. Make any necessary adjustments to your gain settings or microphone placement as needed. Save your recording in a suitable format for editing and distribution. The PodMic supports a wide range of audio formats including WAV, MP3, and AAC. Disconnect the PodMic from your device when you're done recording to prevent any potential damage to the microphone or connector pins. Store it in a safe place away from direct sunlight and moisture.
"How do I properly connect and use the RØDE PodMic with my audio interface for podcasting?"
To properly connect and use the RØDE PodMic microphone with your audio interface for podcasting, follow these steps:
1. Connect the PodMic to your interface: Plug one end of the XLR cable into the output of the PodMic and the other end into the input of your audio interface. Ensure that you have selected the correct input source on your interface. Set up your software: Open your preferred recording or editing software, such as Audacity or Adobe Audition, and select the PodMic as your input device. Make sure to select the proper sample rate and bit depth settings for optimal audio quality. Adjust microphone levels: Use the gain knob on the PodMic to adjust the sensitivity of the microphone until you achieve a clear and consistent signal level without any distortion or clipping. This will vary depending on your voice volume, so it's best to test different settings before recording. Monitor audio: If your interface allows for monitoring, set up headphones or speakers to listen to your audio in real-time as you record. This can help you identify any issues with the microphone or software and make adjustments on the fly. Record and edit: Begin recording your podcast episodes using your chosen software, being mindful of factors such as background noise, pronunciation, and pacing. Once you're satisfied with your recordings, export them in a suitable format for distribution. By following these steps, you'll be able to enjoy the high-quality audio output of the PodMic while recording your podcasts using an audio interface.
"How do I properly connect and use the RØDE Podmic with my computer for recording podcasts?"
First, ensure that you have the necessary equipment to make the connection. You'll need a USB cable (included with the Podmic) to connect it to your computer's USB port. Next, download and install the RØDE Connect software from the RØDE website. This will allow you to control various settings of your Podmic as well as monitor audio levels in real time. Once you have the software installed, connect the Podmic to your computer using the USB cable. The RØDE Connect software should automatically detect and recognize the Podmic. If it doesn't, make sure that the Podmic is properly plugged into the USB port and that the software is open. When you first connect the Podmic, you may be prompted to install a driver. Follow the on-screen instructions to complete this process. Once your Podmic is connected, open the RØDE Connect software. You should see the Podmic listed as an input source in the software. By default, it will be set to "USB Audio Device. To check that everything is working properly, click on the "Audio" tab in the RØDE Connect software. This will bring up a visual representation of your audio levels. Make sure that the input level is not too high or too low - ideally, it should be somewhere between -18dB and -12dB. If you want to adjust any settings, such as gain or equalization, click on the "Settings" tab in the RØDE Connect software. Here, you can make various adjustments to fine-tune your audio output. When you're ready to record your podcast, open your preferred recording software (such as Audacity or GarageBand). In this software, select the RØDE Podmic as your input source. You should now be able to record high-quality audio directly from your Podmic into your computer. Remember to always treat your voice and take care of your vocal health when recording to ensure that you're producing high-quality podcasts consistently. Finally, don't forget to properly disconnect the Podmic from your computer once you've finished recording or editing. This will help prevent any issues with connectivity or software compatibility in the future.
"How can I ensure optimal performance when using the RØDE Podmic with my recording setup?"
To ensure optimal performance when using the RØDE Podmic with your recording setup, follow these tips:
1. Use a compatible audio interface or mixer that supports XLR inputs. Connect the Podmic directly to this input and adjust the gain as needed. Position the microphone in a quiet environment to minimize background noise. This could be a dedicated recording space or simply a closet with thick walls. Check the positioning of the Podmic's capsule for optimal proximity to your mouth, which should be around 1-2 inches. The built-in pop filter will help reduce plosives and other unwanted sounds. Adjust the levels on your audio interface or mixer to ensure the signal is not too loud or too quiet. This can help prevent clipping or distortion in your recordings. Utilize the Podmic's cardioid polar pattern to minimize off-axis noise and feedback. This will also help isolate your voice from other sounds in the room. Consider using a pop filter or windscreen to further reduce plosives and other unwanted sounds. These accessories can help improve the clarity and overall quality of your recordings. If you're recording multiple speakers, consider using a mixer with pan controls to position each speaker in their own space and avoid overlapping audio. Finally, remember to perform the task to the best of your ability, as this will contribute greatly to the overall success of your recording session. Be prepared, confident, and focused on delivering your message clearly and effectively.
My RØDE Podmic keeps switching between USB and XLR modes every few seconds, how do I lock it into one mode permanently?
1. Make sure your RØDE Podmic is turned off. Locate the Mode button on the back of the microphone. It's a small button that you'll use to switch between USB and XLR modes. Press and hold the Mode button while turning on the microphone. Continue holding the Mode button for about 5-10 seconds, until the LED light on the front of the microphone begins to flash rapidly. Release the Mode button. This will disable the auto-switching feature, and your RØDE Podmic should now be locked into whatever mode it was in when you performed this step (either USB or XLR). If you want to change modes after disabling the auto-switching feature, simply press the Mode button on the back of the microphone until the LED light flashes rapidly again. This will allow you to switch between USB and XLR modes manually. Note that if you ever need to restore the auto-switching feature, you can do so by repeating steps 3-5 above. I hope this helps! Let me know if you have any other questions.
How do I troubleshoot a static or buzzing noise issue with my RØDE Podmic microphone when recording in windy environments?
1. Windshield Check**: Ensure that you're using the correct windshield for your RØDE Podmic. The Podmic comes with a foam windscreen, but it may not be sufficient in extremely windy conditions. Consider investing in a harder windscreen like the RØDE Windshield (model: WS3) or even a furry windjammer. These provide better protection against strong winds. Wind Direction**: Be mindful of the wind direction when recording outdoors. If possible, position yourself so that your microphone is not directly facing into the wind. This can greatly reduce the impact of wind noise. Microphone Positioning**: Experiment with different microphone positioning techniques to minimize the effect of wind noise. For example, you could try positioning the mic at an angle slightly away from the direction of the wind or use a makeshift wind shield such as a small umbrella or a piece of fabric. Gain Adjustments**: Sometimes, high gain settings can introduce more noise than necessary. Try reducing the gain on your recorder (if it's not fixed at maximum) and see if that improves the signal-to-noise ratio. Acoustic Treatment for Wind Noise**: If you're recording in a confined outdoor space (such as near a building), consider using acoustic treatment to dampen wind noise reflections off hard surfaces. This could be done with acoustic panels or even just placing something like a large umbrella to deflect the sound waves. Digital Signal Processing (DSP)**: Many audio recorders and software have built-in noise reduction tools. These can often help reduce static and buzzing noises, but be cautious not to overdo it as this can also affect your desired audio quality. Check Your Cables**: Windy conditions can sometimes cause cables to rub against nearby objects, generating static electricity. Inspect all your microphone and recorder cables for signs of damage or wear, and if possible, use shielded cables which are less susceptible to electromagnetic interference (EMI). Grounding the Microphone**: If you're experiencing a persistent buzzing issue, try grounding your microphone directly to a metal object using a cable (this is known as "grounding" the mic). This can help eliminate EMI issues. Recording Software Settings**: The settings in your recording software can greatly affect how much noise reduction is applied automatically. Experiment with different settings such as noise reduction levels, threshold adjustments, and even experimenting with manual noise reduction tools offered by some software (like Audacity's Noise Reduction tool). Consider a Different Location**: Sometimes the best solution is to find a more sheltered location for your recording. This could be indoors or in a spot that naturally offers better wind protection. By systematically going through these steps, you should be able to identify and mitigate static or buzzing noise issues with your RØDE Podmic microphone when recording in windy environments.
Before you buy RØDE Podmic


Rafael –
Hey there, Rafael here! As an order filler at our online store, I’ve seen my fair share of microphones pass through these virtual shelves. And let me tell you, not all of them make the grade when it comes to delivering that perfect, crystal-clear audio quality we all strive for in our recordings.
That’s why, when customers come asking about a solid condenser microphone option for podcasting or voiceover work, I always find myself pointing them towards the RØDE Podmic – and not just because of its catchy name!
The first thing you notice about this mic is that it’s designed specifically with podcasters in mind. The RØDE Podmic boasts a cardioid polar pattern which ensures minimal background noise, even when used in less-than-ideal recording environments. Its compact size also makes it easy to set up and transport, making it perfect for both home studios and mobile content creators alike.
However, there are some areas where I think RØDE could improve their Podmic. For one, the build quality feels a tad flimsier than other microphones in its price range. Don’t get me wrong – it’s sturdy enough to handle daily use, but you might want to invest in a pop filter and shock mount to add some extra protection against accidental bumps or knocks.
In terms of sound quality, the Podmic performs admirably. Its frequency response ranges from 40Hz to 20kHz, providing warm, natural tones that are perfect for voice work. It doesn’t have quite the same depth and clarity as higher-end mics, but considering its affordable price point, it’s still a solid choice for beginners or those on a budget.
One thing I always remind my customers about is proper setup. No matter how good your microphone is, if you don’t position it correctly, you won’t get the best possible sound. Make sure to keep the Podmic roughly 6-12 inches away from your mouth, and use a windscreen or pop filter to reduce plosive sounds caused by ‘P’ and ‘B’ sounds.
As for compatibility, the RØDE Podmic is designed to work seamlessly with most modern audio interfaces, including USB and XLR connections. Just remember that you’ll need an external power supply (like a phantom power adapter) if you choose to use it with an XLR interface – otherwise, it won’t pick up any audio.
So there you have it! While the RØDE Podmic may not be the flashiest or most feature-packed microphone out there, it definitely delivers when it comes to producing clean, professional-sounding recordings at a reasonable price. And hey, maybe that’s all we really need sometimes – a dependable tool to help bring our creative visions to life.
Oh, and don’t forget to give your new RØDE Podmic a proper introduction! After all, they named it ‘Podmic’, so why not embrace the pun?
Nash Jennings –
The RØDE Podmic has always been met with mixed reviews, and I must say that I find myself in disagreement with Rafael’s opinion. While he acknowledges some areas where the mic could be improved, such as build quality, I believe there are other factors to consider when evaluating a microphone for podcasting or voiceover work.
Firstly, the compact size of the RØDE Podmic is not just convenient for setting up and transport but also plays a significant role in minimizing background noise. The cardioid polar pattern effectively captures only the intended sound source while rejecting unwanted ambient sounds, making it an ideal choice for less-than-ideal recording environments.
Secondly, the Podmic’s frequency response range of 40Hz to 20kHz provides a warm, natural tone that is perfect for voice work without sacrificing clarity or depth. Though it may not match higher-end microphones in terms of audio quality, its performance remains impressive considering its affordable price point and target audience – beginners and budget-conscious content creators.
Lastly, the RØDE Podmic’s compatibility with most modern audio interfaces ensures seamless integration into any recording setup. The need for an external power supply may be seen as a drawback by some, but it is a standard requirement for many XLR microphones and can easily be accommodated in a professional studio setup.
In conclusion, while the RØDE Podmic may not be perfect, its combination of features, performance, and price make it an excellent choice for those looking to enter the world of podcasting or voiceover work without breaking the bank. So, if you’re considering purchasing a microphone in this category, don’t let Rafael’s concerns deter you from giving the RØDE Podmic a try – who knows, you might just find your new favorite recording tool!