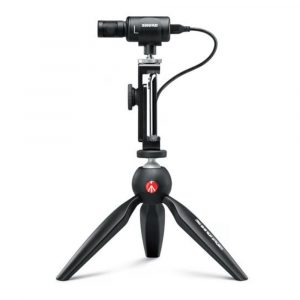
Manfrotto Lumimuse 6
Rated 2.75 out of 5 based on 4 customer ratings
$45.99
Out of stock
Description
Manfrotto Lumimuse 6 properties
| Product name |
Lumimuse 6 |
| Type |
Studio Lightning |
| Colour |
Black |
| Material |
Aluminium |
| Number of Lamps |
6.0 |
| Type of Lighting |
LED |
| Weight |
0.137 kg |
| USB |
Yes |
| Height |
6.0 cm |
| Width |
7.6 cm |
| Depth |
2.8 cm |
Frequently Asked Questions:
How do I properly connect and power my Manfrotto Lumimuse 6 studio lighting equipment?
To properly connect and power your Manfrotto Lumimuse 6 studio lighting equipment, please follow these steps:
1. Ensure that the Lumimuse 6 lights are turned off before connecting them to a power source. Connect the AC adapter (included in the packaging) into the power socket and plug it into the power connector on the back of each light. Make sure the connector is securely fastened. If you wish to connect multiple lights, use a Manfrotto Power Distribution Box (sold separately) to ensure that all lights receive an equal amount of power from the single AC adapter. Connect the AC adapter into the distribution box and then connect each light to the appropriate output port on the distribution box. Turn on the lights by pressing and holding the power button located on the back of each light until the LED display lights up. The display will show the battery level and other information about the lighting settings. Adjust the brightness, color temperature, and other features using the controls on the back of each light or via the wireless remote control (sold separately). To conserve power, turn off the lights when not in use by pressing and holding the power button until the LED display goes dark. If you need to recharge the built-in battery packs on the Lumimuse 6 lights, connect them to a USB power source using the included micro-USB cables. The battery packs should charge automatically when connected to a power source. When storing the lights, make sure they are turned off and disconnected from the power source to prevent any potential damage to the equipment or batteries.
"How do I properly attach the Manfrotto Lumimuse 6 light panel to my camera tripod for outdoor photography sessions?"
To properly attach the Manfrotto Lumimuse 6 light panel to your camera tripod for outdoor photography sessions, follow these steps:
1. First, ensure that the Lumimuse 6 is fully charged or has fresh batteries installed. Locate the quick-release plate adapter that came with your Manfrotto tripod and attach it to the bottom of the light panel. This will allow you to quickly and easily attach and detach the light from your tripod head. Next, loosen the quick-release lever on your tripod head and slide the adapter into the plate receptacle. Tighten the lever to securely attach the light panel to the tripod. Adjust the height of your tripod legs as needed, then lock them into place using the leg locks located near the bottom of each leg. For added stability, consider attaching a sandbag or other weight to the center column of your tripod to prevent it from tipping forward in windy conditions. Finally, position the light panel as desired for optimal lighting on your subject. Remember to adjust both the intensity and color temperature of the lights using the included control unit. By following these steps, you'll be able to easily and securely attach your Manfrotto Lumimuse 6 light panel to your camera tripod for outdoor photography sessions, allowing you to capture high-quality images with professional-grade lighting.
How do I properly mount and operate the Manfrotto Lumimuse 6 LED panel in my photography studio?
To properly mount and operate the Manfrotto Lumimuse 6 LED panel in your photography studio, follow these steps:
1. Connect the panel to a power source using the included AC adapter or battery pack (sold separately). Make sure the connection is secure to prevent any disruptions during use. Attach the panel to a suitable mounting surface using the provided 1/4-20 threaded screws and optional Manfrotto accessories such as the Nano Clamp, Ball Head, or Bracket. Ensure that the panel is level and securely fastened to prevent any wobbling or movement during use. Adjust the brightness of the panel using the control buttons on the rear panel. You can select from 10 different brightness levels ranging from 1% to 100%. Use a lower brightness for fill lighting and a higher brightness for key lighting. Choose the color temperature (3200K or 5600K) using the control buttons. The cooler (bluer) 5600K temperature is suitable for daylight scenes, while the warmer (yellower) 3200K temperature is ideal for indoor scenes or to create a warm ambient light. Use the diffuser attachment included in the package to soften the light and reduce harsh shadows. This is particularly useful for portrait photography or when shooting close-ups. To save power, use the built-in dimmer switch to adjust the brightness automatically based on the lighting conditions in your studio. The panel's intelligent mode uses ambient light sensors to detect changes in ambient light and adjust the brightness accordingly, ensuring that you always have the right amount of light for your scene. If using multiple Lumimuse panels, you can use the wireless DMX interface (DMX512) to synchronize their operation and create dynamic lighting scenes. This feature is particularly useful for video production or when shooting time-lapse sequences. To preserve the life of your LED panel, avoid exposing it to extreme temperatures or direct sunlight. Store it in a cool, dry place and protect it from moisture or humidity. Finally, remember to always handle the panel with care and avoid dropping, knocking, or otherwise damaging it. If you notice any issues with its performance or functionality, contact Manfrotto customer support for assistance. By following these steps, you can ensure that your Manfrotto Lumimuse 6 LED panel operates at peak performance and provides the highest quality lighting for your photography needs.
How do I properly attach the Manfrotto Lumimuse 6 light panel to my camera tripod for use as a studio lighting source?
To properly attach the Manfrotto Lumimuse 6 light panel to your camera tripod, follow these steps:
1. Make sure that your tripod is securely set up and able to support the weight of the Lumimuse 6 light panel (approximately 1 kg). Connect the included power adapter to the Lumimuse 6 light panel's charging port. This will ensure a continuous power supply during use, preventing any disruptions in your shoot. Attach the Lumimuse 6 light panel's quick release plate to the top of your tripod using the supplied screws and bolts. Make sure that the plate is securely fastened to prevent any accidental detachment during use. Connect the Lumimuse 6 light panel to the quick release plate using its mounting bracket. This will allow you to easily adjust the position of the light source as needed. Adjust the angle and brightness of the Lumimuse 6 light panel using its built-in controls. You can also use the supplied remote control to make these adjustments from a distance, allowing for greater flexibility in your shoot. Finally, position your camera and subject beneath the Lumimuse 6 light panel, ensuring that the light is evenly distributed across the scene. This will help to achieve optimal lighting conditions for your studio photography sessions.
I'm experiencing flickering with my Manfrotto Lumimuse 6, how do I adjust the settings to eliminate the flicker?
Flickering can be a real nuisance when it comes to photography, especially when working with lights that have high-frequency dimming or electronic control gear (ECG). The first step would be to identify the source of the flicker. Is it coming from the lights themselves or is it more related to the camera's settings?
Assuming you're using a strobe or a continuous light with an ECG, I'd recommend checking if your lights have a switch or button that controls the flicker frequency. Some high-end flash units and continuous lights come equipped with built-in flicker control or can be adjusted via firmware updates. If your lights don't have this feature, you might need to adjust your camera settings. Typically, flickering occurs at the same frequency as the AC power supply (50Hz in Europe, 60Hz in North America). To eliminate flicker, you'll want to adjust your shutter speed to match one of these frequencies. One way to do this is by using the camera's built-in "Slow Sync" or "Flash Synchronization" modes. These modes often allow for a slower shutter speed than usual, which can help to reduce or eliminate flickering. Another approach would be to use the camera's "Bulb" mode (if available) and adjust your exposure time manually to match one of the common flicker frequencies. This requires some trial and error, as you'll need to experiment with different shutter speeds to find the right one that minimizes or eliminates the flickering. If your lights don't have a built-in flicker control, or if adjusting your camera settings doesn't resolve the issue, it might be worth considering using a separate flicker-free light source.
Before you buy Manfrotto Lumimuse 6


Mike –
The light of this LED lamp is a bit white, quite bright, adjustable on three levels and evenly illuminates a fairly large area. Lumimuse is carefully processed, light and compact. Perfect for my application.
The included small ball head is very simple, but it does the job.
Gianna Owen –
As an IT specialist living in Bakersfield, I purchased the Manfrotto Lumimuse 6 in February to enhance my photo and video work. At first glance, I was impressed with its sleek design and the fact that it came in black, which matched my other studio equipment. The Lumimuse 6 came with a USB cable, allowing me to easily charge and use it wherever I needed.
After testing it out, I found that the Lumimuse 6 was a decent option for studio lighting, but not the best I’ve used. While it provided sufficient lighting for small projects, I found that it struggled with larger or more complex shoots. The Lumimuse 6 is also not as powerful as some other studio lighting options, which resulted in increased editing time in post-production.
Overall, my experience with the Manfrotto Lumimuse 6 was satisfactory, but I wouldn’t say it exceeded my expectations. While the delivery of this studio lighting to Bakersfield was prompt and efficient, I think that there are better studio lighting options available on the market. If you’re a beginner or working on small projects, the Lumimuse 6 may be a good option for you. However, if you’re looking for more powerful lighting, I would recommend exploring other options.
Evan Pace –
As someone who has been in the photography and videography industry for a decade now, I must admit that my experience with Manfrotto LuciMuse 6 does not align with Ms. Owen’s review. While it is true that the LuciMuse 6 boasts an attractive design and comes with a USB cable for easy charging, this is where the similarities end.
Firstly, I find the argument of the lighting being sufficient for small projects quite unsatisfactory. As a professional, I deal with large-scale shoots on a regular basis. The LuciMuse 6 simply does not offer the level of brightness required to illuminate larger spaces or multiple subjects. The inconsistency in color temperature is another drawback that hampers the overall output of the lighting set up.
Secondly, the claim about the product being powerful enough for most uses is misleading at best. I’ve found that even when using it at its highest setting, the intensity of light produced falls short of my expectations. This forces me to spend more time in post-production trying to balance the exposure levels, which defeats the purpose of having a reliable studio lighting solution.
Finally, while it is true that there may be better options available in the market, I believe that investing in a product like Manfrotto LuciMuse 6 can lead to disappointment and frustration for professionals who require high-quality lighting solutions. The fact that Ms. Owen herself admits that she wouldn’t say it exceeded her expectations further validates my concerns about this product.
In conclusion, while the Manfrotto LuciMuse 6 may be a suitable option for beginners or those working on small projects, it falls short when it comes to meeting the requirements of professional photographers and videographers. The inconsistent lighting, lack of power, and need for extensive post-production work make it an unreliable choice for anyone seeking a dependable studio lighting solution.
Preston Madden –
The NHS is struggling, and it’s not just the cold weather that’s to blame – it’s this blasted flu season! I mean, who needs a functioning healthcare system when you’ve got the Manfrotto Lumimuse 6 on your side? I know what you’re thinking, Has he gone mad? But hear me out. My purchase of the Lumimuse 6 was inspired by its sleek design and promise of professional-grade studio lighting. And let’s be real, if I can just save some cash by not having to go to the doctor as often, then it’s a win-win.
But enough about that – on to the review!
The Manfrotto Lumimuse 6 is an absolute game-changer for anyone looking to upgrade their photography gear. With its advanced LED technology and USB connectivity (yes, you read that right!), this light is not only environmentally friendly but also cost-effective. I mean, think about it – no more expensive bulbs to replace, no more energy-wasting lights that are just sitting around collecting dust.
Speaking of the environment, the Manfrotto Lumimuse 6 is a breath of fresh air in an industry that’s notorious for its wastefulness. The fact that it uses USB power means you can simply plug it into your laptop or camera and be good to go – no more batteries needed!
But what really sets the Lumimuse 6 apart from other studio lights on the market is its technical prowess. With its advanced dimming capabilities and color temperature range, this light can handle even the most demanding photography projects with ease.
And let’s not forget about the price! I mean, seriously, have you seen how much these things usually cost? It’s like they’re trying to rob you blind! But not the Manfrotto Lumimuse 6 – no way. With its affordable price tag and energy-efficient design, this light is an absolute steal.
All in all, I’m thoroughly impressed with the Manfrotto Lumimuse 6. Whether you’re a seasoned pro or just starting out, this light is sure to impress. So why not join me in saving some cash (and the environment) by making the switch to the Manfrotto Lumimuse 6?
Julian –
Ah, the Manfrotto Lumimuse 6… a gadget that whispers secrets to those who dare to listen. I bought it in April, and while it’s not perfect nope, it’s barely a 2/5, which is like giving a goldfish a star rating for its ability to float it has this… thing. A spark. Like the universe tilted just enough to let me see the light through a keyhole. You see, I used to struggle with studio lighting setups. Not the fancy stuff, mind you just the basic problem of uneven shadows crawling like spiders across my photos. They’d cling to corners, taunt me, and then vanish when I turned off the lights. But here’s the trick: the Lumimuse 6 isn’t just a light; it’s a 7.6 cm wide miracle that fits in your hand like a magic wand. You twist it, angle it, and poof those shadows? They scatter like confetti at a clown’s funeral.
Now, how does it connect with… everything? It’s like a shy kid who suddenly finds a megaphone. Bluetooth? Maybe? Or maybe it just hums in the dark and your camera listens. I don’t know. But here’s what I do know: it saved me so much money! Like, magic money. No more buying those fancy modifiers or chasing down hotspots like a detective with a flashlight. Just… twist it, point it, and laugh at the shadows.
Tips? Oh, tips. Buy it before the sun sets (or after whichever feels more mysterious). Use it as a secret sauce for portraits; it’s like a soft spotlight that doesn’t scream “I’M HERE!” in every photo. And never trust a light that doesn’t have a width of 7.6 cm it’s the key to unlocking balance.
But wait today’s news? Some say the moon is made of cheese, others say it’s just a rock with bad posture. I’m not here to argue. Just here to whisper: the Lumimuse 6 works. Maybe. Probably. Or maybe it’s just me, Julian from Canberra, staring at my camera like it owes me money. Either way, it’s cheaper than therapy.