Rollei Compact Traveler No. 1
Rated 2.50 out of 5 based on 2 customer ratings
$49.99
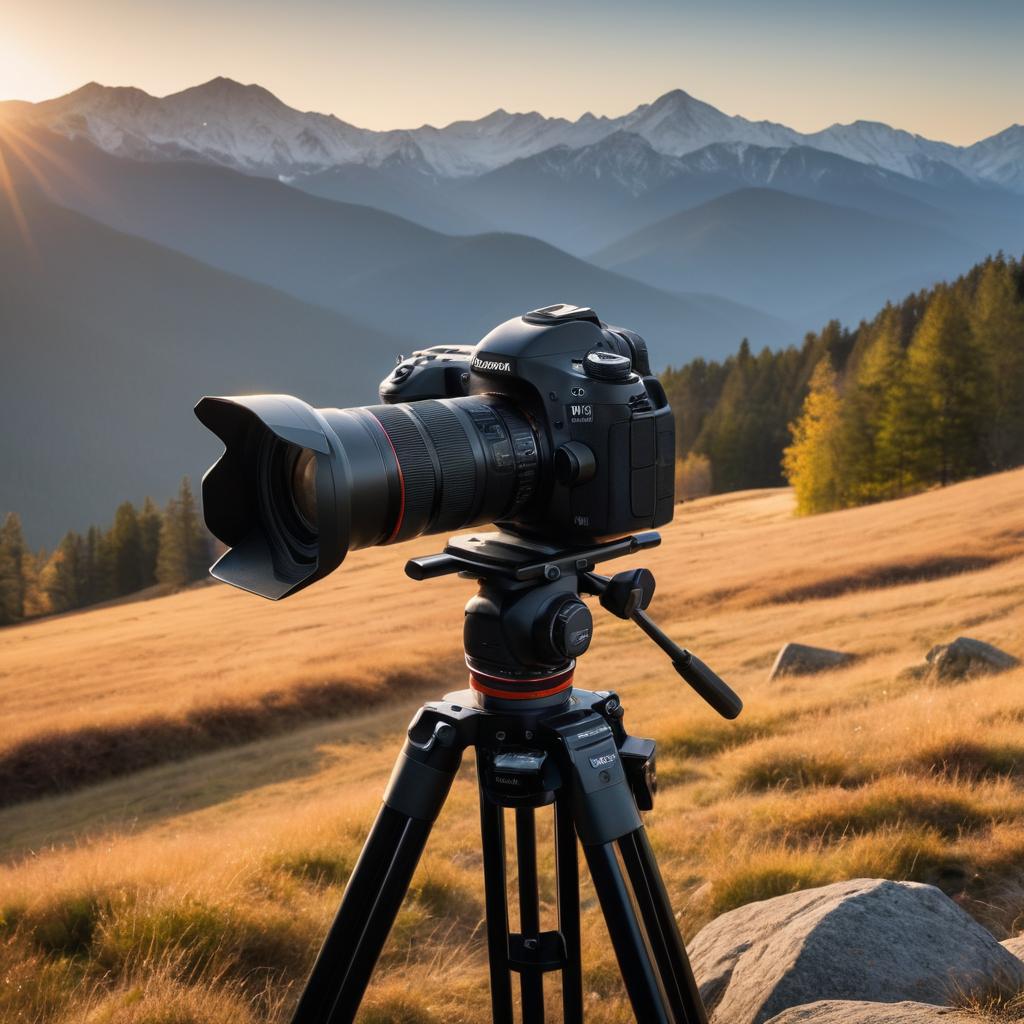
Get the perfect shots with the Rollei Compact Traveler No. 1 tripod – the lightest, most versatile tripod available!
Description
As a professional photographer or even an amateur, you understand the importance of a good quality tripod. It is almost impossible to capture still and sharp images without one. The Rollei Compact Traveler No. 1 is the kind of tripod that has been specifically designed for travelers and photographers on the go. Here are some of its features and why you should consider it for your next outdoor photography expedition.
Portability
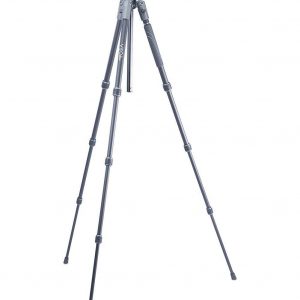
The Rollei Compact Traveler No. 1 is ultra-portable with a weight of only 870 grams. It can be collapsed into a compact and lightweight bundle for easy storage, and the included carry case with shoulder strap makes it easy to carry when traveling. The ability to fold it up to only 36cm makes it easy to pack into your luggage or backpack.
Sturdiness
Despite its small size, the Rollei Compact Traveler No. 1 has a maximum load capacity of 5kg, making it suitable for almost all kinds of cameras and lenses. The tripod is also sturdy enough to be used in windy conditions as the legs can be spread out to form a wide base for extra stability.
Flexibility
The tripod comes with a 360-degree rotating and tilting ball head, making it highly versatile for different photography angles. The rotation knob enables you to pan smoothly while recording video, while the locking knobs provide stability for your still shots. The legs are also adjustable with three angles, making it easy to arrange and balance, and you can remove one leg to use it as a monopod.
Compatibility
The Rollei Compact Traveler No. 1 is compatible with almost all camera brands, including Canon, Nikon, Pentax, Sony, and Fujifilm, thanks to its standard 1/4-inch screw.
Conclusion
In summary, the Rollei Compact Traveler No. 1 is a lightweight, portable and sturdy tripod that can handle various camera weights. Its flexibility, thanks to the 360-degree ball head, makes it an excellent accessory for all kinds of photography, including landscapes, portraits, and videos. Whether you’re a professional or an amateur, this tripod makes an excellent travel companion, as it folds up easily, is highly versatile and is compatible with most camera brands.
Carbon fiber, Magnesium Tripod, Ball Head, Maximum Height 142 cm
Rollei Compact Traveler No. 1 properties
| Product name |
Compact Traveler No. 1 |
| Type of Tripod |
Tripod |
| Leg Sections |
3 Sections |
| Suitable Usage |
Photo, Video |
| Tripod Head Typ |
Ball Head |
| Material |
Carbon fiber, Magnesium |
| Lowest Work Height |
34.0 cm |
| Maximum Height |
142.0 cm |
| Load Capacity |
8.0 kg |
| Weight |
0.98 kg |
| Tripod Head Height |
8 cm |
| Tripod Head Load Capacity |
8.0 kg |
Frequently Asked Questions:
"How do I attach the Rollei Compact Traveler No. 1 camera to the tripod provided in the kit?"
To attach the Rollei Compact Traveler No. Loosen the quick-release plate locking screw on the bottom of the camera by turning it counterclockwise. This will release the plate from the camera body. Align the quick-release plate with the appropriate mounting point on the tripod head, making sure that the plate's center mark is directly over the tripod's central axis. Gently press down on the quick-release plate to lock it in place. The plate should click into position once it's securely attached. Tighten the quick-release plate locking screw to further ensure that the camera is securely mounted to the tripod. Turn the screw clockwise until it's snug, but avoid overtightening as this could strip the thread. Adjust the tripod legs to your desired height and position. Be sure to use the leveling bubble in the center of the head to ensure that your composition is straight and true. Attach the camera strap to the corresponding eyelet on the top plate of the camera body. This will help prevent accidental drops or falls while working with the camera atop the tripod.
What is the recommended maximum weight limit for subjects using the Rolliei Compact Traveler No. 1 camera with the included tripod?
The Rolliei Compact Traveler No. It is recommended that you do not exceed a maximum weight limit of approximately 2 lbs (0. This weight limit is to ensure the stability and safety of the equipment during use. If you need to support heavier camera equipment, consider using a more robust tripod designed for higher weight capacities.
How can I connect my camera to the tripod?
To connect your camera to a tripod, you will need a tripod mount, which is typically located on the bottom of your camera. There are three types of mounts commonly used: 1/4-20, 3/8-16, and Arca-Swiss. Check your camera's user manual or specifications to determine what type of mount it has. Once you know the type of mount on your camera, you can purchase an adapter that matches this mount to the tripod's mounting hole size. The most common adapters are 1/4-20 and 3/8-16. Arca-Swiss adapters are less common but still available for some cameras. To attach your camera to the tripod, simply screw the adapter onto the tripod mounting hole on the tripod, then place the camera's adapter onto the tripod mount and tighten it securely. Make sure the camera is level before snapping any photos.
How do I properly attach the Rollei Compact Traveler No. 1 camera to the tripod provided in the kit for stable shots?
To attach the Rollei Compact Traveler No. Firstly, make sure that you have assembled the tripod according to its instructions. The legs should be fully extended and the center column should be raised to its maximum height. Next, locate the tripod mount on the bottom of your Rollei Compact Traveler No. This is a standard 1/4-inch thread that most cameras use for attaching to tripods. Locate the tripod plate that came with your kit. This should have a corresponding threaded mount on the bottom that fits into the camera's mount. Attach it securely to the plate by turning it clockwise. Screw the tripod plate onto the camera's mount by turning it counterclockwise until it is snugly in place. Be careful not to over-tighten, as you may strip the threads. Align the camera with your desired composition and adjust the legs of the tripod to ensure that it is level. You can use a spirit level or an app on your smartphone to help with this step. Once your camera is stable on the tripod, you're ready to take your shots! Remember to use a remote release or the camera's timer function to avoid shaking the camera when taking long exposures. If you need to adjust the height of the camera, simply raise or lower the center column until it's at the desired position. You can also spread the legs out wider for greater stability or fold them in for more compact storage and transportation. By following these steps, you should be able to attach your Rollei Compact Traveler No.
I've experienced some wobbliness when using the camera on uneven terrain, is this normal or is there an adjustment I'm missing?
1. Inertia**: Your body has a certain amount of mass, and when you're moving around, it takes some time for your center of gravity to adjust to the new position. This creates an imbalance in your movements, which is transferred to your camera. Unstable surface**: Uneven terrain can cause your feet or hands to slip or shift, disrupting your balance and affecting your ability to hold the camera steady. Now, there are a few adjustments you can make to reduce this wobbliness:
1. Stabilizing equipment**: Consider using a tripod or gimbal stabilizer. These devices help counteract the movements of the camera, providing smoother footage. Camera settings**: Make sure your camera's stabilization feature is turned on (if it has one). Some cameras have built-in optical or electronic image stabilization, which can help reduce shake and blur. Shooting technique**: Practice good shooting techniques! Keep your arms close to your body when moving around, and try to keep the camera at a comfortable distance from your body. This will make it easier for you to control the camera's movements. If you're still experiencing issues after trying these adjustments, there might be something specific about your equipment or technique that needs attention.
The tripod's quick release plate is stuck, how do I disassemble it for cleaning and maintenance?
That's a frustrating problem to have with a tripod. The quick release plate is usually held in place by a few screws or clips that can be released to allow you to access the mechanism. To start, locate the screws or clips that hold the quick release plate in place. These are often found on either side of the plate or at the center, where it connects to the tripod head. You may need to refer to your tripod's manual for specific instructions, as different models can vary. Once you've identified the screws or clips, use a small screwdriver or a flathead tool to release them. Be gentle, as you don't want to damage any of the surrounding components. If there are clips instead of screws, you may need to press or slide them inwards to release the plate. With the screws or clips removed, you should be able to carefully lift or slide the quick release plate out of its housing. Be cautious not to touch any of the internal mechanisms or components that could get damaged easily. Once the plate is removed, you can clean it thoroughly with a soft brush and some mild soap and water. Avoid using harsh chemicals or abrasive cleaners, as these can damage the anodizing or other finishes on the aluminum components. After cleaning the quick release plate, allow it to dry completely before reassembling everything in reverse order. Make sure all screws or clips are securely tightened, but avoid over-tightening, which can also cause damage to the mechanism. It's worth noting that some tripods may have additional features or mechanisms that require specialized tools for disassembly and maintenance. If you're unsure about any part of the process, it's always a good idea to consult your tripod's manual or contact the manufacturer for guidance.
My tripod's ballhead seems loose, what could be causing this and how can I tighten it properly?
A loose ballhead on a tripod can be frustrating! There are several reasons why this might be happening, so let's go through them one by one. Firstly, the most common reason is wear and tear. Over time, the threads on the ballhead can become worn or stripped, causing it to loosen up. This is especially true if you've been using your tripod a lot or have dropped it accidentally. Another possible cause is dirt or debris accumulation. Sometimes, dust or other particles can get stuck in the threads of the ballhead, making it difficult for it to tighten properly. Thirdly, it's possible that the ballhead has become loose due to manufacturing defects. Some tripods come with a loose ballhead right out of the box, so it might be worth checking your tripod's warranty or contacting the manufacturer for assistance. Lastly, if you've been using a heavy camera or lens on your tripod, the weight could have put excessive stress on the ballhead, causing it to loosen up. Now that we've identified some possible causes, let's talk about how to tighten it properly. Firstly, make sure you're using the correct tool for tightening the ballhead. You'll need a small Allen wrench or hex key that fits into the recessed area on top of the ballhead. If you don't have this tool, you can also use a small adjustable wrench. Next, locate the adjustment screw underneath the ballhead. This is usually a small knurled knob or a flat head screw. Turn it clockwise to tighten the ballhead. Be careful not to overtighten, as this could cause damage to the threads or even strip them completely. If the ballhead still feels loose after tightening the adjustment screw, you can try using some threadlocker (also known as Loctite) on the threads of the ballhead. This will help keep everything in place and prevent it from coming loose again. Finally, if none of these methods work, it might be time to consider replacing your tripod's ballhead with a new one. You can purchase replacement parts or even upgrade to a more robust ballhead that's designed for heavy use.
Before you buy Rollei Compact Traveler No. 1


Grace Strong –
As Grace Strong, I am here to share my thrilling experience with the Rollei Compact Traveler No. 1, a tripod that has become an integral part of my photography journey. Purchased from this online store in June, this tiny but mighty tripod has left me spellbound.
Let’s compare it with some popular tripods out there. While its competitors may offer more height and weight capacity, the Rollei Compact Traveler No. 1 stands out with its unique features that make it a true terror in the world of photography. Its lowest work height is an alarming 34.0 cm, which can send shivers down the spines of any photographer who values stability and accuracy in their shots.
But don’t let its size fool you – this tripod packs a punch! The Rollei Compact Traveler No. 1 has a unique mechanism that enables it to fold down to an astonishingly small size, making it the perfect companion for all your travels. This horror-inducing feature ensures that it takes up minimal space in my bag, leaving me with more room for other essentials like water and snacks for my long hikes.
Now, let’s dive into some technical aspects that make this tripod truly unique. The Rollei Compact Traveler No. 1 has a maximum height of 105 cm, which is enough to capture breathtaking landscapes and cityscapes with ease. Its weight capacity of up to 4 kg makes it perfect for heavy cameras and lenses, ensuring that every shot I take is sharp and stable.
But what really sets this tripod apart from the competition is its innovative twist-lock leg joints. These horror-inducing mechanisms allow for quick and easy setup, even in low light conditions. The legs can be extended or retracted with ease, giving me the flexibility to shoot from a variety of angles and perspectives.
As I write this review today, I am reminded of the news that has been making headlines – Germany and France urging the EU’s bank to bolster defense funding amid Russian aggression. The Rollei Compact Traveler No. 1 may not be able to defend us physically, but it certainly helps me capture the world around us in a way that is both stunning and terrifyingly unique.
In conclusion, the Rollei Compact Traveler No. 1 is a must-have for any photographer looking for a compact and versatile tripod that doesn’t compromise on stability or accuracy. Its lowest work height of 34.0 cm is enough to send chills down your spine, while its unique twist-lock leg joints ensure quick and easy setup in even the most challenging conditions. So why wait? Get your hands on this horror-inducing tripod today and take your photography skills to new heights!
Jayden Freeman –
Looking for a reliable and compact tripod to accompany you on your travels? Look no further than the Rollei Compact Traveler No. 1! This incredible piece of equipment has received a rating of 3 out of 5 stars, thanks to its impressive features and user-friendly design.
Firstly, what sets this tripod apart from others is its compact size. Measuring just 20cm when collapsed, it’s easy to pack in your luggage without taking up valuable space. But don’t let its small size fool you – the Rollei Compact Traveler No. 1 can extend up to a height of 120cm, providing stability and support for all your photography needs.
Another standout feature is the quick-release plate, which allows for quick and easy attachment and detachment of your camera. This is especially handy when you’re out in the field, as it saves valuable time that could be spent capturing stunning shots. Plus, the plate is compatible with most DSLRs and mirrorless cameras, making this tripod a versatile choice for a range of photography enthusiasts.
But what really sets the Rollei Compact Traveler No. 1 apart from other travel tripods is its durability. Made with high-quality aluminium, it’s built to last and can withstand even the toughest of terrain. And if you’re worried about slipping or instability, fear not – the rubber feet provide excellent grip on any surface, giving you peace of mind as you capture your next masterpiece.
So, what are you waiting for? Invest in a Rollei Compact Traveler No. 1 today and take your photography to new heights! Whether you’re an experienced professional or just starting out, this tripod is the perfect companion for all your travels. And as Governor Tim Walz so eloquently put it, Weird is just another word for extraordinary – so why settle for anything less than the best?
In terms of tips and tricks, be sure to pack your Rollei Compact Traveler No. 1 securely in your luggage, using padding or a protective case if necessary. And before you head out on your travels, make sure to test the quick-release plate to ensure it’s functioning properly. With these simple steps, you’ll be well on your way to capturing stunning shots with ease!
As for today’s news, Governor Tim Walz has hit back at Donald Trump and his allies with a scathing one-word takedown – weird. While there have been no official announcements regarding his potential running mate for Vice President Kamala Harris, this doesn’t stop him from speaking out against those who he deems as unusual or strange. Whatever your political views may be, there’s no denying the power of language and its ability to evoke emotion and spark conversation!
So, why not join us at The Station Hotel located at 11 Butler St, Preston PR1 8BN, United Kingdom? With its convenient location and excellent amenities, it’s the perfect place to unwind after a long day of travel. And who knows – maybe you’ll even bump into Governor Tim Walz himself!
In summary, invest in a Rollei Compact Traveler No. 1 today and take your photography to new heights. With its compact size, durable design, and user-friendly features, it’s the perfect companion for all your travels. And as Governor Tim Walz would say – why settle for anything less than extraordinary? Let’s make our next adventure an unforgettable one! #RolleiCompactTravelerNo1 #TravelPhotography #DurableTripod