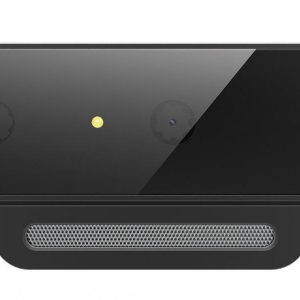
Microsoft LifeCam Cinema
$51.99
Capture crystal clear video and audio with Microsoft LifeCam Cinema, the ideal webcam for all of your video chat and recording needs.
Description
The Microsoft LifeCam Cinema webcam is a high-quality device for videoconferencing, recording videos and taking pictures. It’s a versatile choice for those who want a webcam that can do it all. The LifeCam Cinema features a sharp and clear 720p HD video resolution, a 16:9 widescreen aspect ratio and a 30 frames per second frame rate for smooth motion. It is also equipped with a built-in digital microphone that can capture your voice with clarity and precision.
The LifeCam Cinema is designed with a swivel mount that allows you to tilt and swivel the device in any direction for easy adjustment to your desired viewing angle. The camera is attached to a flexible base with a 360-degree rotation capability for easy positioning and stability. It can be mounted on the top of your computer monitor or placed on a flat surface as per your convenience.
One of the impressive features of the LifeCam Cinema is the TrueColor Technology that automatically adjusts the lighting and color balance of the video feed in order to provide the best possible image. This feature allows you to look your best in any lighting conditions, whether you’re in a dimly lit room or a brightly lit office.
The LifeCam Cinema also comes with some useful software included, such as the Microsoft LifeCam Dashboard. This Dashboard provides easy access to all the features and tools of the webcam and makes it simple to control and adjust the camera settings. You can easily capture still images by just click the button on the software and record videos with the press of a button.
Another advantage of the LifeCam Cinema is its compatibility with various chat applications, including Skype, Zoom, and Microsoft Teams. This makes it an ideal choice for remote workers who need to communicate with their colleagues and clients frequently. Setting up the LifeCam Cinema is easy and straightforward, simply plug it into your computer’s USB port and start using it.
The Microsoft LifeCam Cinema is a high-quality webcam that offers excellent functionality for videoconferencing as well as recording videos and taking pictures. Its versatile design, TrueColor Technology, and wide compatibility with chat apps make it a top choice for people who depend on remote conferencing and working from home. With its sharp video and clear audio quality, the LifeCam Cinema is a popular and reliable webcam that is worth considering for anyone who is looking for a high-quality webcam to keep in touch with their friends, family and even for professional use.
Microsoft LifeCam Cinema properties
| Product name |
LifeCam Cinema |
| Brand |
Microsoft |
| Interface |
USB |
| Max Video Resolution @ 30fps |
1280×720 (HD) |
| Platform |
Windows |
| Digital Zoom |
4 x |
| Max Frame Rate |
30 fps |
| Focus |
Auto |
| Software included |
No |
Frequently Asked Questions:
"How do I install and set up my Microsoft LifeCam Cinema?"
Microsoft LifeCam Cinema is a high-quality HD webcam designed for video calls, streaming, and recording. Here are the steps on how to install and set up your Microsoft LifeCam Cinema:
1. Unpack your Microsoft LifeCam Cinema from the packaging. You'll find the camera, a USB cable, a quick start guide, and other accessories in the box.
2. Connect the USB cable to the camera and plug the other end into a free USB port on your computer or laptop.
3. Your computer should automatically detect the new device and install any necessary drivers. If not, follow these steps:
a. Open Device Manager by searching for it in the Windows search bar or right-clicking on "This PC" > Manage.
b. Expand "Imaging devices," and you should see your Microsoft LifeCam Cinema listed there.
c. If it's not listed, select "Scan for hardware changes" from the action menu at the top of Device Manager.
d. Once installed, you can close Device Manager.
4. To test if everything is working correctly, open a video calling application like Skype or Zoom and start a call with a friend or family member. You should see yourself in the application's video window, indicating that your camera is working properly.
5. If you want to adjust any settings for your Microsoft LifeCam Cinema, such as brightness or field of view, you can do so using the Windows Camera app:
a. Search for "Camera" in the Windows search bar and select it from the results.
b. Click on the gear icon in the top-right corner to access settings for your camera.
6. If you want to use Microsoft LifeCam Cinema with streaming software like OBS or XSplit, make sure to choose "Microsoft LifeCam Cinema" as your video source when setting up your scene.
How do I properly connect and configure my Microsoft LifeCam Cinema for use with my computer's operating system?
First, ensure that your computer meets the minimum system requirements for using the Microsoft LifeCam Cinema. The camera is compatible with Windows 7, 8, or 10 (32-bit and 64-bit) and Mac OS X 10. Next, connect the USB cable that came with your LifeCam Cinema to both the camera and an available USB port on your computer. Your computer should automatically detect the camera and install the necessary drivers. If you're prompted to choose a driver source, select "Search automatically for updated driver software" and follow any additional instructions provided by your operating system. Once the installation is complete, you can begin using the LifeCam Cinema. To test the camera, open a video conferencing or messaging app that supports webcams, such as Skype or Google Hangouts. Your image should appear in the preview window. If you'd like to adjust any settings for your LifeCam Cinema, you can do so by opening the Windows Device Manager (right-click on Computer and select Manage, then navigate to Device Manager) and locating the "Microsoft LifeCam Cinema" device. Right-click on the device and select Properties, then click on the "Settings" tab to access options such as brightness, contrast, and image rotation. To adjust settings specific to your operating system, you can refer to Microsoft's support documentation for Windows or Apple's support documentation for Mac OS X. These resources provide detailed instructions on how to configure your camera for various scenarios, such as video conferencing, streaming, or recording.
How do I install and set up Microsoft LifeCam Cinema on my Windows 7 computer?
First, ensure that your computer meets the system requirements for Microsoft LifeCam Cinema. It requires a PC with Windows 7 (32-bit or 64-bit), Intel Core Duo processor or equivalent, and at least 512 MB RAM. Download and run the setup file from the Microsoft website. The setup will guide you through the installation process. Follow the on-screen instructions to complete the installation. Once the installation is complete, connect your LifeCam Cinema to your computer via USB cable. Wait for the driver to install automatically or follow the manual instructions if required. To test your camera, open any video conferencing software like Skype or Microsoft Lync, and select LifeCam Cinema as your default device. You should be able to see yourself in the preview window. Adjust the settings of your LifeCam Cinema by opening the Microsoft LifeCam Software application. This utility will help you change camera settings such as brightness, contrast, saturation, and sharpness. Finally, clean the lens and surface of the camera with a soft, dry cloth to ensure optimum image quality. That's it! You have successfully installed and set up Microsoft LifeCam Cinema on your Windows 7 computer. Enjoy using it for video conferencing, webinars, or online classes.
How do I properly set up and connect my Microsoft LifeCam Cinema webcam to my computer using USB?
To set up and connect your Microsoft LifeCam Cinema webcam to your computer using USB, follow these simple steps:
1. Make sure your computer has a free USB port available for the webcam. Connect one end of the USB cable that came with the webcam into the USB port on your computer. Insert the other end of the USB cable into the USB connector located on the bottom of the LifeCam Cinema webcam. Turn on your computer and wait for Windows to automatically detect and install the necessary drivers for the webcam. This process may take a few minutes. Once the drivers have been installed, you should be able to see an image from the webcam in any application that supports video input, such as Skype or Microsoft Lync. To adjust settings such as brightness and contrast, launch the Microsoft LifeCam Software by double-clicking the icon on your desktop or searching for it in the Start menu. From there, you can customize various features of the webcam to suit your needs. That's it! Your Microsoft LifeCam Cinema webcam is now set up and ready to use. Enjoy clear, high-definition video calls with friends, family, and coworkers.
My camera doesn't seem to be detecting my face when I'm wearing glasses, is this a common issue with the LifeCam Cinema or is there something wrong with my unit?
1. Move the camera**: Experiment with placing the camera at different angles and distances from you. Sometimes, adjusting the position of the camera can help improve facial recognition. Adjust the lighting**: Ensure that the room is well-lit, as this can help the camera detect your face more accurately. If possible, try using a light source directly behind or to the side of the camera to reduce shadows on your face. Clean the lens**: Dirt, smudges, or other contaminants on the camera's lens could be causing issues with facial recognition. Gently clean the lens with a soft cloth and see if that improves things. Check for glare**: If your glasses have reflective surfaces (like mirrored lenses), try adjusting their position to minimize glare on the camera lens. You can also try tilting the camera slightly to reduce the impact of any glare. Consider software updates**: It's possible that there's an issue with the LifeCam Cinema's firmware or software. Check Microsoft's website for any available updates and follow the instructions to install them. If none of these troubleshooting steps resolve the issue, it may be worth reaching out to Microsoft support directly for further assistance or potential repair/replacement of your unit.


Reviews
There are no reviews yet.