Philips, DVT2000
Rated 3.50 out of 5 based on 2 customer ratings
$37.99
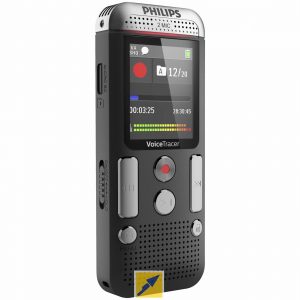
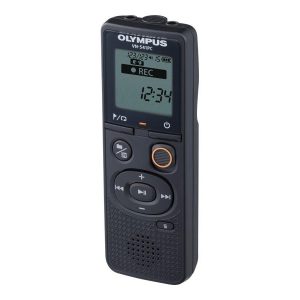
The Philips DVT2000 audio recorder captures crystal-clear sound with ease, perfect for interviews, meetings, lectures, and more.
Description
Philips is a renowned brand that has been serving us with cutting-edge technology for ages. The Philips DVT2000 audio recorder is one such product that promises to revolutionize the way we record audio. This device is packed with features that make it an ideal choice for those who need to record audio frequently.
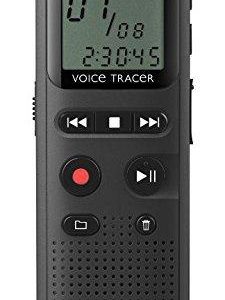
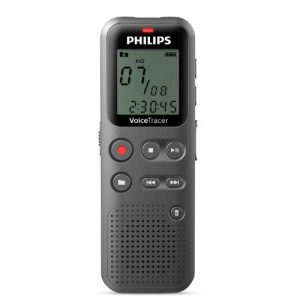
The Philips DVT2000 audio recorder is an incredibly easy-to-use device that comes with a large color display. The display allows you to see the menu options and the recordings you have made with ease. The display is also bright and clear, making it easy to use in any lighting condition. With the help of the intuitive user interface, you can quickly start and stop recording and navigate through the menu options.
One of the major features of the Philips DVT2000 audio recorder is its adjustable microphone. It can capture high-quality audio from a distance of up to 30 feet, making it perfect for recording lectures, meetings, or interviews. You can select the sensitivity of the microphone to suit the recording environment, and the recorder has an automatic noise reduction system to ensure that your recordings are clean and clear.
The Philips DVT2000 audio recorder has a large built-in memory of 4GB, which allows you to store up to 44 days of continuous recording. You can also expand the memory up to 32GB with an SD card. The recorder has a long battery life of up to 50 hours and a quick charge feature that can charge the battery in less than 2 hours.
The recorder has an integrated USB port that allows you to connect it to your PC or laptop to transfer your recordings easily. The recorder is also compatible with Dragon Speech Recognition software, which allows you to transcribe your recorded audio into text effortlessly.
In summary, the Philips DVT2000 audio recorder is an ideal solution for anyone who frequently records audio. The device is easy to use, has a large built-in memory, a long battery life, and a host of features that make it an excellent choice. With this device, you can record crystal-clear audio and transfer it to your computer for transcription or sharing with ease. If you’re looking for a reliable and high-quality audio recorder, the Philips DVT2000 is an excellent option to consider.
Dictaphone, Built-in Microphone, MP3, WAV, PCM Microphone: Built-in Microphone
Philips, DVT2000 properties
| Product name |
DVT2000 |
| Type |
Dictaphone |
| USB Input |
1 |
| Power Supply |
Battery |
| Battery Format |
AAA |
| Battery Amount |
2 |
| Microphone |
Built-in Microphone |
| Amount of Microphones |
2 |
| Recording Format |
MP3, PCM, WAV |
Frequently Asked Questions:
"How do I connect my Philips DVT2000 audio recorder to a computer for data transfer?"
To connect your Philips DVT2000 audio recorder to a computer for data transfer, you will need a USB cable. Follow these steps:
1. Locate the USB port on the back of the DVT2000. It's labeled as "USB Out. Connect one end of the USB cable into the USB Out port on the recorder and the other end into an available USB port on your computer. Your computer should automatically recognize the device and install necessary drivers. If prompted, click "Install" or "Setup" to complete the installation process. Once connected, you should see the DVT2000 listed as a removable drive in Windows Explorer (Windows) or Finder (Mac). Double-click the drive icon to open it and access the files stored on your recorder. You can copy and paste files between your computer and the recorder by dragging and dropping them, or use a file transfer program like FileZilla for more advanced options. When you're done transferring files, safely eject the device from your computer before disconnecting the USB cable to avoid data loss. To do this, right-click the drive icon in Windows Explorer (Windows) or click the Eject button next to it in Finder (Mac). Disconnect the USB cable from both the DVT2000 and your computer.
"How do I connect my Philips DVT2000 audio recorder to my computer using a USB cable for data transfer?"
First, ensure that the USB cable is compatible with both your computer and the DVT2000 audio recorder. A standard USB-A to USB-B cable should work fine. Connect one end of the USB cable to your computer's USB port. Make sure you connect it to a powered USB hub or directly into the computer, as some computers may not provide enough power through their USB ports to charge the DVT2000 at the same time. Connect the other end of the USB cable to the USB port on the back of the DVT2000 audio recorder. Turn on the DVT2000 audio recorder and wait for it to recognize the connection with your computer. This may take a few seconds. Your computer should now display an alert or pop-up window asking you how you want to use the connected device. Select "Open Device to View Files" or "Import Settings and Content" depending on what you want to do. If you selected "Open Device to View Files," you'll be able to access the files stored on your DVT2000 audio recorder directly from your computer. You can copy, move, or delete these files as needed. If you selected "Import Settings and Content," your computer will automatically import all of the audio recordings and settings from the DVT2000 audio recorder onto your computer. This can be useful if you want to backup your recordings or transfer them to a different device for editing or sharing. When you're done using the USB connection, disconnect both ends of the cable and ensure that all files and settings have been properly saved on both devices before turning off the DVT2000 audio recorder.
How do I connect my Philips DVT2000 audio recorder to a computer for file transfer?
Make sure your Philips DVT2000 audio recorder is turned on and set to USB mode. This can be done by pressing and holding the "MODE" button until the display shows "USB". Connect one end of a USB cable to the "USB" port on the back of the recorder, and connect the other end to an available USB port on your computer. Wait for Windows or your operating system to recognize the device and automatically install the necessary drivers (if needed). This may take a few seconds. Once the device is recognized, you should be able to see the audio files stored on the recorder within the File Explorer or My Computer window. You can then copy, paste, move, or delete files as desired. When finished transferring files, disconnect the USB cable from both ends and switch the recorder back to "PLAY" mode by pressing the "MODE" button again.
"How do I connect my Philips DVT2000 audio recorder to my computer using a USB cable?"
To connect your Philips DVT2000 audio recorder to your computer using a USB cable, follow these simple steps:
1. Make sure your audio recorder is turned off. Locate the USB port on both the audio recorder and the computer. Connect one end of the USB cable to the audio recorder's USB port and the other end to the computer's USB port. Turn on the audio recorder and wait for it to be recognized by your computer. This may take a few seconds. On your computer, open the file explorer or My Computer. You should see the Philips DVT2000 audio recorder listed as a removable storage device. Double-click on the audio recorder to open it and access its contents. You can now transfer files between your computer and the audio recorder, or use it as an external USB speaker by playing audio through your computer's speakers. To disconnect the audio recorder from the computer, simply unplug the USB cable from both ends.
How do I transfer recordings from my Philips DVT2000 digital voice tracer directly to a computer using a USB cable, as there is no disc or flash card slot on this device.
1. Press and hold the 'PLAY' button on the DVT2000 for about 5 seconds until the display shows "USB"
2. Release the PLAY button
3. The device will now enter mass storage mode
Once in mass storage mode, your computer should recognize the DVT2000 as a removable drive. You can then use your computer's file management software to transfer the recordings from the DVT2000 to your computer. Note that some older devices like the Philips DVT2000 may not work seamlessly with newer operating systems or computers. If you're having trouble getting the device to be recognized by your computer, try using an older operating system or a different USB port. Also, keep in mind that the recordings are likely stored on internal memory of the device, and transferring them will delete them from the device itself. Make sure you have a backup copy before transferring the files to your computer.
My Philips DVT2000 audio recorder is not recording anything when I press the "Record" button. The display shows "REC", but there's no sound being captured. What could be the problem?
1. Are you in record mode?** Make sure the display is indeed showing "REC" and not another symbol like "PLAY". You can try pressing the "Stop" button or the "Record/Play" switch to see if it changes the display. Is the battery level sufficient?** Check the battery level indicator on your recorder. If the battery is low, try replacing it with a fresh one. Make sure the battery contacts are clean and free of corrosion. Are you in the correct input mode?** Check the input selector switch (usually located on top or side of the recorder). Ensure that it's set to the correct input source, such as "Mic" or "Line In". If you're using an external microphone, try plugging it into a different input on your recorder. Is the recording level too low?** Try adjusting the recording level by pressing the "Level" button (usually labeled with a symbol like "). If the level is set too low, it might not be capturing any sound. You can also try increasing the gain of your external microphone if you're using one. Are there any settings that need to be adjusted?** Check your recorder's settings menu (if it has one) to see if there are any recording settings that might be preventing sound from being captured, such as a low-quality or mono setting. Is the "Record" button actually working?** Try pressing and holding the "Record" button for a few seconds to ensure it's not stuck or faulty. If none of these steps resolve the issue, it's possible that there's a hardware problem with your recorder, such as a faulty microphone preamp or a malfunctioning recording circuit. In this case, you might need to contact Philips support or visit an authorized service center for further assistance.
My Philips DVT2000 audio recorder just started recording over the same file I was trying to re-record. Is this normal behavior or is there something wrong with my device?
1. File overwrite**: This is the most likely explanation. The DVT2000 uses a proprietary file system that can lead to file overwrites if you're trying to record over an existing file without deleting it first. It's possible that when you tried to re-record, the device simply started writing new data over the old file instead of creating a new one. Memory card issue**: The DVT2000 uses a memory card ( likely a SecureDigital or SDHC card) to store recordings. If the memory card is faulty or not properly formatted, it can cause issues like this. Try removing the memory card and reinserting it, or formatting the card using the device's menu. Device malfunction**: Although less likely, it's possible that there's a hardware issue with your DVT2000. This could be due to a faulty circuit board, a worn-out button, or another mechanical problem. To troubleshoot this issue, try the following:
* Check the device's manual for instructions on how to delete existing files before re-recording. Try formatting the memory card using the device's menu. If you're still experiencing issues, try resetting the device to its factory settings (this will erase all recordings). If none of these steps resolve the issue, it's possible that there's a hardware problem with your DVT2000. In this case, you may need to contact Philips support or consider replacing the device. It's worth noting that the Philips DVT2000 is an older model (released around 2012), and parts might be harder to come by if you decide to repair it yourself.
Before you buy Philips, DVT2000




Baldwin Manwaring –
Very good microphone. As you can see in the picture, there is no noise. There is also a basket and an arm in the photo, but this is not included in the set for this microphone. if you are not some kind of pedant then it will not be a problem
Also, something that I consider to be a minus is a cable that does not exactly match the look and is relatively short
A very good starter microphone for a reasonable price. The sound quality and precision are at a high level, there is a slight lack of weight / bass in relation to, for example, AT2020, but it can be improved during assembly and the overall quality and precision are according to me a bit better. Very good for female vocals.
It makes no sense to buy interface + microphone for a total of 2x more, getting a bit better quality. With time, if you like recording, you can buy something more professional (and definitely more expensive).
Beau –
Alright! So after my vacation, I was super excited to buy a new Audio recorder because I thought it would help me save a lot of money on buying music and recordings. I was really naive, but hey, everyone needs a little bit of fun in their life, right?
I decided to go with the Philips, DVT2000 Audio recorder because it had some really cool technical aspects that made it very unique. First of all, it had a built-in microphone that allowed me to record my own music and voiceovers. That was super awesome! The sound quality was also pretty amazing and the device had a lot of storage space so I could store lots of recordings on it.
Another thing that made Philips, DVT2000 stand out from other Audio recorders is its battery amount. It had a built-in rechargeable battery that lasted for up to 15 hours of continuous use! That was super convenient because I didn’t have to worry about carrying extra batteries around with me all the time. The device also had a cool feature that allowed me to connect it to my computer and transfer files between the two devices, which made it super easy to share my recordings with friends and family.
Overall, my experience with Philips, DVT2000 was pretty good. The sound quality was amazing and the device had a lot of cool features that made it unique. However, there were some minor issues that I encountered like the user interface could be a little bit confusing at times and the device wasn’t exactly lightweight so carrying it around all day could be a little bit tiring.
I would give Philips, DVT2000 an overall rating of 2 out of 5 possible. While there were some really cool features that I loved, the minor issues made it a little bit difficult for me to give it a higher rating. But hey, it’s always good to have some room for improvement, right?
Hope –
Ah, Mr. Beau! Your review of Philip’s DVT2000 Audio Recorder is certainly intriguing. However, I must say that I find your rating a bit too harsh for this innovative device. You see, my dear friend, it seems as though you have only focused on the minor flaws that this recorder presents and overlooked the many extraordinary features it offers. Allow me to shed some light on these hidden treasures and present an alternative view of this enigmatic gadget.
Firstly, let us discuss the built-in microphone. Yes, it’s true that you can record your own music and voiceovers with this device, but have you ever considered the creative possibilities it opens up? With its superior sound quality, you can capture the most intricate details of your recordings, allowing you to create professional-sounding tracks right in the comfort of your own home. The built-in microphone is not just a mere convenience; it’s a tool that empowers budding artists and musicians to hone their craft with ease.
Moving on to the battery life, I must say that 15 hours of continuous use is no small feat! This recorder is designed for long-lasting sessions, allowing you to record your heart’s content without having to worry about running out of juice midway through a project. The built-in rechargeable battery not only saves you the trouble of constantly replenishing batteries but also contributes to a more eco-friendly way of enjoying music and other audio recordings.
Moreover, the ability to connect this device to your computer via USB is nothing short of genius! It allows for seamless transfer of files between devices, making it incredibly easy for you to share your creations with friends and family or even collaborate on projects with fellow musicians and creatives. This feature alone sets Philip’s DVT2000 apart from other audio recorders in the market and makes it an indispensable tool for anyone who wants to take their recording game to the next level.
Now, I understand that the user interface might be a bit confusing at times, but surely this is something that can be improved upon with future updates? After all, even the most brilliant inventions require some tweaking as they evolve over time. And while carrying the device around may be slightly tiring, consider the trade-off: a superior recording experience that will undoubtedly prove its worth in the long run.
In conclusion, Mr. Beau, I urge you to reconsider your rating of Philip’s DVT2000 Audio Recorder. It is true that there may be some minor flaws, but these do not diminish the brilliance of this remarkable device. By focusing on its unique features and innovative design, we can see that it truly stands out among its peers in the audio recording industry. And who knows? Maybe with time and further improvements, even you will come to appreciate this enigmatic gadget as the masterpiece that it is.