Blackmagic Design URSA Broadcast
Rated 3.00 out of 5 based on 1 customer rating
$2,540.99
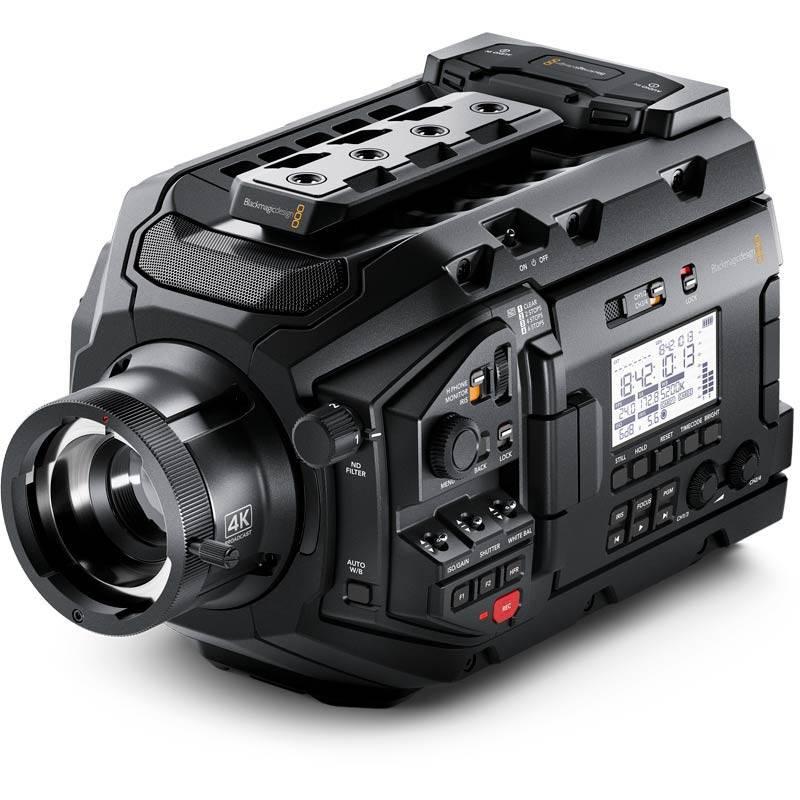
Get the highest quality images with the Blackmagic Design URSA Broadcast camcorder, the perfect tool for professional video and broadcast production.
Description
Blackmagic Design URSA Broadcast Camcorder: The Flagship Camera for Broadcast Professionals
The Blackmagic Design URSA Broadcast Camcorder is the go-to choice for broadcast professionals seeking high-end camera features, broadcast connectivity, and a durable, ergonomic design. Whether you’re shooting news, sports, events, or any other type of broadcast content, the URSA Broadcast is the perfect option to capture footages that meet the industry standards for quality and resolution.
Design and Build Quality
The URSA Broadcast sports a robust design and superior build quality, making it durable and comfortable to use in the field. Its magnesium alloy chassis makes it lightweight, while its splash-proof exterior protects it from harsh weather conditions. The camera also comes with necessary accessories like handles, mounting points, and a shoulder strap with a pad for added convenience.
The camera’s physical controls are well-organized and within reach, making it easy and quick to make adjustments to settings like shutter speed, iris, white balance, and more. For added convenience, it also comes with an LCD screen that displays critical information about the capture settings, battery life, and other details.
Image Quality and Features
The URSA Broadcast boasts a 4K-quality image output with a Super 35mm sensor that delivers sharp, high-quality footage. The camera features a global shutter that eliminates rolling shutter artifacts commonly seen in fast-moving shots like sports events. Its sensitivity range is impressive, enabling it to work well in low-light conditions.
The camera also comes with ND filters that can be quickly adjusted for the ideal exposure. And with its built-in HDR capabilities, the URSA Broadcast can deliver incredible contrast clarity associated with programs that require a wide dynamic range.
Connectivity
The URSA Broadcast comes with multiple connectivity features, including 12G-SDI and HDMI output, making it possible to send output to professional recorders, monitors, and broadcast switchers.
The camera is also compatible with a wide range of optics, including Canon EF, PL, and B4 lenses, for added flexibility in shooting scenarios.
Workflow and Compatibility
The URSA Broadcast supports a wide range of codecs and file formats, including CinemaDNG RAW and ProRes. It can capture video in various frame rate settings for different broadcast standards. Additionally, the camera comes with Blackmagic’s DaVinci Resolve editing software, making it easy to edit footage shot on the URSA Broadcast.
Conclusion
The Blackmagic Design URSA Broadcast Camcorder stands out among other professional video cameras in the market. It offers seamless broadcast connectivity, robust images, and several ergonomic designs that make it easy to handle in any situation. Its flexibility in terms of lens compatibility, codecs, and frame rates make it a recommendable option for those in the broadcast industry. The camera is also relatively affordable, making it an attractive option for independent filmmakers and broadcast professionals on a budget.
Blackmagic Design URSA Broadcast properties
| Product name |
URSA Broadcast |
| Brand |
Blackmagic Design |
| Type |
Action camera |
| Features |
Remote Control |
| Connections |
Bluetooth, Headphone Jack, USB Type-C, XLR in |
| Flash Memory |
Yes |
| Image Stabilization |
Yes |
| Max Video Resolution |
2160p (4K) |
| Max Frames per second (FPS) |
60 fps |
| Video Resolutions |
3840×2160 (60fps), 1920×1080 (30fps) |
| Viewfinder |
Yes |
| Touchscreen |
Yes |
| Sound |
Stereo |
| Focal Length (35mm equiv) |
8-128 mm |
| Flash / Light |
Yes |
| Sensor |
CMOS |
| Sensor Size |
2/3 inches |
| Height |
146.8 mm |
| Width |
255.9 mm |
| Weight |
2600 g |
| Other Memory cards |
CFast 2.0 |
Frequently Asked Questions:
What are the recommended steps for setting up and using the Blackmagic Design URSA Broadcast camera for the first time?
Here are the recommended steps for setting up and using the Blackmagic Design URSA Broadcast camera for the first time:
1. Unpack the camera carefully to avoid any damage to its components. Attach the top handle, which also houses the LCD viewfinder, to the top of the camera. Connect the battery pack to the camera and insert a fully charged battery. Power on the camera by pressing the power button located at the bottom right of the camera's body. Adjust the camera's settings using the touchscreen LCD viewfinder. You can adjust settings such as resolution, frame rate, white balance, and exposure. Attach the desired lenses to the camera by using either the standard B4 mount or EF mount. Set up your shot by adjusting the camera's position, focus, and composition. Use the included shoulder pad to comfortably hold the camera during shooting. Connect any additional accessories such as audio equipment, follow-focus systems, or matte boxes if needed. Begin recording by pressing the record button located on the side of the camera. The camera will automatically create a new folder and start recording in the chosen format (either ProRes or RAW). Remember to always turn off the camera when not in use and store it safely in its carrying case to protect it from damage.
How do I properly connect and configure external audio inputs on my Blackmagic Design URSA Broadcast camera?
First, make sure that the external audio input source is compatible with the camera's audio specifications. The URSA Broadcast supports both balanced and unbalanced audio sources, with options for XLR or 3. You should also ensure that your audio source has enough signal level to be picked up by the camera's input. Next, locate the audio input connector(s) on the camera's body. These will typically be located near the camera's side or top panel, depending on the specific model. Check the camera's manual for exact locations and labels. Connect your audio source to the appropriate input using a balanced XLR cable (if available) or an unbalanced 3. Ensure that the connections are secure and tightened properly. Configure the camera's audio settings in the menus. This will typically involve selecting the correct input source, setting the gain level for the input, and ensuring that the audio is being routed to the desired output (such as SDI or HDMI). Some cameras may also allow you to set up audio monitoring through headphones or an external speaker system. Test your audio inputs by playing back audio from your source and checking the levels on the camera's audio meters. Adjust the gain level as necessary until the signal is clear and free of distortion. If desired, you can also configure advanced audio features such as timecode synchronization or audio routing to multiple outputs simultaneously. Consult the camera's manual for more information on these settings. Finally, ensure that your audio inputs are properly balanced and grounded in accordance with best practices. This will help to prevent interference and noise from external sources (such as electrical fields or electromagnetic radiation) and ensure a cleaner, more reliable signal throughout your production. Always follow proper safety protocols when working with audio equipment, such as using appropriate shielding and grounding techniques, and ensuring that all cables are properly connected and secured to prevent accidental disconnection during use.
How do I properly set up and operate the Blackmagic Design URSA Broadcast camera for live studio productions?
Power Up and Setup
- Connect the power adapter to the URSA Broadcast camera and a wall outlet. The camera will power on automatically. Attach the camera to the tripod plate using the standard 150mm (6 inch) studs, as it comes with an included quick-release plate adapter. Configure the camera's settings using the onboard touchscreen or through a connected computer via USB-C. Connect to the Studio Switcher
- Connect the camera's HD-BNC output to the corresponding input on your studio switcher. You may need an optional SDI converter if using DVI, VGA, or HDMI sources instead. Check that the camera is recognized by the switcher and receiving proper video signals. Adjust Camera Settings for Studio Use
- Switch to Studio mode in the camera's setup menu. This will disable certain features not commonly used in studio environments, such as zoom lenses and image stabilization. Adjust focus and iris settings using the camera's dedicated controls or a separate focus puller device via an optional SDI/Fiber converter. Use the camera's built-in tally lights to indicate which camera is currently active, as well as its status (e. Monitor and Control the Camera Remotely
- Connect a video monitor or broadcast panel to the camera's HDMI output using an optional SDI/HDMI converter. This will allow you to view and control the camera's settings from a separate location. Configure Audio Inputs and Outputs
- Use the URSA Broadcast's XLR inputs to connect external audio sources such as microphones or intercom systems. Adjust audio levels using the camera's onboard controls or via an optional SDI/audio converter for remote monitoring and control. Record Video and Audio Locally
- Use the URSA Broadcast's built-in recording functionality to capture video and audio directly to an optional SSD or SD card for backup purposes or future reference. Connect and Control External Equipment
- Use the camera's 12G-SDI, Ethernet, USB-C, and HDMI ports to connect and control various external equipment such as graphics generators, robotics systems, and teleprompter solutions using optional converters and expansion modules. Ensure Compatibility with Studio Equipment
- Check that the URSA Broadcast is compatible with your existing studio equipment, including switchers, routers, cameras, lenses, and accessories. Blackmagic Design offers a wide range of products specifically designed for use with their cameras, as well as third-party solutions from other manufacturers. Follow Safety Procedures and Maintenance Guidelines
- Adhere to safety protocols such as proper cable management, grounding, and power distribution to prevent electrical hazards and equipment damage. Perform regular maintenance tasks such as cleaning lenses and sensors, checking connections and cables, and calibrating settings. Follow the manufacturer's guidelines for these procedures to ensure proper operation and longevity of your equipment. Seek Professional Assistance When Needed
- If you encounter technical issues or have questions about your URSA Broadcast setup, consult the manufacturer's support resources such as user manuals, FAQs, and forums. You may also consider seeking professional assistance from an authorized dealer or service provider to ensure proper installation, configuration, and maintenance of your equipment.
I'm experiencing an issue with my Ursa Broadcast where it's not recording in ProRes at 4K resolution, but instead defaults to HD. What could be causing this and how do I resolve it?
1. Firmware issue**: Outdated or corrupted firmware can cause compatibility problems with certain codecs like ProRes. Ensure that your Ursa Broadcast is running on the latest firmware version. Codec settings**: It's possible that the codec settings for ProRes 4K recording are not properly configured in the camera's menu. Double-check the camera settings to ensure that ProRes 4K is selected as the desired format. Card compatibility**: The Ursa Broadcast requires a specific type of memory card to support high-bitrate codecs like ProRes. Ensure that you're using a compatible SDXC or CFast card with a sufficient capacity (at least 128GB) and speed rating (U3 or higher). Camera configuration**: Verify that the camera's settings are not set to record in HD by default. You can do this by checking the camera's menu, specifically under the "Record" or "Format" section. System file corruption**: In some cases, system file corruption can cause issues with codec compatibility. Try resetting the camera to its factory defaults and then reconfigure the settings for ProRes 4K recording. To resolve this issue, I recommend the following steps:
1. Update your firmware to the latest version using the Blackmagic Design website. Double-check the codec settings in the camera menu to ensure that ProRes 4K is selected as the desired format. Verify that you're using a compatible SDXC or CFast card with sufficient capacity and speed rating. Reset the camera to its factory defaults and then reconfigure the settings for ProRes 4K recording. If none of these steps resolve the issue, it's possible that there might be a hardware fault or a compatibility problem with your specific setup. In this case, I recommend reaching out to Blackmagic Design support for further assistance.
Before you buy Blackmagic Design URSA Broadcast


Noah Bax –
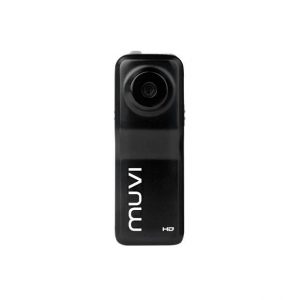
The camera seems to be quite weak structurally. It is light, plastic, it even seems like a toy. The battery is also a big disadvantage. By itself it has a fairly small capacity and the camera is power hungry. You can record a maximum of 30 minutes of video on one battery, but it’s best not to turn off the camera! Switching on and off alternately consumes the battery. The second minus when it comes to the battery is that it is impossible to connect a larger one. The battery is put inside, so you only have to keep the other one in stock.
The picture is also not very good. For a camera that records in “HD”, the image does not seem to be very sharp. It also makes no sense to set the properties of the recorded image lower than the maximum. Only at the maximum can you say that some quality appears, but it does not reflect the real “HD”. Objects filmed up close look the most beautiful, the bigger plan is a bit of a chore.
The sound is clear, but the camera does not record / transmit low frequencies or bass at all.
The camera is good for beginners and undemanding, even undemanding.
No touch screen – joystick; /.