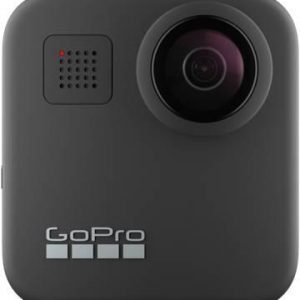
Discovery Adventures Expedition Action Camera
$46.99
Capture life’s most exciting moments with Discovery Adventures Expedition Action Camera Camcorder and experience the thrill of adventure like never before!
Description
The Discovery Adventures Expedition Action Camera camcorder is a great choice for people who love to capture their outdoor activities. From hiking to biking, surfing to skiing, this camcorder can document your adventures with ease. However, what makes this camcorder unique is that it’s designed to withstand the tougher environments and harsh elements that come with outdoor activities.
The camcorder is waterproof, which means you don’t need to worry about it getting damaged if you’re taking a dip in a pool or enjoying a water-based activity. It’s also designed to be shockproof, which means it can survive being dropped or knocked about without getting damaged. If you go on an excursion where you know you’ll be in difficult conditions, this camcorder is built to endure.
The Discovery Adventures Expedition Action Camera camcorder boasts an excellent 4K resolution, which means your videos footage will be sharp and high quality. Additionally, the camera has a wide-angle lens, which captures a 170-degree view. This means that you will be able to capture more of the action in each shot. The camera can also take photos, and its 16-megapixel camera with an f/2.8 aperture will produce high-quality images.
The action camera includes a range of features to ensure that you can get the best footage possible. These features include an image stabilization mode, which ensures that your videos are smooth even when you’re on the move. The camera also features a time-lapse mode, which allows you to capture a scene over a period of time. With exposure modes, you can make sure your images and videos capture the mood and atmosphere of your surroundings correctly.
The camera has a built-in Wi-Fi feature, which allows you to share your photos and videos easily. You can transfer files directly from the camera to your smartphone or tablet. Additionally, the camera comes with a remote control, which means you can control your camera without having to physically touch it. This is particularly useful when you’re filming while participating in a specific activity.
The Discovery Adventures Expedition Action Camera camcorder is lightweight and easy to carry around. The camera is compact and can fit into your pocket or backpack. With a long battery life, you don’t need to worry about the camera running out of charge in the middle of an adventure.
Overall, the Discovery Adventures Expedition Action Camera camcorder is a fantastic piece of equipment for anyone who loves outdoor activities. Its durability and built-in features ensure that your footage will be of excellent quality, no matter the circumstances of your adventure. Whether it’s a day out hiking or a surfing vacation, you can rest assured that you’ll capture everything with this camcorder.
Discovery Adventures Expedition Action Camera properties
| Product name |
Expedition Action Camera |
| Brand |
Discovery Adventures |
| Type |
Action camera |
| Connections |
HDMI, USB 2.0, Wi-Fi |
| Max Video Resolution |
1080p |
| Max Frames per second (FPS) |
30 fps |
| Video Resolutions |
1920×1080 (30fps), 1440×1080 (30fps), 1280×720 (30fps), 848×480 (30fps), 640×480 (30fps) |
| Recordable Files |
AVI |
| Display |
Yes |
| Battery Type |
Li-Ion |
| Sensor Megapixels |
1.0 MP |
| Still Picture Resolution (MP) |
12 |
| Still Pictures |
Yes |
| Height |
41.0 mm |
| Width |
30.0 mm |
| Depth |
59.0 mm |
| Weight |
60 g |
Frequently Asked Questions:
What are the key features and specifications of the Discovery Adventures Expditition Action Camera, and how do I operate it for the first time?
Discovery Adventures Expedition Action Camera is a versatile camera that is designed to capture high-quality photos and videos in various outdoor activities. It comes with several features and specifications to enhance the user's experience. Here are some key features, specifications, and instructions on how to operate it for the first time:
**Features:**
1. 4K Ultra HD Video Recording: The Discovery Adventures Expedition Action Camera can record videos in 4K Ultra HD resolution at 30 frames per second (fps), providing sharp and detailed footage of your adventures.
2. Waterproof Housing: The camera comes with a waterproof housing that allows you to take underwater photos and videos up to 30 meters deep.
3. Wi-Fi Connectivity: You can connect the camera to your smartphone or tablet via Wi-Fi, which allows you to control the camera remotely, view live streaming, and transfer photos and videos wirelessly.
4. Time-Lapse Mode: The camera has a time-lapse mode that captures photos at regular intervals and creates a compilation of images into a short video.
5. Burst Mode: This feature allows you to capture multiple photos in rapid succession, ensuring that you don't miss any crucial moments during your adventure.
6. Image Stabilization: The camera has built-in image stabilization technology that helps reduce shaking and blurring in photos and videos.
**Specifications:**
1. Sensor: 12MP CMOS Sensor
2. Resolution: Up to 4K Ultra HD (3840x2160) at 30fps
3. Video Format: MP4
4. Photo Format: JPEG
5. Battery Life: Approximately 90 minutes of continuous recording
**Instructions for first-time use:**
1. Charge the battery: Before using the camera, make sure you charge the battery fully. It takes around 2-3 hours to charge the battery completely.
2. Mount the camera: Attach the waterproof housing to the camera and mount it on your gear or accessories using the included mounting accessories.
3. Turn on the camera: Press and hold the power button located at the top of the camera for 2-3 seconds until the display turns on. You can now see the current mode (photo, video, etc.) and battery level on the LCD screen.
4. Select mode: To switch between photo, video, time-lapse, or burst mode, press the menu button located below the power button. Use the up and down arrows to navigate through the modes, then press the center button to select your preferred mode.
5. Start recording/taking photos: Once you have chosen your desired mode, press the center button to start capturing photos or videos. You can stop recording or taking photos by pressing the center button again.
6. Connect to Wi-Fi: To connect the camera to your smartphone or tablet, go to the settings of your device and search for the Discovery Adventures Expedition Action Camera's Wi-Fi network. Enter the password provided in the camera's manual, then open the corresponding app (Discovery Adventures Expedition Action Camera App) on your device.
7. Transfer photos and videos: Once connected, you can view live streaming, control the camera remotely, and transfer photos and videos wirelessly to your device.
How do I set up and use the Discovery Adventures Expedition Action Camera for the first time?
Setting up and using the Discovery Adventures Expedition Action Camera for the first time is easy. Follow these simple steps:
1. **Unbox your camera:** Open the box, locate the camera unit, and remove all accessories. Make sure you have your camera, a USB charging cable, a helmet mount, a curved adhesive mount, a flat adhesive mount, a quick-release buckle, a wrist strap, and an instruction manual.
2. **Charge the battery:** Connect the USB charging cable to the camera and the other end of the cable into a power source. The camera will start charging immediately. A red LED light will flash, indicating that it's in charging mode. When fully charged, the red LED light will turn off.
3. **Turn on your camera:** Press the power button (located on the top right corner of the camera) for 2 seconds to switch on the device. You can identify if the camera is turned on by a green LED light that appears next to the mode selection buttons (record/photo and Wi-Fi).
4. **Install the camera onto your desired mount:** First, attach the quick-release buckle to the chosen mount (helmet or flat surface). Next, slide the camera into the buckle until it clicks into place. Tighten the buckle to ensure a secure hold.
5. **Start recording/taking photos:** Press the mode selection button (record/photo) once to switch between modes. The camera will vibrate to indicate that you've successfully switched modes.
- For video, press the record/photo button once to start recording and again to stop. While recording, a red LED light will flash to show that it's in use.
- For photos, press the record/photo button twice quickly, and you'll hear a shutter sound to confirm that an image has been captured. The LED light will flash as well.
6. **View your content:** Connect your camera to a computer or laptop using the USB charging cable. Your content (photos and videos) should appear in the folder where the camera is recognized as a storage device.
7. **Share your adventures:** Edit, upload, and share your footage on social media platforms like YouTube and Instagram.
Remember always to follow safety guidelines while using any action camera during adventurous activities.
How do I transfer footage from my Discovery Adventures Expedition Action Camera to my computer?
Connect your Discovery Adventures Expedition Action Camera to your computer using a USB cable. Make sure the camera is turned on and set to PC mode (press the Mode button until "PC" appears on the screen). On your computer, open Windows Explorer or Finder (Mac) and locate the connected camera under "Removable Disk". Double-click on the camera's drive to view its contents. You should see a folder labeled "DCIM" with subfolders containing your videos and photos. To transfer files, simply select them in Windows Explorer/Finder and drag and drop them into a desired location on your computer. Alternatively, you can copy and paste or use the standard file transfer methods. Once the transfer is complete, safely eject the camera from your computer by right-clicking on its drive in Windows Explorer/Finder and selecting "Eject" (Mac) or by dragging the drive to the trash bin (Windows). Then disconnect the USB cable from the camera.
My camera is not turning on, it just flashes red and beeps when I try to power it on. Is there something wrong with the battery or is it a hardware issue?
1. Battery Condition: Try charging your camera for at least 30 minutes and then try turning it on again. If the camera still doesn't turn on, check if the battery is properly inserted or if there are any signs of physical damage to the battery. Hardware Malfunction: If you suspect a hardware issue, try disconnecting the memory card (if present) or any other accessories and see if this resolves the problem. Sometimes, external devices can cause issues with the camera's circuitry. Software Glitch: If none of the above steps resolve the issue, it might be worth trying to reset your camera to its factory settings. This will erase all saved data on your memory card but may help you troubleshoot any software-related problems. Physical Damage: Inspect the camera for any signs of physical damage such as cracks or water exposure. Water can cause significant damage to electronic components, leading to a malfunction like this. Power Source: If using an external power source (like a battery pack), try switching to an internal power source (internal battery) if your camera has one. If none of these steps resolve the issue and you're still unsure about what's causing it, you might need professional assistance from a camera repair service or manufacturer support.
Before you buy Discovery Adventures Expedition Action Camera


Reviews
There are no reviews yet.