Description
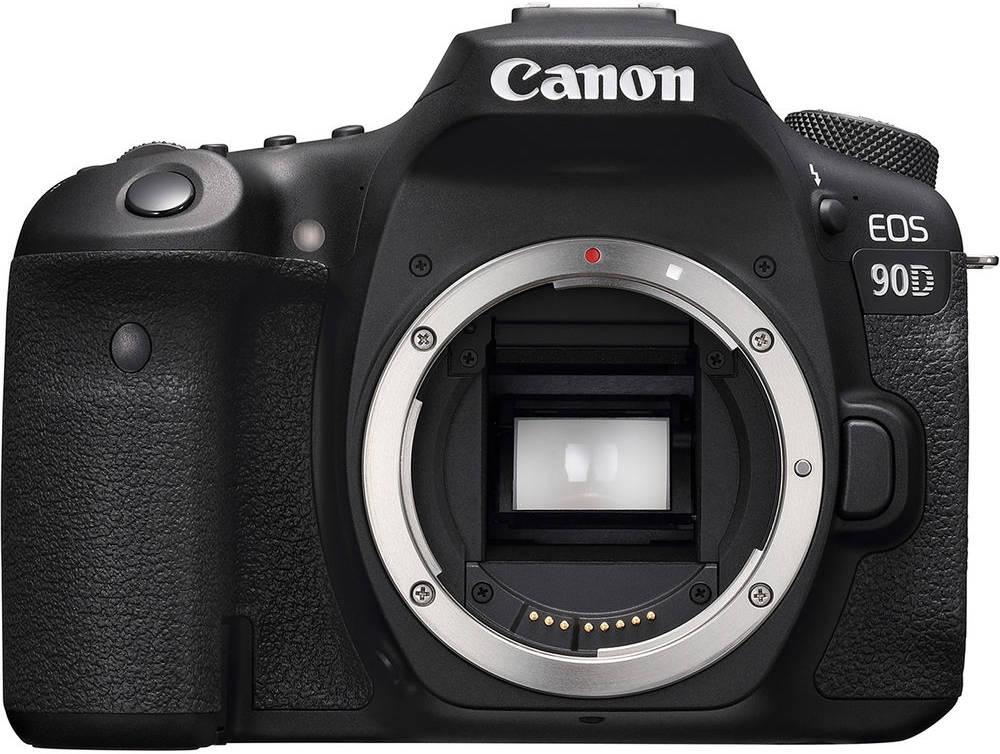
The Canon EOS 90D digital camera is a high-performance device designed for photographers looking for a robust device with exceptional image quality. The camera is an upgrade to the EOS 80D with a bunch of new features and functionalities. The device is user-friendly, and you will love the excellent shooting experience.
Build quality & design
The Canon EOS 90D has a solid build quality with a weather-sealed body to protect from weather elements. The grips are deep, and the buttons are easy to access, making it easy to shoot for long hours without feeling fatigued. The device measures 140.7 x 104.8 x 76.8mm and has a weight of 701g with the battery and memory card included.
Sensor
The camera boasts a 32.5-megapixel APS-C CMOS sensor capable of delivering high-resolution images. The sensor is paired with Canon EOS iTR autofocus system that involves 45 focus points, and the Dual Pixel CMOS AF ensures you capture sharp photos even in low-light environments.
Image processor
The EOS 90D is powered by Canon’s latest Digic 8 processor that compensates for noise, enhances the color tone, and reduces image distortion. With the processor, the camera can capture 4K UHD videos, time-lapse animations, and other advanced features.
ISO Range
The Canon EOS 90D has an ISO range of 100- 25600, which is expandable to 51200. The ISO range enables great image quality in low light conditions by adjusting the shutter speed and aperture.
Shooting speed
The camera has fast autofocus and shooting speeds of up to 10 frames per second, combined with an optical viewfinder, allowing you to capture fast-moving objects accurately.
Display
The device has a 3-inch LCD panel that is touch-sensitive and has an articulating mechanism with a resolution of 1,040,000 dots. The screen makes it easy to select various settings and modes by merely swiping your finger.
Connectivity
The EOS 90D has Wi-Fi and Bluetooth connectivity, allowing you to control the camera remotely and transfer images to your smartphone or computer.
Battery life
The device comes equipped with a powerful LP-E6N rechargeable lithium-ion battery that delivers up to 1300 shots per charge, allowing you to shoot for long hours without worrying about powering off.
Conclusion
In conclusion, the Canon EOS 90D digital camera is an excellent upgrade from its predecessor, with a bunch of features that make it more intuitive, responsive and convenient to use. The camera is ideal for both amateur photographers looking to upgrade their skills and professional photographers who need a reliable device to capture professional-grade photographs.
Digital SLR, CMOS, APS-C, 30-1/8000, 32.5 MP, Bluetooth, Wi-Fi, 701g
Canon EOS 90D properties
| Product name | EOS 90D |
| Type | Digital SLR |
| Lens | Body only |
| Compatible lenses | Canon EF/EF-S |
| Ports | HDMI, USB |
| Memory Cards | SD, SDHC, SDXC |
| Features | Bluetooth, Wi-Fi |
| Viewfinder | Optical |
| Shutter Speed | 30-1/8000 bps |
| Continuous Drive | 10fps |
| Auto Focus | Yes |
| AF points | 45 |
| Image Stabilization | Yes |
| Manual Focus | Yes |
| Max Picture Resolution | 6960×4640 pixels |
| Image File Format | DPOF, EXIF, JPEG, RAW |
| Flash | Built-in, External |
| Flash Sync Speed | 1/250 sec |
| Battery Type | Lithium-ion rechargeable |
| Display Size | 3.0 “ |
| Display Resolution | 1040000 pixels |
| Max Video Resolution | 3840×2160 (4K) |
| Video resolutions (fps) | 3840X2160 (30, 25 fps), 1920×1080 (25, 30, 50, 60, 100, 120fps), 1280×720 (60, 50fps) |
| Video File Format | MP4, MPEG4 |
| Audio File Format | AAC |
| Sensor Type | CMOS |
| Sensor Format | APS-C |
| Effective Pixels | 32.5 MP |
| Total Pixels | 34.4 MP |
| ISO Rating | 100-25600 |
| Weight | 701.0 g |
| Dimensions (HxWxD) | 105x141x77 mm |


Peter Johnson –
I’ve used Canon since I was 20 and love them all. It had been over 5 years since I upgraded from 50D to 90D and It hasn’t disappointed me. I am an amateur, not a pro, so some of its features don’t mean much to me. The auto focus is the main improvement over my previous 50D as it now works with my 400mm lens with the 1.4 extender as well. I found it devilishly difficult to manually focus the 400mm so the aoto focus is a godsend. It’s fast and easy to use. Well done Canon.
Frank C –
The camera is quite ok in a bit of everything, and it is great to use the equipment, the ergonomics of the device give a lot of opportunities when taking photos. When processing photos on a computer it is not always perfect, but you can save the photo in 99% of cases (not counting the lack of focus etc.). As someone is looking for the last good DSLR camera before the mirrorless cameras become unquestionably better, 90D is a relatively good choice.
Everly Valencia –
As someone who is passionate about photography, I was excited to try out the Canon EOS 90D. After several weeks of use, I have to say that I’m fairly impressed with what this camera has to offer.
First, let’s talk about its body – it’s sturdy and well-built, which makes it easy to handle and use. I appreciated the ample amount of buttons and dials that allow for quick adjustments on the fly. However, I do wish that it came with a grip attachment to make it easier to hold for longer periods of time. But overall, I’m happy with the durability of the camera.
Moving on to the lens, the Canon EOS 90D is offered as a body only option. So, if you already have a collection of EF lenses, this camera will be a great addition to your setup. Otherwise, you’ll need to purchase a lens separately. It’s worth noting that the camera is compatible with EF and EF-S lenses, making it versatile in terms of what you can mount onto it.
One of the most impressive features of the Canon EOS 90D is its 3840×2160 (4K) max video resolution. I was blown away by how crisp and clear the footage looked. It’s definitely a step above what I’ve seen from other digital cameras in this price range. Though, it’s worth noting that the autofocus can be a bit slow when recording video, so be mindful of that.
When comparing the Canon EOS 90D to other digital cameras, I find that it offers a nice balance between image quality and affordability. The 32.5-megapixel APS-C sensor is a step up from Canon’s previous models, and the 45-point all cross-type AF system is a nice touch for those focusing on action shots.
Overall, I would give the Canon EOS 90D a solid 4 stars out of 5. It’s not perfect, but it’s a great option for those looking for a well-rounded camera that offers high-quality images and video.
Dean –
As someone who loves photography as a hobby, I was excited to try out the Canon EOS 90D. However, after using it for a while, I have to say that I’m quite disappointed. I’d give it a rating of 2 out of 5.
I was initially drawn to the camera because of its impressive 30-1/8000 bps shutter speed. While this is certainly a great feature, it doesn’t make up for the camera’s other shortcomings. The image quality isn’t as sharp as I would like it to be, and the DPOF image file format is a bit of a pain to work with.
Compared to other digital cameras I’ve used in the past, the Canon EOS 90D just doesn’t measure up. It’s definitely not worth the price tag. In my opinion, there are other digital cameras out there that provide better value for your money.
On a side note, it took a little longer than I would have liked for the camera to be delivered to me in Colorado Springs. I ordered it in February and didn’t receive it until mid-March. While this isn’t necessarily a reflection on the camera itself, it was a bit frustrating to have to wait so long.