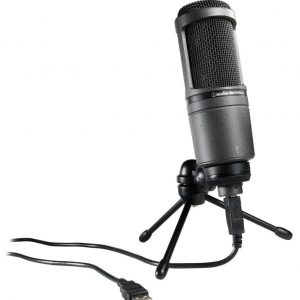
Blue YetiCaster Pro

$178.99

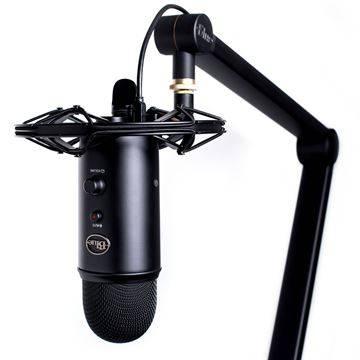
Get your dream podcast setup with the Blue YetiCaster Pro, a professional broadcasting bundle featuring a full-featured streaming mixer, microphone, and headphone amplifier.

Description

The Blue YetiCaster Pro is a premium quality USB microphone that is designed to cater to the needs of professional content creators, streamers, and podcasters. With its sleek and stylish design, this microphone not only looks appealing but also delivers exceptional sound quality. The microphone is packed with advanced features, making it a powerful tool in any recording or streaming setup.

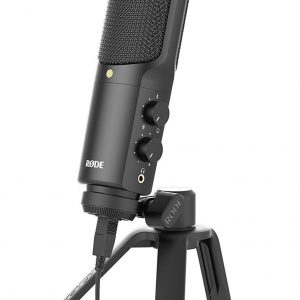
The Blue YetiCaster Pro comes with a tripod stand, shock mount, and boom arm mount. You can choose to use the tripod stand or mount the microphone on the boom arm for a more professional look. The shock mount is specially designed to minimize noise and vibrations, ensuring that you get clean, clear sound recordings.

The Blue YetiCaster Pro features a 24-bit/48kHz high-quality audio resolution that guarantees professional-quality sound recordings. The microphone also has a 4-capsule array that can capture sound from different directions, making it versatile for different recording scenarios. Whether you’re recording a solo podcast or conducting an interview with multiple people, this microphone can capture it all.

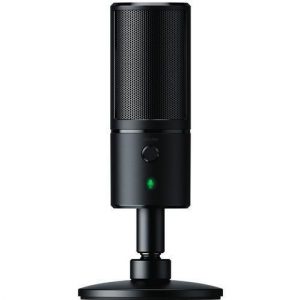
The microphone features a mute button and a headphone jack that allows you to monitor your recordings in real-time. The mute button is handy when you need to pause or stop recording without having to edit out unwanted noise. With the headphone jack, you can listen to your recordings as you record, making it easy to detect any issues that may arise during recording.

The Blue YetiCaster Pro is also compatible with several software applications, including Windows and Mac OS systems. It works with popular applications like Audacity, Adobe Audition, GarageBand, and many others. With its plug-and-play design, the microphone is easy to set up, making it perfect for beginners and experienced users alike.

In conclusion, the Blue YetiCaster Pro is a high-quality microphone that is designed to cater to the needs of content creators, streamers, and podcasters. It comes packed with advanced features that make it easy to use and versatile enough for different recording situations. Its stunning design, exceptional sound quality, and compatibility with different software applications make it an ideal microphone for anyone looking to create professional-quality content.

Microphones with Table Stands

Blue YetiCaster Pro properties

Product name YetiCaster Pro
Type Microphone
Placement for Microphone Microphones with Table Stands
Polar Patterns Bi-directional and figure 8, Cardioid, Omniderectional
Microphone Type Condenser
Wireless No
Type of Instrument String Instruments
Mono/Stereo Stereo
Mute Button Yes
On and Off Button Yes
Volume Control Yes
3.5mm (1/8″) TRS Yes
Colour Black

Additional information

Product name

Product type

Placement for Microphone

Polar Patterns

, ,

Microphone Type

Wireless

Type of Instrument

Mono/Stereo

Mute Button

On and Off Button

Volume Control

3.5mm -1/8" TRS

Colour

2 reviews for Blue YetiCaster Pro

  1. Harry gordon

    The microphone has good sound, but you must be very close to the microphone, at a distance of about 3-6 cm. This is a big disadvantage. The headband cannot be moved continuously, but only with a few clicks. Even if the screws are tightened, the headband wobbles.

  2. Potier

    Microphone okay. Maybe this cable is a bit too thin, we’ll see if it will last in operation. In any case, I rate the quality of the voice recording as good. It is important that – if this microphone is used in the camera – you buy an extension cord (because the microphone has a short cable) and an adapter from TRRS to TRR cable. The features of the smartlav + microphone are determined by the fact that it is a device intended basically for a smartphone (then you do not need an extension cord and adapter) and not for the camera.

Add a review

Your email address will not be published. Required fields are marked *

Frequently Asked Questions:

What is the correct setup process for connecting my Blue Yeti Cast Pro microphone to my computer and recording audio for podcasts or streaming?

Setting up your Blue Yeti Cast Pro microphone for podcasting or streaming on your computer involves several steps. Here's a detailed guide to help you through the process:

1. Unbox your Blue Yeti Cast Pro microphone and make sure all accessories are included (microphone, USB cable, windscreen, stand mount). Connect the microphone to your computer using the included USB cable. Ensure that the USB cable is securely connected to both the microphone and your computer's USB port. Install the Blue Sherpa software if you haven't already done so. You can download it from the official Blue Microphones website or by visiting their support page: https://www. Open the Blue Sherpa application on your computer. If this is your first time using the software, follow the prompts to set up your microphone and select its recording settings. You may need to select "Blue Yeti Cast Pro" as your input device in the software. Configure your audio settings on your computer. On a Windows PC, right-click on the speaker icon in the taskbar and choose "Sounds. In the "Sound" window that appears, click on the "Recording" tab and make sure that "Blue Yeti Cast Pro" is selected as your default recording device. On a Mac, go to System Preferences > Sound > Input and select "Blue Yeti Cast Pro" from the input device menu. Open your preferred audio recording software (e. Audacity, Adobe Audition, OBS Studio) and set it to record from your Blue Yeti Cast Pro microphone. You may need to configure additional settings such as sample rate and bit depth depending on your specific needs. Test your audio by speaking into the microphone and playing back the recorded audio to ensure that the sound quality is satisfactory. Adjust any settings in the Blue Sherpa software or your recording software as needed. Once you're satisfied with the audio quality, you can start recording your podcast or streaming session using your Blue Yeti Cast Pro microphone. Be sure to mute any background noise and maintain a consistent distance from the microphone during your recording.

"How do I properly connect my Blue YetiCaster Pro microphone to my computer for use with streaming software?"

To connect your Blue YetiCaster Pro microphone to your computer for use with streaming software, follow these steps:
1. Connect the microphone to your computer using the included USB-C to USB-A cable (provided in the package). Make sure the computer recognizes the microphone by checking the device manager. To do this, right-click on “Start” and select "Device Manager. Here, you should see your Blue YetiCaster Pro listed under "Audio inputs and outputs. Next, launch your chosen streaming software (such as OBS Studio or XSplit) and configure the microphone settings within the software. In the software, go to “Settings” or “Preferences. Look for the “Audio” section, then select your Blue YetiCaster Pro from the list of input devices available. Configure additional options such as sample rate, bit depth and volume levels according to your preferences. Save your settings and start streaming. When you're finished streaming, close your software and disconnect the microphone by pulling out the USB-C connector. Store it in a safe place when not in use.

"How do I properly set up and connect my Blue YetiCaster Pro microphone to my computer for live streaming?"

First, make sure you have the necessary equipment. You'll need your Blue YetiCaster Pro microphone, a USB cable (included in the package), and a computer with available USB ports. Connect one end of the USB cable to your Blue YetiCaster Pro microphone and the other end to an open USB port on your computer. Power up your Blue YetiCaster Pro microphone by pressing and holding the Mute button for three seconds. The LED ring around the mic's base will light up, indicating that the mic is powered on. Windows users should follow these steps:
- Go to the Start menu and select Settings (gear icon). Click on Devices. Select USB controllers. Turn on the option called "USB selective suspend". This will prevent your computer from automatically putting your Blue YetiCaster Pro microphone into sleep mode, which can cause connection issues during live streaming. Launch your preferred streaming software or platform (e. Twitch, YouTube, or Facebook Live) and follow the prompts to set up your account and profile. In your streaming software, select "Blue YetiCaster Pro" as your audio input device. The exact steps will vary by software, but you should be able to find this option under Audio Input Settings or Preferences. Adjust your microphone's settings (such as gain, EQ, and compression) to suit your preferences and the acoustics of your streaming environment. You may need to refer to your Blue YetiCaster Pro user manual for more detailed instructions on these features. Conduct a test run of your stream to ensure that your audio is coming through clearly and without distortion. If you encounter any issues, try resetting your microphone or adjusting its settings further. Finally, when you're ready to go live, simply launch your streaming software and start broadcasting! Your Blue YetiCaster Pro microphone should be automatically detected and configured for use. After your stream is over, make sure to turn off your Blue YetiCaster Pro microphone by pressing and holding the Mute button for three seconds again. This will help conserve battery life and prevent any unwanted audio from being recorded or transmitted during future sessions.

cards on my new Samsung Galaxy S10+?

Related Products