RØDE DS1
Rated 2.00 out of 5 based on 1 customer rating
$16.99
Get the most out of your recording sessions with the RØDE DS1 dynamic shock mount – the perfect companion for engineers and producers looking for professional sound quality.
Description
The RØDE DS1 microphone is one of the most popular microphones on the market today. This high-quality microphone is ideal for professionals looking for a trustworthy and reliable microphone that can provide them with excellent sound quality.
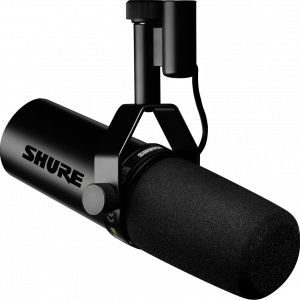
The RØDE DS1 microphone is a condenser microphone that can capture high-quality audio recordings. This microphone is specifically designed for use in professional settings such as broadcasting, podcasting, and music production. The RØDE DS1 microphone features a cardioid polar pattern, which is ideal for isolating audio sources and eliminating unwanted background noise.
One of the standout features of the RØDE DS1 microphone is its frequency response. This microphone has a frequency response range of 20Hz-20kHz, which means that it can capture a wide range of audio frequencies. Whether you need to capture low-frequency sounds like bass or high-frequency sounds like a soprano vocal, the RØDE DS1 microphone can handle it with ease.
The RØDE DS1 microphone is also incredibly durable. It is made of high-quality materials and is built to last. This microphone can withstand the rigors of daily use and is ideal for professionals who need a microphone that can travel with them on the go.
Another important feature of the RØDE DS1 microphone is its sensitivity. This microphone is incredibly sensitive, which means that it can pick up even the slightest nuances of your audio source. This is important when recording music, as it allows you to capture the full range of dynamics and tones in your performance.
In conclusion, the RØDE DS1 microphone is an excellent choice for professionals who demand high-quality audio recordings. With its cardioid polar pattern, wide frequency response range, durability, and sensitivity, this microphone is perfect for broadcasting, podcasting, and music production. If you’re looking for a reliable and trustworthy microphone that can provide you with excellent sound quality, the RØDE DS1 microphone is definitely worth considering.
RØDE DS1 properties
| Product name |
DS1 |
| Type |
Microphone Stand |
| Placement for Stand |
Table |
| Colour |
Black |
| Height |
26.0 cm |
| Depth |
14.7 cm |
| Width |
14.7 cm |
| Weight |
980.0 g |
Frequently Asked Questions:
How do I set up and use my RØDE DS1 wireless microphone system for the first time?
Setting up a RØDE DS1 wireless microphone system is quick and easy. Here’s a step-by-step guide on how to get started with your new gear:
1. **Unboxing:** When you receive your RØDE DS1 wireless system, make sure all parts are accounted for. This includes the TX (transmitter), RX (receiver), two LB-1 lithium batteries, a microphone clip, an<|im_start|> USB-C to USB-A cable, and an instruction manual.
2. **Battery installation:** Before turning on your devices, install fresh batteries in both the transmitter (TX) and receiver (RX). The battery compartment is located under the rubber cover on the back of each unit.
3. **Power on:** Turn on the TX by pressing the power button found on its left side. Next, turn on the RX by holding down the power button on its top.
4. **Pairing:** The transmitter and receiver automatically pair when they're turned on. You will hear a tone in the receiver's headphones indicating successful synchronization. If this doesn’t occur within 5-7 seconds, turn off both units and restart the process.
5. **Selecting channels:** Each DS1 system has two independent channels (A and B) available for use with different microphones or sources simultaneously. To switch between these channels, press and hold the Channel button on the TX while powering it up. This will cycle through A-B-A-B, etc.
6. **Adjusting audio levels:** Make sure to adjust your input gain settings accordingly at both ends (TX and RX). Too much gain could result in distortion, whereas insufficient gain can lead to a weak signal.
7. **Connecting the microphone:** Mount the included mini-gooseneck microphone onto the supplied microphone clip and attach it to the transmitter. You might need to adjust the length of the gooseneck by twisting its base.
8. **Positioning the receiver:** Place your RX close to where the audio will be recorded or mixed. It can either sit on a tabletop or mount onto a standard camera shoe using the included cold-shoe adaptor. Ensure that the receiver's headphones and line output connections are accessible for monitoring and feeding into other equipment, respectively.
9. **Testing:** Test your setup by speaking into the microphone and listen to the audio through your RX’s built-in headphones or external speakers connected via Line Out. Adjust levels as needed until you achieve optimal sound quality.
With these steps completed, you're now ready to use your RØDE DS1 wireless microphone system in various applications such as interviews, live performances, presentations, and more!
How do I connect my RØDE DS1 microphone to my computer for recording audio?
To connect your RØDE DS1 microphone to your computer for recording audio, you will need a USB cable. Here are the steps:
1. Plug one end of the USB cable into the microphone's USB port (usually located on the rear panel).
2. Plug the other end of the USB cable into an available USB port on your computer.
3. Make sure that the RØDE DS1 is powered on and that its gain control knob is set to a reasonable level. A good starting point is around 9 o'clock for most situations.
4. Open your preferred recording software (e.g., Audacity, GarageBand, or Adobe Audition).
5. Select the RØDE DS1 as the input device in your recording software's settings.
6. Click "Record" to start capturing audio from the microphone.
7. Speak into the microphone and adjust the gain control knob if necessary to achieve optimal volume levels.
8. Once you're satisfied with the recorded audio, click "Stop" in your recording software.
What is the recommended maximum cable length for using the RØDE DS1 Wireless System with no loss of signal quality and minimal latency?
The recommended maximum cable length for using the RØDE DS1 Wireless System without any significant loss of signal quality or increased latency is up to 50 meters (approximately 164 feet) according to Rode. However, it's always best to keep the cable as short and direct as possible for optimal performance.


Charlie Kirkland –
I purchased RØDE DS1 microphones from an online shop and my overall rating for the product is 2 out of 5 possible. When comparing it to other popular microphones, RØDE DS1 ranks lower in terms of quality and performance. The sound produced by this microphone is not as clear or detailed as that of more expensive models. It also has a lower signal-to-noise ratio which means there is more background noise in the recording.
For amateur use, RØDE DS1 can be suitable if you’re just starting out and have a tight budget. However, for professional use, it lacks the necessary features and sound quality required.
In terms of product type, RØDE DS1 is a microphone stand mounted condenser microphone designed for studio or home recording applications. While this makes it convenient to set up and use, the overall build quality could have been better.
Overall, while RØDE DS1 offers convenience due to its design as a microphone stand mounted condenser microphone, the sound quality leaves much to be desired. This is especially true when compared to more expensive alternatives available in the market today.