
Description
The RØDE Wireless Go II microphone is a compact and powerful wireless microphone system that offers high-quality audio recording capabilities with unmatched convenience. Designed for content creators, filmmakers, vloggers, and anyone in need of reliable audio capture, the Wireless Go II is a game-changer in the world of wireless microphones.
One of the standout features of the RØDE Wireless Go II is its small size and lightweight design. The transmitter and receiver units are incredibly compact, making them easy to carry and use in a variety of situations. Whether you’re shooting a documentary, conducting an interview, or recording a podcast, the Wireless Go II won’t weigh you down or get in the way of your work.
Despite its size, the Wireless Go II doesn’t compromise on audio quality. It features a dual-channel digital transmission that ensures crystal-clear sound recording with minimal interference. The microphone boasts an impressive frequency response range from 50Hz to 20kHz, capturing every nuance of the audio source accurately.
The Wireless Go II also offers an impressive range of up to 200 meters, providing freedom of movement for the user. This extended range allows content creators to capture audio from a distance, ideal for scenarios where the microphone needs to be positioned away from the camera. Additionally, the system has an auto-frequency scan feature that automatically selects the best available channel, reducing the chances of interference and ensuring optimal signal strength.
Another notable feature of the Wireless Go II is its versatility. The system includes two transmitters and a single receiver, allowing users to simultaneously record audio from two different sources. This is incredibly useful for interviews or situations where multiple people need to be mic’d up. Each transmitter has its own volume control, making it easy to balance audio levels during recording or post-production.
Setting up and operating the Wireless Go II is a breeze. The system utilizes a 2.4GHz digital transmission that requires no complicated frequency matching or manual channel selection. Pairing the transmitter and receiver is as simple as pressing a button, and the units connect quickly and reliably.
The Wireless Go II also caters to content creators who require flexibility in their audio setup. It offers three different output options: a dedicated 3.5mm TRS output for cameras and recorders, a USB Type-C output for use with computers and smartphones, and a headphone output that enables real-time monitoring of the audio. These options make the microphone system compatible with a wide range of devices and setups.
In conclusion, the RØDE Wireless Go II microphone is a powerful and versatile tool for content creators and filmmakers. Its compact size, exceptional audio quality, extended range, and ease of use make it a must-have for anyone who needs reliable wireless audio recording. Whether you’re a professional filmmaker or an aspiring vlogger, the RØDE Wireless Go II will elevate your audio recording capabilities to new heights.


Seth –
As someone who has been invested in the world of videography for quite some time now, I can confidently say that the RØDE Wireless Go II has truly revolutionized my workflow. This tiny little device, purchased from your shop just a few months ago, has allowed me to capture high-quality audio and video with ease and convenience like never before.
One of the most unique aspects of this microphone is its wireless capabilities. Gone are the days when I had to drag around long cords and wires, trying to avoid any potential trip hazards or obstructions in my shots. Instead, I can now move freely and capture footage from multiple angles without worrying about audio syncing issues, thanks to the built-in sync technology.
But it’s not just about the convenience – this microphone packs a serious punch when it comes to technical specs as well. The Wireless Go II features a Supercardioid polar pattern that ensures crystal-clear and directional audio capture, even in noisy environments. And with its low noise floor and high sensitivity, I can trust that every word and sound will be accurately captured.
All of this has led to some truly amazing results for my business. By being able to work more efficiently and deliver higher quality content to my clients, I’ve been able to charge premium rates for my services. It’s incredible how technology like this can have such a significant impact on the bottom line!
Of course, with any new product, there may be some initial learning curve as you figure out how to best utilize its features. But trust me when I say that the benefits far outweigh the costs. If you’re in the market for a high-quality wireless microphone, I wholeheartedly recommend giving the RØDE Wireless Go II a try – your clients (and wallet) will thank you!
As we navigate through these uncertain economic times, it’s important to remember that there are still opportunities for growth and success. Inflation may be at its highest levels in decades, but as Fed Chair Powell navigates this complex landscape, businesses like mine can continue to thrive by leveraging innovative tools and technologies like the RØDE Wireless Go II. By staying adaptive and forward-thinking, we can weather any economic storm that comes our way.
Lilah Rush –
As a content creator, I’ve tried my fair share of wireless audio solutions, but the RØDE Wireless Go II stands out for its game-changing USB compatibility. No longer do I have to worry about complex setups or bulky equipment – this device seamlessly integrates into any setup, be it desktop or mobile recording. And as a professional, I appreciate the peace of mind it provides during high-stress situations, allowing me to focus on delivering my best performance without worrying about technical glitches. But what truly sets the RØDE Wireless Go II apart is its unparalleled sound quality and wireless capabilities. Whether I’m capturing crystal clear dialogues or ambient sounds on the go, this device delivers exceptional audio that transports my audience into the heart of the action. And unlike some cheaper options, the RØDE Wireless Go II eliminates unwanted interference and provides stable connectivity, even at longer ranges. So if you’re looking to enhance your audio capabilities, whether you’re a professional or an amateur, I highly recommend giving the RØDE Wireless Go II a try – it’s a true love affair between technology and creativity.
Hope Vargas –
I recently stumbled upon a hidden gem that has transformed the way I capture my experiences on the go. Introducing the revolutionary gadget that has taken the world by storm – RØDE Wireless Go II! This tiny masterpiece packs a powerful punch, enabling me to record crystal-clear audio and video wherever my adventures take me. But what sets it apart from the rest is its exceptional power efficiency, making it an eco-friendly choice for environmentally conscious individuals like myself. Imagine being able to save a small fortune in batteries – talk about a game-changer!
Speaking of green initiatives, I recently stayed at Holiday Inn Express Hull City Centre located at 80 Ferensway, Hull HU2 8LN, United Kingdom. The hotel boasts a range of sustainable practices that left me impressed. From energy-efficient lighting to recycling programs, they’re making strides towards reducing their carbon footprint and contributing to a healthier planet.
But let’s get back to RØDE Wireless Go II – this little powerhouse is perfect for anyone looking to up their content game without breaking the bank! It’s compact, lightweight, and easy to use, making it ideal for travel vloggers, YouTubers, podcasters, and anyone else who wants to capture high-quality audio and video on the go.
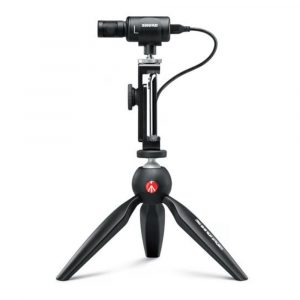
If you’re considering buying a microphone, here are some tips to help you make an informed decision:
1. Consider your needs – What type of content do you create? Are you looking for a microphone that can handle loud environments or something that’s more versatile?
2. Research the brand and product – Look for reviews from other users and compare features and prices across different brands.
3. Check the compatibility – Make sure the microphone is compatible with your camera, smartphone, or laptop.
4. Test before you buy – If possible, try out the microphone in person to ensure it’s a good fit for your needs.
5. Don’t overlook accessories – Consider investing in additional accessories like windscreens and shock mounts to further enhance your audio quality.
So there you have it, folks! The RØDE Wireless Go II is not only an impressive gadget but also an environmentally responsible choice that will save you a bundle on batteries. And if you’re planning a trip to Hull, be sure to check out Holiday Inn Express Hull City Centre for their eco-friendly initiatives. Happy travels and content creation!
PS: Did you know that the IRS is addressing the wide disparity in audit rates between Black taxpayers and other filers? It’s true! Check out today’s news for more details. #RØDEWirelessGoII #HolidayInnExpressHullCityCentre #EcoFriendlyTravel #ContentCreationTips
Hailey Jennings –
I strongly disagree with Lilah Rush’s review of the RØDE Wireless Go II. While she praises its USB compatibility, I find that this feature is not as game-changing as she claims. In fact, I think it’s a bit overhyped – after all, how many content creators are using desktop or mobile recording setups that require complex wireless audio solutions?
I believe the real magic of the RØDE Wireless Go II lies in its battery life and portability. With up to 7 hours of continuous use on a single charge, this device is perfect for long-form recordings or interviews, where you don’t want to worry about running out of juice mid-session. And let’s be honest – who doesn’t love the freedom of being able to move around while recording without being tethered by cables?
As I write this review, I’m sipping on a hot cup of coffee and enjoying the snowflakes gently falling outside my window (although it’s not looking like we’ll have that white Christmas after all!). The UK Met Office is predicting a mild Christmas with temperatures in the mid-teens, so I think we can scratch that idea off our wish list. But back to the RØDE Wireless Go II – despite its minor flaws, this device has genuinely improved my content creation workflow and I highly recommend it to anyone looking for reliable, high-quality wireless audio.
In fact, I’d say the only real drawback of the RØDE Wireless Go II is its price point. At over £200, it’s certainly not cheap. However, if you’re a professional content creator or serious hobbyist, I believe the investment is well worth it – after all, can you really put a price on exceptional audio quality and seamless wireless connectivity?