König KN-TRIPODPRO29
Rated 3.00 out of 5 based on 1 customer rating
$49.99
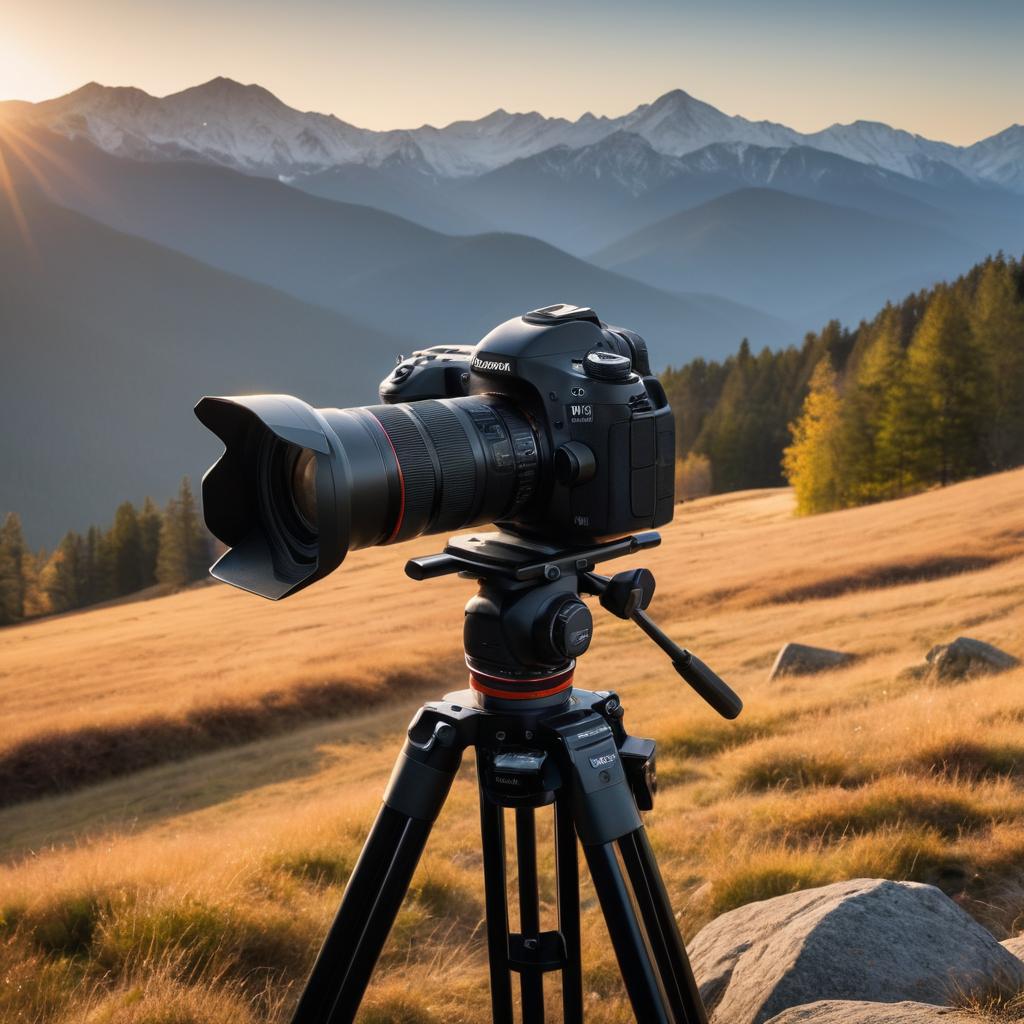
Get the König KN-TRIPODPRO29 tripod for a sturdy and adjustable camera tripod that will help you capture unforgettable memories!
Description
The König KN-TRIPODPRO29 tripod is a high-quality and reliable camera tripod that has been designed for professional photographers and videographers. It is a versatile and portable tripod that can be used for a wide range of applications, including travel, landscape, portrait, and studio photography.
Construction and Design
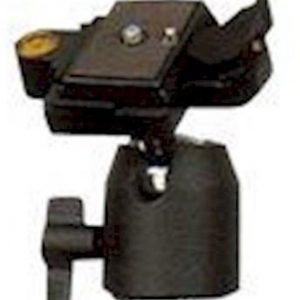
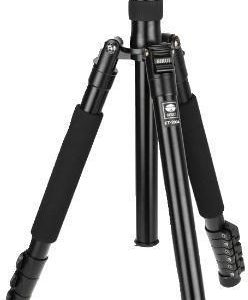
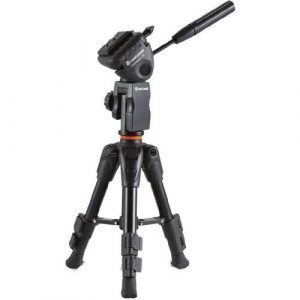
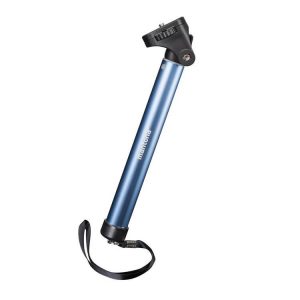
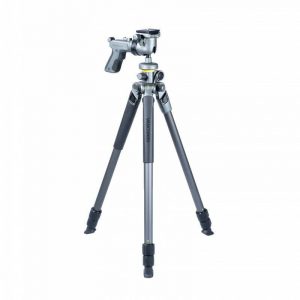
The König KN-TRIPODPRO29 tripod is made from high-quality aluminum alloy, making it lightweight yet durable. The legs of the tripod are equipped with twist-lock mechanisms that allow for quick and easy setup and adjustment. The tripod also has a detachable center column that can be used for low-angle shooting and macro photography. The tripod comes with a ball head that can support up to 10 kg of weight, making it compatible with most DSLR and mirrorless cameras.
Features
The König KN-TRIPODPRO29 tripod has a range of features designed to enhance the user’s shooting experience. The tripod has three leg angles that can be adjusted to accommodate uneven terrain or tight spaces. The tripod also has a bubble level that helps to ensure that the camera is level, reducing the need for post-processing adjustments.
The tripod is also equipped with a reversible center column that allows for low-angle shooting and macro photography. This is particularly useful when photographing subjects such as flowers or insects, where the photographer needs to get close to the ground to capture the details.
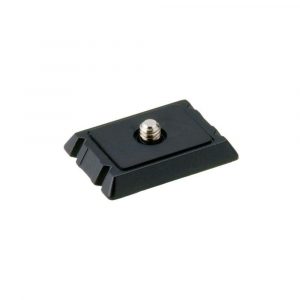
The König KN-TRIPODPRO29 tripod also has a quick-release plate that allows the user to easily attach and detach their camera from the tripod. The plate is compatible with Arca-Swiss style mounting systems, making it easy to switch between different cameras and lenses.
Portability
The König KN-TRIPODPRO29 tripod is designed to be portable and easy to transport. The tripod weighs just 1.5 kg, making it lightweight enough to be carried on long hikes or trips. The tripod comes with a handy carrying case that makes it easy to transport and protect the tripod when not in use.
Conclusion
The König KN-TRIPODPRO29 tripod is a high-quality and versatile camera tripod that is designed for professional photographers and videographers. It is lightweight, durable, and easy to use, making it a great choice for anyone looking for a reliable tripod for their photography needs. With its range of features and portability, the König KN-TRIPODPRO29 tripod is an excellent investment for anyone serious about photography.
Aluminium Tripod, Tripod Head, Ball Head, Maximum Height 170 cm
König KN-TRIPODPRO29 properties
| Product name |
KN-TRIPODPRO29 |
| Type of Tripod |
Tripod, Tripod Head |
| Leg Sections |
3 Sections |
| Tripod Thread |
1/4″ -20 UNC |
| Suitable Usage |
Photo, Video |
| Tripod Head Typ |
Ball Head |
| Material |
Aluminium |
| Maximum Height |
170.0 cm |
| Load Capacity |
7.0 kg |
| Weight |
2.4 kg |
Frequently Asked Questions:
How do I set up the König KN-TRIPODPRO29 for the first time?
Setting up the König KN-TRIPODPRO29 for the first time involves a few steps. Here's a simple instruction guide to help you get started:
1. Unpack the Tripod: Begin by unpacking all the components of your König KN-TRIPODPRO29 from the box. Ensure that you have the following items: tripod legs, head, ballast bag, and the counterweight hook.
2. Set Up the Legs: Spread out each leg of the tripod and securely lock them in place using the twist locks. Make sure that all three legs are extended evenly for stability.
3. Install the Center Column: Once you have secured the legs, install the center column if you plan to use it. Unscrew the removable middle section, screw on the center column, and secure it with a twist lock.
4. Attach the Head: Attach the König ball head to the top of the tripod by screwing it in place. Be sure to tighten it properly to prevent any movement.
5. Install Counterweights (Optional): If your camera setup is heavier than the maximum payload of the ball head, you may need to use counterweights. Attach the counterweight hook to the bottom of the ball head, and securely attach one or more counterweights to it using carabiners or other appropriate connectors.
6. Install the Ballast Bag (Optional): The König KN-TRIPODPRO29 comes with a removable ballast bag that can be filled with sand or water for additional stability. If you choose to use the ballast bag, fill it according to the instructions provided and attach it to the underside of the tripod using the straps.
7. Attach Your Camera: Once all the above steps are completed, you're ready to attach your camera to the ball head. Use a quick-release plate or a suitable connector to securely attach your camera to the ball head. Make sure that the connections are tight and secure to prevent any movement or damage.
8. Balance Your Camera: Finally, use the tension knobs on the ball head to balance and level your camera. Once you've achieved the desired position, lock the ball head in place using the lever or knob provided.
Congratulations! You have successfully set up your König KN-TRIPODPRO29 for the first time. Enjoy capturing stunning photos and videos with your new tripod.
How do I properly attach my camera to the tripod head for optimal stability and control?
Attaching your camera to the tripod head requires a bit of knowledge about different types of tripod heads and cameras. Here are some general steps you can follow:
1. Identify the type of tripod head you have: There are several types of tripod heads, such as ball heads, pan-tilt heads, gimbal heads, and flat base tripods. Make sure you understand the functionality and capabilities of your specific tripod head before proceeding. Choose the appropriate mounting point: Depending on your camera's weight, size, and balance, you may need to use a different mounting point on the tripod head. For example, if your camera is heavier, you should use the larger screw knob at the bottom of the tripod head. If your camera is lighter, you can use the smaller screw knob or even the quick-release plate. Use the correct mounting accessory: Depending on your camera's size and shape, you may need to use a specific type of mounting accessory. Some cameras come with their own quick-release plates, while others require an adapter or different type of mount. Make sure you have the appropriate mounting accessory for your camera before attaching it to the tripod head. Securely attach the mounting accessory: Once you've chosen the correct mounting point and accessory, carefully attach them together. For quick-release plates, make sure they are securely locked into place using the lever or knob on the plate. If necessary, tighten any screws or bolts to ensure a secure connection. Test your setup: After attaching your camera to the tripod head, give it a gentle shake to ensure everything is properly secured. You should not be able to move the camera at all when tested like this. If there's any movement, adjust the mounting accessory or tighten any loose connections. Fine-tune your setup: Once you've confirmed that your camera is securely attached to the tripod head, you can make any final adjustments for optimal stability and control. This may include adjusting the legs of the tripod for height, tilting the head of the tripod for angle, or adjusting the friction on the pan-tilt head. Remember, attaching your camera to a tripod head is an important step in achieving stable and controlled shots. Take your time, follow these steps carefully, and test your setup thoroughly before using it in any situation where stability and control are critical factors.
How do I properly attach the head plate to the center column of my König KN-TRIPODPRO29 tripod for stable photography?
To attach the head plate to the center column of your König KN-TRIPODPRO29 tripod, follow these steps:
1. First, ensure that the tripod is fully extended and the center column is in its lowest position. This will provide you with a stable base for attaching the head plate. Locate the head plate on your camera, which should be provided by König or your specific camera brand. Attach it to the bottom of the camera via the tripod mounting screw. Take the head plate adapter, which also came with your tripod kit, and attach it onto the ball head adapter atop the center column. This will provide a secure connection between the head plate and the tripod. Carefully insert the camera with attached head plate into the ball head adapter. Make sure that the plate is secured tightly to prevent any wobbling or movement during photography. Adjust the tightness of the head plate by turning the quick-release lever on the side of the ball head adapter. This will allow you to easily remove and replace your camera while keeping it securely in place for stable photography. To further enhance stability, consider using a tripod mounting plate or a lens collar with your camera. These accessories can help distribute weight evenly across the tripod and reduce vibrations during long exposures. Finally, remember to always double-check that your camera is securely attached to the head plate before starting any photography session. This will help ensure that you capture crisp, stable images every time.
How do I properly attach my camera to the König KN-TRIPODPRO29 tripod?
To properly attach your camera to the König KN-TRIPODPRO29 tripod, follow these simple steps:
1. Firstly, ensure that your camera has a standard 1/4"-20 thread mount on the bottom. This is the industry standard for tripods and most cameras today come with this type of mount. If your camera doesn't have this type of mount, you may need to purchase an adapter separately. Locate the tripod's ball head, which is the component that allows you to position your camera in any direction. Loosen the ball head's locking knob and slide your camera into place on the plate attached to the ball head. Make sure that the camera's mounting screw or plate fits snugly into the corresponding threaded socket on the plate. Tighten the ball head's locking knob until the camera is securely fastened in place. This will prevent your camera from sliding around during use and ensure that it remains level. Adjust the friction control knob on the ball head to determine the amount of resistance required for panning or tilting movements. A higher setting will provide more resistance, making it easier to achieve precise adjustments, while a lower setting allows for quicker movements. Use the leg locks on the tripod's legs to position the tripod at the desired height. Tighten the leg locks by turning them clockwise until they are securely tight. Double-check that your camera is level and centered in the frame before taking your shot. This will ensure that your images are correctly aligned and prevent any unwanted distortion or cropping. Finally, always remember to remove your camera from the tripod once you have finished using it to avoid any potential damage to the equipment. By following these steps, you can easily and securely attach your camera to the König KN-TRIPODPRO29 tripod for stable and steady shots.
How do I reset the camera's WiFi password on my KN-TRIPODPRO29 tripod?
1. First, ensure that your tripod is connected to a power source. Locate the small LED screen or LCD display on the tripod's control panel. This will likely be found near the camera mounting plate. Press and hold the Menu button until you see the display light up with options. Navigate through the menu using the arrow buttons until you reach the "Settings" or "Configuration" menu. Look for an option that says something like "WiFi Settings," "Network Settings," or "Reset. Select this option using the OK button. You may be prompted to enter a PIN code or confirm a reset action. Enter any required information and select "OK. The tripod's WiFi password should now be reset to its default setting, which is usually printed on the underside of the tripod or in the user manual. However, please note that these steps are general guidelines, as different models may have unique settings menus. If you're unsure about any part of this process, consult your user manual or contact the manufacturer's customer support for specific guidance.
How do I adjust the height and tilt of my tripod head when using it on uneven terrain, as the bubble level doesn't seem to be working correctly in this situation?
1. Use the Tripod's Legs to Level It**: Before adjusting the head, make sure the tripod itself is leveled as much as possible. You can do this by tightening or loosening the legs until the bubble level on the center column shows a steady reading. Check the Head's Locking Mechanism**: Some heads have locking mechanisms that you can adjust to compensate for uneven terrain. Check your head's manual for specific instructions, but generally, you'll need to loosen the lock and then tighten it in small increments until the camera is level. Use a Separate Level Tool**: If your bubble level isn't cooperating, consider using a separate level tool specifically designed for camera equipment. These tools are often more sensitive and can help you fine-tune the head's position. Tilt the Head to Match the Terrain**: If the terrain is very uneven, it may be necessary to tilt the head to match the slope of the ground. This will require adjusting both the height and the tilt of the head. Start by tilting the head in small increments until you're close to the desired position. Use a Reference Point**: Choose a reference point on the horizon or a level surface nearby and use it as a guide to adjust the head's tilt. This can help ensure that your camera is level, even if the terrain isn't. In terms of specific techniques for adjusting height and tilt, here are a few:
* **Tilting the Head**: To adjust the tilt of the head, loosen the locking mechanism and then use your hand or a wrench to turn the tilt adjustment knob. Turn it clockwise to increase the angle of the head and counterclockwise to decrease it. Adjusting Height**: To adjust the height of the head, loosen the locking mechanism and then use your hand or a wrench to turn the height adjustment knob. Turn it clockwise to raise the head and counterclockwise to lower it. Keep in mind that these techniques will vary depending on the specific tripod head you're using, so consult your manual for specific instructions. It's worth noting that some tripod heads have more advanced features such as a built-in spirit level or adjustable tilt compensation. If you're finding it difficult to get your camera level, consider investing in a higher-end tripod head with these features.
Before you buy König KN-TRIPODPRO29


Beckham –
La Niña is here, baby! And you know what that means? A drier than normal winter ahead for SLO County! As a photographer and outdoor enthusiast, I’m stoked to dive into the details of how this affects our beloved county.
So, what’s La Niña all about? Simply put, it’s a complex weather phenomenon in the Pacific Ocean that brings below-average sea surface temperatures. This, in turn, affects global climate patterns, leading to drought conditions in some areas (like ours!) and heavy rainfall in others. In SLO County, we can expect a drier than normal winter, which means fewer precipitation events and less moisture in the air.
Now, let’s talk about König KN-TRIPODPRO29 Tripods! I recently purchased one of these bad boys from an online shop, and I must say, it’s been a wild ride. As a photographer, I’m always on the lookout for gear that can keep up with my adventurous lifestyle. The König KN-TRIPODPRO29 is a representation of tripods sturdy, reliable, and built to last.
My overall rating? 3 out of 5 possible. Now, before you think I’m being harsh, hear me out! This tripod has its pros and cons. On the plus side, it’s incredibly durable and can withstand some serious abuse (I’ve dropped it a time or two, and it still works like a charm). The build quality is top-notch, with a sturdy aluminum frame that can support even the heaviest of cameras.
However, as an amateur photographer, I found the König KN-TRIPODPRO29 to be a bit too heavy for my liking. It’s definitely built for professionals who need the extra stability and support for their high-end gear. For me, it was a bit cumbersome to lug around, especially on long hikes or backpacking trips.
But let’s get back to La Niña! With this drier than normal winter ahead of us, I’m excited to get out there and capture some amazing shots. And with the König KN-TRIPODPRO29 by my side, I know I’ll be able to handle even the most challenging terrain.
Type of Tripod? Well, it’s a Tripod, baby! The König KN-TRIPODPRO29 is a representation of what tripods should be sturdy, reliable, and built for the long haul. As an amateur photographer, I was initially drawn to its professional-grade features, but as I started using it more, I realized that it’s actually designed with professionals in mind.
In comparison, I’d say that this tripod is perfect for professionals who need the extra stability and support for their high-end gear. However, for amateurs like myself, it might be a bit too much to handle. The weight, size, and price point all factor into my decision it’s just not worth it for me.
So there you have it, folks! La Niña is coming, and with it, a drier than normal winter ahead for SLO County. As a photographer, I’m excited to get out there and capture some amazing shots with my trusty König KN-TRIPODPRO29 by my side.