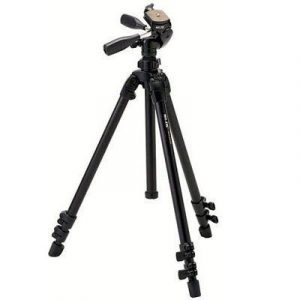
Manfrotto Compact Advanced Aluminium + 3-way Head
Rated 5.00 out of 5 based on 1 customer rating
$48.99
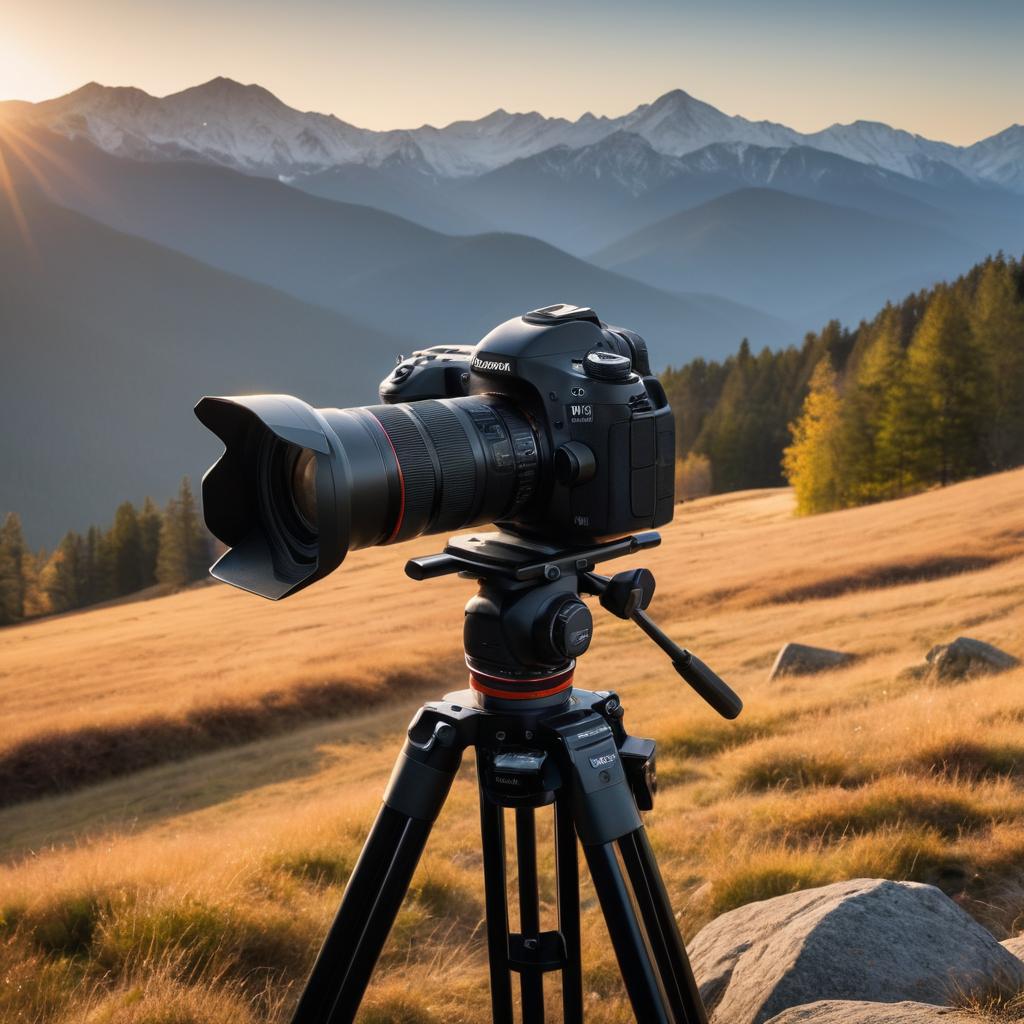
Get the perfect shot every time with the Manfrotto Compact Advanced Aluminium + 3-way Head tripod, designed for professional photographers and videographers.
Out of stock
Description
Manfrotto Compact Advanced Aluminium + 3-way Head Tripod is a versatile and durable tripod designed for photographers who desire portability and stability. It is an ideal accessory for travel photographers, landscape photographers, and videographers who need a lightweight and easy-to-use tripod.
The Manfrotto Compact Advanced Aluminium + 3-way Head Tripod is made of high-quality aluminum materials that can support a maximum weight capacity of 3kg. The tripod itself is lightweight, only weighing 1.42kg. This means you can easily carry it around and set it up wherever you want without feeling weighed down by a cumbersome accessory.
One of the standout features of this tripod is its 3-way head, which allows for precise control of your camera’s position. The head can tilt up and down, pan left and right, and rotate a full 360 degrees, which makes it easy to adjust your shot’s composition. The head even has a quick-release plate that makes it easy to attach and detach your camera from the tripod.
Another great feature of the Manfrotto Compact Advanced Aluminium + 3-way Head Tripod is its adjustable center column. You can extend the center column to get a higher viewing angle, or you can lower it to get closer to the ground. The center column is also reversible, which means you can flip it over and mount your camera upside down for unique angles and perspectives.
The tripod’s legs are also adjustable, thanks to their three-section design. You can adjust the height of each leg independently, which is perfect for getting a level shot on uneven surfaces. The legs even have rubber feet that provide a stable grip on the ground, which further enhances the tripod’s stability.
In conclusion, the Manfrotto Compact Advanced Aluminium + 3-way Head Tripod is an excellent accessory for photographers and videographers who want a lightweight and versatile tripod. It is easy to use, durable, and comes with a 6-year warranty for added peace of mind. If you’re in the market for a new tripod, the Manfrotto Compact Advanced Aluminium + 3-way Head Tripod is definitely worth considering.
Aluminium Tripod, Tripod Head, Maximum Height 165 cm
Manfrotto Compact Advanced Aluminium + 3-way Head properties
| Product name |
Compact Advanced Aluminium + 3-way Head |
| Type of Tripod |
Tripod, Tripod Head |
| Leg Sections |
5 Sections |
| Material |
Aluminium |
| Lowest Work Height |
44.5 cm |
| Maximum Height |
165.0 cm |
| Folded Length |
44.0 cm |
| Load Capacity |
3.0 kg |
| Weight |
1.42 kg |
Frequently Asked Questions:
How do I properly secure my camera on the Manfrotto Compact Advanced Aluminium + 3-Way Head tripod for stable photography?
To properly secure your camera on the Manfrotto Compact Advanced Aluminium + 3-Way Head tripod for stable photography, follow these steps:
1. Extend the legs of the tripod and tighten the rubber leg locks to ensure a stable base. Make sure the legs are fully open and well spread out for maximum stability.
2. Attach the camera plate to your camera by screwing it onto the tripod mount on the bottom of your camera. Ensure that it is securely attached before proceeding to the next step.
3. Connect the camera plate to the tripod head using a compatible quick release system. Manfrotto tripod heads generally come with quick release plates that can be easily attached and detached from the tripod head for convenience.
4. Once the camera is securely connected to the tripod head, adjust the angle of the camera by loosening or tightening the knobs on the 3-way head. You can move your camera in different directions - up, down, left and right - to find the perfect position for your shot.
5. Make sure your camera is leveled before taking a photo by using the spirit bubble level on the tripod head. If the camera is not level, use the adjustable knobs on the 3-way head to make necessary corrections.
6. When you're done shooting and want to pack up your gear, simply release the quick-release plate from the tripod head and remove it from your camera. Store the tripod in its carrying case when not in use for optimal protection and longevity.
How do I correctly attach my camera to the Manfrotto Compact Advanced Aluminium + 3-way Head for stable photography?
To attach your camera to the Manfrotto Compact Advanced Aluminium + 3-way Head for stable photography, follow these steps:
1. Unscrew the quick release plate from the head by turning it counterclockwise. If your camera uses a different type of mount, such as an Arca-Swiss style plate or a ballhead adapter, attach that instead of the quick release plate.
2. Attach the quick release plate to your camera body or lens using the appropriate screws. Make sure the plate is securely attached and the camera is balanced on the plate. Some cameras may require additional steps, such as removing battery grips or other accessories before attaching the plate.
3. Attach the camera to the head by sliding it into the plate clamp on the head. Press the camera down firmly until you hear a click, which indicates that the plate is locked in place. Make sure that the plate and the camera are aligned properly and that the camera is not tilted or rotated.
4. Tighten the knob on the side of the head to secure the camera in place. This will prevent the camera from moving even if the ballhead is loosened.
5. If necessary, use the pan and tilt controls on the head to adjust the orientation of your camera for your desired composition. Once you have achieved the desired position, tighten the controls to lock the camera in place.
By following these steps, you should be able to attach your camera securely to the Manfrotto Compact Advanced Aluminium + 3-way Head for stable photography. Remember to always use a sturdy tripod with this setup to ensure maximum stability and prevent any potential damage to your equipment.
How do I properly attach my Manfrotto Compact Advanced Aluminum + 3-Way Head to my camera for stability and balance during photography sessions?
To properly attach your Manfrotto Compact Advanced Aluminum tripod with 3-way head to your camera, follow these steps:
1. Firstly, ensure that your camera is compatible with the tripod by checking if it has a standard screw thread at the bottom of the camera body for attaching to the tripod's center column. Open the leg locks on each of the three legs of the tripod by squeezing them and pulling them upwards. Make sure that all the legs are locked in place by checking if they click into position. Adjust the height of the tripod according to your needs by extending or retracting the legs. You can also adjust the angle of each leg independently for added stability on uneven surfaces. Once you have achieved the desired height and angle, close the leg locks securely to lock the tripod in place. Attach your camera to the tripod by unscrewing the quick release plate that comes with the 3-way head from the head itself. Place this quick release plate on top of your camera's tripod mount (the standard screw thread at the bottom). Screw the quick release plate into the center column of the 3-way head until it clicks into place. Make sure that it is securely attached and not wobbly. To balance your camera on the 3-way head, first, ensure that it is properly aligned with the tripod's center column. Then adjust the horizontal and vertical movement of the head by rotating the knobs at the bottom of each side of the head. You can also tilt the camera forward or backward by using the knob in the middle of the head. Finally, tighten all the knobs securely to ensure that your camera is stable and won't move during photography sessions. Remember always to use caution when setting up your tripod and camera equipment to avoid accidents and damage to your gear.
How do I properly attach my camera to the Manfrotto Compact Advanced Aluminium tripod and adjust the tilt and pan angles using the 3-way head?
Begin by attaching your camera to the tripod plate that is included with the Manfrotto Compact Advanced Aluminium tripod. Make sure the plate is securely fastened to the bottom of your camera. Next, attach the 3-way head to the top of the tripod legs by aligning the head's release lever with the locking screw on the tripod. Turn the collar clockwise to secure the head in place. To adjust the tilt angle, look for the tilt handle located at the front of the head. Squeeze the lever to unlock the tilt mechanism and then move the camera up or down until you achieve the desired composition. Release the lever to lock the tilt in place. To adjust the pan angle, locate the side-to-side panning handle on the right side of the head. Once again, squeeze the lever to unlock the mechanism and then rotate the camera left or right as required. Release the lever when you're satisfied with the positioning. If you need to make fine adjustments to either angle, there are small knobs located on the sides of the head that will allow you to make minor tilt and pan adjustments without unlocking the entire mechanism. Use these knobs sparingly, as over-tightening them can lead to issues with the head's movement. When finished using your camera and tripod, be sure to reverse the process to disassemble everything properly. This will help ensure the longevity of both the tripod and the 3-way head.
What is the maximum load capacity for the tripod's pan lock and how does it affect the overall stability of the head?
1. Preventing unwanted movement**: A robust pan lock can prevent the camera from tilting or panning unexpectedly due to wind, vibrations, or accidental bumps. This ensures that your camera remains stable and focused on the subject. Reducing camera shake**: By preventing sudden movements, a strong pan lock helps reduce camera shake, which is essential for capturing sharp images, especially in low-light conditions. Maintaining level horizon**: A good pan lock also helps maintain the level horizon of your camera, ensuring that straight lines remain straight and minimizing the need for post-processing adjustments. However, it's worth noting that a pan lock can only do so much to stabilize the head. Other factors such as the tripod's base stability, the weight distribution of the camera equipment, and environmental conditions (e.
My tripod's ballhead has stopped locking down tightly, and I think it might be due to wear and tear on the friction discs. Can you replace or repair these parts for me?
Replacing or repairing the friction discs in a ballhead can be a bit of a challenge, but it's definitely doable with the right tools and some patience. First, let's take a closer look at the ballhead to determine if the problem is indeed due to wear on the friction discs. You'll need to disassemble the head to access the discs. This usually involves removing a few screws or clips that hold the discs in place. Once you have access to the discs, inspect them for any signs of wear or damage. If they're worn out or damaged, it's likely that they need to be replaced. You can purchase replacement friction discs from the manufacturer or online retailers. Make sure to get the correct type and size of disc for your ballhead model. To replace the discs, you'll need to remove the old ones and install the new ones in their place. This may require some cleaning and lubrication of the surrounding areas to ensure smooth operation. If you're not comfortable with this process or if you're not sure about how to proceed, it's always a good idea to consult the manufacturer's instructions or seek the help of a professional. As for repairing the discs, it's possible to resurface them using a grinding stone or a sanding disk. However, be careful not to damage the surrounding areas or the disc's surface finish. If you're not comfortable with this process, it's usually better to replace the discs entirely. In any case, make sure to reassemble the ballhead carefully and test it before use to ensure that the replacement or repair has been successful.
What is the difference between the pre-set and customised settings on the quick release lever, and when should I use each?
Pre-Set (or "Index" mode) and Customized (or "Non-Index" mode). Pre-Set mode is designed for convenience and ease of shifting. In this mode, the QRL is pre-set to specific gear ratios, which are usually marked by small dots or notches on the lever. When you shift gears in Pre-Set mode, the chain will jump from one set of teeth to another at these pre-determined points. Customized mode, on the other hand, allows for more precise control over gear shifting. In this mode, you can adjust the QRL to any point between the marked notches. This gives you more flexibility when navigating complex terrain or when you need to fine-tune your gearing. You should use Pre-Set mode in the following situations:
* When you're riding on smooth roads and don't require precise gear control. When you're commuting short distances, as it's faster and easier to shift gears. When you're using a derailleur with a wide range of cassettes, as pre-set mode can help avoid damage from excessive shifting. You should use Customized mode in the following situations:
* When riding on technical terrain or when navigating tight switchbacks, where precise gear control is essential. When you need to fine-tune your gearing for optimal performance. When using a derailleur with a narrow range of cassettes, as customized mode allows you to adjust the QRL more precisely. Ultimately, it's up to personal preference and riding style. If you're a casual rider who values ease of use, Pre-Set mode may be sufficient. However, if you're an avid cyclist or ride in challenging conditions, Customized mode offers greater flexibility and control.
Before you buy Manfrotto Compact Advanced Aluminium + 3-way Head


Jennifer –
Hello! I’m Jennifer, and let me tell you buying this Manfrotto Compact Advanced Aluminium + 3-way Head in July was like finding the missing piece of my photography puzzle. It’s lightweight, sturdy, and honestly, it feels like a high-five from the universe when you’re trying to capture that perfect shot without your legs giving out. The lowest work height at 44.5 cm? Let’s just say I’m now the proud owner of a tripod so low, my cat can use it as a stepstool for its “royal” throne (don’t ask).
Now, about saving the planet okay, tripods aren’t exactly solar panels, but this one’s power efficiency is impressive. Its compact design and aluminium construction reduce material waste, and because it’s so efficient to transport, it cuts down on carbon emissions from shipping. Plus, who doesn’t love a product that lasts decades instead of ending up in a landfill after one use? (Raise your hand if you’ve ever cried over a broken tripod.)
Technically, the 3-way head is a marvel smooth panning, precise adjustments, and that aluminium build feels like it’s made by engineers who also happen to be yoga instructors (flexibility for the win). The only downside? It makes my old, wobbly plastic tripod look like a toddler’s art project.
P.S. Today’s news about eco-friendly gear trends was spot-on this tripod is basically a green thumbs-up for photographers who still want to take amazing photos without guilt. Just don’t let your cat use it as a stepstool too often, or you’ll be explaining why your camera is now 6 feet off the ground.