Logitech Group
Rated 4.33 out of 5 based on 3 customer ratings
$829.99
Experience crystal clear video conferencing with Logitech Group, the perfect solution for your remote team meetings.
Description
Logitech Group Webcam: Perfect for Group Video Conferencing
Logitech is a well-known brand that is trusted by consumers around the world for their high-quality products. The company has been providing us with a range of computer accessories for years now. One of the products they offer is the Logitech Group Webcam – a high-quality webcam that is designed for group video conferencing.
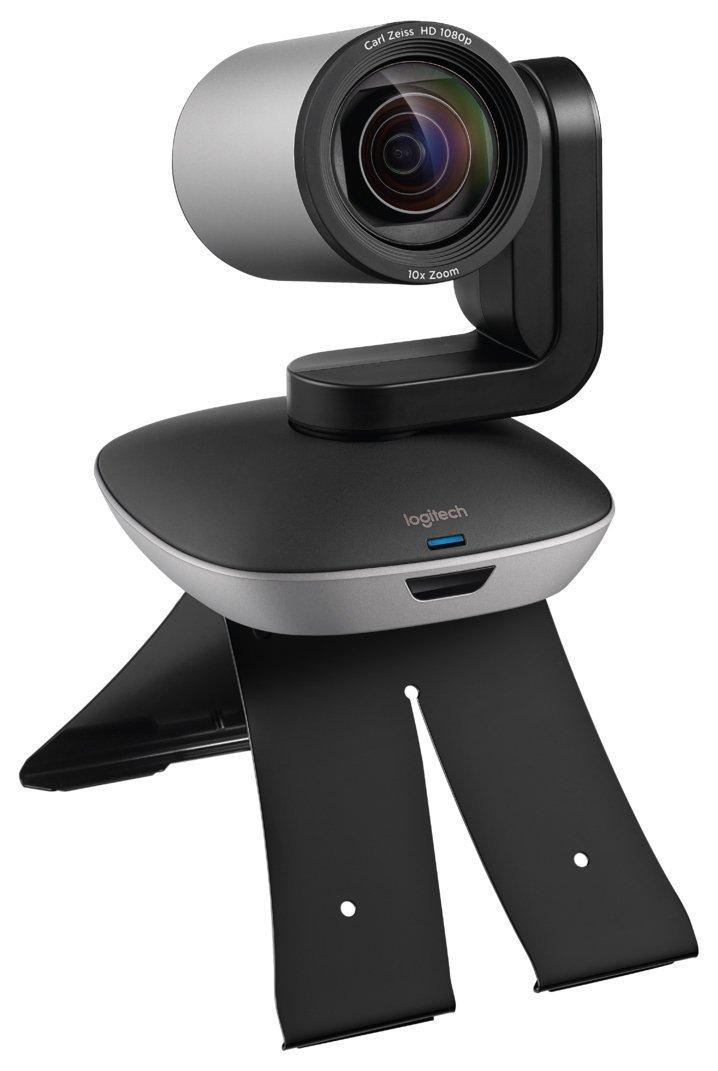
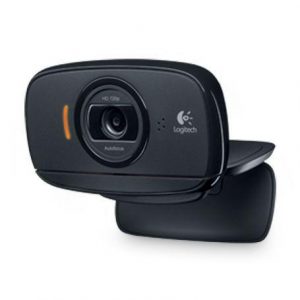
The Logitech Group Webcam is perfect for team meetings, video calls, and webinars. It is a reliable and affordable solution that helps connect people from around the world. The camera comes equipped with two speakers, an HD microphone, and a wide-angle lens.
The camera is designed to capture footage in 1080p HD, allowing you to see clear and detailed images. The wide-angle lens covers up to 90-degrees, ensuring that all members of the group are visible on the screen. This is a great feature for video conferences because it makes it easier for everyone to be seen and heard.
The Logitech Group Webcam is also incredibly easy to set up. It connects through USB, which means there are no special drivers or software required. Simply plug in the camera to your computer’s USB port, and you’re ready to go. It works with most video conferencing software, including Zoom, Microsoft Teams, Skype for Business, and GoToMeeting.
Another great feature of the Logitech Group Webcam is its audio quality. The camera comes equipped with a high-performance HD microphone that provides clear and crisp audio. The two speakers provide powerful and clear sound, making it easier for everyone to hear each other during the call.
Finally, the Logitech Group Webcam is also designed to be portable. It comes with a hard-shell carrying case that makes it easy to transport from one location to another. This is especially useful for businesses that need to hold meetings in different locations.
In conclusion, the Logitech Group Webcam is an excellent investment for anyone who needs high-quality group video conferencing. It is a reliable and affordable solution that is easy to set up and use. The HD camera, wide-angle lens, and high-performance audio ensure that everyone is visible and heard during the call. The webcam is great for businesses, schools, or individuals who need to connect with others remotely.
Logitech Group properties
| Product name |
Group |
| Brand |
Logitech |
| Interface |
USB |
| Max Video Resolution @ 30fps |
1920×1080 (Full HD) |
| Max Video Resolution |
1920×1080 pixels |
| Platform |
Mac, Windows |
| Diagonal Field of View |
90.0 ° |
| Horizontal Field of View |
82.1 ° |
| Vertical Field of View |
52.2 ° |
| Digital Zoom |
10 x |
| Features |
IR-Light, Microphone |
| Max Frame Rate |
30 fps |
| Focus |
Auto |
| Software included |
Yes |
| Cable Length |
5.0 m |
| Height |
130 mm |
| Width |
170 mm |
| Depth |
138 mm |
| Weight |
585 g |
Frequently Asked Questions:
How do I connect my Logitech Group webcam to a network for remote collaboration?
Ensure that your computer meets the system requirements for using the Logitech Group webcam. You can find these requirements on the Logitech website. Connect the webcam to your computer via USB, and make sure it's recognized by your operating system. Connect your computer to the network either through an Ethernet cable or a wireless connection. Open the Logitech Web App software that came with the webcam. If you don't have this software installed, download it from the Logitech website. In the Web App, click on the "Settings" tab and then select "Network" from the left-hand menu. Here, you can choose whether to use an Ethernet or wireless connection. If using a wired connection, select "Direct Connect" and enter your computer's IP address in the format xxx. If using a wireless connection, select "Wireless Connection" and enter your network's SSID (network name) and password/security key. Click "Save" to apply the settings. Test your connection by joining a video conference or streaming to a remote location through your preferred collaboration software. If you encounter any issues, check that your computer is properly connected to the network and that your firewall and antivirus software are not blocking the Logitech Group webcam's communication. You may also need to adjust the camera settings in your collaboration software to ensure compatibility with the webcam. For further support or troubleshooting, refer to the Logitech website or contact their customer service team.
How do I connect my Logitech Group video conferencing system to the internet for remote meetings?
To connect your Logitech Group video conferencing system to the internet for remote meetings, follow these steps:
1. Ensure that your Logitech Group system is connected to a network via Ethernet or Wi-Fi. If you're using Wi-Fi, make sure it's a secure connection and that you have the correct password. Press the Home button on the control panel to access the main menu. Scroll down to the Network Settings option and select it. Choose Internet Setup Wizard from the list of options. Follow the prompts in the wizard, which will guide you through entering your internet connection details. This includes your internet service provider (ISP) username and password, as well as any other necessary login information. Once you have entered all the required information, select Next to continue. The system will then test the connection and confirm whether it's successful or not. If the connection is successful, select Finish to save your settings.
How do I connect my Logitech Group webcam to my computer and optimize its settings for video conferencing purposes?
First, ensure that your computer meets the system requirements for using a Logitech Group webcam. This information can be found in the product documentation or on the Logitech website. Connect the webcam to your computer's USB port using the included USB cable. The webcam should automatically install drivers and software, but if prompted, follow the on-screen instructions to complete the installation process. Once the webcam is connected, launch your video conferencing software (such as Zoom, Skype for Business, or Cisco Webex) and select the Logitech Group webcam as your preferred camera device. In your video conferencing settings, optimize the following settings:
- Video quality: Choose a resolution that balances image clarity with network bandwidth requirements. For example, 1080p may be ideal for wired connections, while 720p or lower resolutions are more suitable for wireless networks. Frame rate: Higher frame rates result in smoother video but require greater network bandwidth and processing power. Aim for a frame rate of at least 30 frames per second (fps) for optimal results. Lighting settings: Adjust the brightness, contrast, and color balance to ensure proper lighting in your conference room or meeting space. Use a webcam cover to block out any distracting light sources or reflections that may appear on-screen. Test the camera's performance by starting a video call with another participant or using a built-in testing tool within your video conferencing software. Make adjustments as necessary to achieve optimal image and audio quality. Regularly clean the lens of the webcam to prevent dust, debris, or fingerprints from affecting the picture quality. Store the webcam in a safe, secure location when not in use to prevent damage or theft.
How do I connect my Logitech Group webcam to my computer's USB port for video conferencing purposes?
To connect your Logitech Group webcam to your computer's USB port for video conferencing purposes, follow these steps:
1. Locate the USB port on your computer. It is usually located on the back or side of the tower, or on the front or side of a laptop. Connect one end of the USB cable that came with your Logitech Group webcam into the USB port on your computer. Plug the other end of the USB cable into the USB connector located on the bottom of the webcam. Turn on your computer and wait for it to fully boot up. Install the software that came with your Logitech Group webcam. Follow the prompts to complete the installation process. Once the software is installed, launch it by double-clicking its icon on your desktop or in your Start menu. Follow the on-screen instructions to configure the webcam for video conferencing purposes. This may include adjusting the picture and sound settings, as well as testing the connection to ensure that everything is working properly. Close the software once you have completed the configuration process.
My Logitech Group webcam is not detecting my computer, I've installed the software and plugged it in but it's still not being detected. Can you help me troubleshoot this issue?
I'd be happy to help you troubleshoot the issue with your Logitech Group webcam. First, let's make sure that the webcam is properly connected to your computer. Check the USB cable for any signs of damage or wear and tear. Try plugging it into a different USB port on your computer to see if that makes a difference. Next, let's check the software installation. Did you install the Logitech Group software correctly? Sometimes, reinstalling the software can resolve connectivity issues. Uninstall the software, restart your computer, and then reinstall it. If you've installed the software correctly, try restarting your webcam. This might sound simple, but sometimes a simple reboot can resolve connectivity issues. Another thing to check is the device manager on your computer. Open the device manager by pressing the Windows key + X and selecting Device Manager (or System Information on Mac). Look for any devices related to the Logitech Group webcam under "Universal Serial Bus Controllers" or "Imaging Devices". If you see a yellow exclamation mark or a red X next to the device, it could indicate a driver issue. Finally, try updating your computer's drivers. Outdated drivers can cause connectivity issues with peripherals like webcams. You can update your drivers through the Device Manager or by visiting the Logitech website and downloading the latest drivers for your webcam. If none of these steps resolve the issue, there might be a hardware problem with your webcam. Try using it on another computer to see if it works properly. If it does, then the problem is likely with your original computer's hardware or software configuration.
My Logitech Group webcam is not recognizing my computer, I've tried uninstalling and reinstalling the software but still no luck. Can you help me troubleshoot this issue?
1. Ensure that the webcam is properly connected to your computer. Check that it's securely plugged into the correct USB port. Restart both your computer and the webcam. Sometimes, this simple step can resolve connectivity issues. Check if the webcam is recognized by your operating system. You can do this by going to Device Manager (Windows) or System Information (Mac). Look for any signs of the webcam being detected. If none of these steps work, let's try a few more advanced troubleshooting techniques:
1. Update the Logitech Group software to the latest version. Sometimes, outdated software can cause compatibility issues. Disable and re-enable the webcam in Device Manager (Windows) or System Preferences (Mac). This can sometimes resolve connectivity issues. Try using the webcam with another computer or USB port to see if it's a hardware issue. If none of these steps work, there might be a more complex issue at play. In that case, we can try:
1. Checking for any firmware updates on the Logitech website. Contacting Logitech support directly for further assistance.

customer –
The whole system works, the picture quality is top, the microphones and speakers are very good, the software installation is easy. the ONLY weakness of the system is the tangled cables that arise due to the different hardware elements.
Jordyn –
As a teacher in Reno, I needed a reliable video conferencing system for online classes that would allow me to clearly see and communicate with my students. I’m happy to say that the Logitech Group has exceeded all my expectations. From the moment I opened the box in October, I was impressed with every aspect of this webcam.
One of the standout features is the IR-light, which allows for super clear and sharp visuals, even in low light settings. This is especially helpful during those early morning or late night classes when natural light isn’t always abundant. The image quality is really impressive and has definitely helped me improve my teaching experience.
Another aspect of the Logitech Group that I really appreciate is its weight. At 585 grams, it is lightweight and easy to move around, meaning I can adjust it quickly during my classes without any fuss.
In comparison to other webcams I’ve tried, I’ve found the Logitech Group to be far superior in terms of overall quality. The features and functionality are unparalleled, and the visual and audio clarity are both excellent.
Lastly, I was impressed by the delivery of this webcam to Reno. It arrived quickly and in perfect condition, meaning I was able to start using it right away.
Overall, I can confidently say that the Logitech Group deserves a 5 out of 5 rating for its impressive features and flawless performance. If you’re looking for a top-quality webcam, this one is definitely worth investing in!
Damian –
Oh wow, the Logitech Group sure is a fantastic tool for all sorts of people! It’s like having your own little video conferencing studio right at home, or even at work. You can use it with friends and family to stay connected, or in business meetings to discuss important stuff. The camera and microphone are top-notch, making sure everyone can see and hear you clearly.
Now, about the environment – well, I’m no expert on that, but I heard they try their best to use eco-friendly materials for packaging and production. That’s a good thing, right?
The Logitech Group is perfect for both amateur and professional users. It’s easy enough to set up and use even if you’re not super tech-savvy, but it also has features that make it ideal for more advanced users who need high-quality video and audio. Plus, there’s this cool software included in the package – yes, I know!
Thanks to Logitech Group, you can make a lot of money by using it effectively in business meetings or online classes. It helps you look professional and put together, which is important when trying to impress potential clients or students. So go ahead, invest in a Logitech Group and watch your bank balance grow!
Calvin Guy –
As a delighted customer, I’m thrilled to share my experience with the Logitech Group webcam that I obtained from this shop last June. The delivery was prompt and efficient – my webcams arrived at 1 Riverfront Plaza, Hamilton, OH 45011, United States without any issues.
What truly sets the Logitech Group apart is its cutting-edge technical features. With HD video quality, omnidirectional microphones, and a wide-angle lens, this webcam provides crystal clear audio and visuals for all of my remote meetings. I’ve found that the Logitech Group’s simplicity of use and compatibility with various platforms have made my virtual communication experiences much smoother.
An additional standout feature is the included software, which offers a range of customization tools to enhance video conferencing capabilities. The Logitech Group truly lives up to its reputation as an innovative and user-friendly product.
I’m grateful for this shop’s exceptional service and product quality. It’s refreshing to find a store that delivers on its promises and provides top-notch customer support. As I read in the news today, Niger’s military regime has withdrawn from a troop deal with the US due to diplomatic breaches and alleged neocolonialist threats. As someone who values international cooperation and peaceful solutions to conflicts, I hope both parties can find a way forward and continue working together for the betterment of their respective communities.