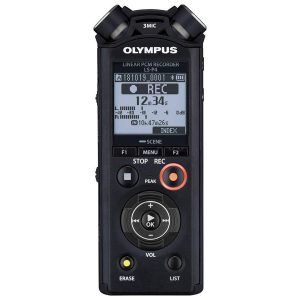
Sony, ICD-PX470
Rated 5.00 out of 5 based on 1 customer rating
$38.99
Capture crystal clear audio recordings every time with Sony’s ICD-PX470 audio recorder.
Description
Sony ICD-PX470 audio recorder is a reliable and versatile device designed to make audio recording easy and convenient. The recorder comes packed with a range of features and functions that allow you to capture high-quality audio and store it with ease. In this article, we will take a closer look at the Sony ICD-PX470 audio recorder and explore its key features.
Design and Build
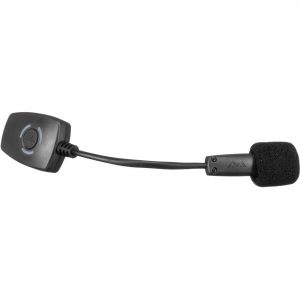
The Sony ICD-PX470 audio recorder has a sleek, modern design that is easy to use and comfortable to hold. The device is compact and lightweight, making it easy to carry with you wherever you go. The recorder has a built-in microphone that is capable of picking up sound from a distance, making it perfect for recording meetings, lectures, and interviews.
Features and Functions
The Sony ICD-PX470 audio recorder comes packed with a range of features and functions that make it an excellent choice for people who need to make audio recordings regularly. Here are some of the device’s top features:
– High-quality recording: The recorder features an advanced microphone that captures high-quality audio with exceptional clarity and detail. The device can record in MP3 format, making it easy to share your recordings with others.
– Noise reduction: The Sony ICD-PX470 audio recorder features noise reduction technology that minimizes background noise, ensuring that your recordings are clear and easy to understand.
– Long battery life: The device has a long battery life, allowing you to record for up to 55 hours on a single charge. This is ideal for people who need to make extended recordings.
– Multiple recording modes: The recorder features three different recording modes, including normal, focus, and dictation mode. Each mode is customized to suit different recording situations, ensuring that you capture the best possible audio.
– Memory and storage: The recorder has 4GB of internal memory and can store up to 59 hours of audio. You can also add a microSD card (sold separately) to the device to extend the storage capacity.
– Easy file transfer: The device comes with a USB cable that makes it easy to transfer your recordings to your computer or other devices. You can also use the device’s built-in speaker or headphone jack to listen to your recordings.
Conclusion
The Sony ICD-PX470 audio recorder is an excellent choice for anyone who needs to make audio recordings regularly. The device is easy to use, portable, and packed with features that make it a versatile and reliable tool. With its high-quality recording capabilities, noise reduction technology, long battery life, and easy file transfer, the Sony ICD-PX470 audio recorder is an excellent investment for professionals, students, and anyone who wants to capture audio with ease.
Dictaphone, Built-in Microphone, MP3, WMA, WAV, PCM, AAC Microphone: Built-in Microphone Weight: 74 g
Sony, ICD-PX470 properties
| Product name |
ICD-PX470 |
| Type |
Dictaphone |
| USB Input |
1 |
| 3.5mm Output |
1 |
| Memory Card Reader |
Built-in/Flash |
| Colour |
Black |
| Power Supply |
Battery |
| Battery Format |
AAA |
| Battery Amount |
2 |
| Microphone |
Built-in Microphone |
| Amount of Microphones |
1 |
| Frequency Range Microphone Min |
50.0 |
| Frequency Range Microphone Max |
16000.0 |
| Recording Format |
AAC, MP3, PCM, WAV, WMA |
| Supported Audio Formats |
LPCM, MP3 |
| File Size |
5000.0 |
| Height |
114.1 mm |
| Depth |
19.3 mm |
| Width |
38.3 mm |
| Weight |
74.0 g |
Frequently Asked Questions:
What is the process to update firmware on my Sony ICD-PX470 audio recorder?
Updating the firmware on your Sony IC-PX470 audio recorder ensures you have the latest software version for improved performance and new features. Here are the steps to follow:
1. Download the latest firmware file:
Visit the Sony support website (https://www.sony.net/support/product/) and search for your IC-PX470 model. From there, you can find the latest firmware version available for download.
2. Install the "Sony Device Update Software" on your computer:
This software is necessary to update the firmware. Download it from the Sony support website by selecting "Downloads" under the product page for IC-PX470 and then find the "Device Update Software."
3. Connect the audio recorder to your computer using a USB cable:
Plug one end of the USB cable into your recorder's USB port and connect the other end to your computer. Make sure your computer recognizes the device.
4. Launch the "Sony Device Update Software" on your computer:
Open the software you downloaded in step 2 by double-clicking its icon or locate it from your applications folder.
5. Start updating firmware:
Once the software is open, click on "Start" to start the process of updating your IC-PX470 audio recorder's firmware.
6. Follow the on-screen instructions:
The software will guide you through the remaining steps of the update process. Make sure not to disconnect the USB cable or turn off your computer during this procedure, as it may cause problems with updating firmware.
7. Wait for the update to complete:
The update process may take several minutes to finish. Once done, the software will notify you that the update was successful, and your audio recorder will restart automatically.
8. Check the new firmware version:
After restarting, turn on your IC-PX470 audio recorder and check if the firmware version is updated to the latest one available. If not, repeat the process until you successfully update it.
Note: Always make sure to back up any important data before performing a firmware update. Also, ensure that you have enough battery power or connect your IC-PX470 to an external power source during the update process.
What are the basic instructions for recording audio using the Sony ICD-PX470 recorder?
To use a Sony ICD-PX470 digital voice recorder, you'll need to follow these basic steps:
1. **Insert Battery:** Open the battery compartment at the bottom of the device and insert two AAA batteries as directed. The device will automatically detect if the batteries have enough power. Make sure that the batteries are fresh and not expired for better recording quality.
2. **Power On:** Press the ON/OFF button on top of the recorder to turn it on. The device is ready when you see "Rec" displayed on the screen.
3. **Choose Recording Mode:** You can choose from four different modes: High Quality, Standard Quality, Extended mode (for longer recording time), and Voice Memo. Press the MENU button to access these options. For high-quality sound, use the High Quality mode.
4. **Select File Format:** The device records in two formats - LPCM or MP3. LPCM is uncompressed audio while MP3 is compressed for smaller files. To choose your format, go into the settings and select "Audio File Format".
5. **Set Recording Time:** You can set a limit to how long you want each recording to be. This will be useful if you're recording multiple sessions or need to conserve memory space. Press the MENU button again to access this feature, then scroll down to "Recording Limit" and choose your desired length.
6. **Begin Recording:** Press the big red button on top of the device to start recording. The screen will show "REC" while it's recording. You can pause or stop a recording by pressing the same button again. If you want to overwrite an existing file with new content, simply start recording when there is still some remaining time left on the old file.
7. **Playback Audio:** To listen back to your recordings, press and hold the Play/Stop button for about 2 seconds until you see "PLAY" displayed on the screen. Use the playback controls (<<, >>, Stop) located at the top of the recorder to navigate through your files.
8. **Save Files:** After you've finished recording, you might want to save your audio files onto your computer or another device. To do this, connect the recorder to your computer using the included USB cable and follow the on-screen prompts.
Remember, these are just basic instructions. For more detailed information about features such as auto voice recognition or connecting to a smartphone app, refer to the user manual provided by Sony.
How do I transfer recorded audio from my Sony ICD-PX470 to my computer for editing or sharing?
To transfer recorded audio from your Sony ICD-PX470 to your computer, you will need a USB cable and the appropriate software. Here are the steps:
1. Connect the Sony ICD-PX470 to your computer using the supplied USB cable. Install the Sony Audio Manager software on your computer if it hasn't already been installed during the device setup process. You can download the latest version of the software from the Sony support website: https://support. Launch the Sony Audio Manager on your computer. Your ICD-PX470 should be automatically detected by the software. If not, click "New Device" and follow the prompts to install the device driver. Once the device is recognized, you can view the recorded audio files on the device. Select the file(s) you want to transfer and click "Export" or "Copy". Choose a location on your computer where you want to save the exported file(s). The selected file(s) will be transferred from the ICD-PX470 to your computer. Once the transfer is complete, disconnect the USB cable and you can now edit or share the audio files using any audio editing software on your computer.
How do I transfer audio files from my Sony ICD-PX470 to my computer for editing and sharing purposes?
To transfer audio files from your Sony ICD-PX470 to your computer, follow these simple steps:
1. Connect the USB cable that came with your recorder to your computer's USB port and the recorder itself. The recorder will automatically turn on when you connect it via USB. Your computer should recognize the device and display a prompt asking whether you want to open the folder containing the files or install a driver. Select "Open folder to view files" to proceed. The Audio Manager software that came with your recorder will launch automatically. If it doesn't, you can download and install it from Sony's website if you haven't done so already. The Audio Manager will allow you to transfer files, organize them, create playlists, and edit metadata. In the Audio Manager window, select the checkboxes next to the audio files you want to transfer (or click "Select All" to transfer all the files). Click on the "Export" button located at the top of the window. A dialog box will appear, allowing you to choose a destination folder for your transferred files. Select the location where you want to save them and click "OK. The Audio Manager will begin transferring the selected files to your computer. Depending on the number of files and their sizes, this may take a few minutes or more. You can monitor the progress by looking at the "Export Progress" bar in the lower-right corner of the window. Once the transfer is complete, you'll see a confirmation message. Click "OK" to close the dialog box. If you want to edit your audio files using software other than Audio Manager (such as Adobe Audition or Audacity), navigate to the destination folder on your computer and open the file in your preferred editing software. Make your edits, save the file, and then share it however you'd like. That's it! With these simple steps, you can transfer audio files from your Sony ICD-PX470 to your computer for editing and sharing purposes.
How do I format the internal memory for the first time when my new ICD-PX470 recorder is delivered?
1. Connect the Recorder to Your Computer**: First, connect your ICD-PX470 to your computer using the supplied USB cable. Open the File Manager Software**: After connecting, open the file manager software provided with your recorder on your computer. This is usually found in a folder that comes with your recorder's drivers. The specific steps may vary depending on your operating system (Windows or macOS). For Windows: Typically, you'll find it under 'Program Files' > 'ICD' and then open the software. For macOS: It might be located within 'Applications' > 'ICD', and then you can open the file manager. Check for Firmware Updates**: Before proceeding to format the internal memory, ensure your recorder's firmware is up-to-date. The latest firmware may include bug fixes or enhancements that could affect formatting. Format the Internal Memory**: Once inside the file manager software, look for an option to format the device. This might be labeled as "Erase" or a similar term in other languages. Be cautious when you choose this option because it will completely erase all data stored on your recorder's internal memory. Initialize the Recorder**: After formatting, the recorder should automatically initialize. This process can take several minutes and may appear to hang; however, it's crucial for the proper operation of your device. Update the Firmware (if necessary)**: If there are firmware updates available after initial setup, apply them according to the instructions provided by ICD. Test the Recorder**: Finally, test your recorder to ensure all functions are working correctly and that you're able to record audio without any issues. By following these steps, you should be able to format your ICD-PX470's internal memory for the first time successfully.
Before you buy Sony, ICD-PX470


John –
Excellent product, easy to handle, very intuitive. I recommend experimenting with the different registration methods. For my university lessons I often used the “seminar” mode, with excellent sound quality and very few background noises. Too bad there is no backlit display and rechargeable battery; would make it perfect! I recommend using a micro sd to record files, as it can be conveniently inserted into the phone and always have the files available for use.
Melanie Morrison –
As a journalist, I always look for a reliable audio recorder that is easy to use and delivers high-quality recordings. The Sony ICD-PX470 ticks all the boxes. I am thoroughly impressed with this device and rate it 5 stars out of 5 possible.
One of the things I appreciate about this recorder is its compact size. At just 38.3 mm wide, it is easy to carry around in my pocket or purse. This is particularly handy when I’m covering events or conducting interviews on the go.
Another great feature of the Sony ICD-PX470 is its built-in/flash memory card reader. This allows me to quickly transfer my recordings to my computer for easy editing and sharing.
Compared to other audio recorders I have used in the past, the Sony ICD-PX470 stands out for its clear and crisp sound quality. It is incredibly easy to use, with intuitive controls and a bright display that shows me exactly what settings I’m using.
Overall, I highly recommend the Sony ICD-PX470 to anyone looking for a reliable and easy-to-use audio recorder. It is an excellent choice for professionals and beginners alike.