VisionTrack VT1000
$229.99
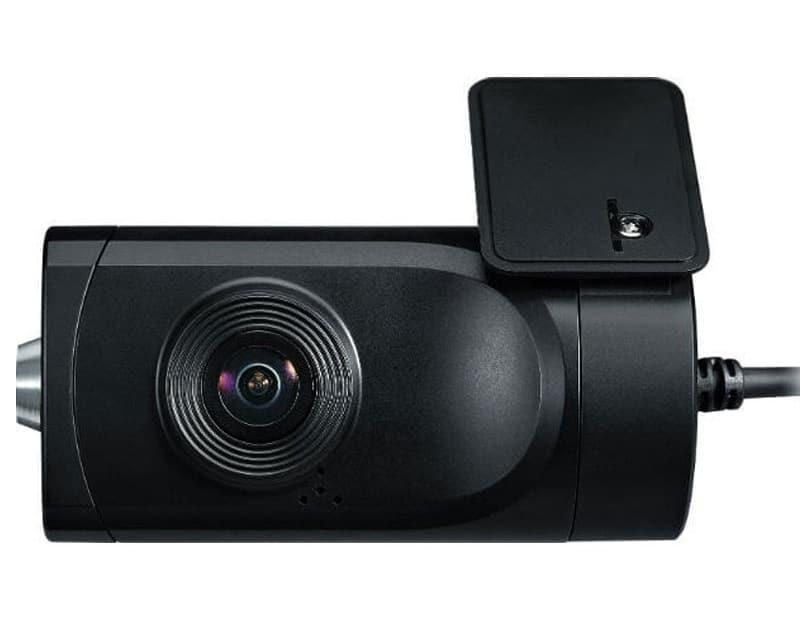
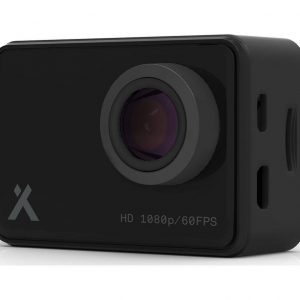
Capture exceptional quality footage with the VisionTrack VT1000, a powerful and low light camcorder with an advanced sensor for superior images.
Description
The VisionTrack VT1000 camcorder is a powerful piece of technology designed for drivers who want to protect themselves and their vehicles. The camcorder provides a host of features that make it easier to capture on-road incidents, improve driver safety, and reduce insurance premiums. In this article, we’ll take a closer look at this impressive device.
Design and Features
The VT1000 features a 120-degree wide-angle lens that captures a broad perspective of the road. The device is equipped with a 2.7-inch TFT LCD screen that makes it easy to view recordings in real-time. The camcorder comes with a built-in GPS that tracks your vehicle’s position and speed, and helps you track your route history. This information can be useful in the event of an accident or theft.
One of the standout features of the VT1000 is the forward collision warning system. The device uses advanced algorithms to detect when you’re too close to the vehicle in front of you and warns you with an audible alert. This feature is incredibly helpful in preventing accidents caused by inattention or driver error.
The VT1000 also features a lane departure warning system that alerts you when you’re drifting out of your lane. This feature can help prevent accidents caused by drowsy or distracted driving.
The camera can record in full HD 1080p, and the device supports loop recording, so you don’t have to worry about running out of storage space. The VT1000 also comes with a G-sensor that detects sudden impacts and saves the recording as an emergency video.
Installation
Installing the VT1000 is straightforward and can be done in a matter of minutes. The device mounts onto your windshield using a suction cup, and the included power cable plugs into your car’s cigarette lighter socket. The camera can also be hardwired into your vehicle’s electrical system if you prefer.
The device comes with a user manual that provides step-by-step instructions and tips for optimal performance. However, the device is intuitive, and you’ll be using it like a pro in no time.
Conclusion
The VisionTrack VT1000 camcorder is an excellent investment for any driver looking to improve their safety and reduce insurance premiums. The device offers a host of advanced features that make it easier to capture on-road incidents and prevent accidents caused by inattention or driver error. The installation process is straightforward, and the device is designed to be user-friendly. Overall, we highly recommend this impressive little device.
VisionTrack VT1000 properties
| Product name |
VT1000 |
| Brand |
VisionTrack |
| Type |
Dashcam |
| Features |
GPS |
| Max Video Resolution |
1080p, 480p, 720p |
| Max Frames per second (FPS) |
30 fps |
| SD Type |
SD |
| Max Supported Memory Size |
32 GB |
| Sensor |
CMOS |
| Sensor Megapixels |
3.0 MP |
| Sensor Size |
1/3 inches |
| Height |
50.0 mm |
| Width |
100.0 mm |
| Depth |
45.0 mm |
| Weight |
175 g |
Frequently Asked Questions:
How do I transfer videos from my VT1000 camcorder to my computer for editing?
To transfer videos from your VT1000 camcorder to your computer for editing, follow these steps:
1.
Open Windows Media Player on your computer. This will allow you to view and import the video files from your VT1000 camcorder into your computer.
2.
Connect your VT1000 camcorder to your computer using a USB cable. Make sure that both the camera and computer are turned on before connecting the two devices.
3.
Windows Media Player should automatically detect the connection between your camcorder and computer, and begin importing the video files. You may need to select "Import from Camera" in the Import tab of Windows Media Player if this does not occur.
4.
Once the videos have been imported, you can transfer them onto your editing software for further manipulation. Simply drag and drop the videos into your preferred editing software or burn them to DVD using a burning program.
How do I connect my VisionTrack VT1000 camera to Wi-Fi for live streaming and remote monitoring?
To connect your VisionTrack VT1000 camera to Wi-Fi for live streaming and remote monitoring, please follow these steps:
1. Ensure that the camera's firmware is up-to-date. Connect the camera to a computer via USB and download the latest version of the camera software from the manufacturer's website. Follow the on-screen instructions to install the update. Power on the camera and connect it to a display using an HDMI or VGA cable. Make sure that the camera is properly mounted and positioned for your intended application. Connect the camera's Ethernet port to your local area network (LAN) using an Ethernet cable. If you do not have a wired connection available, you can also connect the camera to Wi-Fi by following the next steps. Open a web browser on a computer or mobile device that is connected to the same network as the camera. Type the IP address of the camera into the URL bar and press Enter. The default IP address is 192. If prompted, enter the administrator username and password (both are "admin" by default). On the camera's web interface, select the "Network Settings" tab. Choose the Wi-Fi network you want to connect to from the list of available networks. Enter the security key or password for the selected network and click "Save". The camera will now attempt to connect to the selected Wi-Fi network. If the connection is successful, the IP address displayed on the web interface will change to reflect the new network settings. To test the camera's live stream and remote monitoring capabilities over Wi-Fi, open a media player application (such as VLC or QuickTime) on a device that is connected to the same network as the camera. Type the new IP address of the camera into the media player's URL bar and press Enter. Alternatively, you can scan for available cameras using a mobile app like Camera Fi. If the live stream successfully loads in the media player, you can adjust various camera settings such as video resolution, frame rate, and compression format through the web interface or a dedicated software application. To ensure reliable Wi-Fi performance, position the camera near the network access point (NAP) and minimize obstructions between the camera and NAP. You may also need to adjust the camera's Wi-Fi power and channel settings using the "Advanced" tab in the web interface. Finally, ensure that you have appropriate security measures in place to prevent unauthorized access to your network and camera feeds. This can include setting a strong password for the camera administrator account, enabling WPA2 encryption on the Wi-Fi network, and configuring firewall rules to restrict access to the camera's ports.
"How do I connect my VisionTrack VT1000 to a computer using USB for data transfer?"
To connect your VisionTrack VT1000 device to a computer using USB for data transfer, please follow these steps:
1. Ensure that the USB cable provided with your device is compatible with both the device and the computer you are connecting it to. If necessary, purchase an additional USB cable from a reputable electronics retailer. Insert one end of the USB cable into the USB port on the side of the VT1000 device. The USB port is located near the SD card slot and the power input. Connect the other end of the USB cable to an available USB port on your computer. Make sure that the USB connection is securely established between the two devices. Turn on the VT1000 device by pressing and holding the power button until the screen displays "VT1000". The device should automatically connect to your computer via USB. Your computer may prompt you to install a driver for the VisionTrack VT1000 device. If this happens, follow the on-screen instructions to download and install the appropriate driver software. Once the driver is installed, your computer should recognize the VT1000 as an external storage device. Open a file explorer window (e. Windows Explorer for Windows computers or Finder for Mac computers) and locate the connected VT1000 drive. You can now transfer files between your computer and the VT1000 by dragging and dropping files from one location to another. Alternatively, you can copy files using the right-click context menu in the file explorer window. When you are finished transferring files, safely eject the VT1000 device from your computer by right-clicking on it in the file explorer window and selecting "Eject" or "Safe Remove Hardware". This will prevent any data loss that may occur if the device is disconnected abruptly. Disconnect the USB cable from both the VT1000 device and your computer, then turn off the device by pressing and holding the power button until the screen displays "VT1000 OFF". Your VT1000 device is now ready for use in your vehicle.
"How do I properly connect my VisionTrack VT1000 camera to my computer using the supplied USB cable?"
First, ensure that your computer has a functioning USB port. Connect one end of the USB cable into the back of your VisionTrack VT1000 camera. The USB port is located on the bottom right corner of the camera body. Connect the other end of the USB cable into an available USB port on your computer. This may be a USB hub, USB expansion card, or directly into the computer's built-in USB ports. Wait for your computer to recognize the connected device. The operating system will automatically install necessary drivers if they are not already present. Once the connection is established, you can begin using your VisionTrack VT1000 camera with your computer. This may include accessing software applications or video editing programs that support USB camera input.
I'm experiencing some issues with my VT1000's night vision capabilities, and I was wondering if there are any settings or adjustments I can make to improve its low-light sensitivity.
The VT1000 is a rather old device, isn't it? As for the night vision issue, I'd recommend checking the sensor settings. The default setting might be too high for optimal performance in low light conditions. Try adjusting the gain to around 50-60% and see if that improves the image quality. If you're still experiencing issues, try lowering the exposure time to about 100ms. This will help reduce noise but may compromise on image brightness. You can also experiment with different noise reduction algorithms, such as the "Low Light" or "Night Vision" modes, which might offer a more optimized setting for low-light conditions. Lastly, ensure that any external light sources aren't affecting the device's sensor, as this could be causing the issue. If none of these adjustments help, it may be worth consulting the user manual or contacting the manufacturer for further assistance.
I'm having trouble connecting my VT1000 to the wireless transmitter, it says "no connection" on the screen, what should I do first?
That's a pretty old terminal, the VT1000. First, let's make sure that your transmitter is actually broadcasting. Can you tell me if there are any lights or LEDs on the transmitter to indicate its status?
Also, have you tried resetting the VT1000 by pressing and holding the reset button for about 10 seconds? This might clear out any stale connections or configurations. Lastly, can you check that your wireless transmitter is using the correct frequency and channel? Maybe there's interference from another device on the same channel.
Before you buy VisionTrack VT1000


Reviews
There are no reviews yet.