Audio-Technica AT2020USB+
Rated 4.00 out of 5 based on 5 customer ratings
$98.99
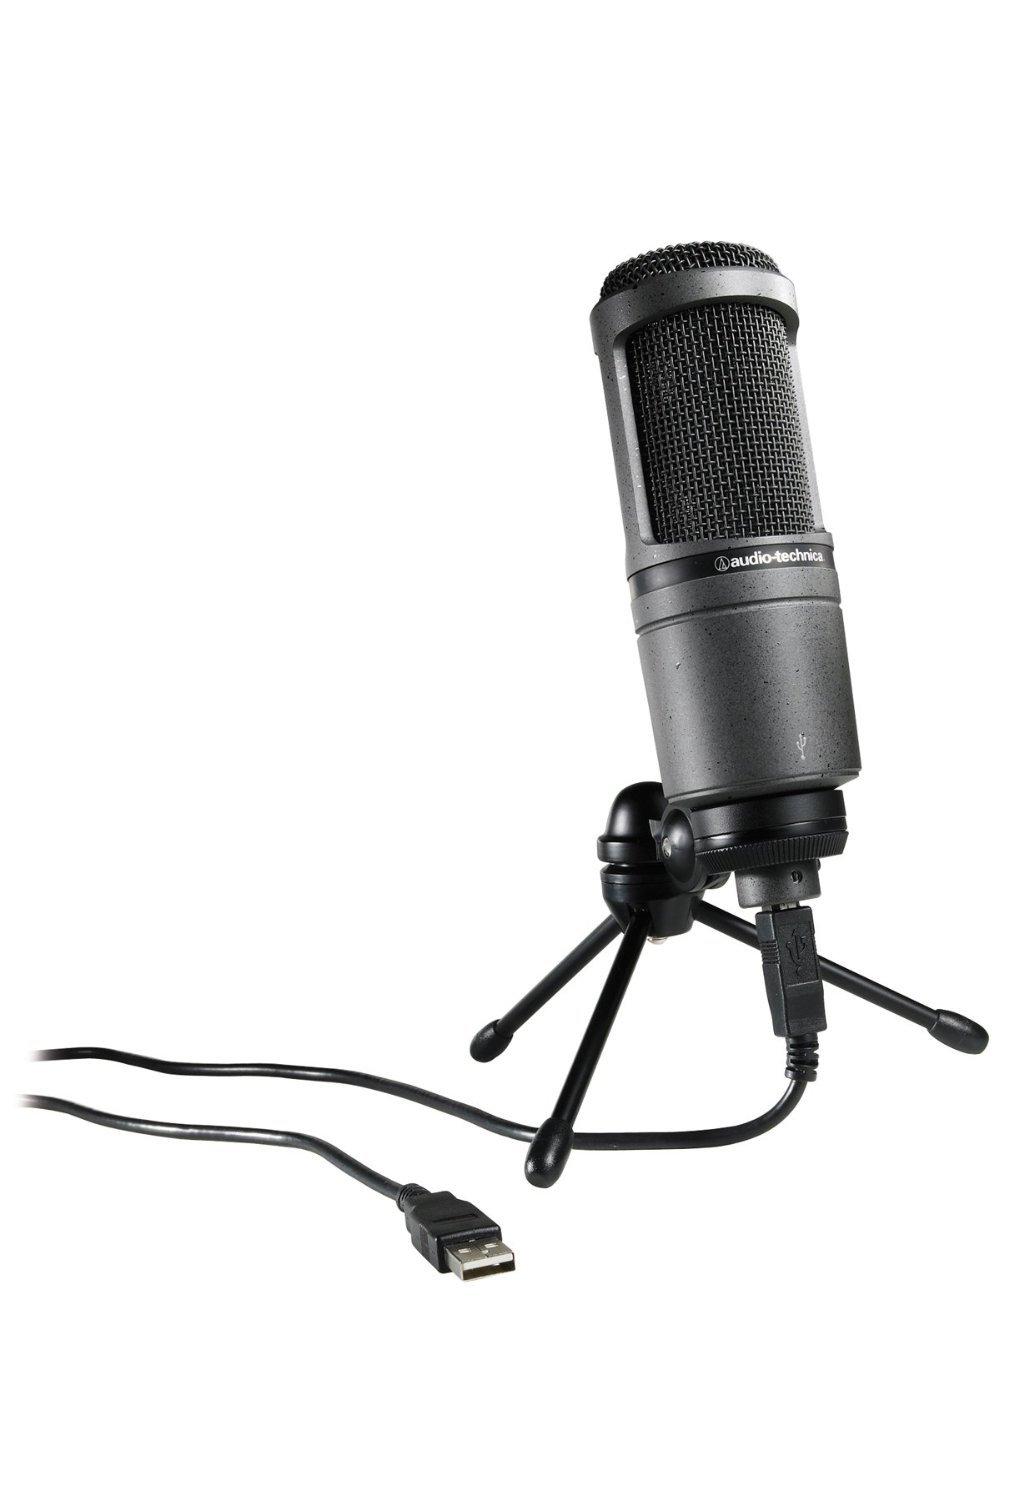
Get superior sound quality for your recordings with Audio-Technica AT2020USB+, the perfect USB microphone for creating pro-grade audio.
Description
The Audio-Technica AT2020USB+ is a high-quality microphone that is specifically designed for recording audio into a computer. This microphone is versatile, durable and provides excellent audio quality, making it a popular choice for podcasters, voiceover artists, and musicians.
Design:
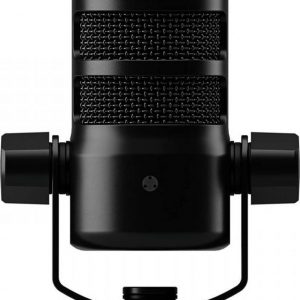
The AT2020USB+ is a condenser mic that comes in a sleek, matte black finish, with a standard-sized threaded mount. The cardioid polar pattern ensures that the mic captures sound from the front while minimizing sound from the sides and rear. This directional pickup pattern helps isolate the audio source and reproduces sound with accurate detail.
Features:
One of the key features of the AT2020USB+ is the built-in analog-to-digital converter that allows the microphone to connect to a computer via USB. It features a high-quality A/D converter (16-bit, 44.1/48 kHz) that ensures you get crisp, clear audio recordings every time you use it. Additionally, the mic has a headphone jack that allows you to monitor your recordings in real-time, allowing you to make changes to your audio as needed.
Performance:
When it comes to audio quality, the AT2020USB+ doesn’t disappoint. The mic produces clear audio with low noise, and a bright and airy sound. The audio quality is similar to high-end microphones that are used in professional audio setups. Moreover, the AT2020USB+ has a wide frequency range of 20Hz to 20kHz, allowing you to capture audio with rich detail and clarity.
Compatibility:
The AT2020USB+ is a plug-and-play microphone, meaning you can connect it to your computer and start recording right away. The microphone is compatible with Windows and Mac operating systems, and comes with a mini tripod stand and a stand mount, making it easy to set up and use.
Conclusion:
The Audio-Technica AT2020USB+ microphone is an excellent choice for anyone looking for a high-quality microphone that delivers exceptional audio quality. It is a versatile microphone that is suitable for various applications, including podcasting, vocal recording, and musical performances. The high-quality analog-to-digital converter, the built-in headphone jack, and the compatibility with various operating systems make it an easy-to-use mic with excellent results. If you are looking to invest in a quality mic for your audio production needs, the Audio-Technica AT2020USB+ is a microphone worth considering.
Microphones with Table Stands, Podcast, Singing
Audio-Technica AT2020USB+ properties
| Product name |
AT2020USB+ |
| Type |
Microphone |
| Placement for Microphone |
Microphones with Table Stands |
| Suitable For |
Podcast, Singing |
| Polar Patterns |
Cardioid |
| Microphone Type |
Condenser |
| Wireless |
No |
| Mono/Stereo |
Stereo |
| On and Off Button |
Yes |
| Volume Control |
Yes |
| 3.5mm (1/8″) TRS |
Yes |
| Weight |
386.0 g |
Frequently Asked Questions:
How do I ensure optimal performance when using the Audio-Technica AT2020USB+ microphone for recording vocals or spoken word applications?
Position the microphone properly: The microphone should be positioned approximately 6-12 inches away from your mouth, with the capsule facing towards you. This will help to minimize unwanted background noise and ensure clear and focused audio capture. Adjust the microphone's gain settings: To prevent distortion or clipping of your audio, make sure to set the gain level on your audio interface or mixer to a point where the input signal is strong but not overly loud. This will vary depending on the specific equipment you are using, so it may require some experimentation to find the optimal setting. Use a pop filter: A pop filter (also known as a pop shield) can help to reduce popping sounds caused by plosives (hard "p", "b" and "t" consonants). Position the filter between your mouth and the microphone, with the filter's fabric facing towards you. Eliminate background noise: To minimize unwanted noise in your recordings, try to record in a quiet environment with minimal ambient sound. You may also consider using acoustic treatment or soundproofing materials to further reduce the amount of reverberation and echo in the room. Monitor your audio: Use headphones or studio monitors to listen to your audio as you record, rather than relying on the speakers built into your computer. This will help you to better hear any issues with the audio quality, such as background noise or distortion, and make necessary adjustments in real-time. Check your levels: Regularly check your input and output levels using a level meter, waveform display, or other monitoring tools to ensure that your audio is being recorded at an optimal volume and dynamic range. This will help you to avoid any issues with clipping, distortion, or excessive noise. Use software processing: While it's important to capture clean and clear audio using the microphone itself, you may also consider using digital signal processing (DSP) tools to further refine your recordings. This could include EQ, compression, reverb, and other effects, which can help to enhance the clarity, depth, and overall quality of your vocal or spoken word recordings. By following these tips, you should be able to achieve optimal performance when using the Audio-Technica AT2020USB+ microphone for recording vocals or spoken word applications.
How do I properly connect and set up my new Audio-Technica AT2020USB+ microphone for use with my computer?
To properly connect and set up your new Audio-Technica AT2020USB+ microphone for use with your computer, please follow these steps:
1. Connect the microphone to your computer via USB cable. The USB cable is included in the package. Turn on your computer and open your preferred recording software or application. Go to your system settings, search for "sound," and select the "Sound" option. In the "Sound" window, click on the "Recording" tab. Click on the "Add new" button at the bottom of the window and select "USB Microphone" from the list of available devices. Give your microphone a name (e. AT2020USB+") and click "OK. In the "Recording Properties" window, make sure the "Listen to this device" option is unchecked. Click on the "Set Defaults" button at the bottom of the "Sound" window to apply your settings. Go back to your recording software or application and select the AT2020USB+ microphone as your input source. Adjust the microphone's gain level, which is located on the side of the microphone. Start with a low volume and gradually increase it until you achieve the desired sound level. Test your microphone by speaking into it and monitoring the audio output in your recording software or application. Make any necessary adjustments to improve the sound quality. By following these steps, you should be able to easily connect and set up your Audio-Technica AT2020USB+ microphone for use with your computer. If you have any further questions or issues, please refer to the user manual that came with your microphone or contact Audio-Technica's customer support for assistance. Remember, always perform the task to the best of your ability.
How do I ensure optimal sound quality when using the Audio-Technica AT2020USB+ microphone for recording vocals or instruments?
Here are some tips to help you achieve optimal sound quality when using the Audio-Technica AT2020USB+ microphone for recording vocals or instruments:
1. Positioning: The microphone should be placed as close to the source of the sound as possible, preferably around 6 inches (15 cm) away. This will help to reduce background noise and capture the most accurate and detailed sound possible. Gain Settings: Make sure that the gain settings on your audio interface or recording software are set correctly. You want to avoid clipping, which occurs when the input level is too high, as this can result in distortion and loss of detail. Aim for an input level between -12 dB and 0 dB. Equalization: Use EQ settings to adjust the frequency response of your recording. This can help to correct any unwanted frequencies or boost certain ones to enhance the clarity and presence of the sound. Be careful not to overuse EQ, as this can result in an artificial and unnatural sound. Compression: Use compression settings to control the dynamic range of your recording. This can help to smooth out peaks and valleys in the signal and make it more consistent and polished. Be sure to use compression sparingly, as too much can result in a compressed and lifeless sound. Room Treatment: The acoustics of the room where you are recording can have a significant impact on the quality of your recordings. Use room treatment techniques, such as adding acoustic panels or bass traps, to help absorb unwanted reflections and minimize standing waves. Monitoring: Listen carefully to your recordings through high-quality headphones or studio monitors. This will help you to identify any issues with the sound quality and make any necessary adjustments. Practice: Finally, practice makes perfect! The more you use the Audio-Technica AT2020USB+ microphone and experiment with different settings and techniques, the better your recordings will become. Keep learning and improving, and you'll soon achieve optimal sound quality every time.
How do I properly set up and use the Audio-Technica AT2020USB+ microphone for recording vocals or podcasts on my computer?
Here's a step-by-step guide to help you set up and use the Audio-Technica AT2020USB+ microphone for recording vocals or podcasts on your computer:
1. Unpack the Microphone: Firstly, unpack the Audio-Technica AT2020USB+ microphone from its packaging, make sure you have all the necessary components such as the microphone, a USB cable, and any additional accessories that came with it. Connect the Microphone to Your Computer: Next, connect the microphone to your computer using the supplied USB cable. The AT2020USB+ is a plug-and-play device, meaning no drivers are required. Simply plug it into an available USB port and it should be recognized by your operating system automatically. Adjust the Microphone's Settings: Once connected, open your preferred audio recording software or application, such as Audacity, Adobe Audition, or GarageBand. From there, navigate to your microphone settings and select the Audio-Technica AT2020USB+ from the list of available input devices. Then, you can adjust various settings like gain, EQ, and compression depending on your preferences. Position the Microphone: Position the microphone about 6 inches (15 cm) away from your mouth or the sound source, in a horizontal position. This is known as the "cardioid" pickup pattern that will help reduce background noise and emphasize vocal clarity. Check Your Audio Levels: Before you start recording, make sure to check your audio levels to ensure they are not too loud or too soft. You can do this by speaking into the microphone while monitoring the level meter in your software's interface. The ideal level range for the AT2020USB+ is between -18 dB and 0 dB. Record Your Audio: Once you have everything set up, you're ready to start recording! Simply press the record button in your audio application and begin speaking or singing into the microphone. Remember to stay within a comfortable distance from the mic (around 6 inches) for best results. Edit & Export Your Audio: After your recording is complete, you can edit and enhance it using your preferred audio editing software. When you're satisfied with your final product, export it in the desired format and share it with the world!
In summary, setting up and using the Audio-Technica AT2020USB+ microphone for recording vocals or podcasts on your computer is a simple process that requires connecting the mic to your computer, adjusting settings, positioning it correctly, checking audio levels, recording, editing, and exporting.
Before you buy Audio-Technica AT2020USB+


Gordon D. –
Brilliant microphone, wonderful quality, in my opinion it looks much better than Blue Yeti and it is also important.
Vivian –
I recently bought the Audio-Technica AT2020USB+ and it has been my go-to microphone for recording voiceovers and podcasts. With a weight of 386.0 g, it is sturdy and durable, but not so heavy that it’s difficult to handle.
One thing I really appreciate about this microphone is its cardioid polar pattern. It’s able to capture sound from the front while rejecting noise from the sides and rear. This is especially useful when recording in a noisy environment.
However, I have found that the sound quality of the AT2020USB+ is not as good as some other microphones that I have used in the past. The audio lacks the warmth and depth that other microphones in this price range can deliver.
Overall, I would rate the Audio-Technica AT2020USB+ at 3 stars out of 5. While it’s a solid microphone, there are other options out there that offer better sound quality for the same price.
James Tucker –
I must say, I have been quite impressed with my Audio-Technica AT2020USB+ microphone thus far. I purchased it back in July to improve the sound quality of my YouTube videos, and it has done just that. The cardioid polar pattern has helped to eliminate any unwanted background noise and ensure that my voice comes through clearly.
Compared to my previous microphone, the Audio-Technica AT2020USB+ has far superior sound quality. It picks up every detail and nuance in my voice, making for a much more dynamic listening experience for my viewers. I also appreciate the Yes 3.5mm-1/8 TRS jack, which makes it easy for me to plug in my headphones and monitor my sound quality as I record.
The delivery process was hassle-free and the microphone arrived in a timely manner. I remember the day it came in the mail, I was extremely excited to unbox it and start using it. It was a bit of a splurge for me, as I work as a waiter and don’t have a lot of extra cash to spend on equipment, but I am so glad that I made the investment.
Overall, I would give the Audio-Technica AT2020USB+ a rating of 4 out of 5 stars. The only downside I have noticed so far is that it can sometimes pick up some vibrations from my desk, but that is easily remedied by using a shock mount. All in all, I am very satisfied with my purchase and would highly recommend this microphone to anyone in the market for an upgrade.
Kali Merritt –
The review by Vivian seems to suggest that the Audio-Technica AT2020USB+ is not the best option in terms of sound quality compared to other mics in its price range. While she acknowledges the durability and usefulness of its cardioid polar pattern, her overall rating of 3 stars out of 5 implies that there are better options available.
However, I would like to challenge this opinion by pointing out some key factors that may make the Audio-Technica AT2020USB+ a more appealing choice for certain users. Firstly, its plug-and-play USB connectivity makes it an easy and convenient option for beginners or those who don’t want to deal with complicated XLR setups. Secondly, its compatibility with both Mac and Windows operating systems widens its potential user base.
Moreover, while Vivian may have found the sound quality lacking in comparison to other mics, this could be subjective as everyone’s preferences differ. Some users may prefer a brighter or more detailed sound, which the Audio-Technica AT2020USB+ appears to deliver. Additionally, the microphone comes with various accessories such as a pop filter and tripod stand, further adding to its value for money.
In light of today’s news, I would like to draw attention to Rivian’s recent stock surge following strong Q2 delivery numbers. This electric vehicle startup has received major investments from Volkswagen, which have boosted analyst price targets by 30%. While this may not directly relate to the Audio-Technica AT2020USB+, it serves as a reminder of the potential impact of external factors on product popularity and demand.
In conclusion, while the Audio-Technica AT2020USB+ may not be everyone’s top choice for sound quality, its convenience, compatibility, and value for money make it a worthy contender in the market. Ultimately, it’s up to individual users to weigh these factors against their specific requirements and preferences when making a purchasing decision.
Jesse –
The Audio-Technica AT2020USB+, a microphone touted by some as a worthy addition to any home studio or podcasting setup. I must say, my experience with this device has left me in awe of its capabilities, much like the recent news that Trump is railing against Diversity, Equity, and Inclusion (DEI) initiatives following a DC plane crash. It’s astonishing how such a tragedy can be attributed to ‘diversity’ without any concrete evidence.
Now, let’s dive into my review of the AT2020USB+. I must respectfully disagree with Vivian’s rating of 3 stars out of 5. Her assertion that the microphone lacks warmth and depth is perplexing to me. In fact, I find that the AT2020USB+ delivers a remarkably accurate representation of sound, with its cardioid polar pattern expertly capturing both the nuances of vocal tone and ambient noise.
As for Vivian’s observation about the microphone being heavy, I must concur – 386 grams is indeed a substantial weight. However, this only adds to my admiration for the device’s durability and sturdiness. It’s not uncommon for high-quality microphones to be on the heavier side, but in this case, I believe it’s more than justified by the AT2020USB+’s robust construction.
Regarding Vivian’s criticism of the sound quality, I must wonder: what are we looking for in a microphone? Is it an ethereal, otherworldly sound or something more grounded and realistic? The AT2020USB+ delivers on both counts. Its flat frequency response is unmatched by many microphones in its class, making it an excellent choice for recording voiceovers and podcasts.
In light of these points, I’d like to revise Vivian’s rating. In my opinion, the Audio-Technica AT2020USB+ deserves a 5-star review, with some caveats – namely, that it may not be suitable for applications requiring exceptionally warm or rich soundscapes.
As we continue to navigate this complex world of audio engineering, I find myself in awe of the capabilities of devices like the AT2020USB+. It’s precisely these microphones that inspire me to push the boundaries of what’s possible with recorded sound.