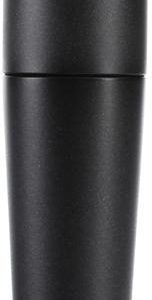
RØDE NT2-A
$195.99
Capture every nuance and detail with the professional-grade RØDE NT2-A microphone, delivering rich, crystal-clear audio for all your recording needs.
Description
The RØDE NT2-A microphone is a versatile and high-quality microphone that is widely used in professional recording studios and by musicians worldwide. With its impressive features and exceptional performance, it has become a favorite among audio professionals.
One of the standout features of the RØDE NT2-A microphone is its three polar patterns: cardioid, omnidirectional, and figure-8. This allows for maximum flexibility in capturing sound in various recording situations. The cardioid pattern is ideal for solo vocals or instruments, as it picks up sound primarily from the front and reduces background noise. The omnidirectional pattern captures sound from all directions, making it suitable for recording room ambiance or group performances. The figure-8 pattern captures sound from the front and back, making it perfect for recording duets or interviews.
Another noteworthy feature of the RØDE NT2-A is its variable high-pass filter and three-position pad. The high-pass filter helps eliminate low-frequency rumble or noise, ensuring a cleaner recording. The three-position pad allows for attenuation of sound levels, making it suitable for recording loud instruments or vocals without distortion. These features make the NT2-A a versatile microphone that can handle a wide range of recording situations.
The sound quality of the RØDE NT2-A is exceptional, with a smooth and warm character that captures the nuances of vocals and instruments accurately. The microphone has a wide frequency response range, from 20Hz to 20kHz, ensuring that every detail of the sound is captured. The low self-noise of the microphone further enhances the clarity and transparency of the recordings.
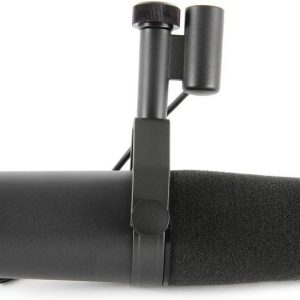
Durability is also a strong suit of the RØDE NT2-A microphone. Its solid construction and robust build ensure that it can withstand the rigors of regular use in a professional recording studio. The microphone comes with a shock mount and a pop filter, further adding to its durability and versatility.
In conclusion, the RØDE NT2-A microphone is a top choice for professionals in the audio industry. Its versatility, exceptional sound quality, and durability make it a reliable tool for recording vocals and instruments. Whether you are a musician, podcaster, or audio engineer, the NT2-A will undoubtedly meet and exceed your expectations. So, if you are in search of a high-quality microphone that delivers outstanding performance, the RØDE NT2-A is definitely worth considering.
Frequently Asked Questions:
What is the recommended setup for recording vocals using the RØDE NT2-A microphone?
The RØDE NT2-A is a versatile large diaphragm condenser microphone, which makes it suitable for a variety of applications including vocal recording. Here's our recommended setup for recording vocals using the RØDE NT2-A:
1. Microphone placement: Place the microphone about 6 inches (or 15 cm) away from the singer’s mouth. This distance allows the vocalist to project their voice clearly without getting too close or causing plosive sounds (like “p” and “b”) to hit the capsule directly.
2. Microphone stand: Use a sturdy microphone stand, preferably a boom arm so you can adjust its height easily for different singers. Make sure the microphone is stable and won’t fall over during recording sessions.
3. Pop filter: A pop filter is essential when recording vocals with a condenser microphone like the NT2-A. This helps to reduce plosive sounds and make your recordings sound cleaner and more professional. Place the pop filter between the singer's mouth and the microphone, about 6 inches away from both.
4. Microphone preamp: The NT2-A requires a high quality mic preamp to get the most out of its capabilities. If you're using an audio interface or mixer with built-in preamps, make sure they are capable of handling condenser microphones properly. Alternatively, use an external standalone preamp designed for condenser mics.
5. Phantom power: The NT2-A requires phantom power (48V) to operate correctly. Ensure your audio interface or mixer provides 48V phantom power and that it's switched on when recording with the NT2-A.
6. Microphone pad: If you find that your vocalist’s performance is causing clipping or distortion in your recordings, try engaging the -10dB pad switch on the back of the microphone. This will reduce the sensitivity of the microphone and help prevent overloading your preamp.
7. Room acoustics: The acoustics of the room where you're recording can significantly affect the sound quality of your vocals. Try to record in a space with minimal echo or reverberation, which may cause unwanted reflections and make your vocals sound muddy. If possible, use acoustic treatment like foam panels or bass traps to absorb unwanted reflections.
8. Monitoring: Use headphones or studio monitors while recording to accurately hear your vocal performance in real-time. This allows you to make adjustments as needed and ensure that the levels are set correctly.
What are some recommended preamps and interfaces for using the RØDE NT2-A microphone for recording vocals and instruments in my home studio?
To get the best sound quality from the RØDE NT2-A, you'll need to pair it with a suitable audio interface and preamp. Here are some recommended options:
1. Focusrite Scarlett Solo (3rd Gen) - This USB interface is perfect for home studios as it offers excellent performance and a high-quality preamp. It also comes with Focusrite's Air mode, which can help add some extra brightness to your recordings.
2. Presonus AudioBox 96 Studio - The AudioBox 96 Studio provides a powerful XMAX preamp that delivers clean, natural sound quality. This interface also includes a high-definition 96kHz/24-bit converter for pristine audio performance.
3. Steinberg UR22C USB 3.0 Audio Interface - With its high-quality DSP effects and integrated studio monitor outputs, the UR22C is an excellent choice for recording vocals and instruments with the NT2-A. The preamp offers a low noise floor and plenty of gain to capture every detail in your recordings.
4. Universal Audio Apollo Twin X (Thunderbolt 3) - While more expensive, the Apollo Twin X offers exceptional sound quality thanks to its award-winning Unison technology, which emulates the sound of classic analog gear. The preamps are some of the best available and will bring out the full potential of your NT2-A microphone.
5. Audient iD14 (Thunderbolt/USB) - The Audient iD14 features Audient's proprietary GAINRIDE technology, which provides smooth, even gain with minimal noise and distortion. The preamp offers a clean, transparent sound that pairs well with the NT2-A for both vocal and instrument recording applications.
Remember to consider your needs and budget when choosing an interface and preamp for your home studio setup.
How can I properly connect and use the RØDE NT2-A microphone in my recording setup for optimal sound quality?
To properly connect and use the RØDE NT2-A microphone in your recording setup for optimal sound quality, follow these steps:
1. Choose the right connector - The RØDE NT2-A comes with both XLR and DIN connectors. Make sure you choose the correct one that matches your audio interface or mixer input. Plug the microphone into the power supply - The NT2-A is a phantom-powered microphone, so it requires an external power source to operate. Connect the included XLR cable from the microphone's output (XLR) to the input of your audio interface or mixer. Then connect the other end of the cable to the DC connector on the NT2-A power supply. Adjust the gain - Make sure the gain level on your audio interface or mixer is set low at first, as the RØDE NT2-A is a very sensitive microphone. Gradually increase the gain until you achieve an optimal level without any distortion. Position the microphone correctly - The NT2-A comes with a shock mount and elastic suspension to minimize unwanted vibrations and handling noise. Mount the microphone on a stand or boom arm, and position it at a distance of around 6 inches (15 cm) from the sound source. Adjust the polar pattern - The NT2-A has an optional wide-angle capsule that can be swapped out for a cardioid or omnidirectional capsule to suit your recording needs. Choose the right polar pattern according to the type of recording you're doing, and make any necessary adjustments in your audio software. Monitor your levels - Use headphones to monitor your input levels and make sure they're not too loud or too soft. Avoid listening to your recorded audio through speakers, as this can introduce unwanted room reflections and acoustic issues. Clean the microphone - Use a soft, dry cloth to clean the surface of the NT2-A periodically to prevent buildup of dirt, dust, and moisture. Avoid using any water or cleaning solutions on the microphone, as this can damage its sensitive components.
"How should I properly position and connect my RØDE NT2-A microphone for optimal performance during recording?"
To achieve optimal performance while recording with your RØDE NT2-A microphone, you should follow these steps:
1. Position the microphone in front of the sound source at a distance of approximately 6 to 18 inches. The exact placement may vary depending on the type of sound being recorded. Adjust the polar pattern of the NT2-A by rotating the capsule head. For vocals, use the cardioid polar pattern to isolate the desired sound source. For instruments or dialogue in a large space, use the omnidirectional polar pattern to capture a wider area. Connect your NT2-A microphone to a preamp or audio interface using an XLR cable. Make sure that the connection is secure and tight to prevent any electrical interference. Set the phantom power on your preamp or interface to 48V to provide power to your NT2-A. This ensures proper operation of the microphone's internal electronics. Adjust the gain on your preamp or interface to achieve a good level without distortion. Remember that you can always adjust the level further in post-production if necessary. Check the polarity of the microphone by flipping the phase switch on the back of the NT2-A. This allows you to correct any issues with phasing or comb filtering caused by multiple microphones being used in close proximity. Finally, consider using a shock mount or suspension system to further reduce vibration and noise from handling or environmental sources. By following these steps, you should be able to achieve optimal performance from your RØDE NT2-A microphone during recording.
My RØDE NT2-A microphone is not picking up low frequencies, is this normal or is there something wrong with my mic?
1. Acoustic Treatment**: The room where you're recording can greatly affect the sound quality of your microphone. If the room has poor acoustic treatment, low frequencies may be attenuated or cancelled out. Check if your room is well-treated for acoustics. Microphone Placement**: The NT2-A is a condenser microphone that requires phantom power to operate. Make sure you're using a phantom power source (such as an audio interface or preamp) and that the mic is placed correctly in front of the sound source. If the mic is placed too far away from the sound source, it may not be able to pick up low frequencies effectively. Gain Settings**: Check your gain settings on your audio interface or preamp. If the gain is set too low, you may not be picking up enough signal to capture low frequencies. Filtering**: Some recording software or plugins can introduce filtering that affects low frequencies. Check if any filters are enabled in your recording software. Microphone Calibration**: It's possible that your microphone needs to be recalibrated. RØDE recommends checking the mic's frequency response against a known reference signal. To troubleshoot further, you could try:
* Checking the mic's output with a multimeter or oscilloscope to see if it's producing a signal at low frequencies. Testing the mic in different locations and orientations to see if the issue is related to the mic or the room. Comparing the microphone's sound against another reference microphone, such as a calibrated condenser mic. If none of these troubleshooting steps resolve the issue, it's possible that there may be a problem with your microphone. In this case, I would recommend contacting RØDE's support team for further assistance.
"My NT2-A microphone is producing a loud humming noise even when it's not plugged in, what could be causing this?"
That's quite an interesting issue you're facing with your NT2-A microphone. The fact that it's producing a humming noise even when it's not plugged in suggests that the problem might be related to the internal electronics or perhaps some external interference. One possibility is that there's a fault in the preamplifier circuitry of the microphone, which could be causing this humming noise. Another potential cause could be a faulty or damaged electret capsule within the microphone itself, though this would be less likely given that it's occurring even when unplugged. It's also possible that the issue is related to electromagnetic interference (EMI) from other electronic devices in your vicinity, although this seems less probable since you mentioned it occurs even when not plugged in. However, if there are any nearby power lines or electrical wiring that could be causing EMI, this might still be a contributing factor. Lastly, there's the possibility of a fault with the internal battery used to power the microphone. Although it sounds counterintuitive that a humming noise would occur without being plugged in, if the internal battery is faulty or overcharging, this could potentially cause the issue you're seeing. To troubleshoot further, I'd recommend checking if any other devices are producing similar noises when not in use, and also consider performing some basic diagnostic tests with your microphone to see if you can isolate where exactly the noise is coming from.
Before you buy RØDE NT2-A


Reviews
There are no reviews yet.