Rode Podmic USB
$143.99
Experience professional-grade audio quality and effortless recording with the Rode Podmic USB microphone – your perfect companion for podcasts, streaming, and voiceovers.
Description
The Rode Podmic USB microphone is a versatile and high-quality microphone designed for podcasting, streaming, and other content creation needs. With its sleek design and exceptional audio performance, this microphone has quickly become a favorite among professionals and beginners alike.
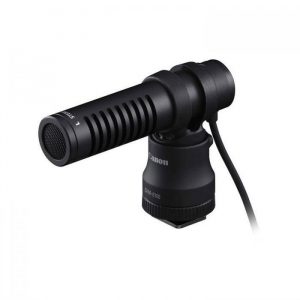
One of the standout features of the Rode Podmic USB microphone is its excellent sound quality. It is equipped with a dynamic cardioid capsule that delivers clear and crisp audio, capturing every detail of your voice. Whether you are recording vocals, interviews, or voiceovers, this microphone ensures professional-grade sound.
The microphone also features an integrated pop filter that minimizes plosive sounds and reduces unwanted background noise. This allows for a cleaner and more polished recording, saving you time and effort in post-production. Additionally, the robust build of the microphone ensures durability and longevity, making it a reliable choice for content creators.
Setting up the Rode Podmic USB microphone is a breeze. It connects directly to your computer via USB, eliminating the need for additional audio interfaces or complicated setup processes. This makes it a user-friendly option, particularly for those new to recording or podcasting. It is compatible with Mac and Windows operating systems, making it accessible to a wide range of users.
The Rode Podmic USB microphone also offers great flexibility in terms of adjustment and customization. It features a built-in headphone output, allowing for real-time monitoring of your recordings. This is especially useful when recording podcasts or livestreams, as it allows you to hear yourself and make any necessary adjustments on the fly.
Furthermore, the microphone has an adjustable head and sturdy base, allowing you to position it according to your preference. Whether you prefer a traditional desktop setup or a boom arm configuration, the Rode Podmic USB microphone can easily accommodate your needs.
Another notable feature of the Rode Podmic USB microphone is its value for money. Despite its professional-grade performance, this microphone is priced competitively, making it accessible to those on a budget. With its exceptional sound quality and user-friendly design, it offers excellent value for its price point.
In conclusion, the Rode Podmic USB microphone is an outstanding choice for content creators looking for a reliable, high-quality microphone. With its exceptional sound quality, user-friendly design, and affordable price, this microphone is a great investment for podcasters, streamers, and other content creators. Whether you are a professional or a beginner, the Rode Podmic USB microphone has everything you need to produce professional-grade audio recordings.
Frequently Asked Questions:
What is the recommended microphone gain setting for using a Rode PodMic USB with my computer?
The recommended mic gain setting for using a Rode PodMic USB microphone with your computer depends on the specific recording software or platform you're using. Here are general guidelines:
1. **Windows 10**: Open the Sound settings by searching "Sound" in the search bar. Click on "Manage sound devices," then select your PodMic USB microphone and click "Device properties." Under the Enhancements tab, make sure Noise Suppression is turned off.
2. **Mac**: Open System Preferences > Sound > Input. Choose "Rode PodMic USB" as the input source. In the same window, adjust the Input volume slider to a level that's neither too high nor too low. You might need to experiment with different levels depending on your setup and environment.
3. **Recording Software**: Each software may have its own settings for microphone gain or input volume. Make sure you adjust the gain in both Windows/Mac system settings as well as your specific recording software for optimal sound quality.
Remember, it's essential to monitor your audio levels during recording to avoid distortion and ensure you capture clean audio. It's also recommended to use a pop filter or windscreen to minimize plosive sounds and sibilance.
How do I ensure optimal sound quality when using my Rode PodMic USB microphone for podcasting?
Proper Gain Settings - To ensure optimal sound quality, make sure to adjust the gain settings on your computer or recording software correctly. The gain should be set high enough to capture a clear and loud signal without any distortion or background noise. Close-up Microphone Placement - Position the microphone close to your mouth (around 1 inch or less) to minimize background noise and maximize vocal clarity. Pop Filter Usage - Use a pop filter to prevent plosive sounds like 'p' and 'b' from causing popping noises and ruining audio quality. This will help keep the sound clean and clear. Avoid Background Noise - Try to minimize background noise by finding a quiet place to record, such as a closet or a room with minimal traffic. Proper Microphone Technique - Speak directly into the microphone and avoid speaking too far away from it to ensure optimal sound quality. Proper Microphone Positioning - Make sure that the microphone is positioned at an appropriate angle towards your mouth, such as straight ahead or slightly tilted upwards for better vocal clarity. Use a Shock Mount - To reduce vibration and handling noise, use a shock mount to securely hold the microphone in place while you record. Keep Software Up-to-Date - Make sure that your computer's operating system and recording software are up-to-date as it may affect the sound quality and performance of your Rode PodMic USB microphone.
How do I ensure proper connectivity and setup of my Rode PodMic USB microphone for use with my computer or laptop?
To ensure proper connectivity and setup of your Rode PodMic USB microphone, follow these steps:
1. Connect the PodMic to your computer or laptop using the provided USB cable. The PodMic is a plug-and-play device, so no additional drivers are required for Windows or Mac OS X. Adjust the microphone gain by twisting the chromed section on the top of the microphone. For optimal results, we recommend setting the gain at around 75% of its maximum position. Check the microphone's status in your operating system's sound settings. On Windows, open the Control Panel and select Sound. Click on the Recording tab and ensure that the PodMic is selected as the default recording device. On Mac OS X, open System Preferences and select Sound. Click on the Input tab and select the PodMic as the default input device. To further customize your microphone's settings, download and install Rode's Studio Dashboard software from their website. This will allow you to adjust various parameters such as the microphone's frequency response, pad, and high-pass filter settings. For best results, we recommend using a pop filter and shock mount with your PodMic to minimize unwanted noise and plosives during recording. Finally, ensure that your computer or laptop meets the system requirements for using the PodMic, as outlined by Rode on their website. This includes having a USB port, meeting the minimum operating system version requirements, and ensuring that any other USB devices are not sharing bandwidth with the PodMic.
How do I properly connect and configure my Rode PodMic USB microphone for use with my computer?
Firstly, ensure that you have the necessary equipment. You will need a Rode PodMic USB microphone, a USB cable (included in the package), and a computer with an available USB port. Connect one end of the USB cable to the bottom of the Rode PodMic and then connect the other end to your computer's USB port. The LED light on the front of the PodMic will turn on, indicating that it is powered and ready for use. Go to your computer's control panel and select the "Sound" or "Audio" option. Within this menu, select the "Recording" tab. You should see the Rode PodMic listed as an available input device. Click on it to open its properties dialog box. In the properties dialog box, make sure that the "Listen to this device" and "Speakers (Realtek High Definition Audio)" options are both selected. This will ensure that you can hear any audio being played through your computer's speakers while also allowing your PodMic to pick up your voice for recording or speaking purposes. You may also want to adjust the microphone's gain settings. The PodMic comes with a -15dB pad switch, which can help reduce background noise and prevent overloading in high-volume environments. To access this feature, flip the small switch on the bottom of the microphone (located near where it connects to the USB cable). This will engage the pad switch, reducing the sensitivity of the mic by 15dB. If desired, you can also adjust the microphone's output level using the volume control knob located on the front of the PodMic. This allows you to fine-tune the input levels for your specific recording or speaking needs. Finally, test your connection by speaking into the microphone and listening to the audio through your computer's speakers. Adjust the settings as needed until you achieve the desired sound quality and volume level.
The left channel on my Rode Podmic USB is not working, but the right one is fine. Is this a hardware or software issue and how can I fix it?
Ensure that all cables are securely connected to both ends. Verify that the left channel's XLR (or TRS) cable is properly plugged into the right port on the Rode Podmic USB. Try swapping the XLR cables between the left and right ports to see if the issue follows the cable. Audio software settings**: Check your digital audio workstation (DAW) or recording software settings. Ensure that the correct input and output channels are selected for the left channel. Sometimes, a simple misconfiguration can cause issues. Rode Podmic USB driver updates**: Visit Rode's website to check if there are any updated drivers available for your Podmic USB. Outdated drivers might be causing compatibility issues. Disable and re-enable the audio interface**: In some cases, disabling and re-enabling the audio interface can resolve issues like this. If none of these steps resolve the issue, it's possible that there's a hardware problem with the left channel on your Rode Podmic USB. Here are a few potential causes:
* **Faulty XLR connector or cable**: The XLR connector or cable might be damaged. Try replacing the XLR cable and connector to see if it resolves the issue. Faulty audio circuitry**: There could be an internal fault within the Rode Podmic USB's left channel audio circuitry. In this case, you may need to contact Rode support for further assistance or consider returning the device for a replacement. Interference from other devices**: Other nearby electronic devices might be interfering with your Rode Podmic USB's signal. Try moving it away from these devices and see if that resolves the issue. If none of these steps resolve the issue, I would recommend contacting Rode support directly for further assistance. They may be able to diagnose the problem remotely or provide guidance on how to proceed.
My audio signal is being distorted, what's causing this issue and how do I resolve it?
Distorted audio signals can be frustrating to deal with! There are several possible causes for this issue, so let's go through them step by step. Firstly, have you checked the physical connections between your audio source (e. Loose or damaged cables can cause distortion, so ensure that all connections are secure and not worn out. Next, let's consider the gain settings. If the gain is set too high on your audio source or preamp, it can lead to distorted signals. Check if the gain levels are correctly adjusted for your specific setup. You may need to reduce the gain to a more suitable level. Another common cause of distortion is electrical interference (EMI) from nearby devices. Are there any other electronic equipment or power sources in close proximity that could be causing interference? Try moving your audio source away from potential sources of EMI and see if it resolves the issue. Now, let's talk about the device receiving the signal. Is the input gain on the mixer, amplifier, or recording equipment set correctly? If the input gain is too high, it can cause distortion. Check the manual for guidance on adjusting the input gain. Another possibility is that your audio source is not designed to handle the level of signal being sent to it. For example, if you're using a microphone with a low dynamic range (the difference between the loudest and quietest signals), it may become distorted when dealing with high-level signals. In this case, consider using an external preamp or attenuator to reduce the signal level before sending it to your audio source. Finally, let's not forget about software-related issues! If you're working on a digital audio workstation (DAW) like Ableton or Logic Pro, check if there are any settings or plugins that could be causing distortion. Try disabling plugins and adjusting DAW settings to see if it resolves the issue. If none of these steps resolve the issue, it's possible that there's a hardware problem with your audio source or receiving device. In this case, you may need to consult the manual or contact customer support for further assistance.
Before you buy Rode Podmic USB


Reviews
There are no reviews yet.