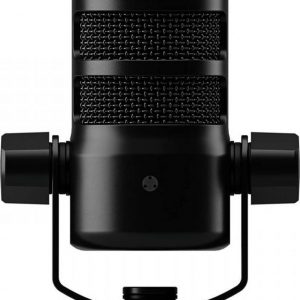
RØDE PSA1+
$89.99
Upgrade your audio game with the RØDE PSA1+ microphone, delivering professional-grade sound quality and unparalleled versatility for all your recording needs.
Description
The RØDE PSA1+ microphone is a versatile and high-quality microphone stand that is designed for professional audio recording. Whether you are a podcaster, streamer, voice actor, or musician, this microphone stand is an excellent addition to your setup.
One of the standout features of the RØDE PSA1+ is its robust build quality. Made from durable steel, this microphone stand is built to last. It can support microphones weighing up to 2.4 pounds, making it suitable for a wide range of microphone models. The stand also features a 360-degree rotation and a 33-inch reach, providing you with ample flexibility to position your microphone exactly where you need it.
The PSA1+ is incredibly easy to set up and use. It comes with a desk clamp that can be quickly attached to any desk or table, allowing you to mount the stand securely. Additionally, the stand has three cable management clips that keep your microphone cable tidy and prevent any unwanted tangling or tripping hazards.
One of the most notable features of the PSA1+ is its ability to reduce noise and vibrations. The stand employs internal springs that isolate the microphone from any surface vibrations, providing a clean and clear audio recording. This feature is particularly useful for podcasters and streamers who want to eliminate any unwanted background noise.
Another impressive feature of the PSA1+ is its compatibility with a range of microphones. The stand features a standard 3/8-inch thread mount, which is compatible with most microphone models. This allows you to easily attach your preferred microphone to the stand without the need for additional adapters or accessories.
The PSA1+ also offers excellent adjustability options. It has two points of articulation, allowing you to adjust the height and angle of the microphone with ease. This flexibility ensures that you can find the perfect positioning for optimal sound capture.
In terms of aesthetics, the RØDE PSA1+ exudes a sleek and professional look. Its black finish and minimalist design make it a visually appealing addition to any studio or workspace. Moreover, the stand’s compact design and foldable arms make it easy to store and transport when not in use.
Overall, the RØDE PSA1+ microphone stand is an exceptional product for anyone seeking a reliable and versatile solution for audio recording. Its robust build quality, noise reduction capabilities, and compatibility with various microphones make it a valuable asset for professionals and enthusiasts alike. With its ease of use and adjustability options, this stand is sure to enhance your recording experience and help you achieve professional-grade audio results.
Frequently Asked Questions:
How do I properly adjust and use the RØDE PSA1+ arm for optimal microphone placement during recordings?
Adjusting and using the RØDE PSA1+ arm for optimal microphone placement during recordings involves a few simple steps:
1. Mount the PSA1+ arm on a mic stand or mounting plate. Ensure that it is securely fastened and level to prevent any wobbling during use. Attach your chosen RØDE microphone to the top of the PSA1+ arm using its threaded connector. Make sure the microphone is tightly secured, so it doesn't fall off during use. Adjust the length and angle of the arm as needed for your recording setup. You can extend the arm fully to reach farther distances or adjust it to a more compact size to save space on your desk or stage. The PSA1+ allows for smooth, fluid movement to help you position your microphone exactly where you need it. When positioning your microphone, consider the angle of the sound source relative to the microphone. Generally, aim the microphone directly at the sound source for optimal results. If necessary, adjust the arm's tilt or rotation to point the microphone in the correct direction. To further refine your placement, you may want to use a pop filter or windscreen to reduce plosives (popping sounds) and improve clarity. Once you have found the optimal position for your microphone, make sure it is securely fastened in place. This will help prevent any unwanted movements during recording that could cause unwanted background noise or distortion. Finally, test your setup to ensure that everything sounds clear and accurate. Adjust as necessary until you achieve the desired sound quality for your recordings.
"How do I properly set up and calibrate the RØDE PSA1+ studio microphone for optimal performance?"
To ensure optimal performance of your RØDE PSA1+ studio microphone, here is a step-by-step guide on how to set it up and calibrate it:
Step 1: Unpack the Microphone
Carefully unpack the microphone from its packaging. Make sure all the components are present, including the boom arm, microphone head, desk clamp, and allen key. Step 2: Assemble the Boom Arm
Attach the boom arm to your desk or studio surface using the desk clamp. Tighten the screws securely to prevent any wobbling. Step 3: Install the Microphone Head
Attach the microphone head to the end of the boom arm. Use the allen key provided to tighten the screws holding the microphone head in place. Make sure it is secured firmly but not overtightened, as this could damage the threads on the boom arm. Step 4: Connect the Cable
Connect the XLR cable from your audio interface or mixer to the microphone's output port at the base of the boom arm. Be careful not to pull or strain the cable excessively, as this could damage both the cable and the connector. Step 5: Calibrate the Microphone
Before using the microphone, it is essential to calibrate it for optimal performance. To do this, follow these steps:
a) Position the microphone in front of your voice source at a distance of around 10-15 cm (4-6 inches). Speak into the microphone at a normal volume level. Adjust the gain on your audio interface or mixer until the signal level is around -18 dBFS to -12 dBFS, depending on your recording software's input requirements. Check that the microphone is picking up your voice clearly and evenly across the frequency spectrum. If necessary, adjust the position of the microphone or use a pop filter to reduce plosives (the harsh "p" sounds). Test the microphone's sensitivity by recording some speech or music and listening back to ensure that the audio is clear and free from distortion or unwanted noise. By following these steps, you can ensure that your RØDE PSA1+ studio microphone is set up and calibrated correctly for optimal performance, producing high-quality recordings every time.
How do I properly install and set up my new RØDE PSA1+ microphone arm for use in a studio environment?
The installation process for your new RØDE PSA1+ microphone arm is straightforward and can be completed in a few simple steps. Before getting started, ensure that you have all the necessary tools and components required for assembly. These include the main arm section, clamp plate, mounting bracket, screws, washers, and the Allen key provided with your PSA1+ kit. Step 1: Choose a location
Decide where you want to install the microphone arm in your studio. The RØDE PSA1+ is designed for use on flat surfaces such as desks, tables, or shelves. Make sure that the surface can support the weight of the arm and the microphone. Once you've selected a suitable location, clean the area thoroughly to ensure a secure and stable mounting. Step 2: Attach the clamp plate
Begin by attaching the clamp plate to your chosen location using the mounting bracket, screws, and washers. The plate should be level and centered for optimal placement. Make sure that the surface is sturdy enough to hold the weight of the arm and microphone. Step 3: Install the main arm section
Next, install the main arm section onto the clamp plate using the Allen key provided. Ensure that the arm is securely fastened and level. The RØDE PSA1+ can be adjusted to various heights and angles, so take some time to experiment with different positions until you find the one that works best for your needs. Step 4: Attach the microphone
Now it's time to attach your chosen microphone to the arm. Depending on the type of microphone you're using, you may need to use an adapter or mounting bracket to ensure a secure fit. Make sure that the microphone is positioned in a way that allows for clear and consistent audio recording. Step 5: Adjust and fine-tune
The RØDE PSA1+ is designed with flexibility and versatility in mind, so take some time to adjust and fine-tune your setup to suit your specific needs. This may include adjusting the height, angle, or position of the arm and microphone for optimal recording conditions. You can also use the RØDE PSA1+'s integrated spring system to fine-tune the tension of the arm and ensure a stable and secure mounting. Overall, installing and setting up your new RØDE PSA1+ microphone arm is a straightforward process that can be completed in just a few simple steps. By following these instructions carefully, you'll be able to enjoy all the benefits of this versatile and flexible studio accessory for years to come.
How do I properly adjust the height and distance of my RØDE PSA1+ microphone for optimal recording conditions?
To adjust the height of your RØDE PSA1+ microphone, follow these steps:
1. Make sure the boom arm is locked in place using the knob located at the base of the arm. Gently push down on the microphone to release it from the shock mount. Adjust the height of the microphone by moving it up or down along the boom arm until it is positioned at the correct height for your needs. Once you have found the desired height, gently press the microphone back into the shock mount. Check that the microphone is still locked in place using the knob located at the base of the arm. To adjust the distance of your RØDE PSA1+ microphone, follow these steps:
1. Make sure the boom arm is locked in place using the knob located at the base of the arm. Gently push down on the microphone to release it from the shock mount. Move the microphone closer or farther away from your sound source until you achieve optimal recording conditions. Once you have found the desired distance, gently press the microphone back into the shock mount. Check that the microphone is still locked in place using the knob located at the base of the arm. Remember to always perform the task to the best of your ability and take care not to accidentally knock over or damage the microphone during these adjustments.
How do I prevent pops and plosives when recording vocals using the RØDE PSA1+?
1. Use a pop filter**: A good quality pop filter can make all the difference. The RØDE PSA1+ comes with a built-in windscreen, but if you're recording in a studio or prefer more control over your sound, consider investing in an external pop filter. These usually consist of a mesh or metal screen that's placed between 6-12 inches (15-30 cm) in front of the microphone. Positioning**: Experiment with different mic positions to find one that minimizes pops and plosives. Try placing the microphone slightly off-axis, either at an angle or about 3-4 inches (7-10 cm) away from the vocalist's mouth. This can help diffuse the sound waves and reduce the intensity of P's and B's. Windscreen**: As mentioned earlier, the RØDE PSA1+ comes with a built-in windscreen. If you're not using an external pop filter, make sure to use this windscreen as it will still provide some level of protection against pops and plosives. Recording technique**: Encourage your vocalist to speak or sing in a more relaxed manner, avoiding sudden bursts of air when pronouncing P's and B's. You can also try asking them to "blow" into the microphone more gently, rather than pushing air out with their lips. Acoustic treatment**: If you're recording in a room, consider acoustic treatment such as absorption panels or diffusers. These can help reduce echo and reverberation, which can exacerbate pops and plosives. Gain staging**: Make sure your gain settings are optimal for the vocalist's dynamic range. If the signal is too hot, it can lead to more pronounced pops and plosives. By implementing these techniques, you should be able to minimize pops and plosives when recording vocals with the RØDE PSA1+.
I'm experiencing some static noise on my recordings, I've checked the cables and connections but can't seem to find the issue. How do I troubleshoot this further?
Static noise on recordings can be frustrating, especially when you're not sure where it's coming from. First, let's rule out a few more obvious culprits. Have you tried using a different set of cables or connections? Sometimes, faulty or worn-out cables can cause electrical interference that manifests as static noise. If you've already checked the cables and connections, the next step would be to inspect your recording equipment for any signs of physical damage. Loose screws, damaged circuit boards, or broken components can all contribute to electrical noise. Check for any signs of wear and tear on your preamp, mixer, or other gear that might be contributing to the problem. Another possibility is electromagnetic interference (EMI) from nearby devices. Have you got any other electronics in the vicinity that could be causing interference? Fluorescent lights, computers, and even cell phones can all emit electromagnetic fields that can interfere with your recordings. To troubleshoot further, you could try using a noise reduction plugin or software to see if it makes a difference. These plugins can help remove or reduce background noise from your recordings. You might also want to record some test signals or tones to see if the static noise is consistent across all frequencies. If none of these steps resolve the issue, you might need to take a closer look at your recording environment itself. Are there any sources of electrical interference nearby? Power lines, motors, or other electronic devices can all contribute to EMI and static noise. Lastly, consider using a noise-reducing accessory like a pop filter or windscreen to see if it makes a difference. These can help reduce the impact of external noise on your recordings.
My microphone is picking up a lot of background noise, even when I'm in a quiet room. Is there something wrong with it or is this a normal issue with the PSA1+?
1. Poor placement of the microphone: If the microphone is not placed correctly, it may pick up more ambient noise than necessary. Sensitive microphone design: Some microphones are more sensitive to background noise than others. Quality of the microphone: Unfortunately, some microphones may be prone to picking up background noise due to their design or construction. The PSA1+ is a popular and highly-regarded USB microphone, but like any electronic device, it's not immune to issues. However, based on user reviews and feedback, it seems that the PSA1+ generally performs well in quiet environments. To troubleshoot the issue, I would recommend trying a few things:
1. Check your surroundings: Move away from any potential sources of EMI or background noise. Adjust the microphone placement: Experiment with different placements to see if you can reduce the background noise. Use a pop filter: A pop filter can help reduce plosive sounds (such as "p" and "t") and other types of background noise. Try a different audio interface or recording software: Sometimes, issues can be due to compatibility problems between your microphone and audio interface or recording software. If none of these troubleshooting steps resolve the issue, it's possible that there may be a problem with your microphone itself. However, based on the information provided, it's also possible that the issue is more related to your environment or setup rather than the microphone itself.
Before you buy RØDE PSA1+


Paislee –
I’m also a nurse living in Wakefield, and I can attest to the importance of clear communication in our daily work. The RØDE PSA1+ seems like an excellent microphone for enhancing speech clarity, especially in noisy environments. Its affordability is also a major plus compared to other premium brands.
I recently purchased this microphone myself and have been impressed with its sound quality and flexibility. It’s true that the Wakefield accent can be challenging for outsiders to understand, but the RØDE PSA1+ has made a significant difference in my communication with patients and colleagues alike.
As someone who also values clear communication, I highly recommend this microphone for anyone looking for an affordable yet high-quality option. Whether you’re working from home or attending online classes, the RØDE PSA1+ is versatile and compatible with various devices.
Regarding the news article, it’s unfortunate to hear about the widow’s struggle with her ex-husband’s contradictory will. It serves as a reminder that we must always be prepared for the worst and fight for what is rightfully ours. Let us show our support for this widow and others in similar situations by spreading awareness and advocating for justice.
In closing, I would like to thank the author of the product review for their insightful recommendation and encourage others to consider the RØDE PSA1+ as well. Together, let’s strive for clear communication, resilience, and justice in our daily lives! #ClearCommunication #Resilience #JusticeForAll #RØDEPSA1PlusReview #WakefieldNursesUnite.