Rode Wireless ME

$103.99

Experience crystal clear audio with the Rode Wireless ME microphone, delivering professional-grade sound quality for your voice recordings and performances.

SKU: 6411137066 Category: Tags: ,

Description

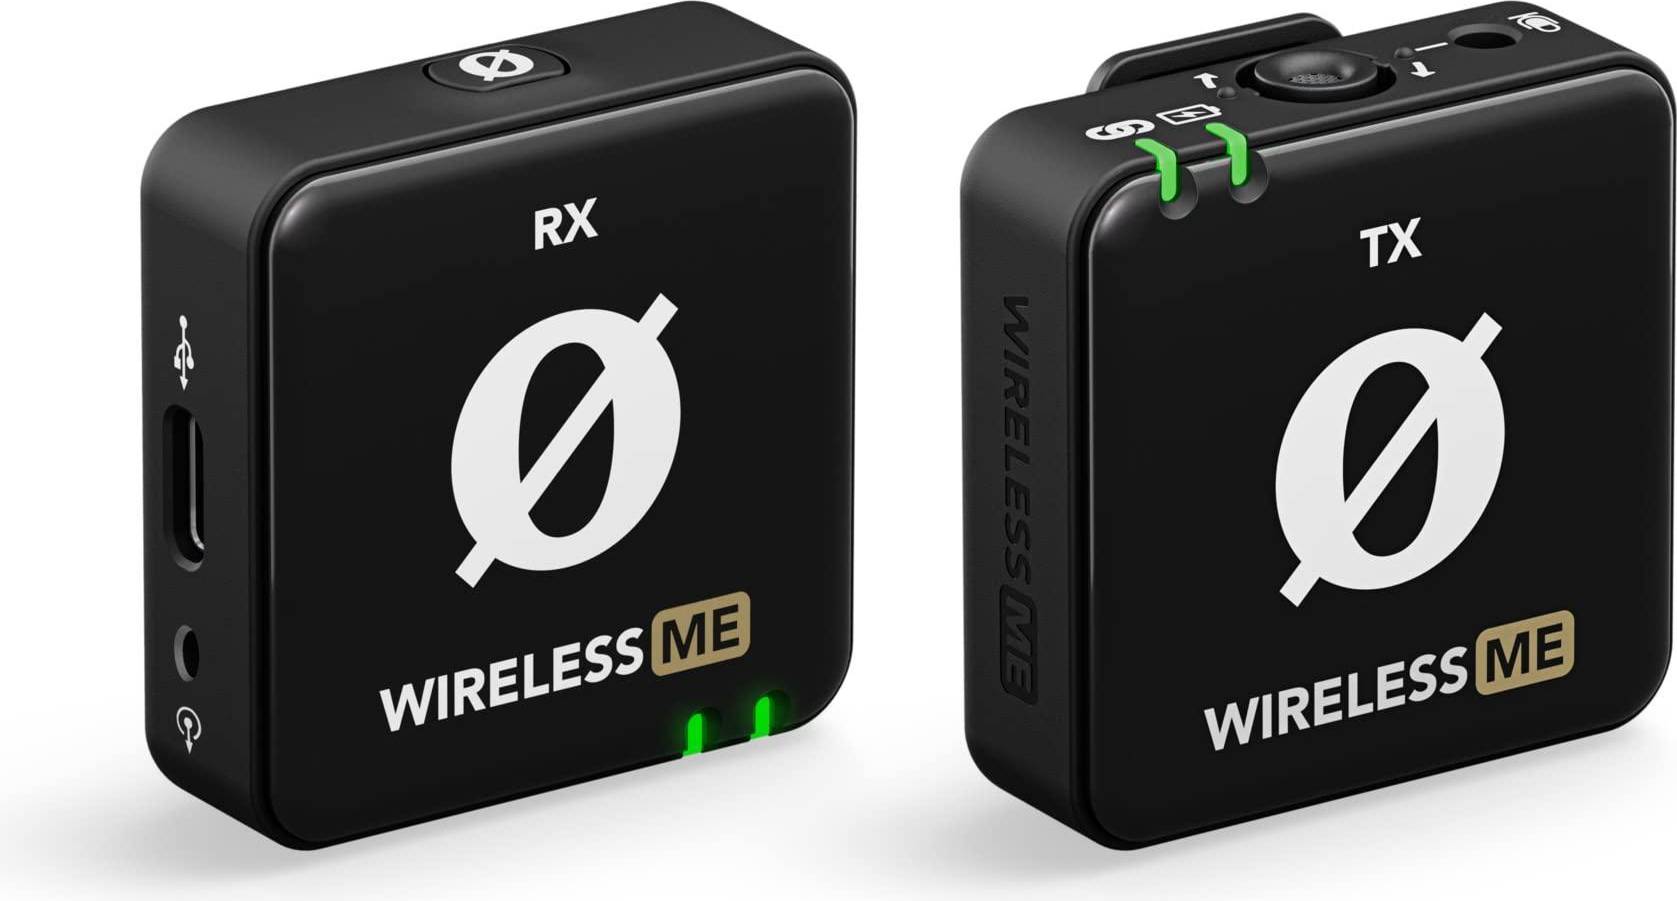
The Rode Wireless ME microphone is a revolutionary audio device that offers professional-grade sound quality and versatility for a wide range of applications. Whether you are a content creator, filmmaker, journalist, or musician, this wireless microphone system can greatly enhance your audio recording experience.

One of the standout features of the Rode Wireless ME microphone is its compact and lightweight design. The transmitter and receiver units are both small enough to fit in the palm of your hand, making them incredibly portable and easy to set up. This is particularly useful for on-the-go recordings or when working in tight spaces.

Despite its small size, the Rode Wireless ME microphone delivers exceptional audio quality. It features a high-quality condenser microphone capsule that captures every nuance of your voice or instrument with pristine clarity. The microphone also has a wide frequency response range, ensuring that you capture all the details in your audio recordings.

The Rode Wireless ME microphone operates on a secure digital transmission, which means you can expect reliable and interference-free audio. It has a range of up to 100 meters, allowing you to move around freely without worrying about losing the signal. This is especially useful for videographers and filmmakers who need to capture audio from a distance.

Another notable feature of the Rode Wireless ME microphone is its flexibility. It offers multiple output options, including a 3.5mm TRS output, a USB-C output, and a headphone output. This allows you to connect the microphone to a wide range of devices, such as cameras, smartphones, computers, and audio recorders. You can also monitor your audio in real-time using the built-in headphone output, ensuring that you are getting the desired sound.

Setting up the Rode Wireless ME microphone is a breeze. The transmitter and receiver units automatically pair with each other, eliminating the need for complicated syncing processes. The microphone also has a convenient OLED display that provides essential information, such as battery life, signal strength, and audio levels.

In terms of battery life, the Rode Wireless ME microphone offers up to 7 hours of continuous use on a single charge. This is more than enough for most recording sessions or events. The microphone also has a USB-C port for quick and easy charging, so you can power up the device in no time.

Overall, the Rode Wireless ME microphone is a game-changer in the world of wireless audio recording. Its compact size, exceptional sound quality, and versatile features make it a must-have for any audio professional or enthusiast. Whether you are recording interviews, creating YouTube videos, or capturing live performances, this microphone is sure to elevate your audio recordings to the next level.
Additional information

Product name

Brand

Product type

Wireless

Colour

Reviews

There are no reviews yet.

Be the first to review “Rode Wireless ME”

Your email address will not be published. Required fields are marked *

Frequently Asked Questions:

How do I properly pair my Rode Wireless ME lavalier microphone with my wireless receiver for optimal performance?

Pairing your Rode Wireless ME lavalier microphone with your wireless receiver is a simple process that ensures optimal performance. Here's how to do it:
1. Make sure both the microphone and receiver are switched off. Insert a fresh set of batteries into the microphone (two AAA alkaline batteries). Turn on the receiver by pressing and holding the power button until the LED indicator starts flashing rapidly. This indicates that the receiver is searching for a signal from the microphone. Press and hold the pairing button located near the battery compartment of the microphone. The LED light on the microphone will start flashing quickly. Keep holding the pairing button on the microphone until the LED on the receiver stops flashing rapidly and becomes solid, indicating successful pairing. If the LED light starts flashing slowly instead of stopping, press and hold the pairing button again until a solid LED is displayed. The microphone and receiver are now paired and ready to use. Remember to always switch off both the microphone and receiver when not in use to extend battery life. If you experience interference or poor signal quality, move the microphone closer to the receiver or reduce any obstructions between them for better performance. To unpair the microphone from the receiver, turn on both devices and hold down the pairing button on the microphone until the LED light starts flashing quickly again. The LED light on the receiver will also flash rapidly, indicating unpairing. Release the pairing buttons when the LED lights stop flashing to confirm the microphone has been unpaired. Repeat this process to pair your microphone with a different receiver if needed. Note that each Rode Wireless ME microphone can only be paired with one receiver at a time. If you encounter any further issues, consult the user manual or contact Rode customer support for assistance.

How do I properly pair my Rode Wireless ME microphone with my receiver unit for wireless audio transmission?

To pair your Rode Wireless ME microphone with the corresponding receiver unit, follow these steps:
1. Turn on both the transmitter and receiver by pressing and holding the power button until the LED indicator lights up. Ensure that the receiver is set to the correct frequency channel using the CH/FREQ button located on the top of the unit. Press and hold the PAIRED/SYNC button on the back of the transmitter for three seconds, until the LED light starts flashing rapidly. Within two seconds, press and hold the same button on the receiver (located in the center of the unit). The LED indicators on both the transmitter and receiver will stop flashing once pairing is successful. To confirm pairing, check that the LED light on the microphone capsule is solidly lit. If the light is blinking or does not turn on, repeat the pairing process. Before using the microphone, ensure it is securely attached to your desired recording device using the TRS connection cable provided. Adjust the sensitivity of the microphone by using the PAD/TRIM switch located at the base of the unit. Finally, test your audio transmission to ensure proper function.

How do I properly pair my Rode Wireless ME lavalier microphone with the RX-CAM wireless camera receiver for the first time?

To properly pair your Rode Wireless ME lavalier microphone with the RX-CAM wireless camera receiver for the first time, follow these steps:

1. Make sure both the microphone and receiver are turned off. On the receiver, press and hold the "Pair" button until the red LED light starts flashing rapidly. This indicates that the receiver is in pairing mode. Within 5 seconds, turn on your Rode Wireless ME microphone by pressing and holding the power button for two seconds. The microphone's green LED light will flash twice to indicate that it is searching for a signal. Wait for the receiver and microphone to sync automatically. This process should take no more than 15 seconds, after which the red LED on the receiver will stop flashing rapidly and turn solid red, indicating a successful connection. To confirm that the devices are paired, check that the green LED on the microphone is solid instead of flashing. If you experience any issues during pairing or have further questions, please consult the user manuals for both the Rode Wireless ME and the RX-CAM, or contact Rode's customer support team for assistance. Remember to always follow the proper procedures for pairing your devices to ensure optimal performance and minimize interference.

How do I properly pair my Rode Wireless ME lavalier microphone with my receiver unit for wireless operation?

Pairing the Rode Wireless ME lavalier microphone with its corresponding receiver unit is a straightforward process, as outlined below:

1. Turn on both the microphone and receiver by pressing and holding the power button (located on the side of each device) until the LED light begins to flash. Select the desired frequency channel for your location using the channel selection buttons located on the side of the receiver unit. The frequency channels are labeled numerically from 1-10, and you should select a channel that is not being used in your area to avoid interference. Place the microphone within range (up to 20 meters/65 feet) of the receiver unit and ensure that they are both powered on. The LED light on the microphone will stop flashing, indicating that it has found a signal from the receiver unit. Press and hold the power button on the microphone until the LED light begins to flash rapidly. This indicates that the microphone is now in pairing mode. Within 10 seconds of releasing the power button, press and hold the sync button (located on the side of the receiver unit) for approximately three seconds. The LED light on both devices will begin to flash rapidly as they search for a connection. Once the pairing process is complete, the LED light on the microphone will stop flashing, indicating that it has successfully paired with the receiver unit. The LED light on the receiver unit will also stop flashing and display a solid green light, indicating that the devices are now communicating wirelessly.

Related Products