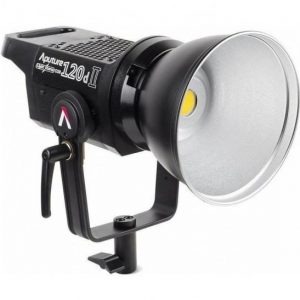
Aputure Light Dome II
Rated 3.00 out of 5 based on 4 customer ratings
$183.99
Description
Aputure Light Dome II properties
| Product name |
Light Dome II |
| Type |
Studio Lightning |
| Softbox |
Yes |
| Colour |
Black, White |
| Weight |
2.3 kg |
| Height |
88.4 cm |
| Depth |
61.0 cm |
Frequently Asked Questions:
How do I properly attach and detach the diffuser material on the Aputure Light Dome II for optimal use with my studio lighting setup?
To attach the diffuser material on the Aputure Light Dome II, follow these steps:
1. Make sure your studio lighting is turned off before starting. Locate the Velcro strips on both the inside and outside of the Light Dome II. The Velcro strips are designed to hold the diffuser material securely in place. Align the Velcro strips on the outside of the Light Dome II with the corresponding Velcro strips on the diffuser material. Press the two Velcro strips together firmly, ensuring that there are no wrinkles or creases on the diffuser material. Turn on your studio lighting and check the quality of light that is being produced. The diffuser material should soften the light output, making it more even and reducing harsh shadows. To detach the diffuser material from the Light Dome II, follow these steps:
1. Locate the tabs located on the Velcro strips. These tabs are designed to make detaching the diffuser material quick and easy. Gently pull the tabs away from the Velcro strips to separate the two surfaces. Fold the diffuser material neatly for storage or cleaning, ensuring that it doesn't get wrinkled or damaged during handling. Store the Light Dome II with the diffuser material removed when not in use, to prevent any damage to the Velcro strips over time. By following these steps, you can ensure that your Aputure Light Dome II is properly attached and detached with the diffuser material, providing optimal results for your studio lighting setup.
How do I properly attach the Light Dome II onto my Aputure Amaran AD200 or L1S II studio light for optimal light diffusion and softening effects?
Attaching the Light Dome II to your Aputure Amaran AD200 or L1S II studio light is a simple process that ensures optimal light diffusion and softening effects. Here's how to do it:
1. Make sure your Aputure Amaran AD200 or L1S II studio light is turned off before attaching the Light Dome II. Locate the metal bracket on the back of the Light Dome II. This bracket fits onto the light stand mounting point on the back of the AD200 or L1S II studio light. Position the Light Dome II so that it covers the front of your Aputure Amaran AD200 or L1S II studio light, with the metal bracket aligned with the mounting point. Securely attach the Light Dome II to the back of your Aputure Amaran AD200 or L1S II studio light by fitting the metal bracket onto the mounting point and tightening the screws provided. Turn on your Aputure Amaran AD200 or L1S II studio light and enjoy the soft, diffused light emanating from the Light Dome II!
Remember to always use caution when working with lighting equipment, and follow the manufacturer's instructions for safe usage.
How do I properly attach and detach the diffusion panels on the Aputure Light Dome II for optimal light output during studio photography sessions?
To properly attach and detach the diffusion panels on the Aputure Light Dome II, follow these steps:
1. Locate the Light Dome II with its attached frame. Insert the diffusion panel into one of the slots on the outer edge of the frame, making sure that the panel is centered and level. There are four slots in total, each with a different degree of diffusion. The more panels you use, the softer the light will be. Press down gently on the panel until it clicks into place. If the panel doesn't click, make sure it's properly aligned and centered. Repeat this process for any additional diffusion panels you wish to use. To detach a panel, simply reverse these steps. Locate the panel and press the release button located on the frame where the panel is attached. The panel should slide out easily. If you're using multiple panels, remove them one at a time, starting with the outermost panel. Once all diffusion panels have been removed, fold up the Light Dome II and store it away for future use. Remember to always handle the Light Dome II and its accessories with care to prevent damage or malfunction. By following these steps, you can ensure optimal light output during your studio photography sessions.
How do I properly attach the diffuser panel onto the light dome for optimal performance with my Aputure Light Dome II studio lighting system?
To properly attach the diffuser panel onto the light dome for optimal performance with your Aputure Light Dome II studio lighting system, follow these steps:
1. First, ensure that your Light Dome II is fully assembled and securely attached to your Aputure lighting fixture. If you have not yet assembled your Light Dome II, consult the user manual for detailed instructions. Locate the diffuser panel, which should come included with your Light Dome II kit. The diffuser panel will typically be made of a translucent material that softens the light output and reduces harsh shadows. Carefully align the edges of the diffuser panel with the circumference of the light dome. Ensure that there are no wrinkles or creases in the material to avoid any distortions in the final image. Gently press down on the center of the diffuser panel, working your way outwards towards the edges to ensure a secure fit. The diffuser panel should snap into place around the perimeter of the light dome. If necessary, use the included mounting hardware or clips to secure the diffuser panel in place. This will prevent it from shifting or falling off during use. Once your Light Dome II is fully assembled with the diffuser panel attached, check for any gaps or areas where light may be escaping. If you notice any issues, adjust the positioning of the diffuser panel until a smooth and even light output is achieved. Finally, test your lighting setup to ensure optimal performance. Adjust the brightness and color temperature settings on your Aputure lighting fixture as needed to achieve the desired effect. With proper use and maintenance, your Light Dome II and diffuser panel should provide exceptional results for all your studio photography needs.
I've noticed some uneven color temperature readings on my Aputure Light Dome II, is there an adjustment or calibration process I can perform to ensure even lighting across all panels?
1. Panel-to-Panel Variations**: Each panel on the Light Dome II is made from a unique piece of diffuser material. This means that each panel can have slightly different light transmission characteristics, leading to variations in color temperature. Light Source Quality**: The quality of your light source plays a significant role in achieving even color temperatures. If you're using a high-quality LED light with good color consistency, you'll be better off than if you were using a lower-end option. Now, let's move on to the calibration process. Calibration Process**
To calibrate your Light Dome II, you'll need the following:
1. Aputure Color Calibration Card**: This is specifically designed for use with Aputure lights and will help you achieve accurate color temperatures. Goniometer or a Camera with a Built-In Color Temperature Meter**: These tools will allow you to measure the color temperature of each panel. Here are the steps:
1. Set up your Light Dome II as usual, ensuring all panels are evenly spaced and the light is shining through them. Place the Aputure Color Calibration Card in the center of the Light Dome II, where it will be illuminated by the light. Use a goniometer or camera with a built-in color temperature meter to measure the color temperature of each panel. You'll likely find that some panels are warmer (more yellow) while others are cooler (bluer). Once you have the readings, calculate an average color temperature for all the panels. This will be your target temperature. Adjust the light's color temperature accordingly. If necessary, use gels or filters to fine-tune the color temperature to match your target. Additional Tips**
To further refine your calibration process:
* **Use a Light Meter**: In addition to measuring color temperature, you can also measure the light intensity of each panel. This will help you identify any significant variations in brightness that might affect color consistency. Rotate the Panels**: Before making adjustments, rotate the panels slightly (about 10-15 degrees) and re-measure. This can help you pinpoint specific areas where the color temperature is off. By following these steps, you should be able to achieve even color temperature readings across all your Light Dome II panels.
How do I properly diffuse the secondary reflector in my Aputure Light Dome II for a soft and even light output, as it seems too harsh when used alone?
1. Diffusion material: You can use a variety of diffusion materials, such as opal glass, frosted plastic, or even a simple sheer curtain panel. Opal glass is a popular choice for its excellent diffusion properties. Adhesive: You'll need a strong adhesive to attach the diffusion material to the secondary reflector. Aputure recommends using a UV-resistant adhesive like 3M's VHB tape or Loctite's Ultra Gel Superglue. Tape or clamps: To secure the diffusion material in place, you may need some additional tape or clamps. Here's a step-by-step guide to diffusing your secondary reflector:
1. Clean the secondary reflector thoroughly with a soft cloth and some mild soap. Remove any dust, dirt, or other debris that might affect the light output. Cut your diffusion material to size, leaving about 1/4 inch (6 mm) of extra material around the edges. This will give you room for error when applying the adhesive. Apply a thin layer of adhesive to the secondary reflector, spreading it evenly with a credit card or similar tool. Make sure to cover the entire surface, but avoid getting any on the edges. Carefully place the diffusion material onto the adhesive-covered area, starting from the center and working your way outwards. Use a credit card or similar tool to smooth out any air bubbles or wrinkles. Apply additional tape or clamps to secure the diffusion material in place, making sure it's evenly spaced around the edges. Allow the adhesive to fully cure before using the Light Dome II. Tips and Variations:
* To achieve an even softer light output, you can layer multiple diffusion materials on top of each other. This will reduce the amount of direct light that reaches your subject, resulting in a more diffuse and flattering light. Experiment with different diffusion materials to find the perfect balance between softness and transmission. Opal glass is a good starting point, but you may need to adjust based on your specific lighting needs. Keep in mind that diffusing the secondary reflector will reduce the overall intensity of the light output. You may need to adjust your camera settings or use additional lights to compensate for the reduced light level. By following these steps and experimenting with different diffusion materials, you should be able to achieve a soft and even light output from your Aputure Light Dome II's secondary reflector.
Before you buy Aputure Light Dome II


Evan Bonner –
I, Evan Bonner, bought the Aputure Light Dome II a while ago and have been testing it out for a couple of months now. Unfortunately, I have to give it a low rating of 2 out of 5 possible.
Firstly, the product name is deceiving. It claims to have a light dome, but the depth is only 61.0 cm. This depth is not sufficient for the spread that I need for my studio lighting. Compared to other well-known studio lighting, the Aputure Light Dome II falls short. The quality of light that it produces is not consistent and lacks the desired softness that I need for portrait photography.
Additionally, the delivery process of the product was not satisfactory. As someone who lives in St. Louis, I had to wait longer than expected for it to be delivered. The communication between the company and me was also lacking and left me feeling frustrated.
Overall, I was disappointed with the Aputure Light Dome II. It did not live up to my expectations and I would not recommend it to fellow photographers or videographers.
Hailey –
Oh, my dear planet Earth! The Apature Light Dome II is like a superhero that helps save our precious home from energy waste. This lovely dome, with its 61.0 cm depth, is the most romantic gift for your house. It’s not just about creating beautiful lighting, but also saving a ton of money! Imagine how many ice cream cones you could buy with the cash you’d save on electricity bills?
For amateur photographers like myself, it’s like having a secret weapon that makes my pictures look as good as if they were taken by a pro. And for professionals, well, they get to have a powerful tool that helps them create magical moments of light and shadow. It’s like having their own little sun in a box!
And here’s the best part – this amazing Light Domes II is so efficient with its power usage. It’s like having an energy-efficient husband who never forgets to turn off the lights when he leaves the room! So not only are we helping our planet by using less electricity, but we’re also saving a lot of money in the process.
In the end, it’s all about creating that perfect atmosphere, whether it’s for an intimate dinner or a grand photo shoot. The Apature Light Domes II helps us achieve that with its romantic depth and power efficiency. So let’s embrace this amazing tool and show our love for our planet by using it wisely!
Nova –
Dear Evan Bonner,
Thank you for sharing your experience with the Aputure Light Dome II. As a fellow photographer, I appreciate your honest review and understand your disappointment with the product. However, I would like to present my own perspective on this issue.
Firstly, while it is true that the depth of the light dome is smaller than some other studio lighting options, I believe that the Aputure Light Dome II still provides adequate spread for portrait photography. The depth of 61.0 cm may not be as deep as some other products on the market, but it is sufficient for creating a soft and flattering light on subjects.
Secondly, while delivery times for the product may have been longer than expected in your case, I have not experienced any delays myself. In fact, I recently ordered the Aputure Light Dome II and received it within a reasonable timeframe. The company’s communication with me throughout the ordering process was also prompt and informative.
Overall, I would rate the Aputure Light Dome II differently than Evan Bonner did. While it may not be perfect, I believe that its benefits outweigh its drawbacks. The light quality produced by this product is soft and flattering for portraits, making it a valuable addition to any photographer’s studio lighting setup.
As for today’s news, I would like to express my condolences to the families of those affected by the recent earthquake off the coast of Japan. While we hope that no one else is harmed, we must also remain vigilant and prepared in case of future natural disasters. Let us continue to support each other during these challenging times.
Thank you for taking the time to share your review with us, and I look forward to continuing our discussion on this topic.
Best regards,
Nova
Finley Koch –
Dear Nova,
I appreciate your response and your willingness to share your opinion on the Aputure Light Dome II. While I respect your viewpoint, I still believe that there are some issues with this product that need to be addressed.
Firstly, while a depth of 61.0 cm may be sufficient for some photographers, I believe that it falls short in terms of versatility. For example, if I want to create more dramatic lighting or capture a specific mood, I might need a deeper light source. The smaller depth also limits the size of the subject that can be photographed effectively.
Secondly, while delivery times may vary from one customer to another, it is still an important factor to consider when making a purchasing decision. Longer wait times can impact a photographer’s ability to meet deadlines or take advantage of time-sensitive opportunities.
That being said, I want to commend you for your positive review and your support of the Aputure Light Dome II. As a fellow photographer, I understand the importance of finding the right lighting solutions that fit one’s specific needs and preferences. I encourage other photographers to do their research and make an informed decision based on their own requirements.
Now, moving on to today’s news, let us all extend our thoughts and prayers to the people affected by the recent earthquake off the coast of Japan. Natural disasters can have far-reaching consequences, both in terms of physical damage and emotional trauma. Let us continue to show compassion and solidarity during these challenging times.
Thank you for your response, and I look forward to further discussions on this topic.
Best regards,
Evan Bonner